Having a website without a domain name is like having a house without an address. Only once you have a domain will visitors know where to go to find your website. With SiteGround domain services, you can register and manage a URL so your site has somewhere to exist. You can also park other domains, create subdomains and set up redirects. The SiteGround Site Tools (their replacement for cPanel) give you a lot of power in making sure that your website’s domain is always under control.
How to Buy a SiteGround Domain
While buying a domain from SiteGround isn’t part of Site Tools specifically, it is part of the overall domain and website management process. And there’s no limit to how many SiteGround domains you can buy (or park or host) when you have a hosting plan.
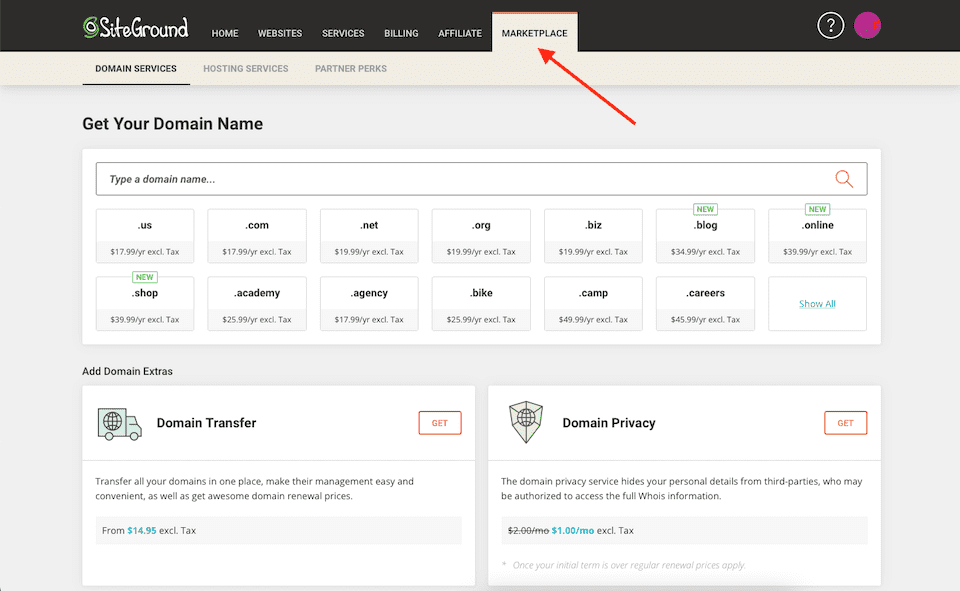
Log in to SiteGround.com and click the Marketplace link at the top of the page. Type your preferred domain name into the search bar and click the Search icon to see if it’s available.
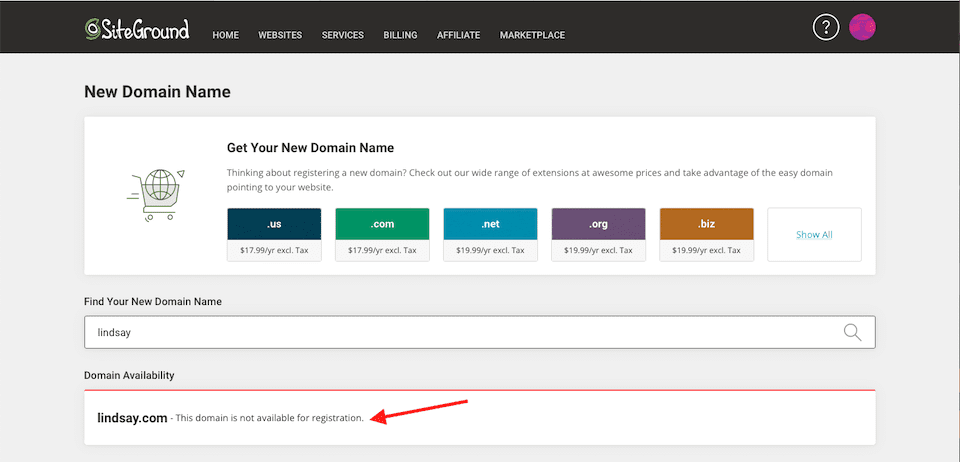
If it isn’t, SiteGround doesn’t offer alternatives — so you have to just keep trying until you hit on one that you can purchase. In this example, I searched for “Lindsay” and was told that lindsay.com is not available — but I can’t see what is available.
However, if you go over to Instant Domain Search and type in “Lindsay,” you can see all of the related domain names that are available and can also check out the WHOIS database for information about who owns the domains that aren’t available.

Once you know which domain name you want to buy and that it’s available, you can head back to SiteGround to register it. This may take some trial and error, too. For example, Instant Domain Search said that lindsay.app was available, but SiteGround doesn’t offer the .app TLD. But using a third party to research available domain names is still a lot easier than guessing on SiteGround.
Once you’ve found the domain name you want on SiteGround, click Add to the far-right of it. When you purchase a domain name — and before you have your website set up — the nameservers will be automatically pointed to SiteGround’s DNS. Once you create a site using that domain name, the nameservers will be auto-updated to point to your website.

After that, you can finish the transaction and the domain will be added to your account.
Site Tools and SiteGround Domain Management
The Site Tools dashboard is SiteGround’s hosting portal that replaced cPanel in 2019. To access the tools, log in to SiteGround, click Websites at the top of the page, and then click Site Tools to the right of the domain name you’ll be working with.

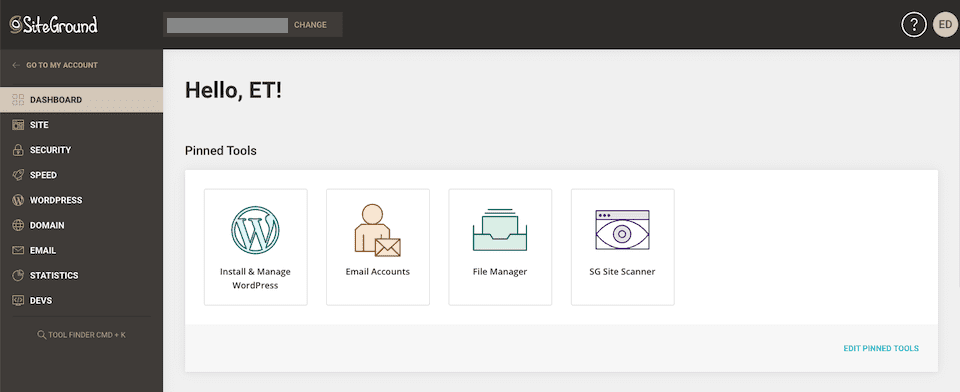
The Site Tools will then open, and the various sections live in the lefthand sidebar.
A Brief Overview of SiteGround’s Site Tools
We have an article dedicated to explaining the Site Tools, but here’s a quick recap:
- Dashboard: SiteGround announcements, Pinned Tools, and site info (such as stats)
- Site: File and database management; user accounts
- Security: Various security tools, including SSL certificates and the malware Site Scanner
- Speed: Caching and CDN tools
- WordPress: Installation and management for WordPress websites
- Domain: Set up different kinds of domains; access the DNS Zone Editor
- Email: Manage email accounts
- Statistics: Various statistics and logs
- Dev: Developer-level tools
SiteGround Domain Tools
The Domain section of Site Tools includes Parked Domains, Subdomains, Redirects, and the DNS Zone Editor. Here’s how to work with each section:
Parked Domains
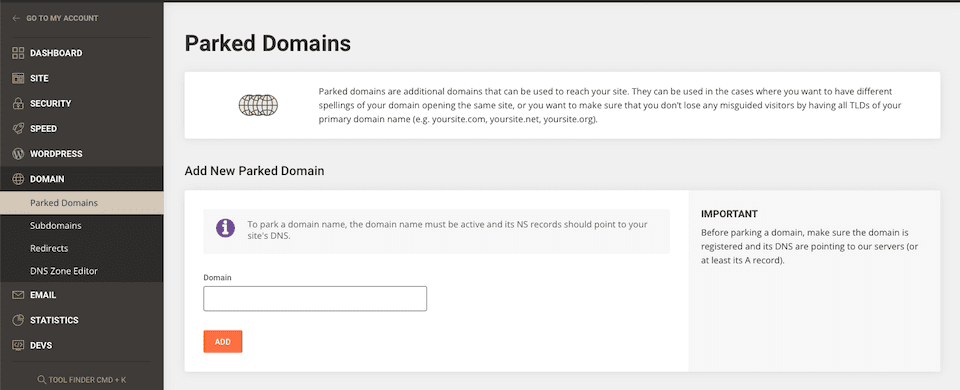
When you have more than one domain name but you don’t want to split traffic amongst all of them, you may park one (or more) and direct the traffic to your main website. For example, let’s say you buy yoursite.com and your site.net. While you want to set up your website at yoursite.com, you purchased yoursite.net so that a competitor can’t. And if one of your potential visitors accidentally types in .net instead of .com for some reason, you want them to find your main website.
In the Domain > Parked Domains window, enter the domain name you want to park under Add New Parked Domain, then click Add. That’s it!
You may need to delete a parked domain at some point. In that same window, click the Trash icon to the right of the parked domain.
Subdomains
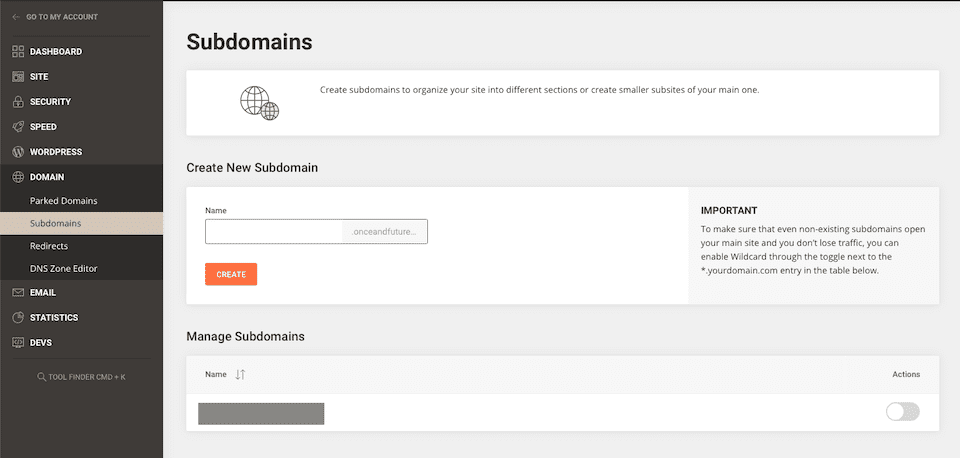
A subdomain places a prefix on your URL. For example, if your main URL is yoursite.com, a subdomain of blog will create the URL blog.yoursite.com. Instead of adding a page to your website and having something like yoursite.com/blog (which is called a “subdirectory”), a prefix actually creates a new entity.
Search engines see yoursite.com and blog.yoursite.com as two different websites instead of the same one. We cover this more in our article What is a Subdomain and How to Use One With WordPress, including why you may want subdomains.
To set up a subdomain with SiteGround, go to the Domain > Subdomains window. Add the prefix to the space under Name and click Create. Remember, you’re only adding the prefix, not the full URL.
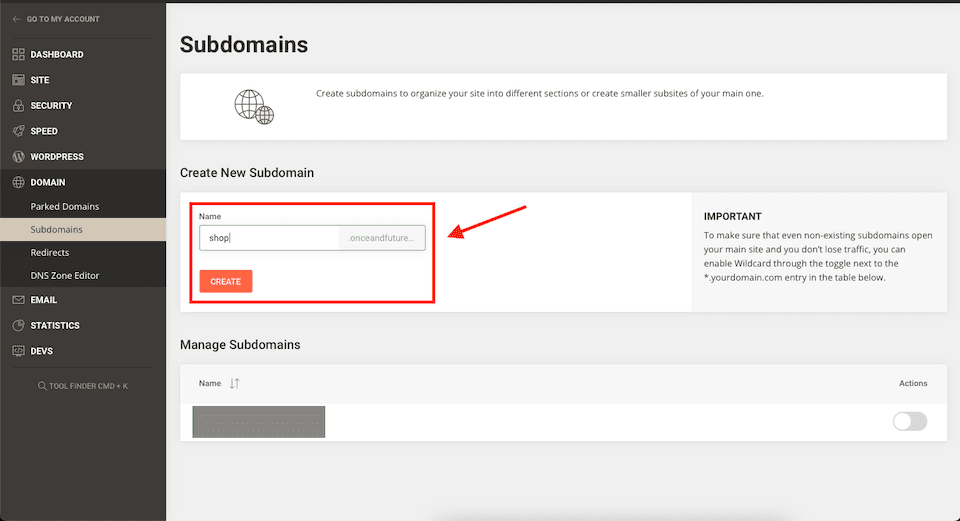
If you need to delete a subdomain at some point, just click the Trash icon to the right of it.
Redirects
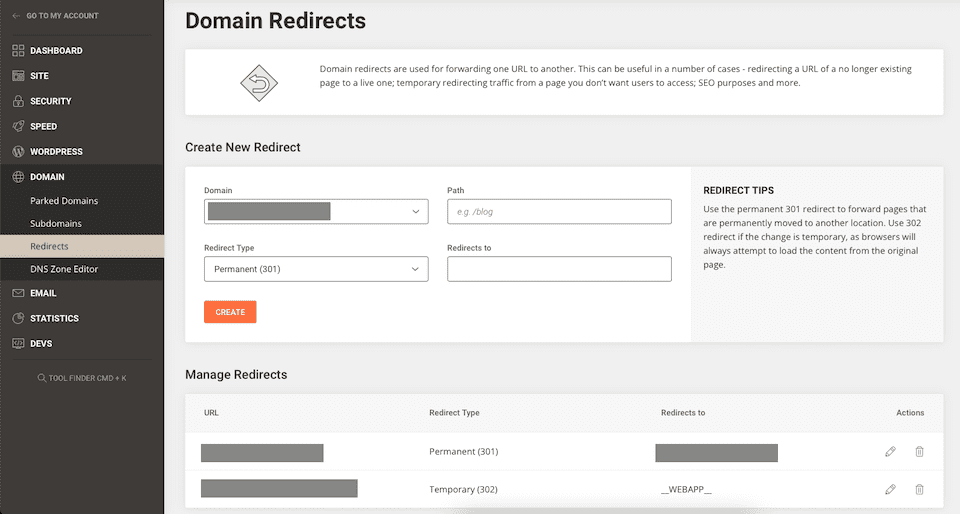
If you want people who visit a specific URL to be automatically redirected to another URL, you’ll use redirects. For example, if you no longer have a page on your site that some people may still try to visit, you can redirect that old URL to a new one so that visitors automatically land there instead of on a defunct page.
Go to the Domain > Redirects window. Under Create New Redirect, fill in the four boxes:
- Choose the Domain.
- Add the rest of the URL (the file or the subdirectory of the page) under Path. This is the part that comes after the TLD (after .com, for example).
- Set the Redirect Type as Permanent or Temporary. A Permanent (301) redirect is cached in the browser memory — the original page is moved to the new URL permanently. A Temporary (302) redirect is not cached, making it the better option if you plan to use the original URL again.
- Enter the Redirects To URL.
When you’re done, click Create. If you need to delete a redirect at some point, click the Trash icon next to it.
DNS Zone Editor
DNS stands for “Domain Name Service,” and it’s what turns a domain name that you can read (like elegantthemes.com) into a numerical IP (Internet Protocol) address that computer networks can read. A DNS file has several zone records, which tell your domain name where to find things like your email and website.
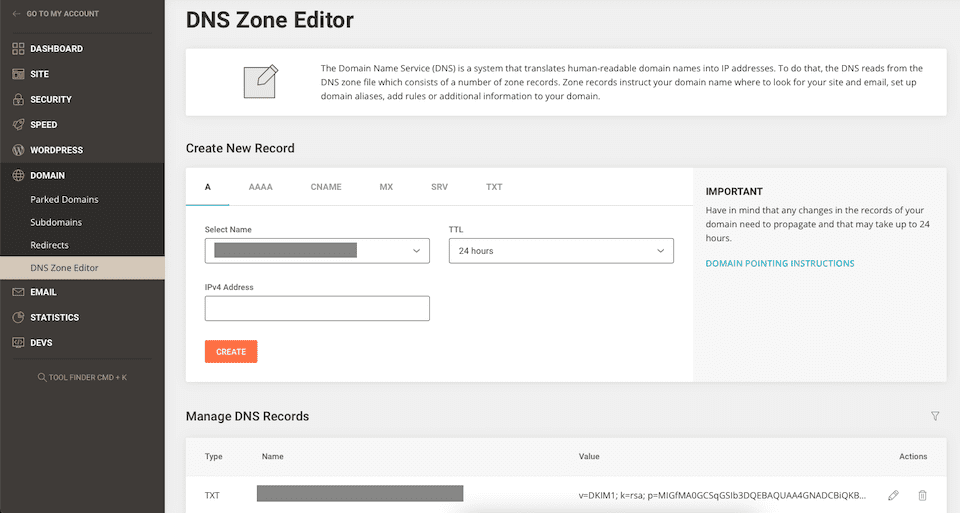
By going to Domain > DNS Zone Editor, you can view, edit, add and delete DNS records. However, you’ll only be able to manage DNS records for domains that are pointed to SiteGround nameservers.
What Does Each DNS Record Do?
- A (Address) and AAAA: Both are records of the domain’s IP, but the A records is used for an IPv4, while the AAAA record is used for an IPv6. You can learn the differences between IPv4 and IPv6 here.
- CNAME (Canonical Name): Forwards a domain/subdomain to another domain.
- MX (Mail Exchange): Routes email to a server.
- SRV (Service): The host and port for services like instant messaging and VoIP.
- TXT (Text): The domain administrator can save notes to the record.
You can learn more about each record and others in the DNS records glossary from Cloudflare, which includes links to dive even deeper into the meaning of each one. SiteGround also has a help page on managing DNS records in Site Tools.
To add a record, choose the correct tab and fill in the information under Create New Record. To edit an existing record, scroll down to Manage DNS Records and select the Pencil icon to the right of the record. There’s also a Trash icon there if you want to delete the record.
When adding or editing a record, you’ll need to choose a TTL (Time to Live) duration — SiteGround recommends 1 Hour unless you prefer a different duration. Learn more about TTL here.
Final Thoughts
Editing DNS records may take a bit of advanced knowledge, but SiteGround hosting includes top-notch customer support, so you’re never truly going it alone. Plus, Site Tools makes adding parked domains, subdomains, and redirects uncomplicated even if this is your first time running a website.
Also, remember that Elegant Themes members can easily buy and manage domain names through Divi Hosting by SiteGround. You’ll benefit from domain services and streamlined management, and you’ll also be able to access server environments that are optimized for Divi.
Have you had experience with SiteGround’s domain services? Tell us about it in the comments!


It is quick and easy to set up good looking, high performance websites with the minimum of fuss. Really informative article.
Thanks for this tutorial
nice article, waiting for your another 🙂
It’s a really informative article for the Siteground hosting users.
SiteGround is one of the top web hosting providers, it offers everything you need to run your website smooth, be it tools for domain management, caching, speed improvement, security etc.
Thanks for this informative article.
Siteground with it’s site tools is also an excellent choice for web hosting, along with the Divi theme it is quick and easy to set up good looking, high performance websites with the minimum of fuss.
I Like: “Having a website without a domain name is like having a house without an address.
This is actually very true
Very Helpful!