

As you may know, WordPress is capable of sending basic transactional emails out of the box. However, a lot of web hosts don’t support that functionality or offer email capabilities at all. To get around this issue, you have to rely on third-party transactional email providers such as SendGrid.
This platform powers email for some of the biggest companies in the world. That means it can make short work of your WordPress website’s registration and password reset emails. In this article, we’ll show you exactly how to set SendGrid up to work with your site in three short steps.
Let’s dive in!
What Is SendGrid?
SendGrid is a platform that offers both marketing and transactional email services. This distinction is important because, for the purposes of this tutorial, we’re going to focus on using it as a transactional email provider and not for marketing campaigns.

For transactional emails, SendGrid can use either Simple Mail Transfer Protocol (SMPT) or its web API. We’re going to focus on the latter since it’s easier to implement with WordPress and is typically faster. Plus, by integrating the platforms via the API, you can improve deliverability rates.
Using a dedicated transactional email provider is also a smart move when it comes to scalability. A lot of web hosting platforms aren’t optimized for email delivery, even if they do support it. With SendGrid – or another reputable service – you should be able to handle thousands of transactional messages per day.
If you run a WordPress website with a modest user base, SendGrid offers a free plan that should be perfect for your needs. You can use it to send up to 100 emails per day. That should be more than enough for signup confirmations and password resets for a small to medium-sized site.
For an online store, you might want to consider using a premium plan that can handle a higher volume of emails. After all, e-commerce sites need to deal with a whole other set of transactional emails, such as purchase confirmations and shipping notifications. Prices start at $14.95 per month.
How to Send Email Using SendGrid with WordPress (In 3 Steps)
To follow this tutorial, you’ll need two things: access to a WordPress website and a SendGrid account. For the latter, you can take advantage of the free plan to test the service. Once you have both prerequisites, move on to Step 1.
Step 1: Find Your SendGrid API Key
Once you set up your SendGrid account, you’ll gain access to your user dashboard. Here, you can review which applications you’ve authorized to work with SendGrid.
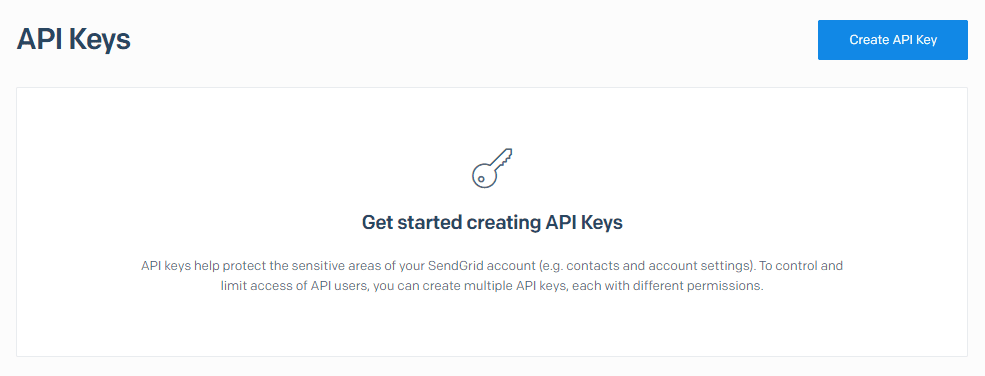
Right now, that list should be empty. To fix that, go to Settings > API Keys and click on the Create API Key button:
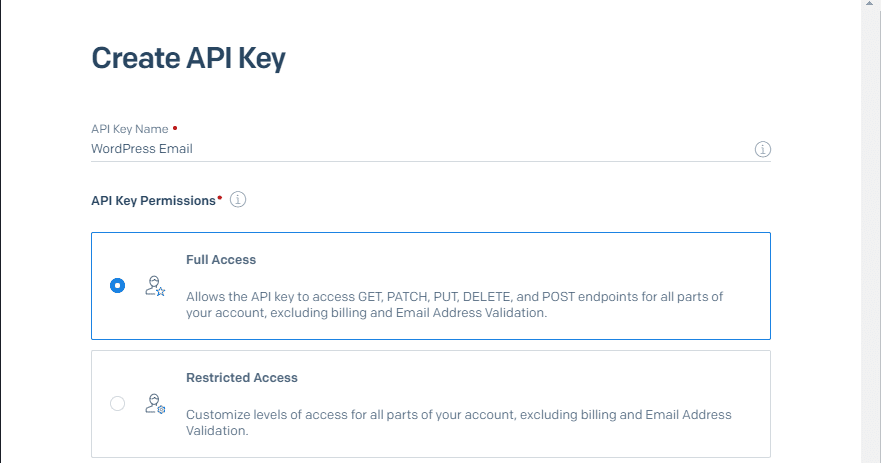
On the next page, you can set a name for the API key for internal identification purposes. The service will ask what level of permissions you want the key to give access to. We recommend the Full Access option:
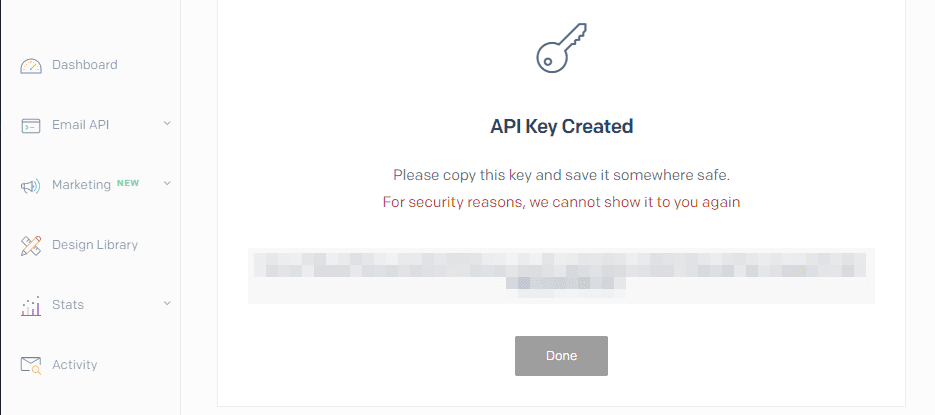
Now click on Create and View and you’ll gain access to your API key right away. Keep in mind that you only get to see the full key once for security reasons, so make sure you store it safely:
You’re going to need that key in a moment, so hold on to it.
Step 2: Connect SendGrid With WordPress
The easiest way to integrate WordPress with SendGrid is by using an SMTP plugin. SendGrid offers an official tool you can use for this, but it doesn’t receive regular updates.
Instead, we’re going to use the Post SMTP plugin, which you can connect to SendGrid using the API key you generated a minute ago:

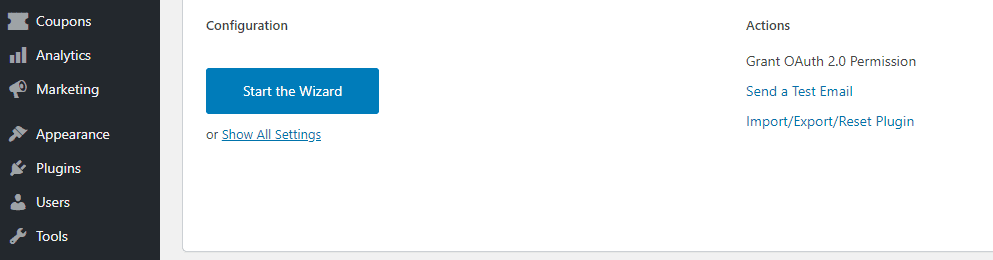
Install and activate the plugin, then navigate to the Post SMTP tab on your dashboard. You’ll see an option to use the plugin’s configuration wizard – click on the blue button to launch it:
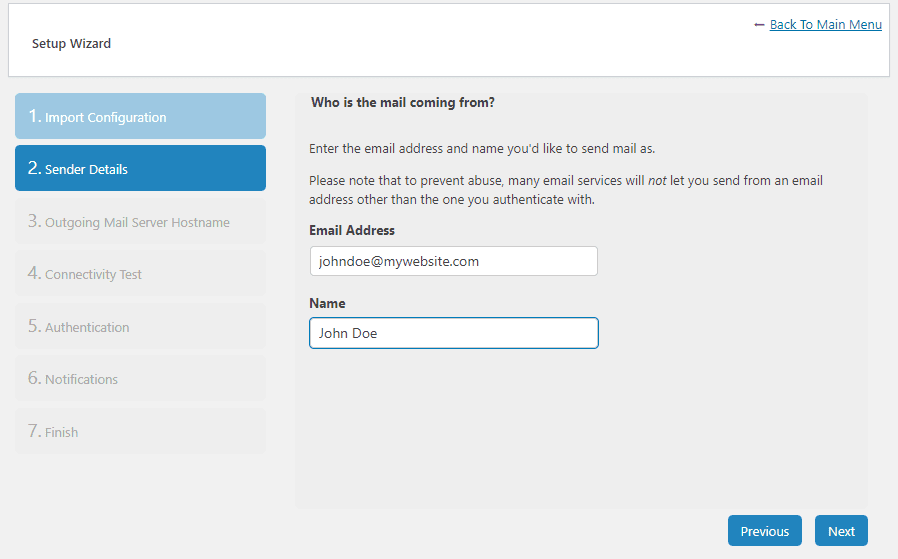
First up, the plugin will ask you to enter the sender’s email. By default, it’ll use your administrator email, which should work just fine:
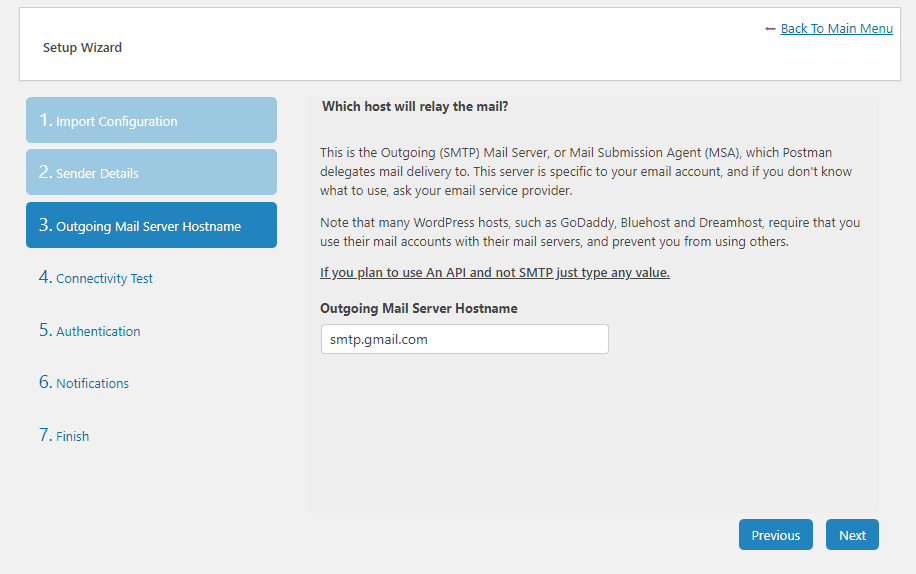
Next up, you’ll need to set up your outgoing mail server hostname. Since we’re using SendGrid’s API instead of SMTP, you can leave the default value in or enter any random string:
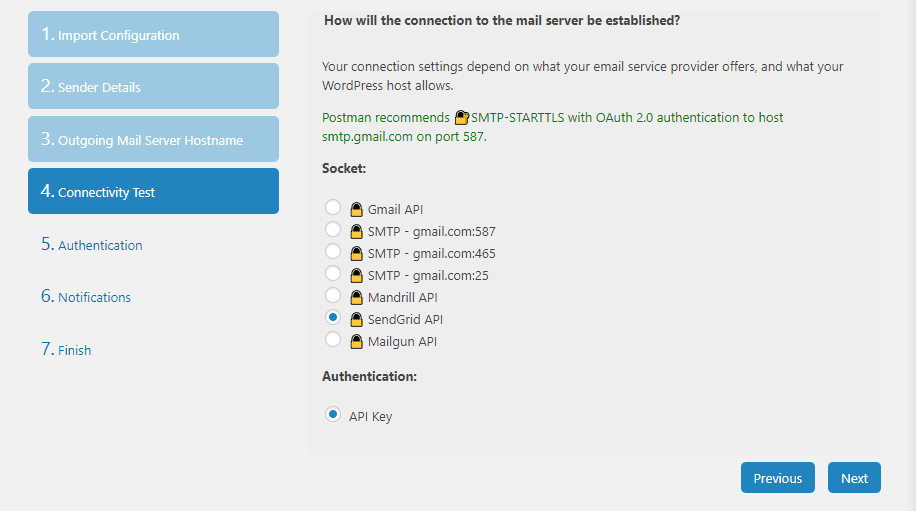
Now Post SMTP will run a connectivity test for several popular email service providers, including SendGrid. Once the plugin lets you make a choice, select the SendGrid API option under Socket:
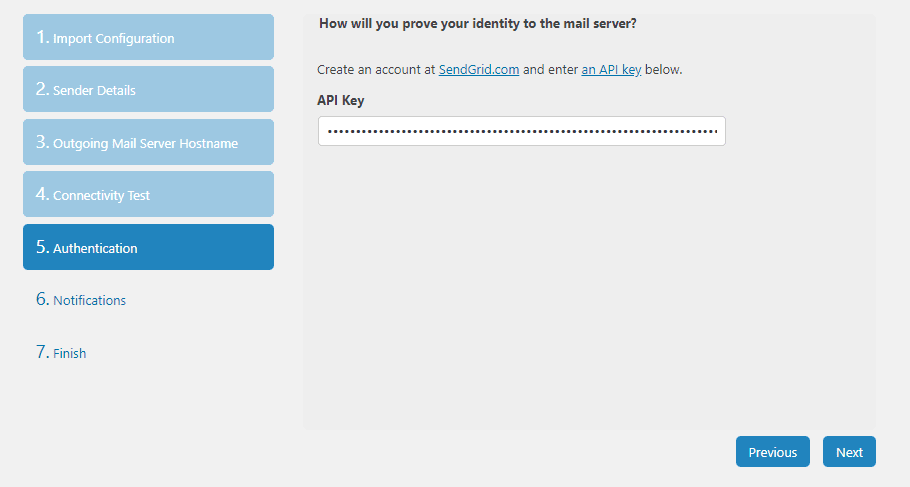
Finally, go ahead and paste the API key you generated during Step 1:
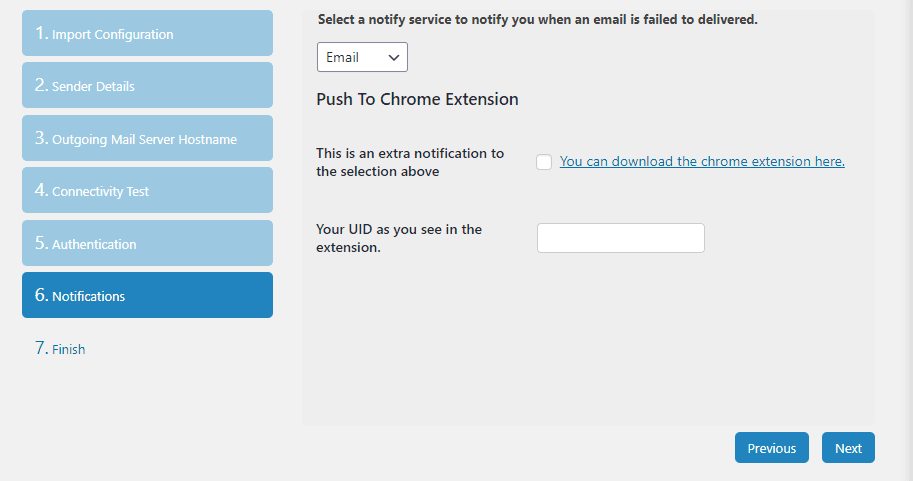
Before you wrap things up, the plugin will ask you what to do in case SendGrid fails to deliver an email. By default, it’ll notify you of that failure via email, but you can also configure it to use Chrome notifications.
Post SMTP includes an email testing feature you can use to check if your mailing provider is working properly. However, before you do so, let’s return to the SendGrid dashboard and verify your domain.
Step 3: Authenticate Your WordPress Website’s Domain
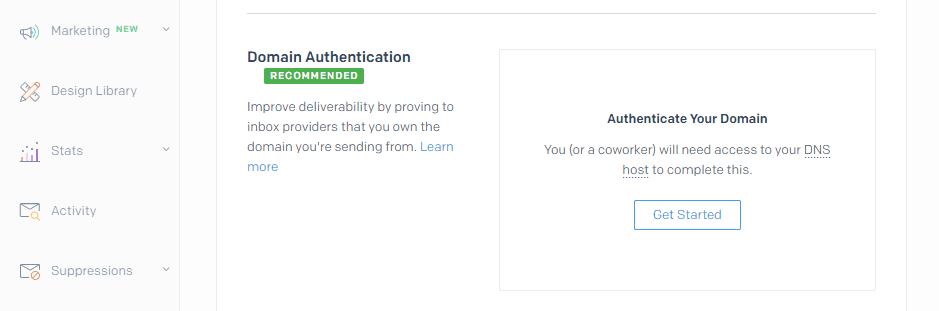
As a rule of thumb, it’s recommended you authenticate your domain through whatever email provider you’re using. That way, your transactional emails are much less likely to end up in recipients’ spam folders.
To do this in SendGrid, go to your account dashboard and jump to the Settings > Sender Authentication tab. Here, you’ll see an option that says Domain Authentication and next to it a button that reads Get Started – click on it:
The first thing SendGrid will ask is what Domain Name Server (DNS) your domain uses. That can be either a domain registrar or your web host, depending on where you registered your domain (and if you’ve transferred it):
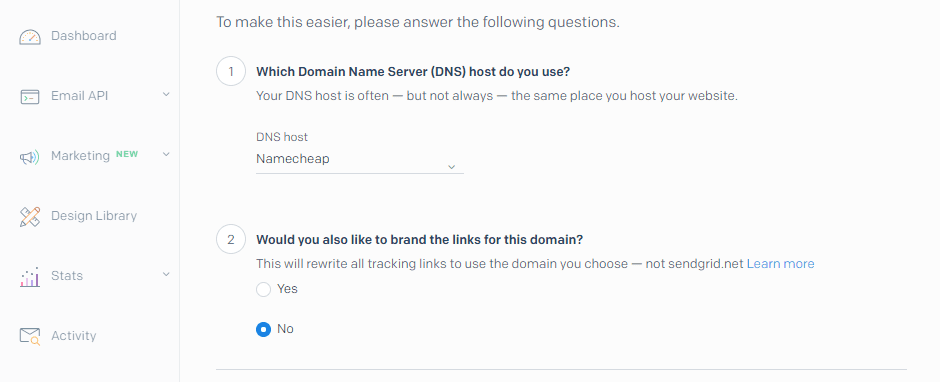
If your web host or registrar doesn’t appear on that list, select the Other Host (Not Listed) option.
Next up, you can choose whether to use your domain for tracking links as well. Since that doesn’t have an impact on your email’s deliverability or presentation, select whichever option you prefer.
On the next page, you’ll need to enter the domain of your WordPress website:
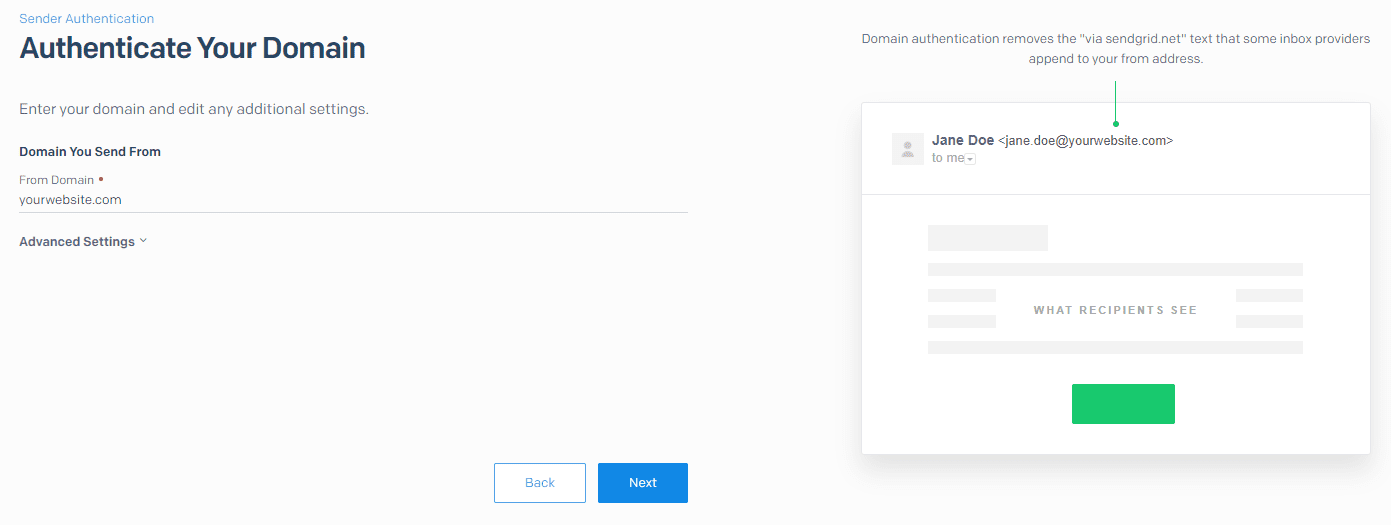
At this stage, SendGrid will show you a set of DNS records you need to add via your registrar or web host:
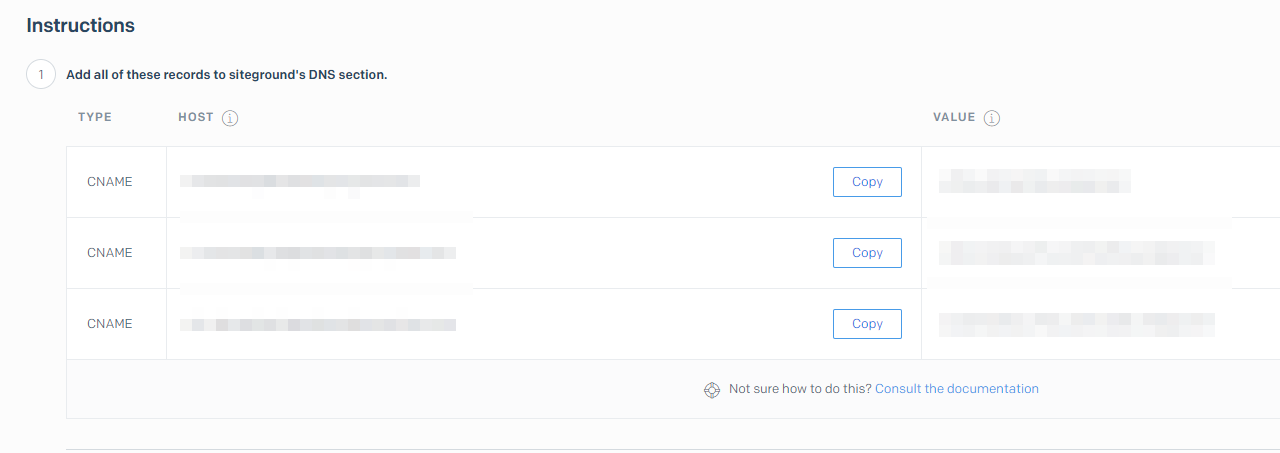
You may need to check your host’s knowledge base or contact support for help with this.
Once you add those records, you can click on the Verify button in your SendGrid dashboard. If everything is working correctly, you’ll see a success message. Now you can sit back and let SendGrid take care of your WordPress emails.
Conclusion
SendGrid is one of the many services you can use to power your website’s transactional emails. However, the service stands out due to its generous free plan, which is perfect for WordPress websites that send a moderate number of emails per day (anything less than 100 and you’re set!).
Configuring SendGrid to work with WordPress is easy and it only takes three steps:
- Find your SendGrid API key.
- Connect SendGrid with WordPress using Post SMTP.
- Authenticate your WordPress website’s domain through SendGrid.
Do you have any questions about how to send email using SendGrid with WordPress? Let’s go over them in the comments section below!
Article thumbnail image by Eny Setiyowati / shutterstock.com


Thank you for sharing this article, I am also confused that without this plugin people can not send emails to my business through my website?
Thanks for your question, Muktaruzzaman. This post is about sending transactional emails from your site, rather than receiving emails from users. In short, there are many ways you can accomplish that, most of which do require a plugin of some kind (although not necessarily SendGrid specifically). For example, if you simply want to enable site visitors to reach out to you, you can use a contact form plugin to let them send you messages.
Hi, Will
Thanks for sharing this article, I have learned a lot of thing from this blog. Sending mails from WordPress is such a hard for me, but after using SendGrid it has became so easy. Good job.
Thanks, Dennis! I’m glad the post was helpful.
Thanks for this article Will. I have been spending the morning researching this very issue. With a brand new WP site hosted on Siteground, should my subscription/email plugin provider be based on number of emails a month or subscriber count per month? For example, if I have 50 subscribers and send one blog post/update a day = 1500 emails a month, what metric should I be using to get the most bang for my buck?
Glad you liked the post, Rachael! The answer to your question depends on which service you’re using and how its pricing system works. Some charge based on the number of subscribers, others based on the number of emails, and some use a combination of the two. SendGrid bases its pricing on emails per month, so you would want to base your budget on the 1,500 emails in your example above.
I’m confused. If I don’t use a plug-in like this, people can’t send emails to my business through my WordPress website?
Hi Jill! In this post, we actually focused on sending transactional emails from your site to users. For that, you will need to connect WordPress with some kind of email service. Using a plugin to do so is usually the simplest solution.
In order to let users send you business emails through your WordPress site (such as via a contact form), you would also likely need a plugin, although not necessarily one like SendGrid. Basic contact form plugins will enable you to set this up, too. You can also always just list your business email address on your site, but that tends to invite spam.
I have gone through this process recently, and it has changed a bit. Previously, verifications were suggested only.
The first thing is that domain verification is now compulsory.
Secondly, it is also necessary to verify the sender email.
Without doing both, it won’t work.
I hope that helps anyone who setting up SendGrid.
Thanks for pointing that out, Michael!
Sendgrid has a free trial offering. It gets heavily abused. I run a hosting/email company. We have to block sendgrid quite often because of their failure to deal with their spam problem. Free trials invite this kind of thing, sadly. So go ahead and try them out, but be warned your emails may get blocked.
Thanks for your insight!
the problem is when u start to be targed by spammer, even if u have a captcha, it happens to my website this weekend and now I can’t send any email with Sendgrid as the spammer bots reach the Sendgrid limit 🙁
Sorry to hear that, Jimmy! Hope you’re able to get it sorted. If you haven’t already, you might try contacting SendGrid support about this.