Nobody sets up a website in the hopes of it never being found—what would be the point? But if the major search engines don’t know your site exists, they won’t be able to list your site in search results. And without appearing in search engine results, you can pretty much kiss most of your traffic goodbye. Enter the Bing Webmaster Tools sitemap, which lets Bing know about your website’s URLs so it can show them to potential visitors. Getting set up with Bing Webmaster Tools is as easy as can be. Plus, it’s free.
Getting Started
A sitemap is a file on your website that lists all of the pages on your site, and it lets search engines know which pages exist. It’s basically what it sounds like: a map of your site.
There are a number of sitemap formats you can submit to Bing, including XML—which we’ll be talking about in this article. XML is the format that search engines need to crawl your site.
You may read elsewhere that if you have a very small website with just a handful of pages, you don’t need a sitemap. That’s not necessarily true, though. A brand new, miniature site with very few backlinks still needs a sitemap to show up in search results. Again, the search engine has to know it’s there to rank it. Since generating and submitting a sitemap is free (and super easy), there’s no reason to not do it, especially since it’s massively important for SEO.
First, you’ll need a Bing Webmaster Tools account, which takes seconds to sign up for. Go to just sign up or sign in. It’s even easier if you already have a Microsoft Bing account.
Setting Up the Yoast Plugin
In order to submit a Bing Webmaster Tools sitemap, you need to start by generating the sitemap. The easiest and most reliable way to generate an XML sitemap for your website is to use an SEO plugin. We’re going to use Yoast for this walkthrough, but if you prefer a different SEO plugin, the directions will still be relatively the same. (If you’re not sure which plugin to choose for this, we have an article with even more sitemap plugins to consider.)

Install and activate the Yoast plugin. Then, hover over SEO in the left sidebar of your WordPress dashboard. Click General from the menu that shows up. Click Features from the tabs toward the top. Scroll until you see XML Sitemaps, and make sure it’s toggled On (it should be by default). Click Save Changes to finish up.
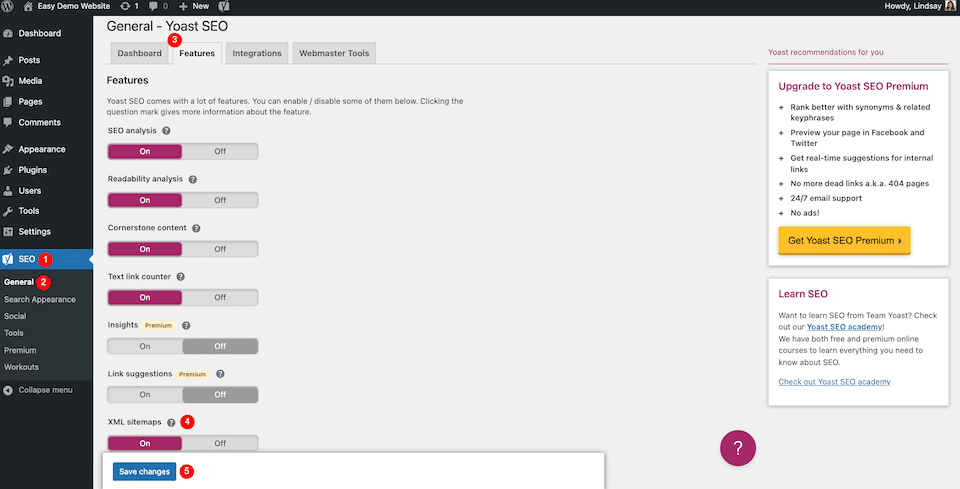
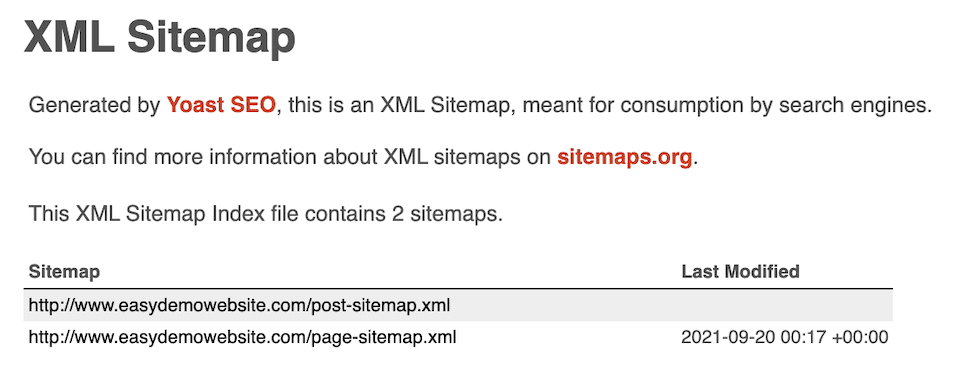
To see the XML sitemap and to get its URL, which you’ll need for a little later on, click the Question Mark next to XML Sitemaps and then click See the XML Sitemap. This will open up the sitemap page. Keep it open so you can copy that URL in a bit.

Adding Your Website to Bing Webmaster Tools
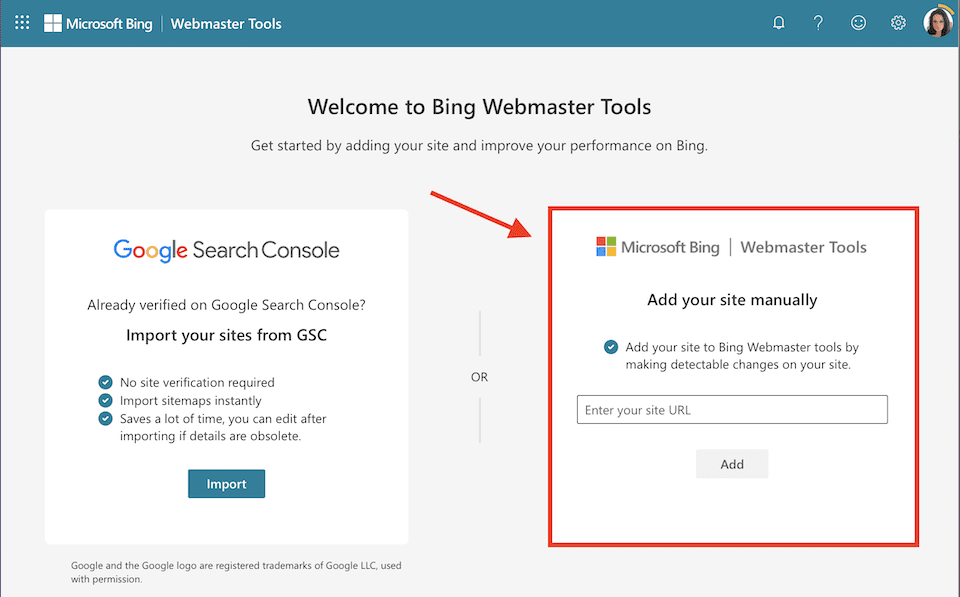
Before you can submit your Bing Webmaster Tools sitemap, you have to let Bing know that your website exists. The screenshot below is of the first page you’ll see once you’re logged in to your Bing account. We’ll be working with the option on the right, Add Your Site Manually. Paste your website URL into the Enter Your Site URL box and click Add.
Next, you’ll see a window to Add and Verify Site. Choose the HTML Meta Tag option. Click Copy to the right of the tag.
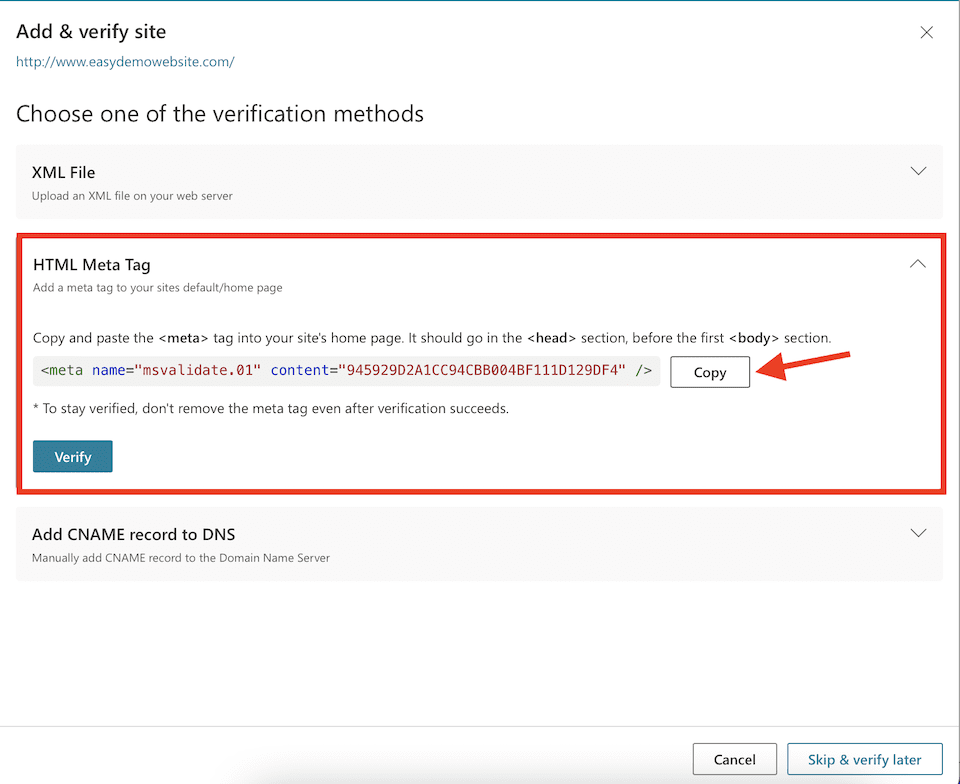
Instead of following the directions in that window, we’re going to utilize the Yoast plugin, which is an easier method. Go to your WordPress dashboard, and in the left sidebar, click SEO > General. Then select Webmaster Tools from the top. In the empty box under Bing Verification Code, paste the code you copied. Click Save Changes at the bottom.
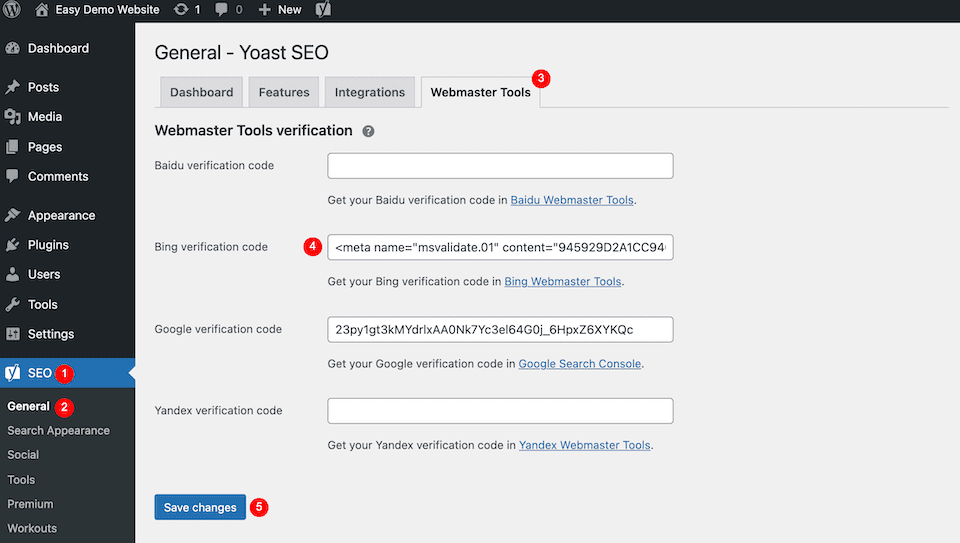
Now go back to the Bing Webmaster Tools page and click Verify. You should see this page (below) that says you successfully added your site to the database. You don’t have to wait to do this. It will work right away.
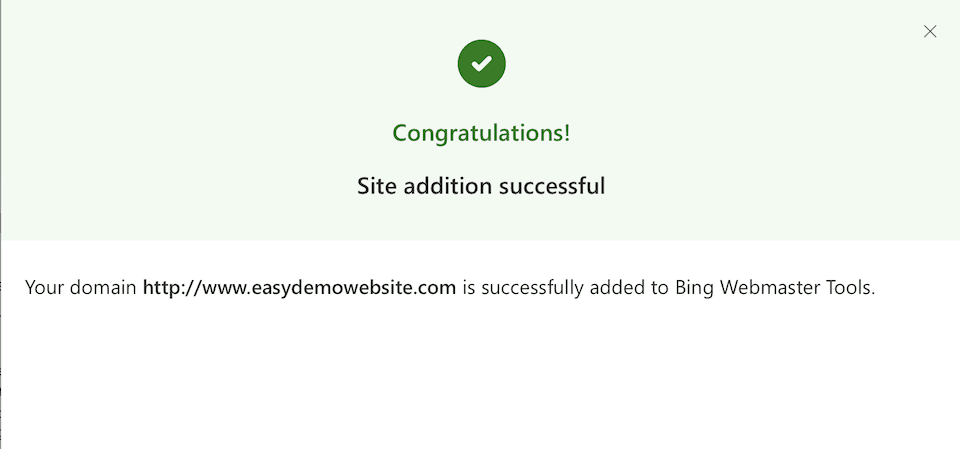
Submitting Your Bing Webmaster Tools Sitemap
When you close out of that “Success” page, you’ll be brought to the details page of the domain you just added. Click Sitemaps on the left, then click Submit Sitemap.
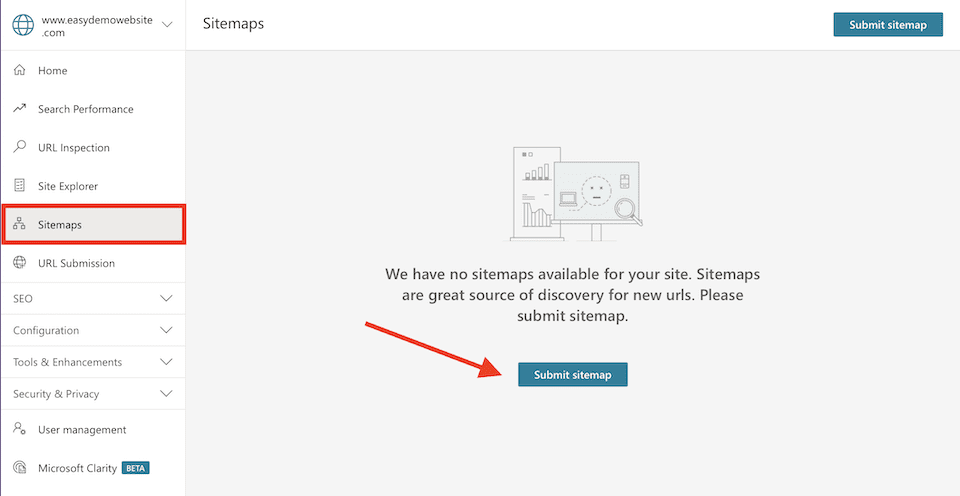
Copy and paste the URL of the sitemap you generated with Yoast (the page you’ve kept open), then click Submit. You should see a green banner that shows up at the bottom of the screen for a few seconds, confirming you successfully submitted the Bing Webmaster Tools sitemap.
And that’s it! It’ll take a little while for Bing to fully process your site (maybe up to one day) but you can check back soon to see when it last crawled your website, the URLs it found, and so on. After Bing crawls your site for the first time, it should then crawl your site daily to keep the sitemap updated. As you add content to your site, Bing webmaster tools will add it to search results.
Final Thoughts About the Bing Webmaster Tools Sitemap
When it comes to whether or not you need a sitemap, the answer is simple: if you have a website that you want others to find, then you definitely do. No matter the site’s size, an XML sitemap that you submit to major search engines, like Google, Bing, and Yandex is necessary to generate traffic. Your sitemap tells the search engine which URLs exist and how your site is structured so it can return relevant, accurate results to people when they search.
Your sitemap requires a bit of maintenance, too, if only to make sure it’s functioning correctly. It’s good practice to regularly check your sitemap to make sure the URLs are still correct, especially after you make an update. Typically, sitemaps update automatically daily, so if you made changes a few days ago but the sitemap hasn’t been updated yet, there could be a problem.
If you’re on a sitemap-submission kick, you’ll want to check out our article about how to submit your XML sitemap to Yandex. You can never be too thorough when it comes to improving search engine ranking.



Hi thanks for the useful article. I as a rule submit to Google Search Console. Should I be submitting sitemaps to all the search engines? Thanks