ChatGPT has greatly impacted how we create since it burst onto the scene in November 2022. With the chops to help you craft outlines, headlines, paragraphs, or full blog posts, digital creators everywhere are warming up to the idea of creating content with artificial intelligence (AI). As AI continues to evolve, we see integration with ChatGPT in several ways, including within WordPress. In this post, we’ll showcase how to use ChatGPT in WordPress.
Let’s dive in.
What is ChatGPT?

ChatGPT (or generative pre-trained transformers) is an AI chatbot, created by OpenAI, that makes humanlike dialog through natural language processing. It can respond to questions, carry on conversations, and even write code for you. It uses a form of artificial intelligence called generative AI, which is also used to create images, videos, music, and text.
What is Generative AI?

Generative AI is a unique form of artificial intelligence that learns from large amounts of data to produce high-quality text, images, and other forms of media. It uses deep learning, such as generative adversarial networks (GANs), to learn from a dataset and generate new content based on that data. GANs are made up of two systems: a discriminator and a generator.
During training, the generator’s job is to create new content to try and fool the discriminator. The discriminator receives the data, processes it, and determines whether it’s real. Initially, the generator could be better at creating new content so the discriminator can easily spot the fake. As training progresses, the generator gets better at its job, eventually being able to fool the discriminator.
Benefits of Using ChatGPT in WordPress
Subscribe To Our Youtube Channel
There are several benefits to using ChatGPT within WordPress. First and foremost, it can save you a ton of time in the content creation process. With ChatGPT, you can quickly write blog posts, product descriptions, and more within a few clicks. Another benefit of ChatGPT is increased customer engagement.
AI chatbots answer common questions, personalize recommendations, and quickly access information. Using ChatGPT as a live chat agent, you can provide customers with a service without hiring live agents to field questions. That said, there are plenty of other use cases for ChatGPT.
7 Use Cases for Using ChatGPT in WordPress
There are a few ways to use ChatGPT within WordPress. It’s great for researching blog post ideas, generating outlines, writing code, and creating plugins. Here are a few tasks that ChatGPT can assist you within WordPress.
Researching Blog Post Ideas
Coming up with fresh blog post ideas can be a challenge. With ChatGPT integrated into WordPress, you can brainstorm ideas by conversing with it. It can suggest topics, trends, or even niche subjects, helping to overcome writer’s block and ensuring your blog has fresh content regularly.
Generating Outlines
Crafting a well-structured blog post starts with an outline. ChatGPT can help you build an online based on an idea, adding main points, subheadings, and key points, allowing you to keep your thoughts organized and on track.
Writing and Debugging Code
If you’re looking for a way to add functionality to your site but don’t have coding knowledge, ChatGPT can help you write CSS, HTML, and even PHP. In addition, if you’re experiencing an error and need help deciphering it, you can plug error messages into ChatGPT to help identify the problem.
Creating Plugins
If you need your site to encompass functionality that isn’t possible with existing plugins, you can ask ChatGPT for help. It can assist you in creating plugins to handle several different tasks, from something simple as a link finder to more complex functions like a mortgage calculator.
User Engagement
ChatGPT can increase user engagement through chatbots. You can integrate it to offer recommendations, answer questions, and assist in finding relevant content on your site. You can even use it to provide technical support should you offer products and services.
SEO Optimization
One of the most important ways to ensure your site gets noticed in the search engine ranking pages (SERPs) is by using an SEO plugin. Did you know that one of the more popular ones, AIOSEO, uses ChatGPT? With AIOSEO, you can use ChatGPT to generate titles and meta descriptions, making your life much easier.
Generating Web Content
Writing high-quality, engaging content is a time-consuming task. ChatGPT can aid in writing content for your site, saving you time and effort. It’s perfect for crafting headlines, paragraphs, or entire landing pages.
How to Use ChatGPT in WordPress: 2 Methods
There are many ways to use ChatGPT for your website, but most involve using OpenAI’s interface to do it. In this post, we want to concentrate on ways to use ChatGPT within WordPress itself. The first is through Divi AI, which allows you to generate text (and images) when building pages in the Divi Builder. The second is through a WordPress plugin called AI Engine.
Divi AI
Elegant Themes’ new flagship AI product, Divi AI, incorporates ChatGPT (3.5) inside the Visual Builder, so you can generate text on the fly. It can also be used to build a webpage, write a blog post, or simply improve copy you’ve already written.
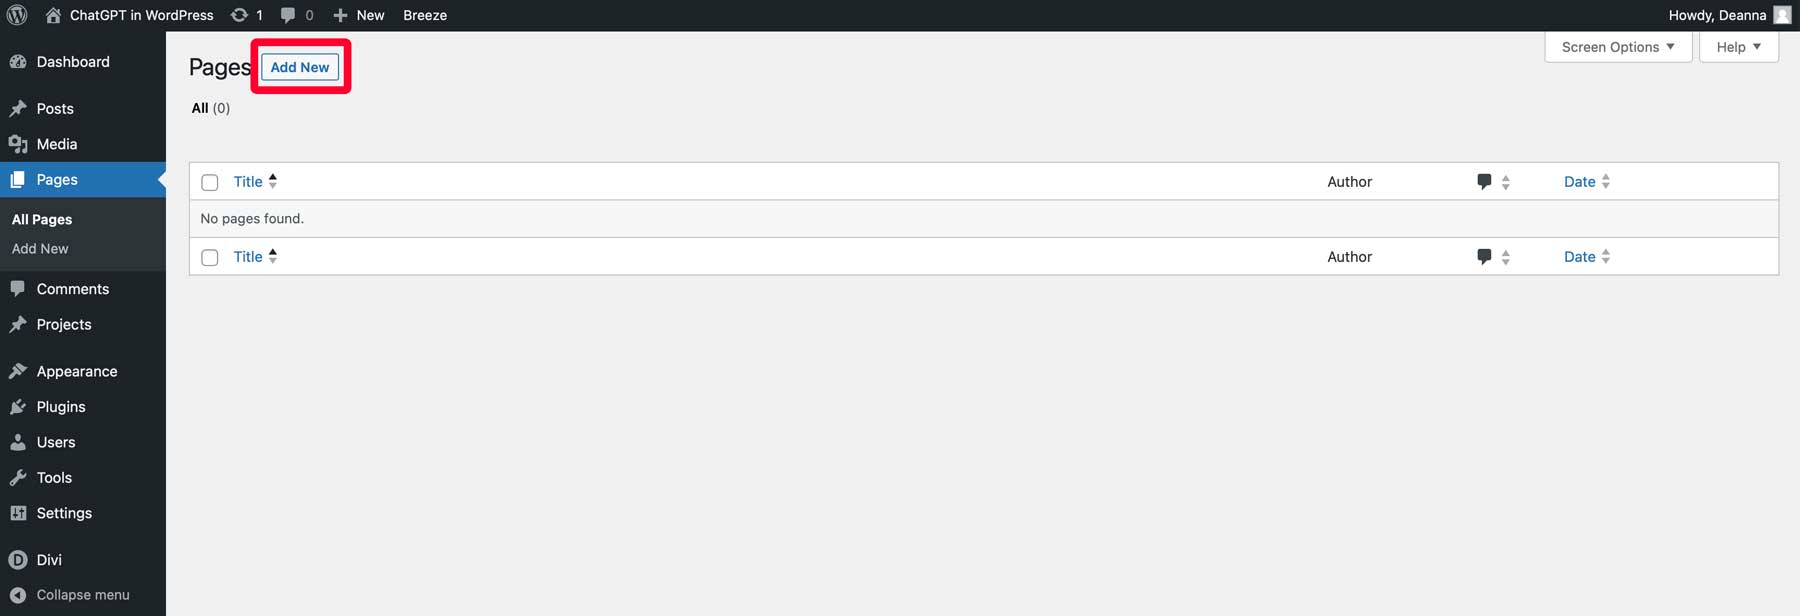
You can use Divi AI to create posts or pages, but for this post, we’ll create a page. Log in to the WordPress admin dashboard, then create a new page to start using Divi AI with ChatGPT.
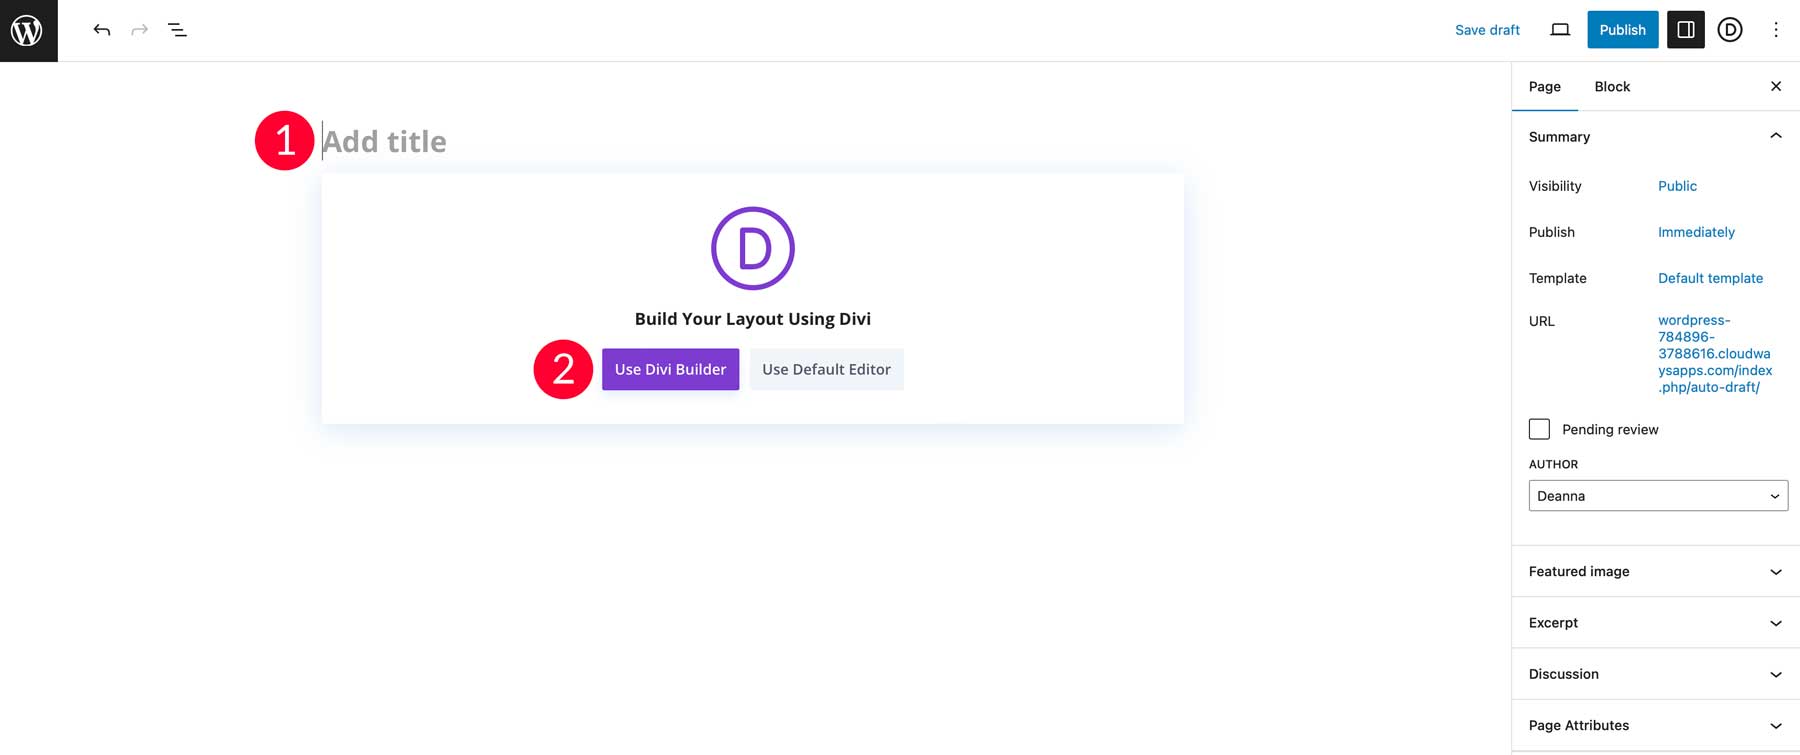
Next, give your page a title (1), then click the Use Divi Builder button (2).
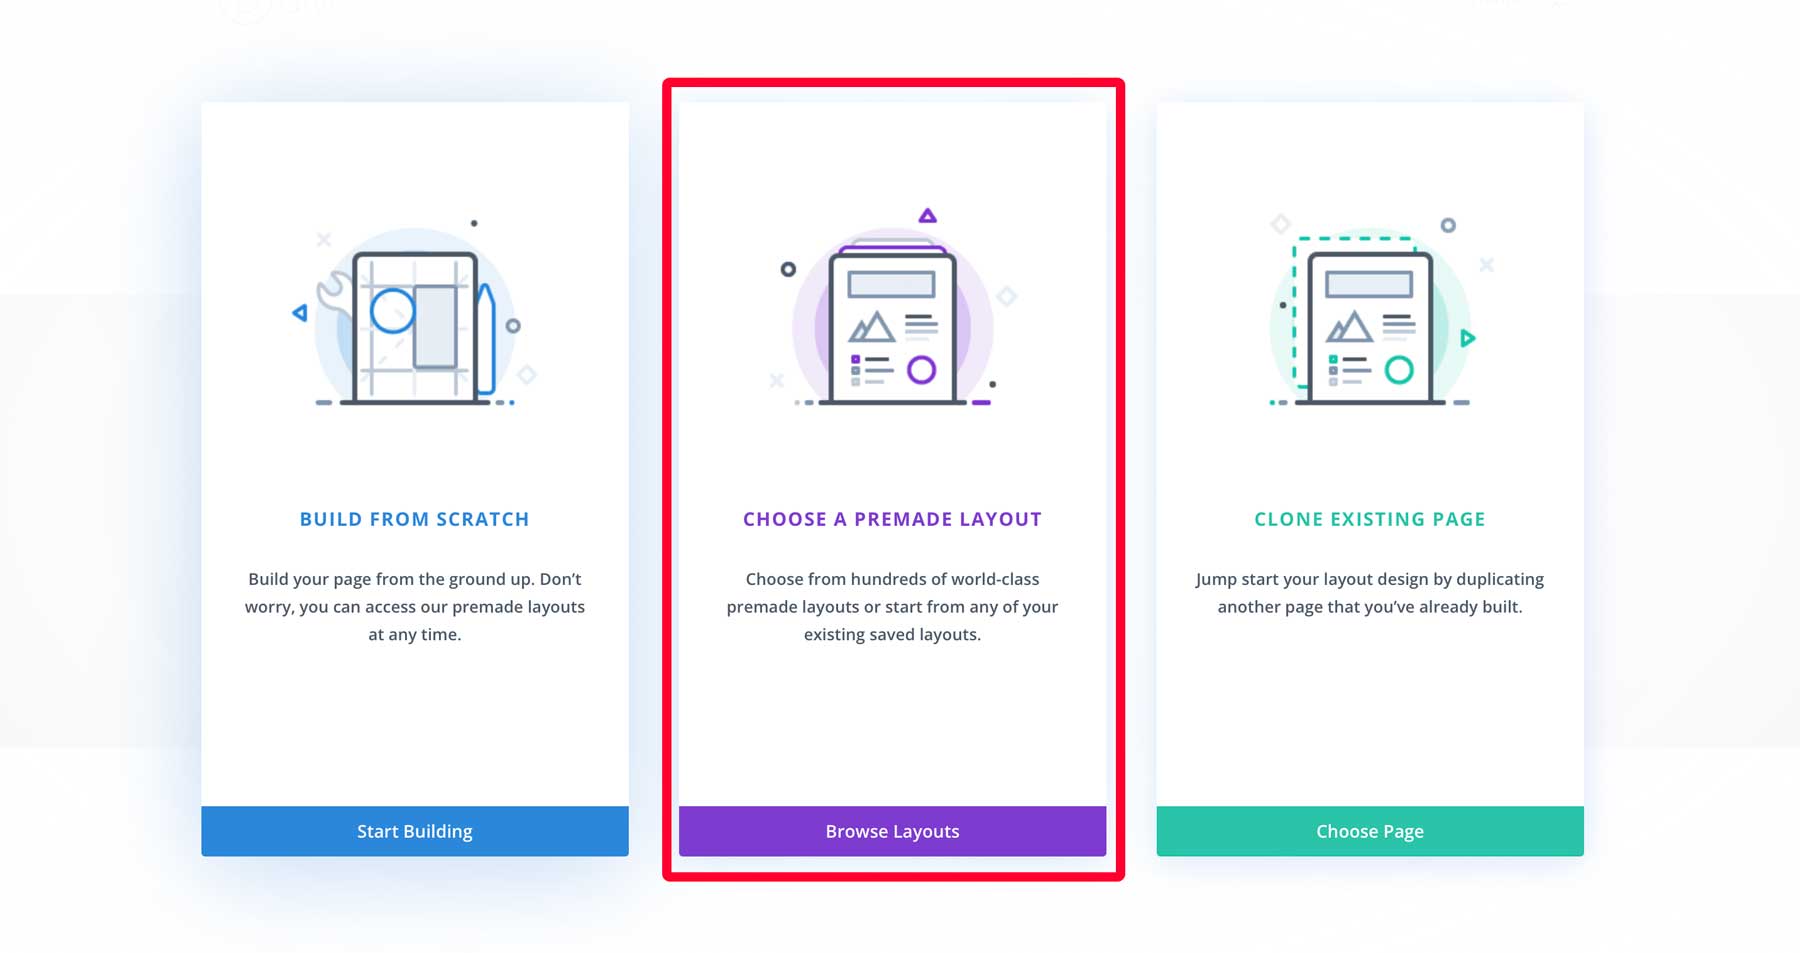
You can create a new page from scratch or choose a premade layout. We’ll choose to build our page with a premade layout:
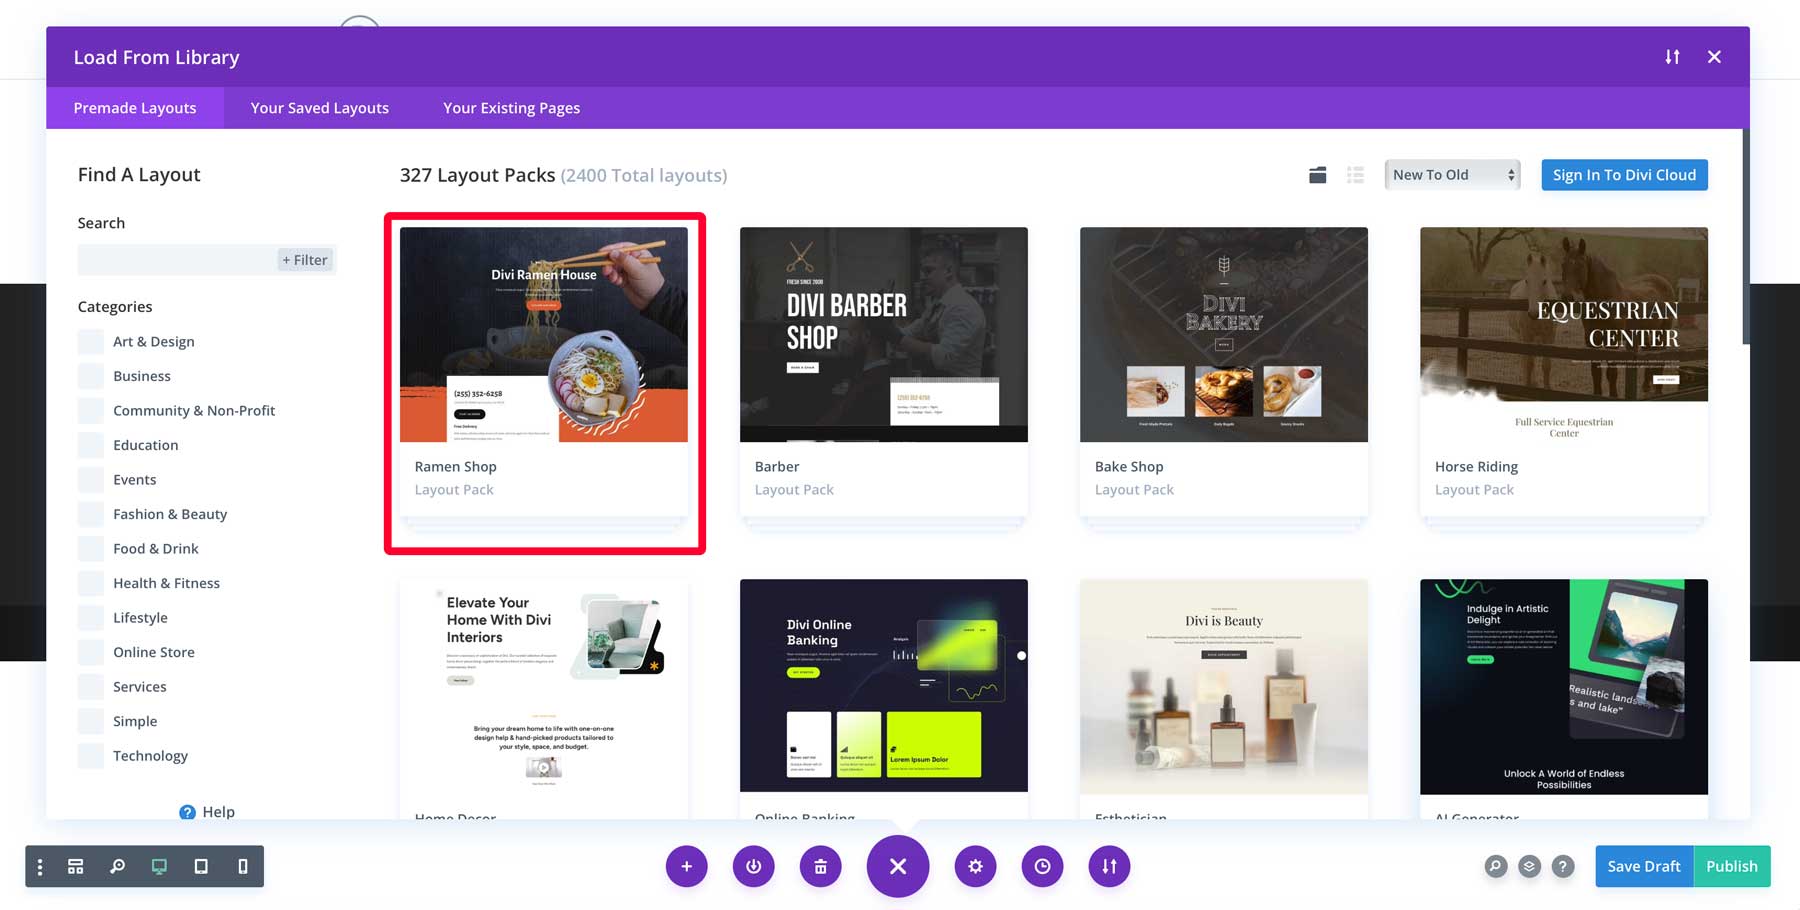
Select the ramen shop layout pack for Divi:
Next, choose the landing page layout (1), then click the Use This Layout button (2).
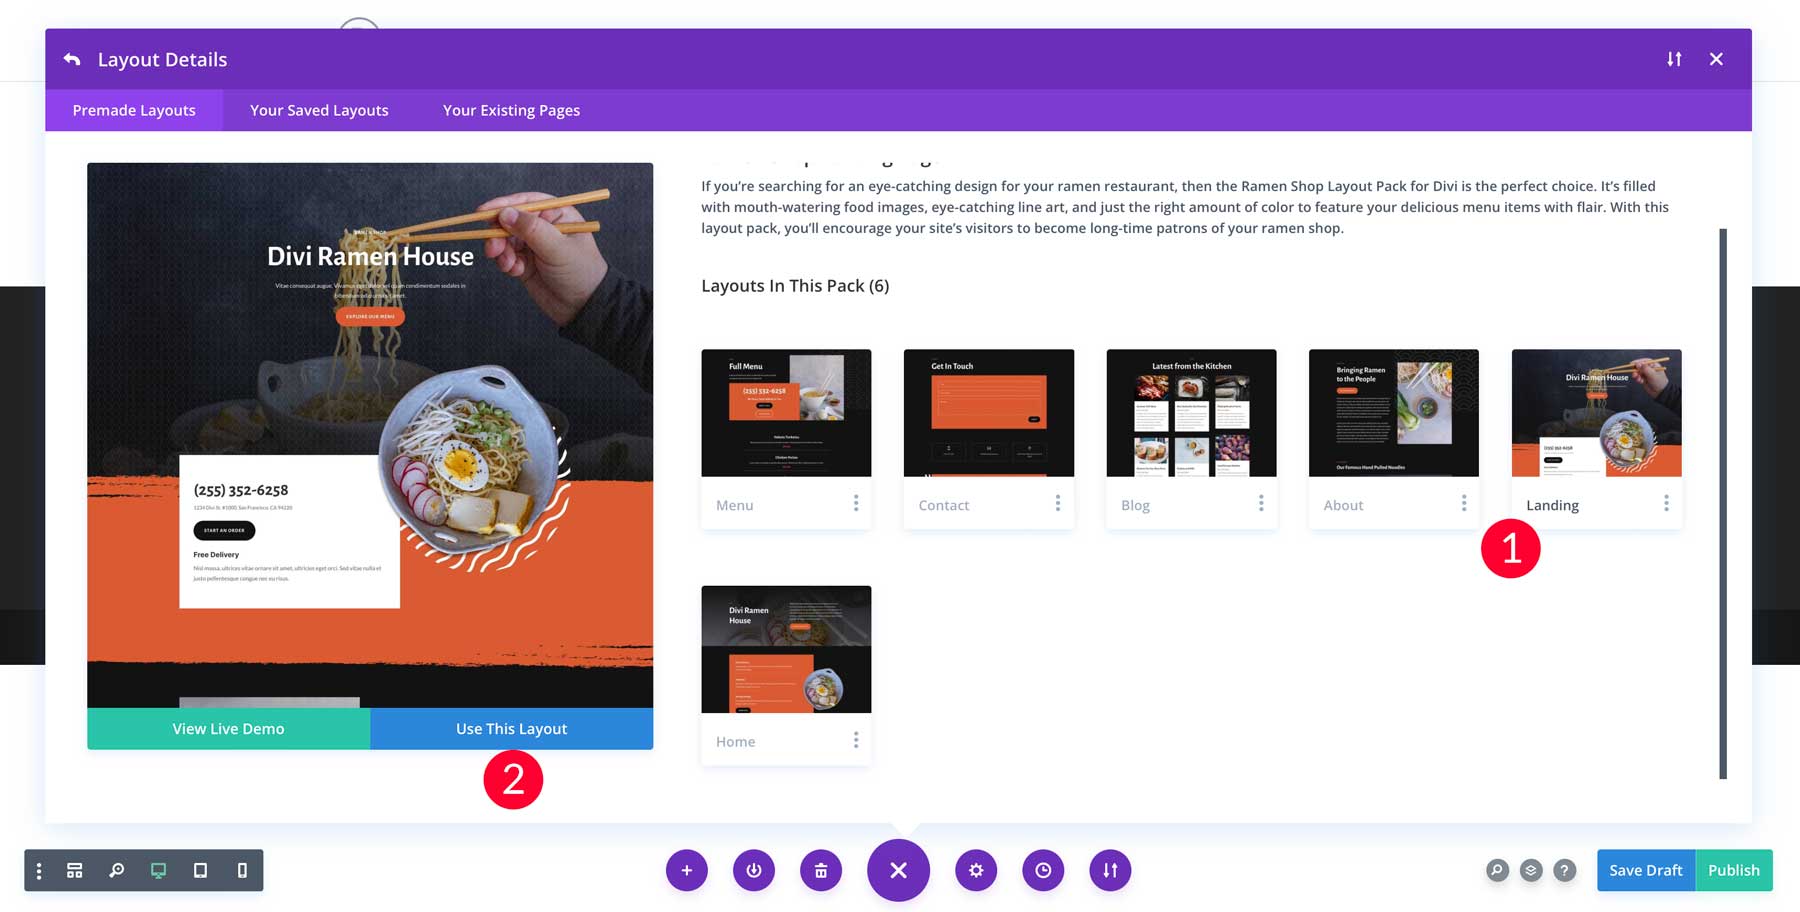
With the layout loaded, we can start using Divi AI to generate copy for our page.
Divi AI: Generating Copy Automatically with ChatGPT
One of the fastest ways to use ChatGPT in WordPress is to generate copy automatically. Divi AI uses proprietary technology combined with ChatGPT that gives Divi unique insight into the content you want to create. Divi AI can examine surrounding content and make suggestions when using a pre-made layout or previously built page. To showcase this, select the text box under the page title by hovering over it to reveal the gray settings icon.
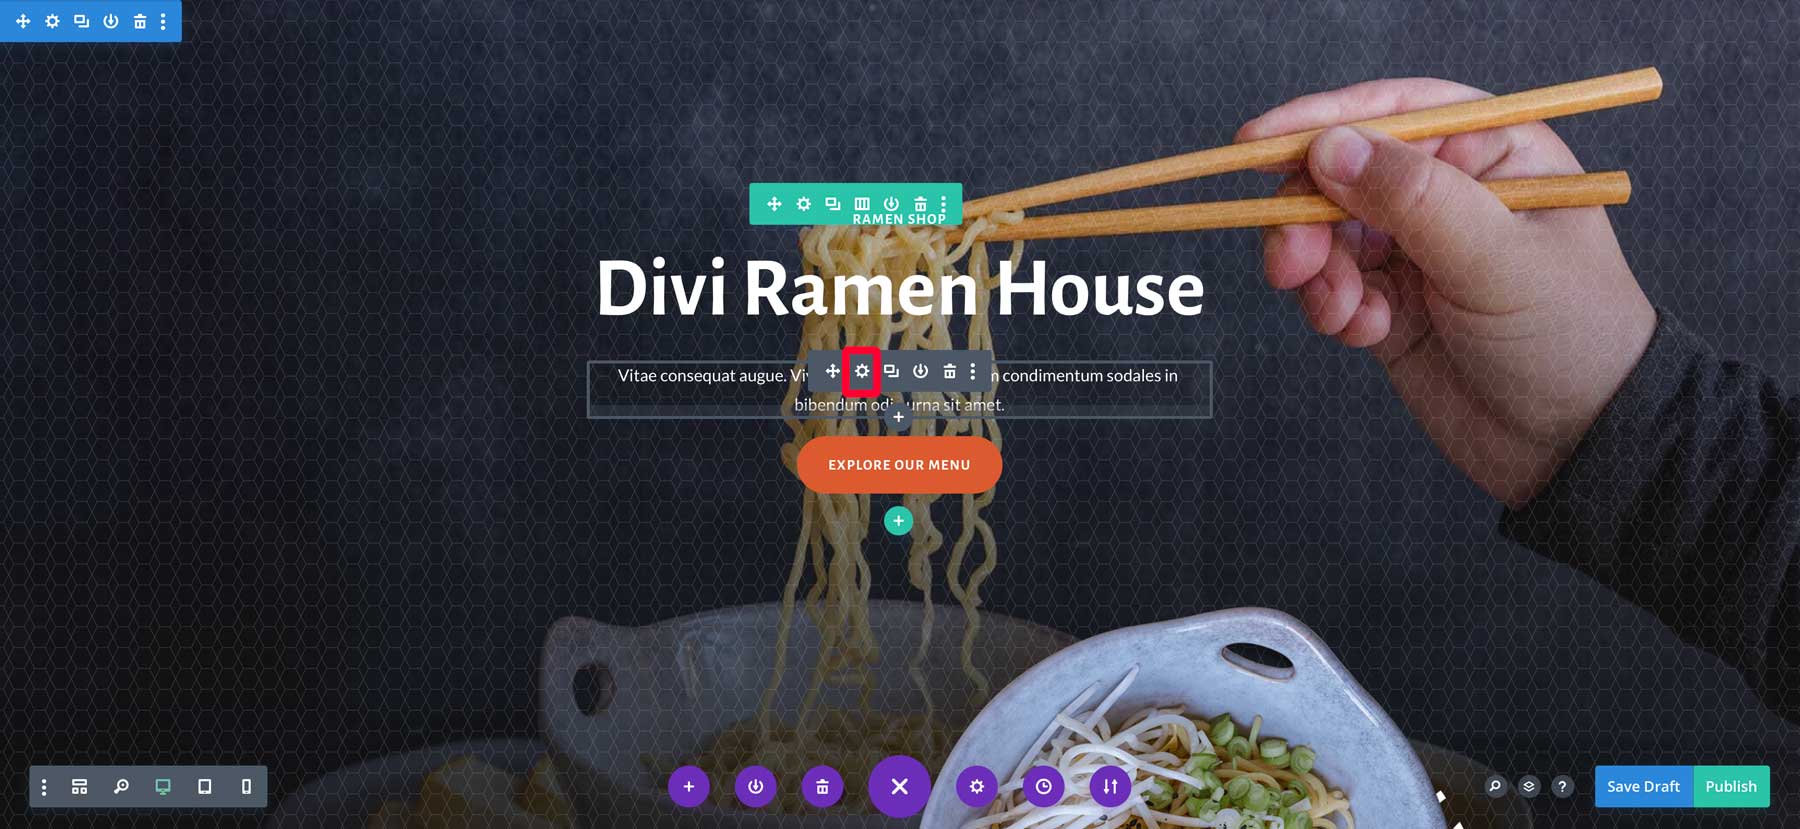
Click it to bring up the module settings. You’ll have two options to create copy with Divi AI. If you want to automatically generate copy for your module, click the Generate Content With AI button (1). Alternatively, you can hover over the text area to reveal the AI icon (2).
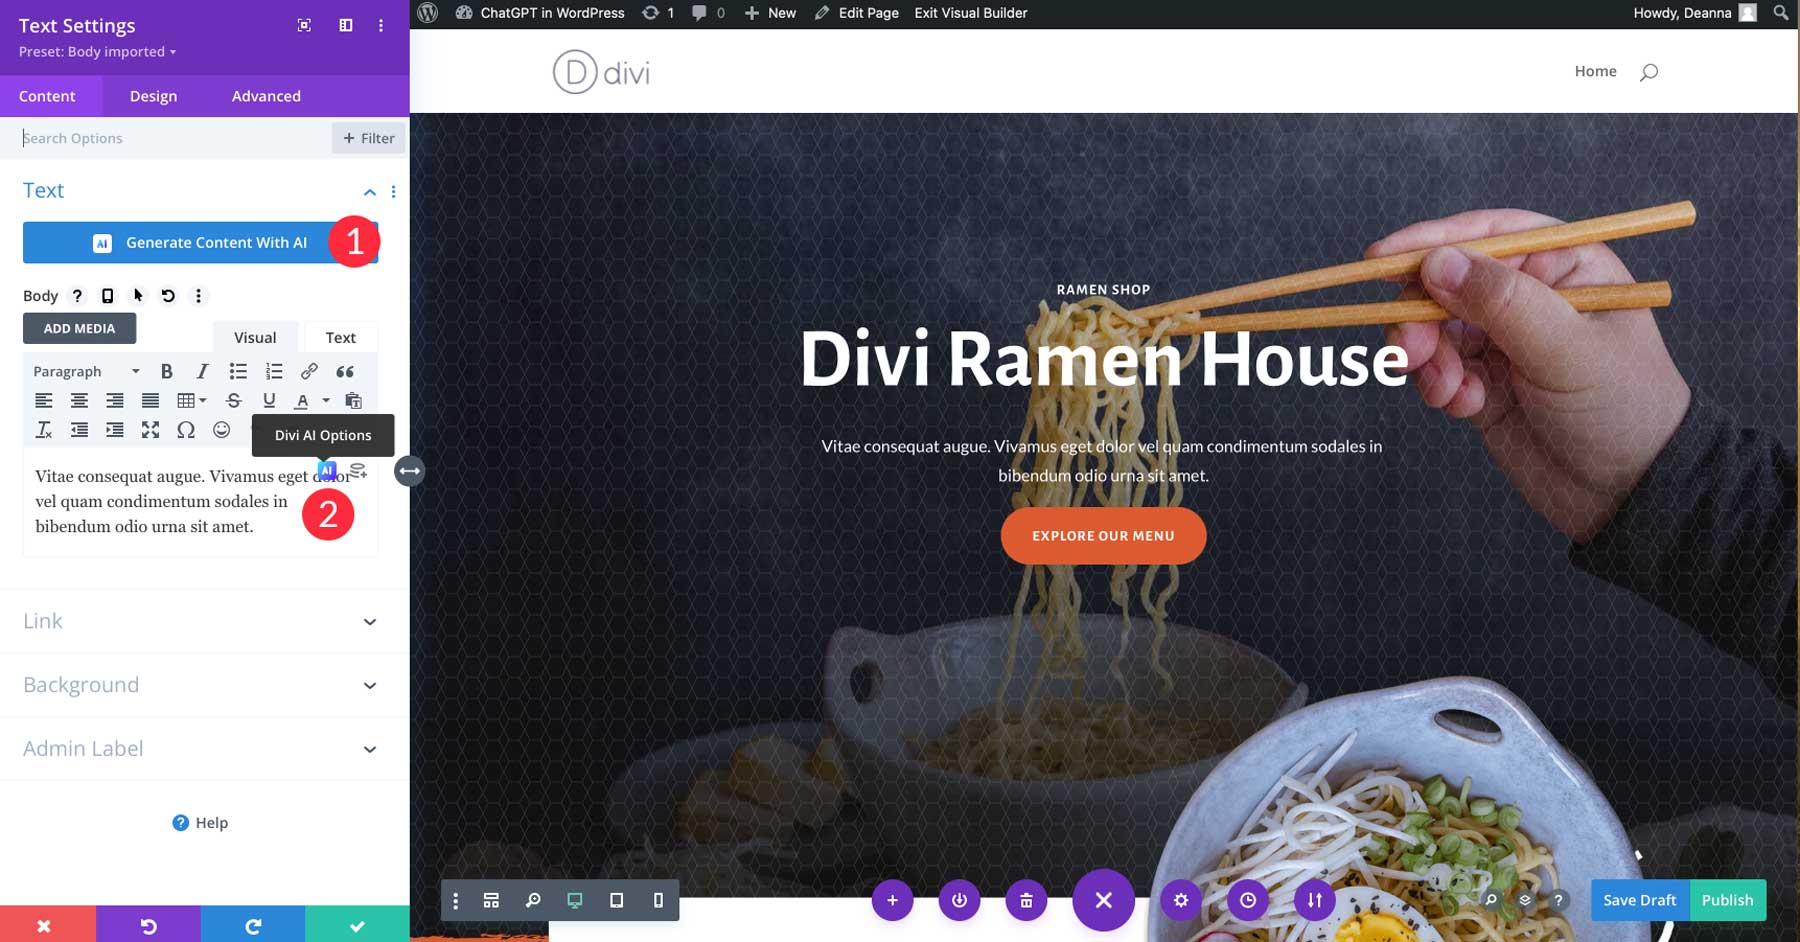
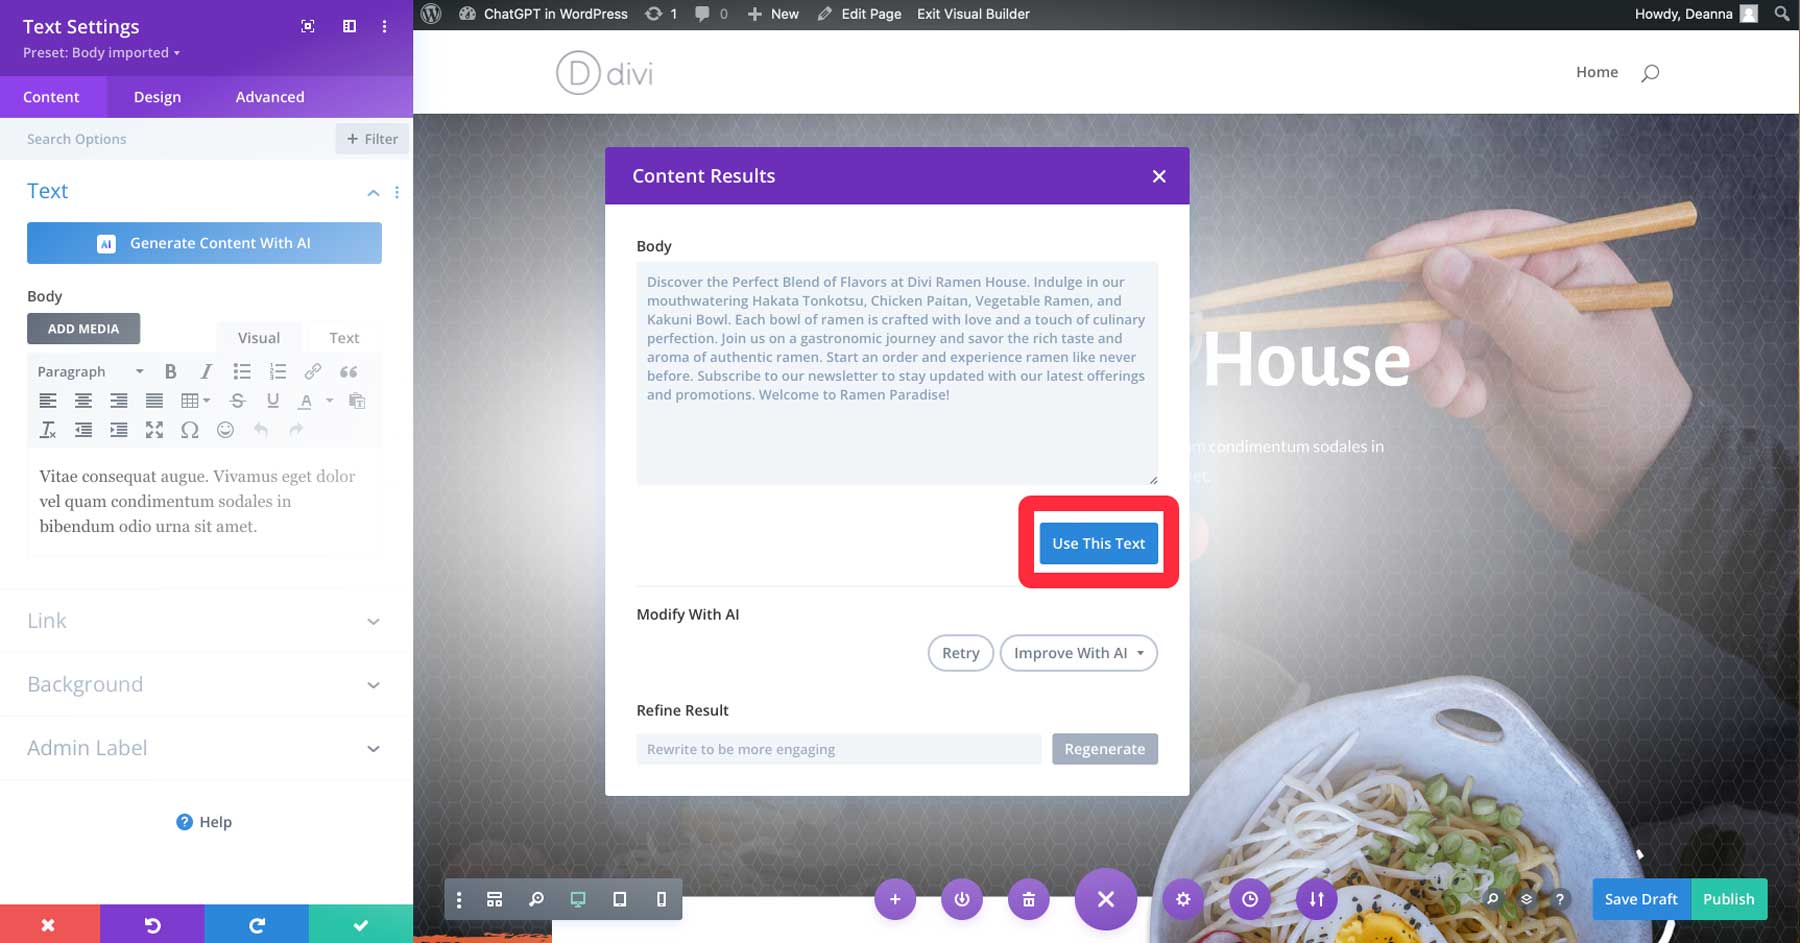
Upon clicking the Generate Content With AI button, a new dialog box will appear with AI-generated text. As you can see, it used other elements within the layout pack to create copy directly associated with the content on the page.
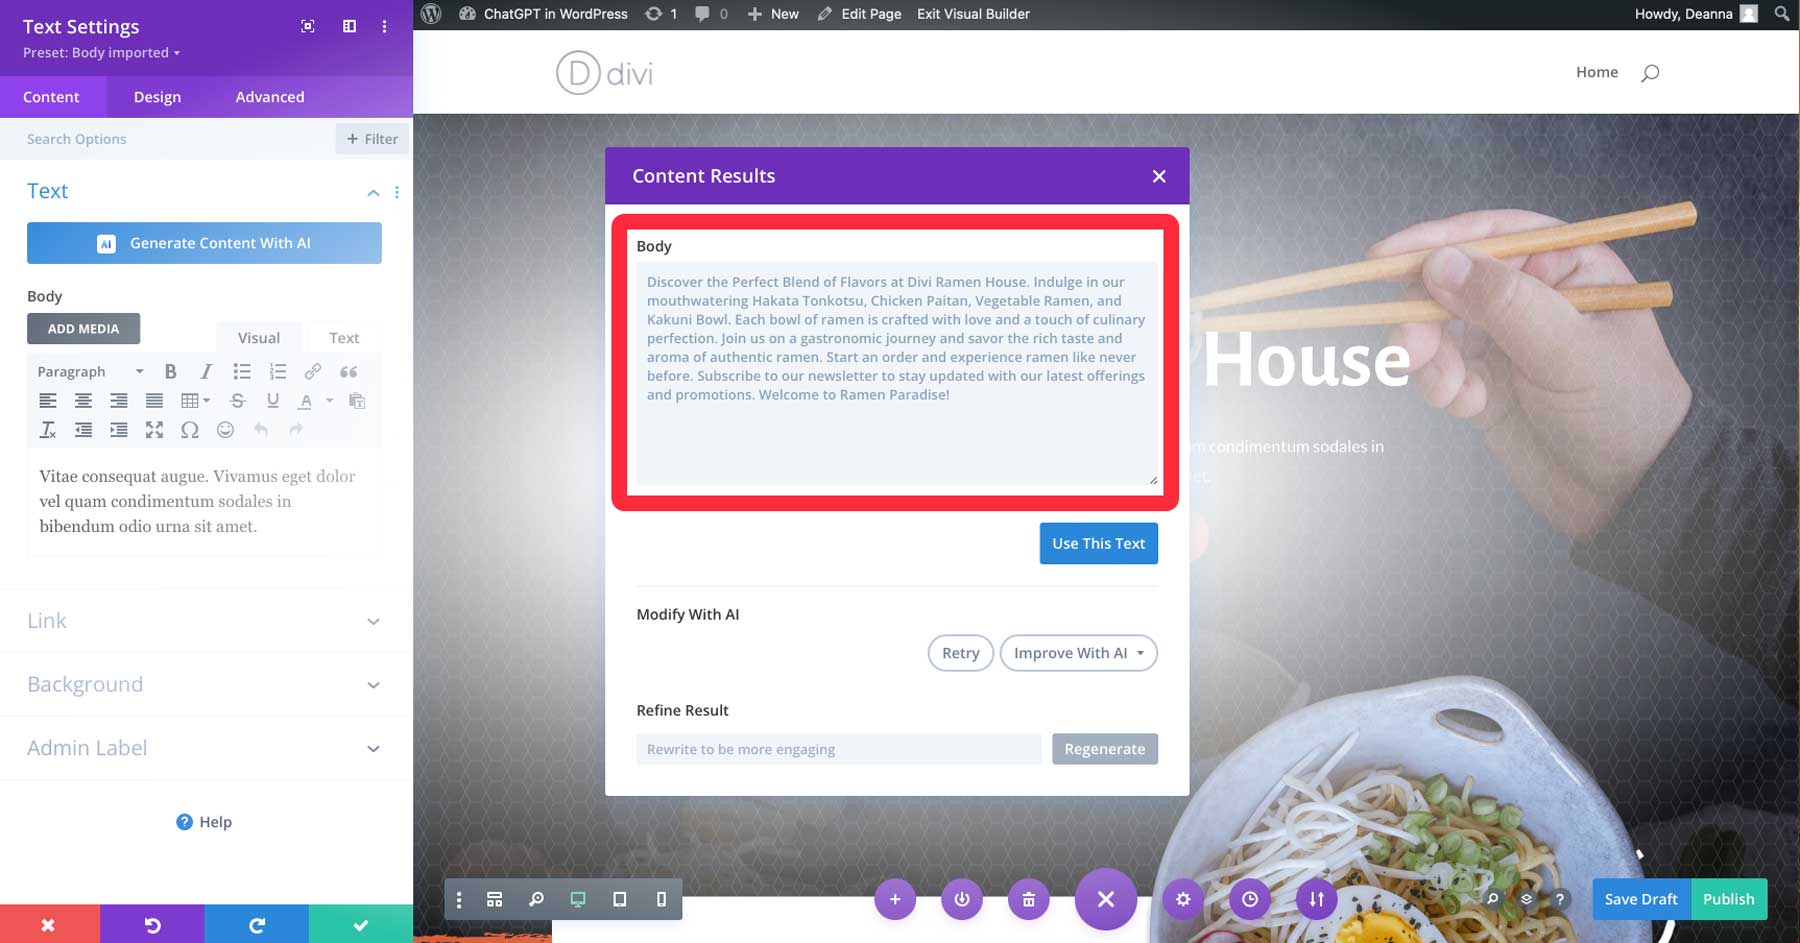
To use the text, click the Use This Text button to insert the newly generated text into the text module.
Improving Copy with Divi AI
What if you want to improve the text? Thankfully, Divi AI lets you make improvements to copy just as easily. With the same text module activated, click the AI icon within the text box to bring up the options. As you can see, there are quite a few to choose from.
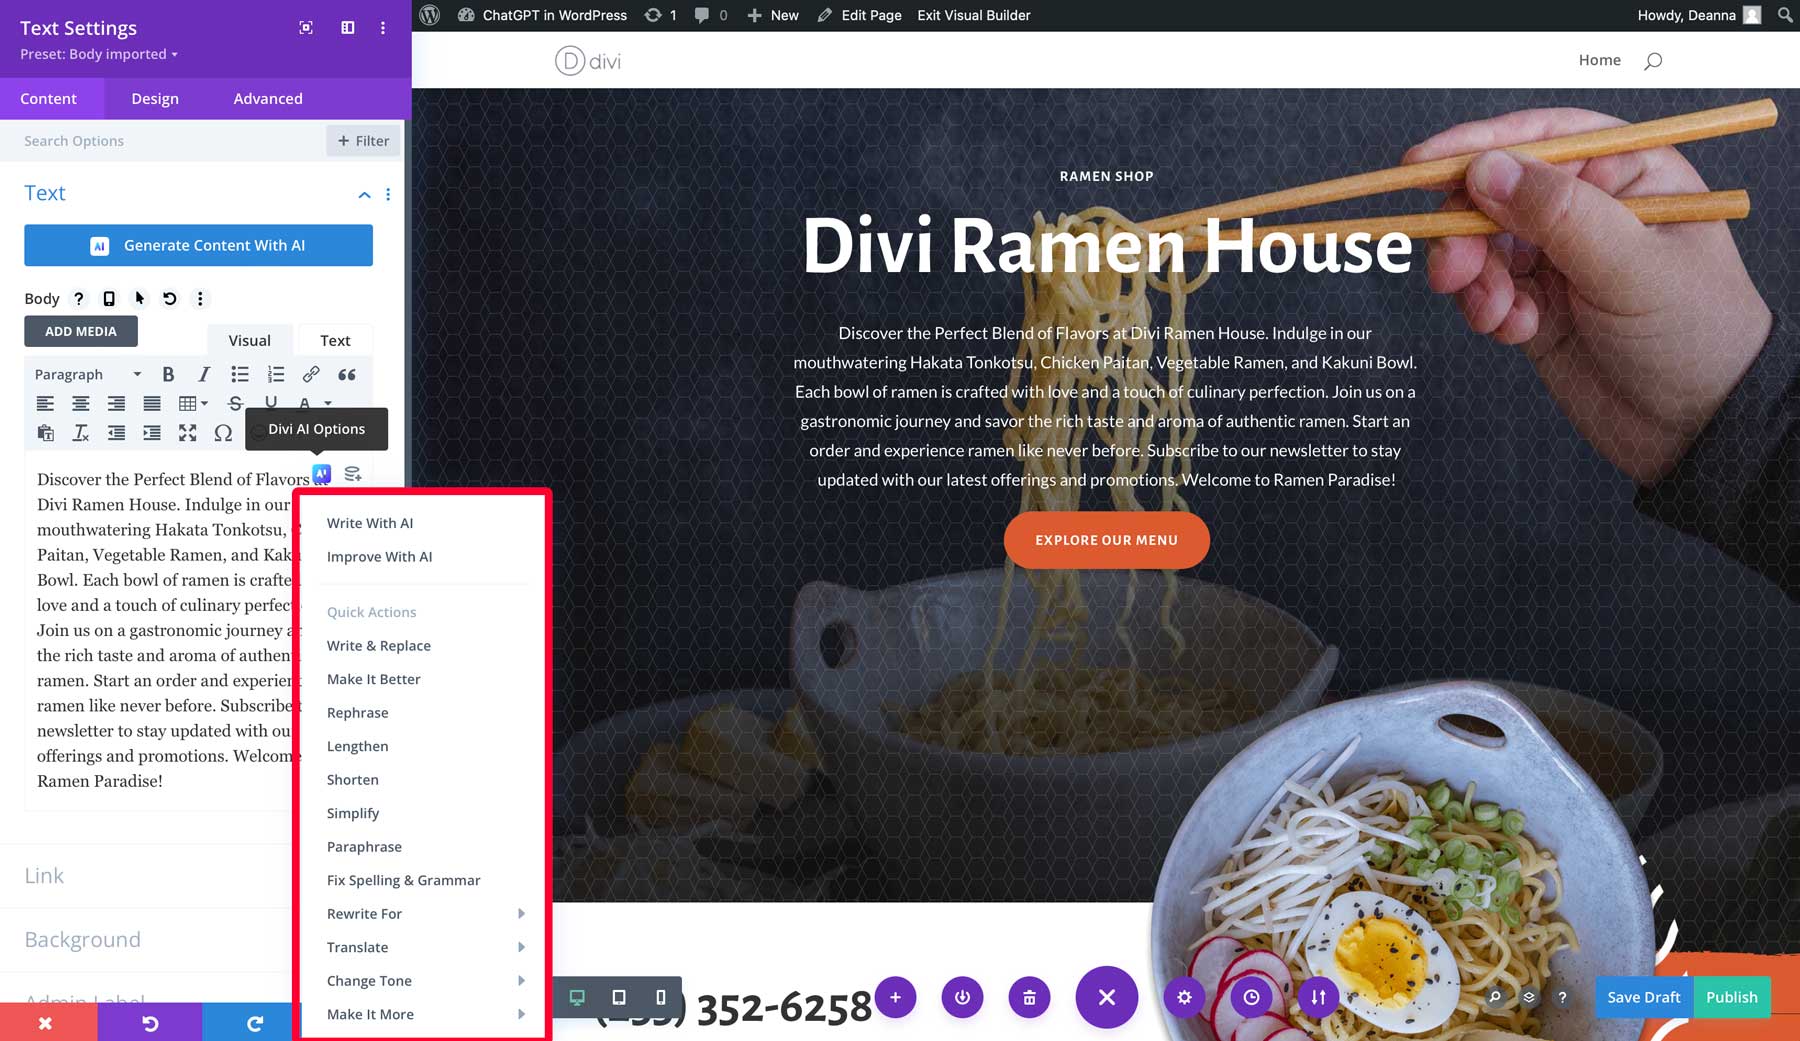
Let’s choose Improve with AI. A new dialog box will appear, revealing a few options:
- Content Type: Choose from a title, paragraph, button, blog post, or social media post.
- What are you writing about: Allows you to provide context to give Divi AI a better shot at producing what you want.
- Added context: Choose from this page content, this section content, this module content, or no context.
- Tone of voice: Allows you to provide the tone for ChatGPT to follow, including creative, informative, or funny.
- Must use keywords: Add keywords (short or long tail) that you’d like included in the text.
- Content length: Specify how many words, characters, sentences, paragraphs, or list items you want to generate.
- Language: Choose the language for your text.
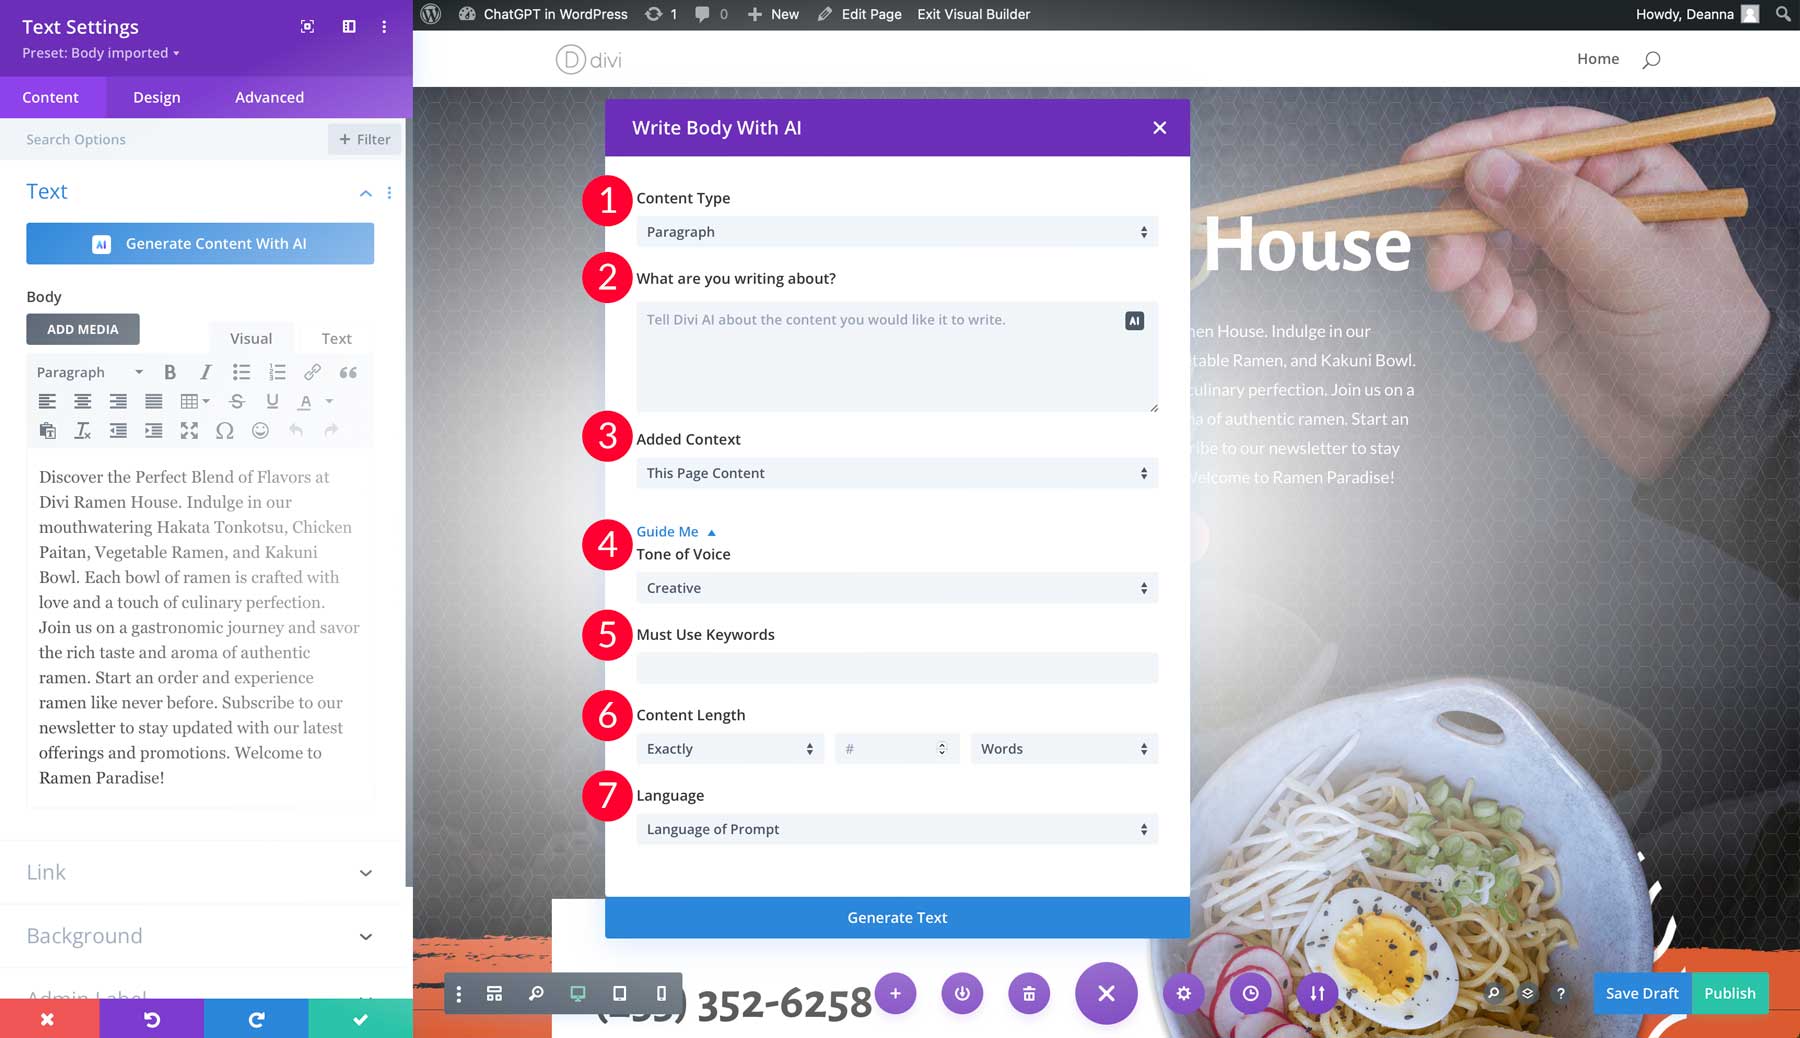
These settings allow you to fine-tune copy generated with Divi AI or written by a human. The great thing about ChatGPT within Divi AI is that you can guide it using keywords and other settings to produce content more attuned to your needs. For example, suppose we want to shorten the content created in the last section. In that case, we can easily specify how many words we’d like the text to have.
AI Engine
Another good way to use ChatGPT in WordPress is through a WordPress AI plugin called AI Engine. It allows you to create chatbots, generate blog post ideas, and create images. To use AI Engine, you’ll need to obtain an API key through OpenAI and purchase credits. In our experience, generating a three-paragraph blog post will cost roughly a fraction of a penny, so it’s very cost-effective. Before we walk you through using AI Engine, let’s get you set up with an API Key.
Setting up AI Engine
After searching for and installing AI Engine, the first step is getting the settings squared away. Before you do anything else, you’ll need to acquire an API key through OpenAI. To do this, click on the settings tab in the AI Engine interface.
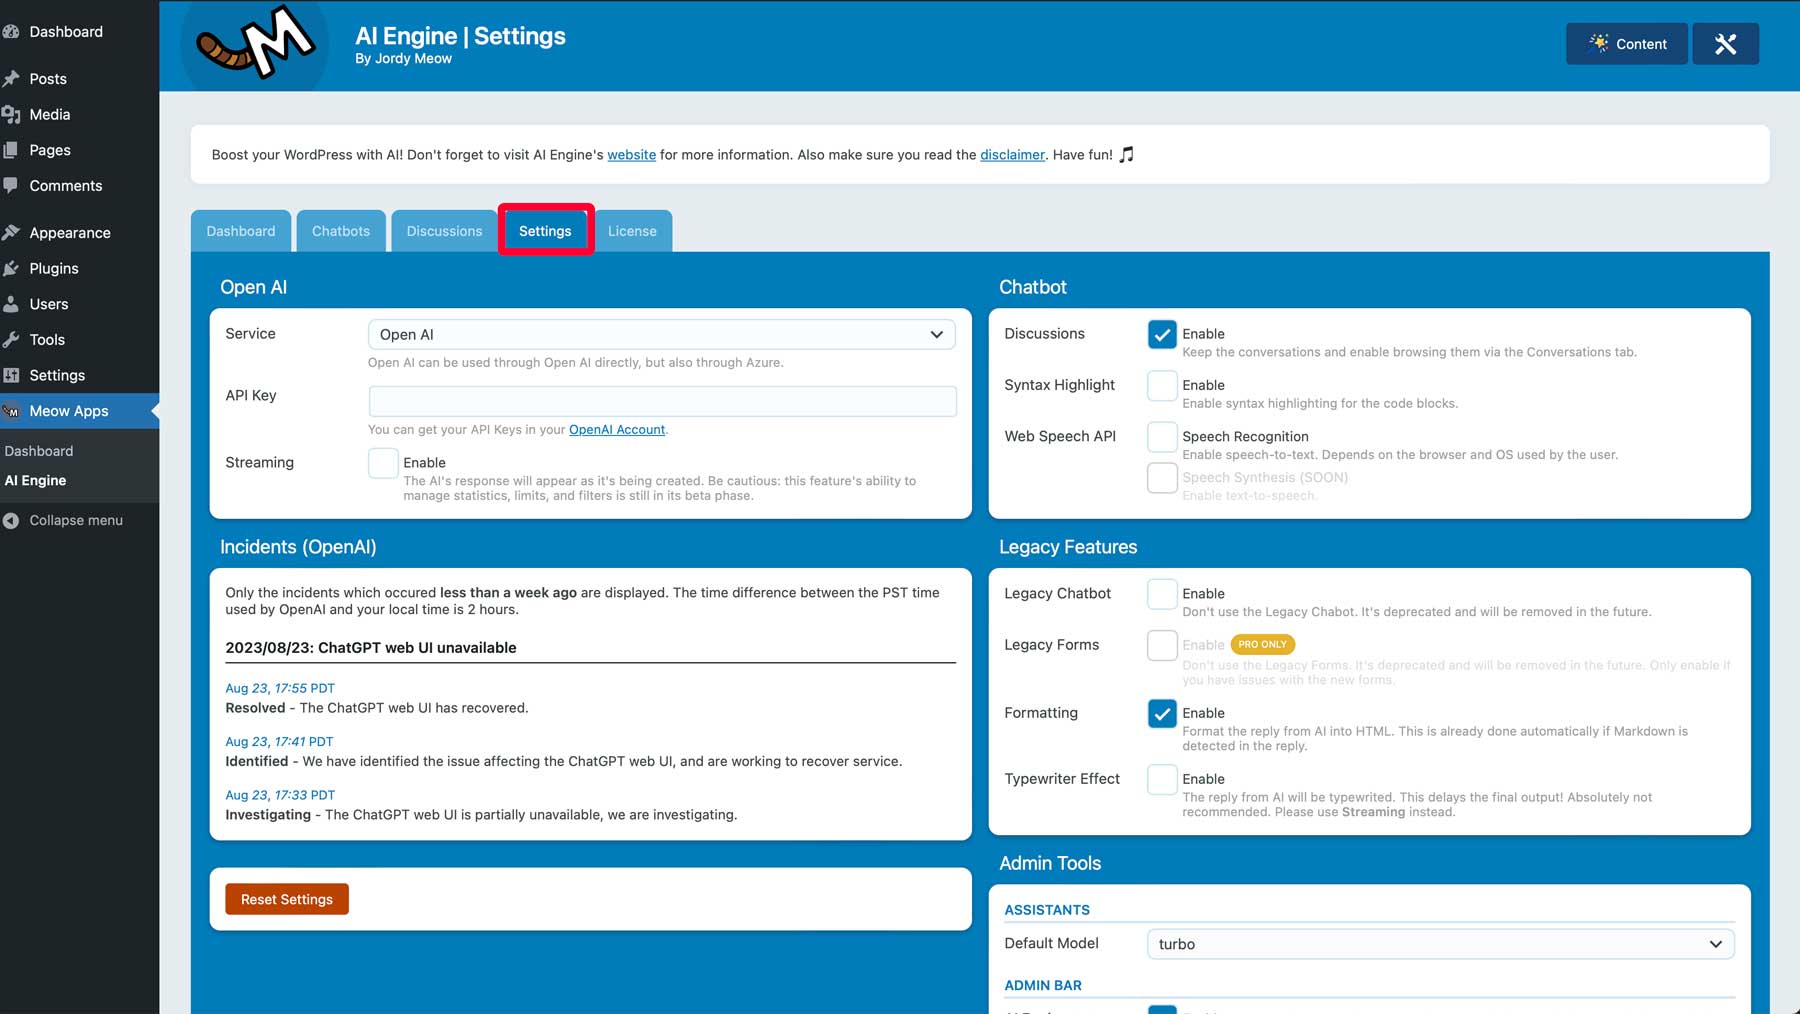
Before proceeding to the next step, be sure that you sign in (1) to an active OpenAI account and have purchased credits. If you need to sign up, click the sign up button (2) on the top right of the OpenAI website.

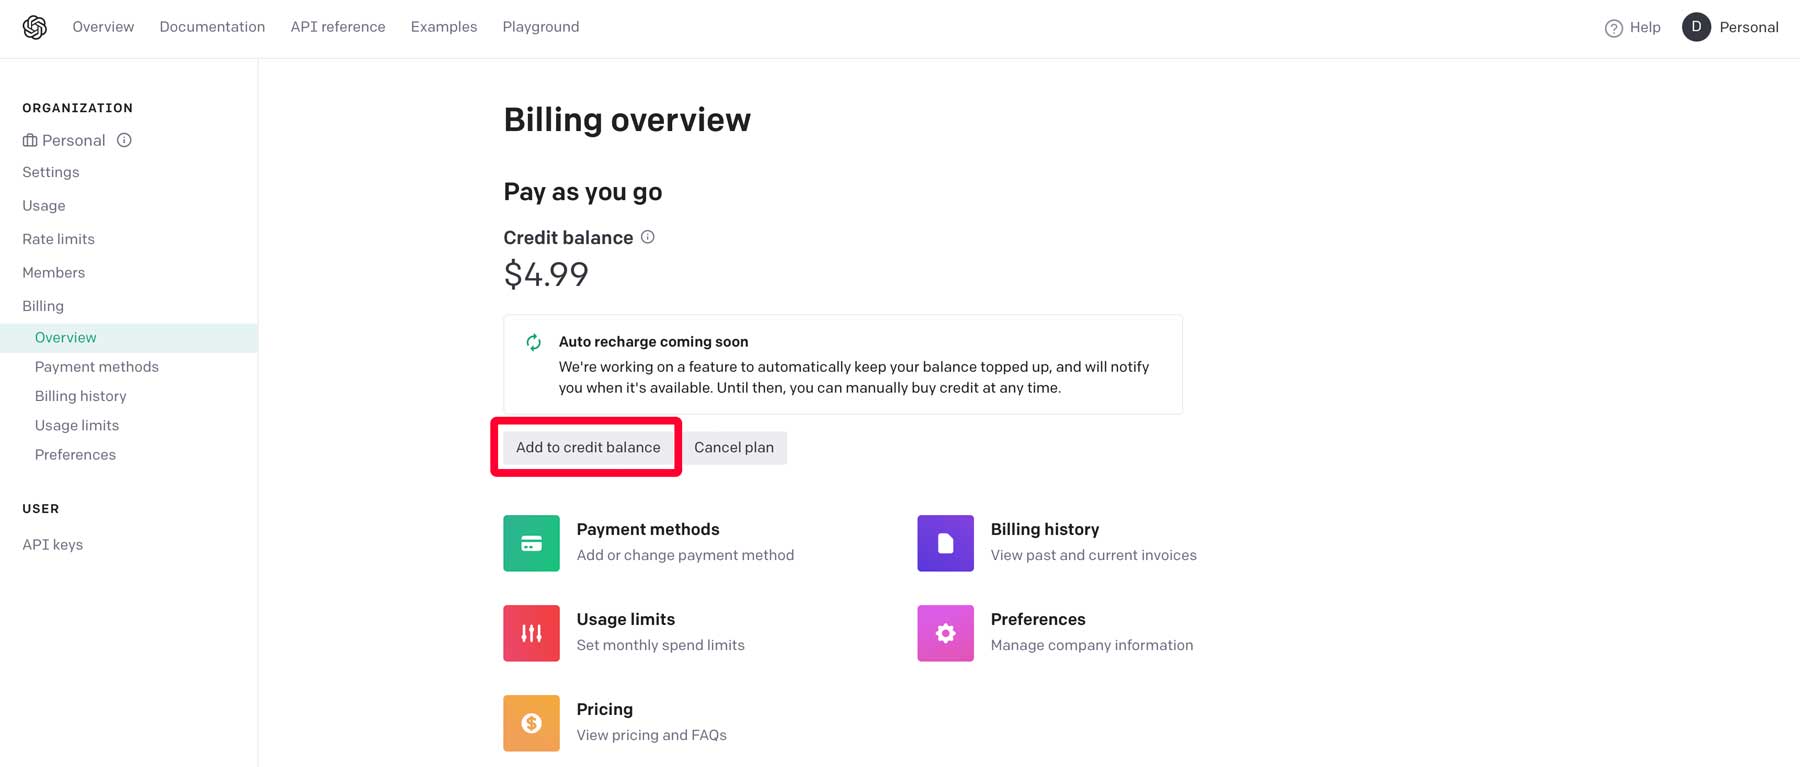
To add credits, navigate to the billing overview screen and click the add to credit balance button to add credits to your account.
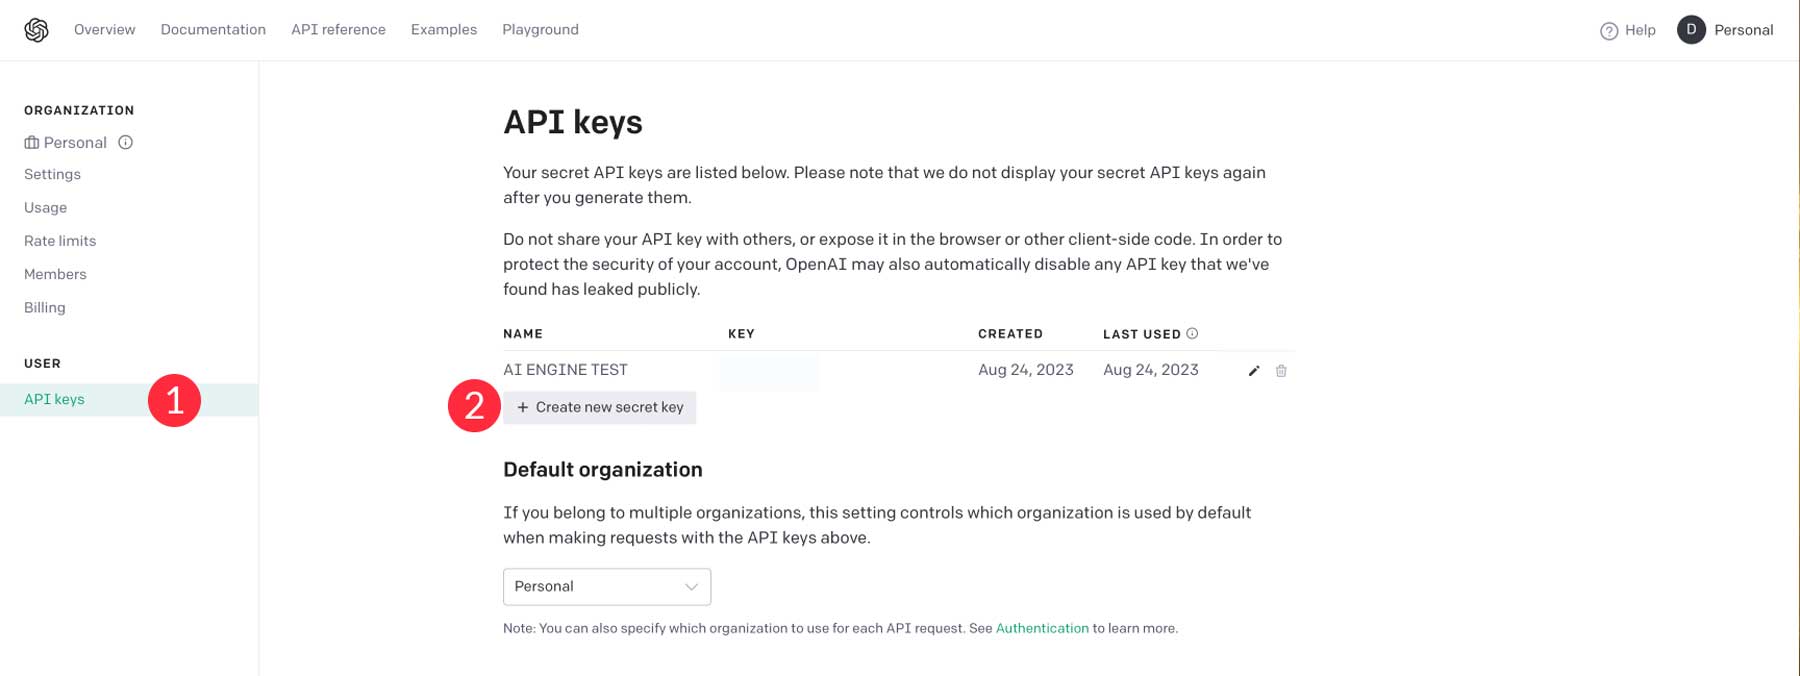
Once you’ve purchased credits, click API keys (1) under the user tab. From there, click + Create new secret key (2).
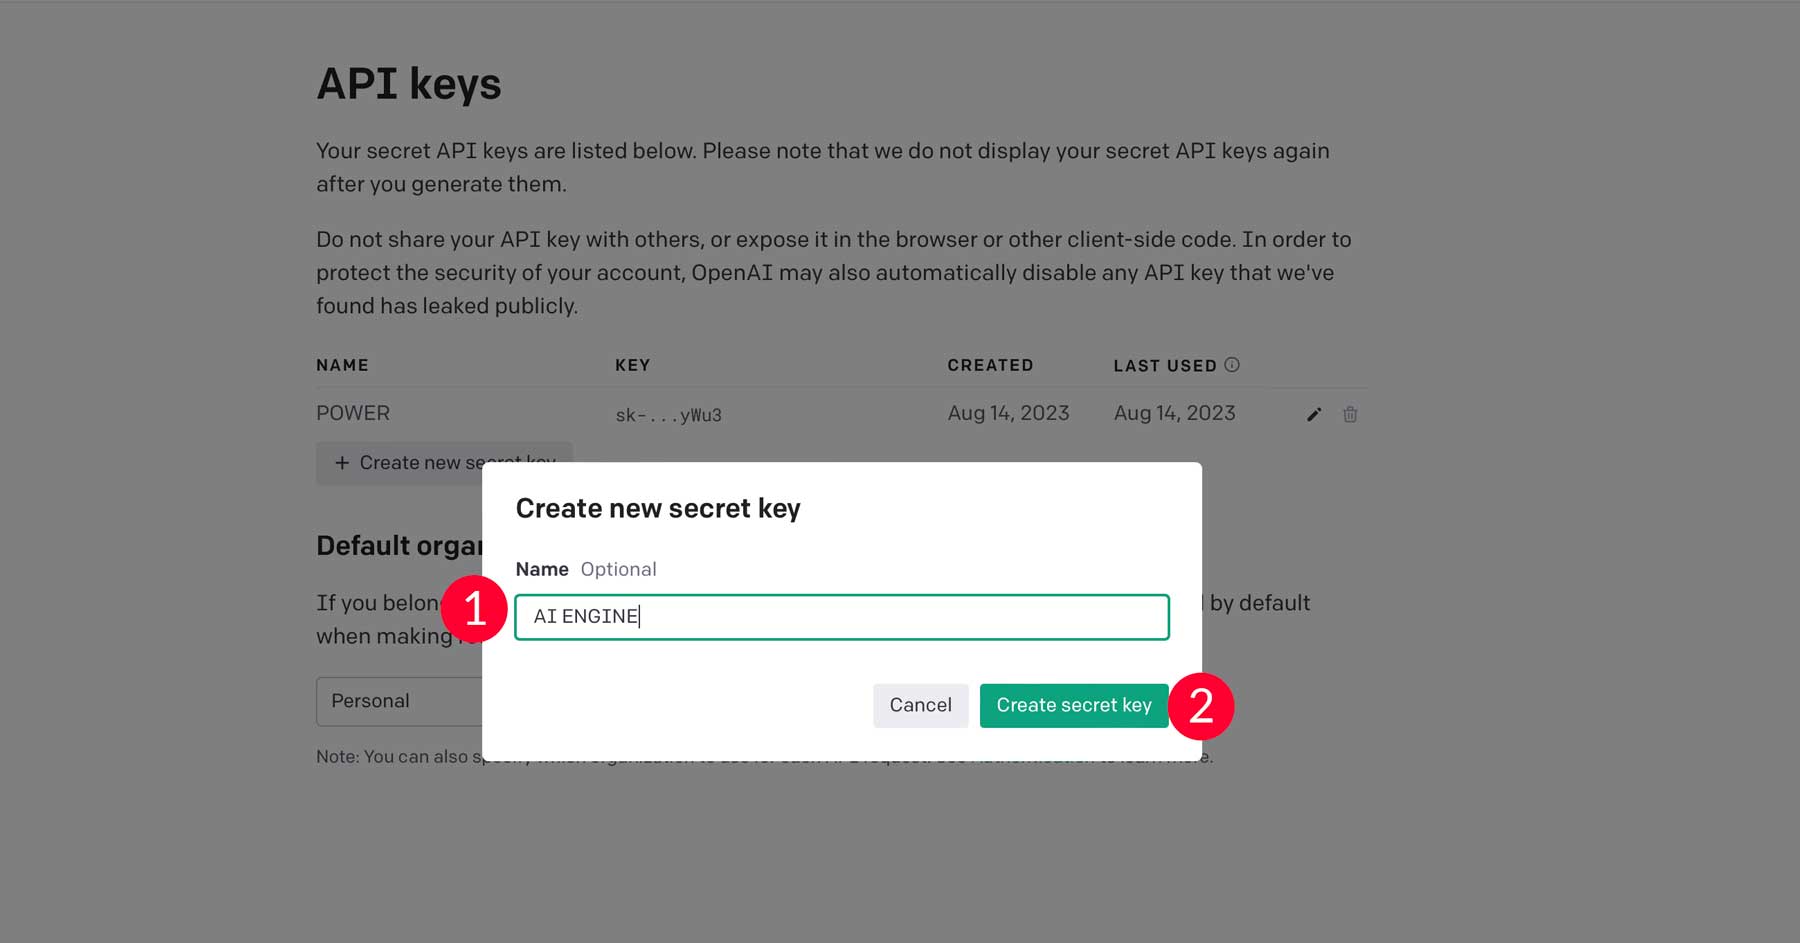
Next, give your API key a name (1) and click Create secret key (2).
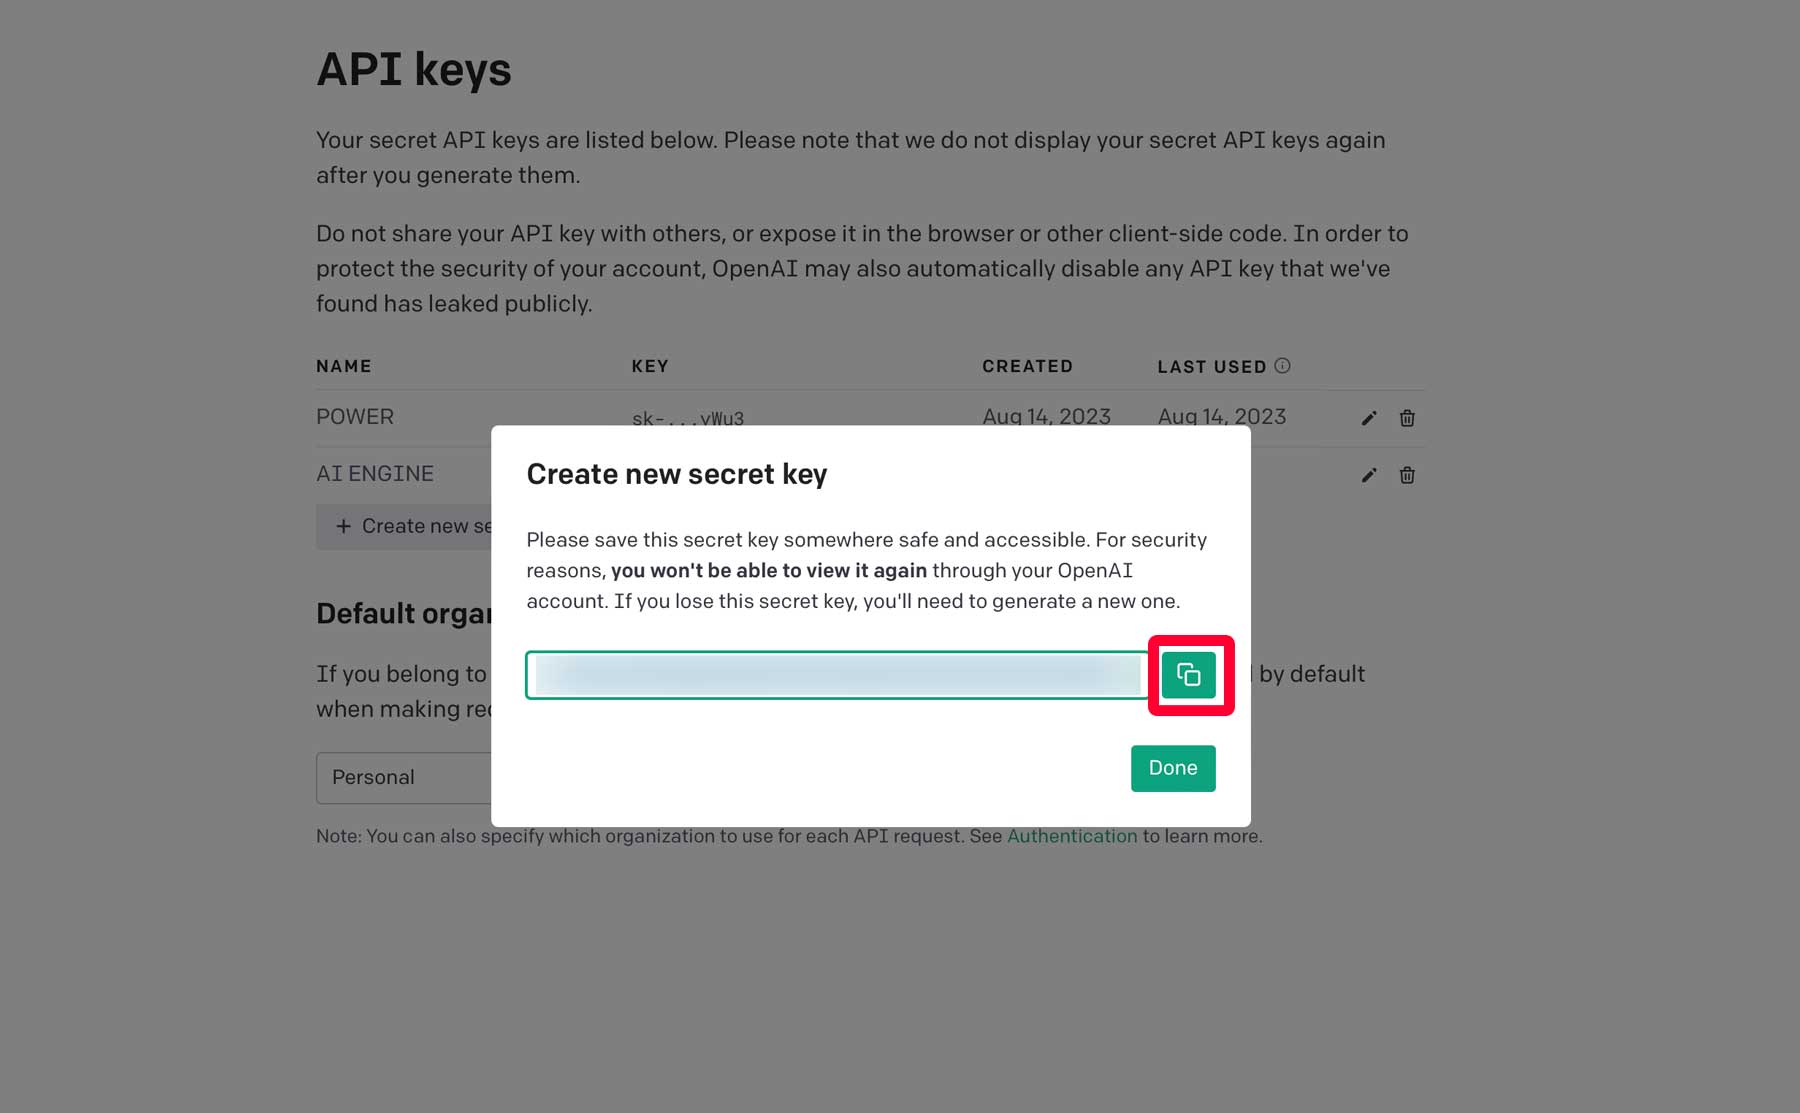
Once the key is created, click the copy button to copy the key to your pasteboard.
Finally, head to the AI Engine settings screen and paste your new API key into the text field.
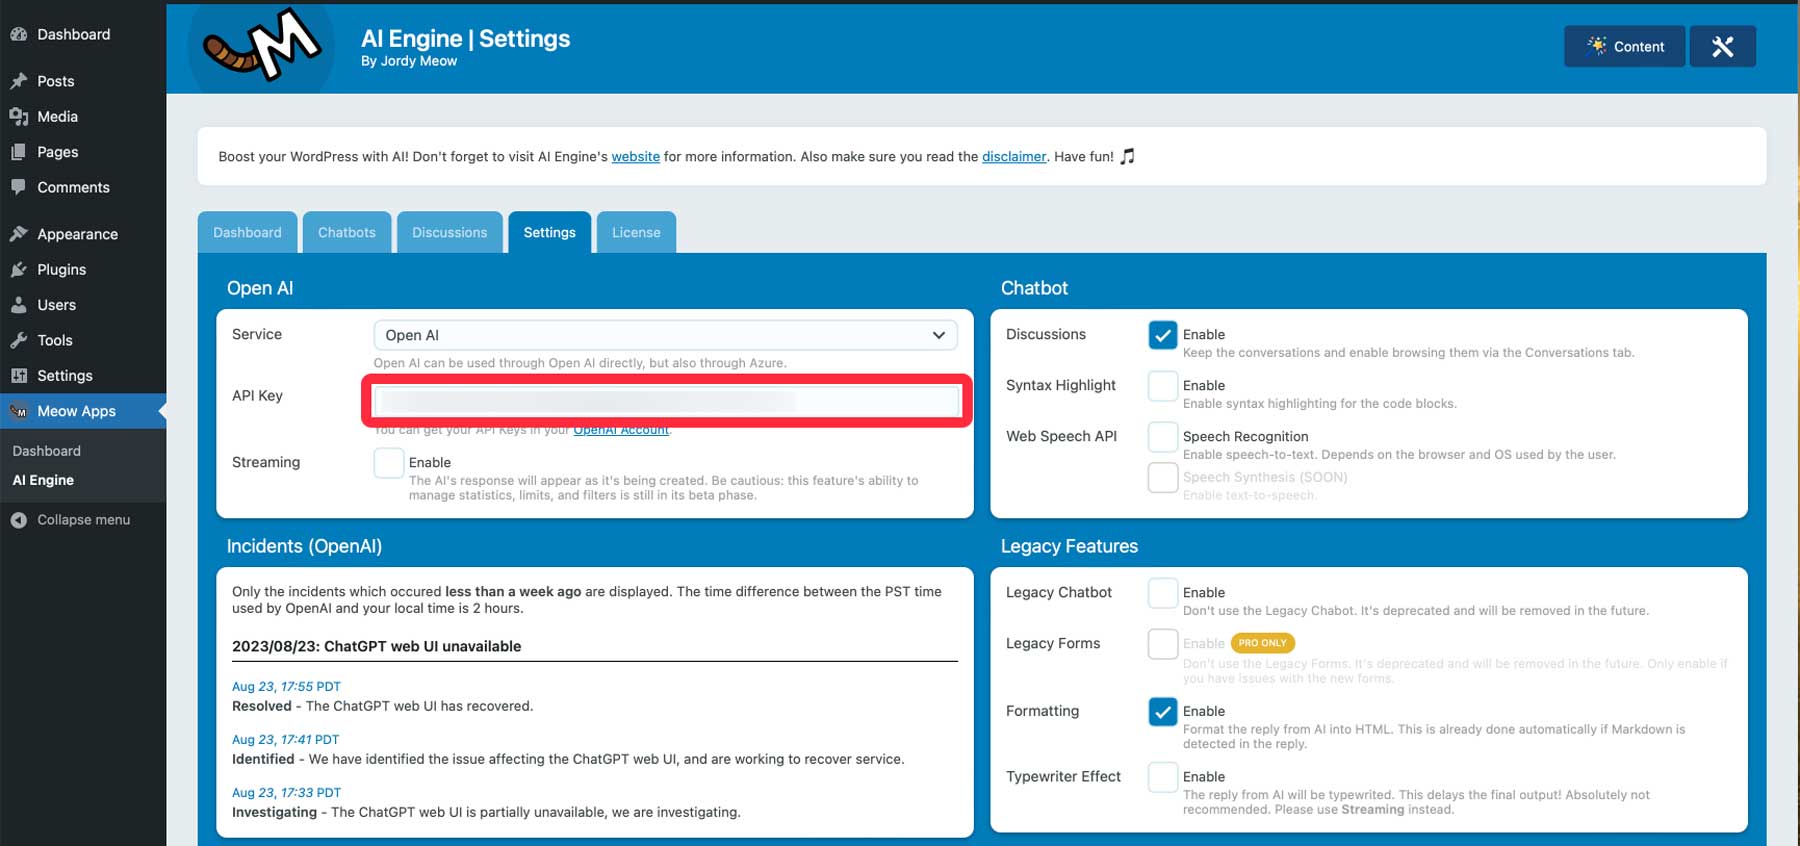
AI Engine Content Generator Settings
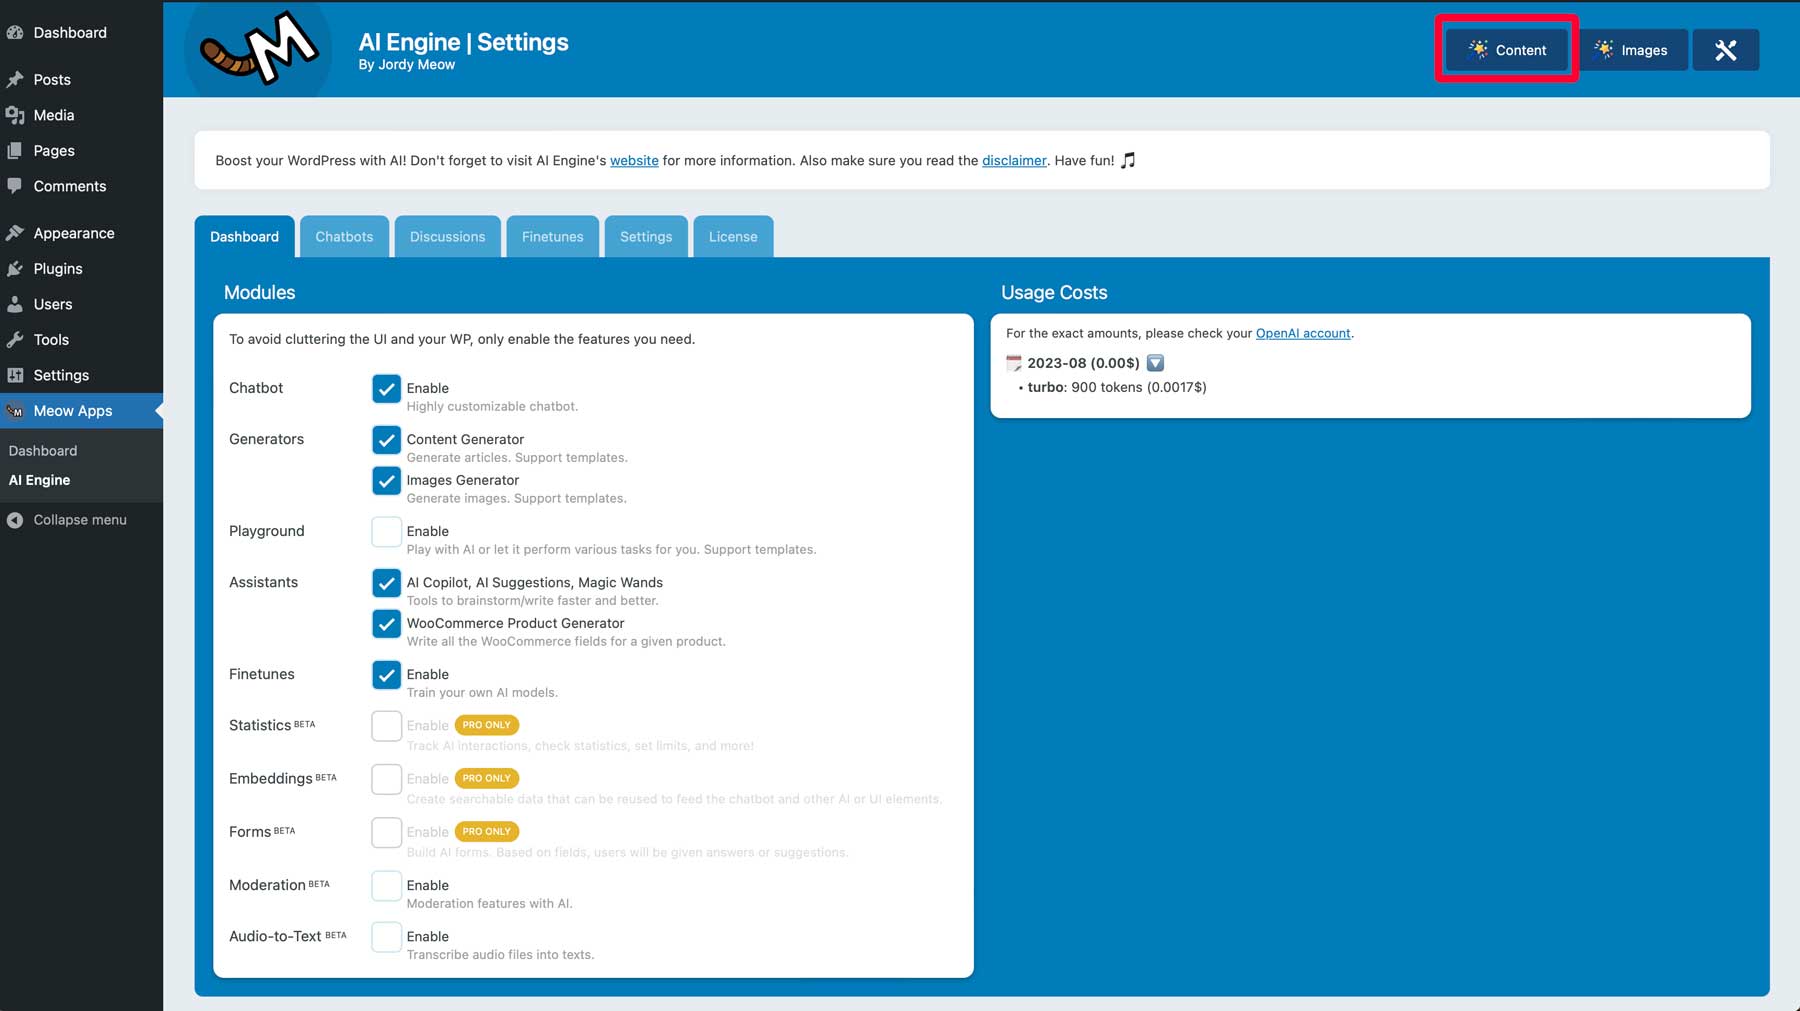
Now that AI Engine is set up, we can start generating content. Start by clicking the content tab at the top right of your screen.
Once your screen refreshes, you’ll be taken to the AI Engine content generator. Here, you can easily use it to create content for your site, emails, or even code. Here’s a brief overview of the interface:
- Topic: Start by adding a topic for the content you want to generate.
- Templates: Create new templates based on current settings.
- Title: Insert a title for your content. Alternatively, you can use the topic box to create one for you.
- Sections: Input text to rewrite it using ChatGPT, or have the AI generate it for you.
- Content: The body of your content.
- Excerpt: Used to generate a post excerpt.
- Select between posts and pages.
- Create Post button.
- Content parameters: Includes a language selector, writing style, and writing tone for your content.
- Post Parameters: Choose between posts and pages.
- Model Parameters: Set the temperature, max tokens, and model.
- Prompts: Shows the prompts used, along with variables. Prompts are saved in templates for reuse.
- Usage Cost: Allows you to see the cost of the current generation.
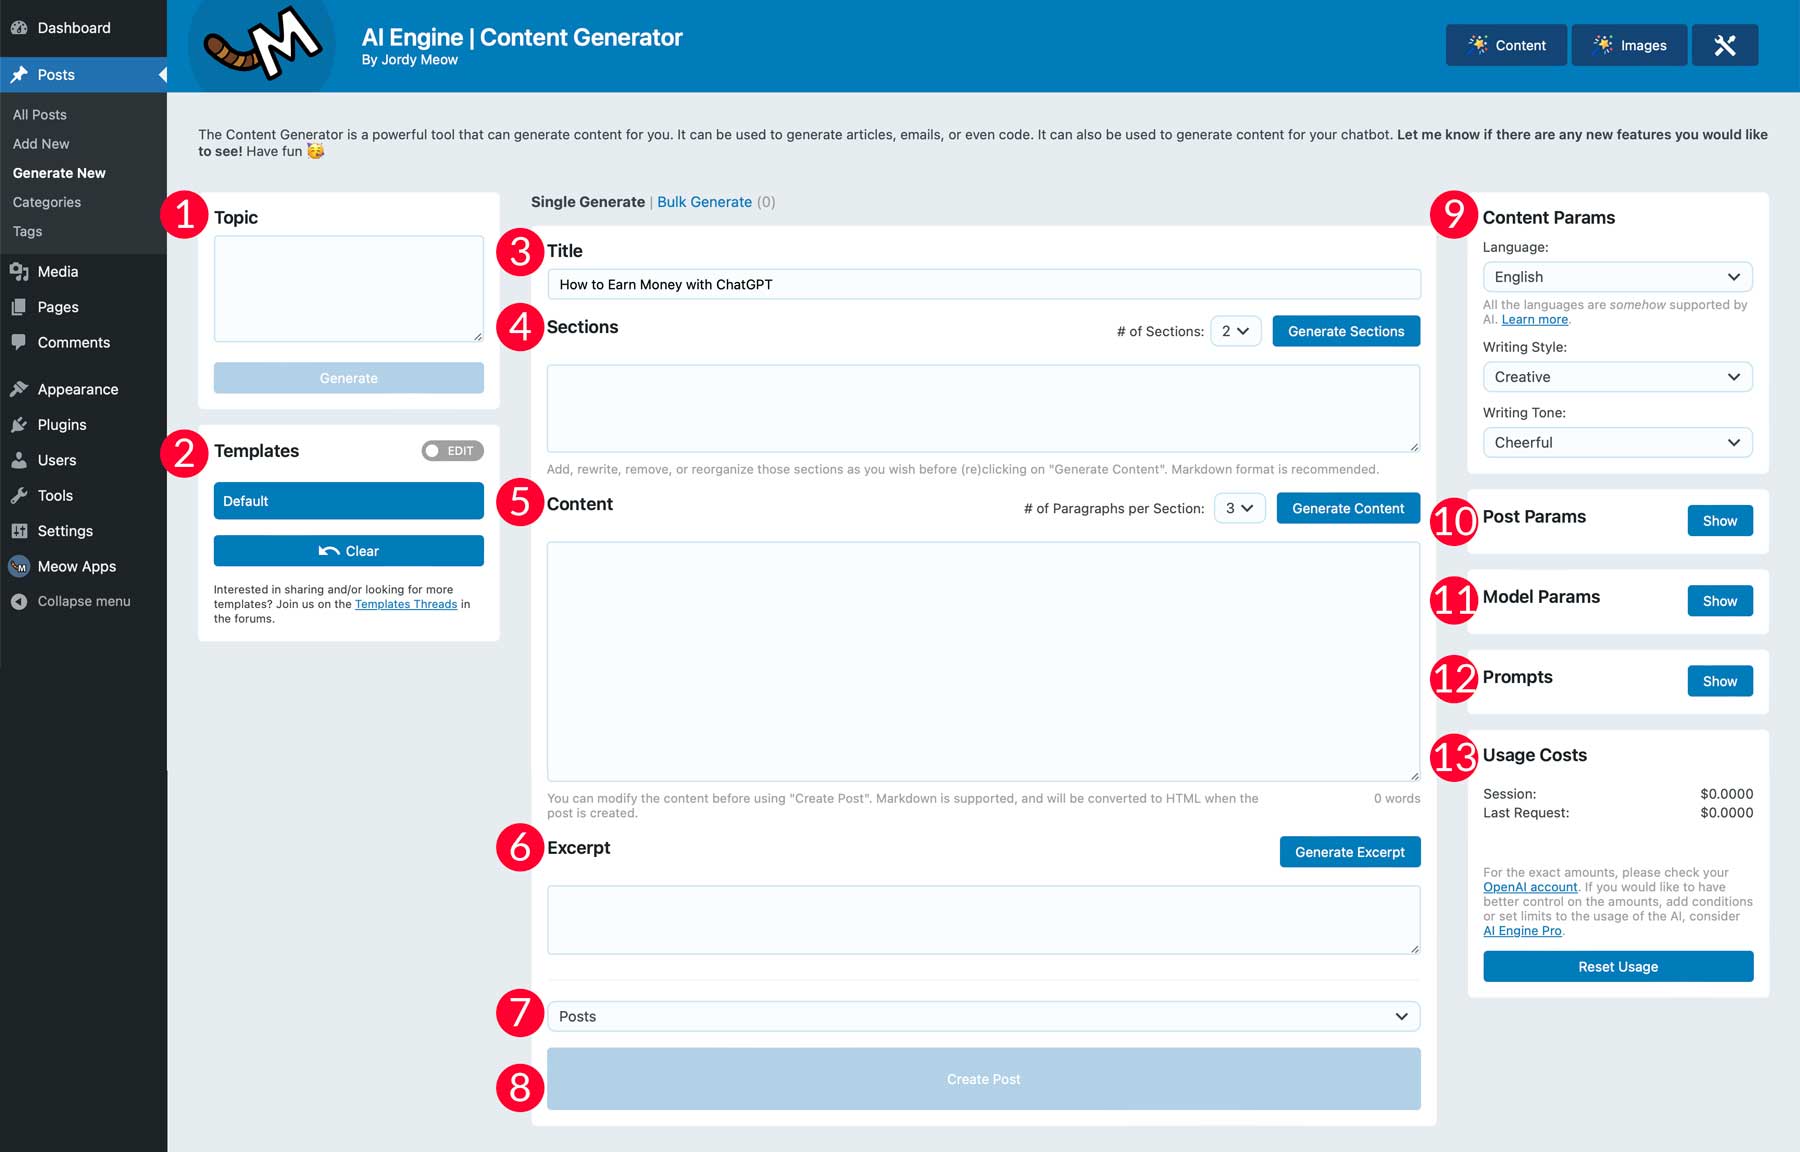
Generating Content With AI Engine
Now that you are familiar with the settings in the content generator, we’ll demonstrate how easy it is to create a blog post with AI Engine. Start by adding the following topic: How to Make Money with ChatGPT. Then click the Generate button.
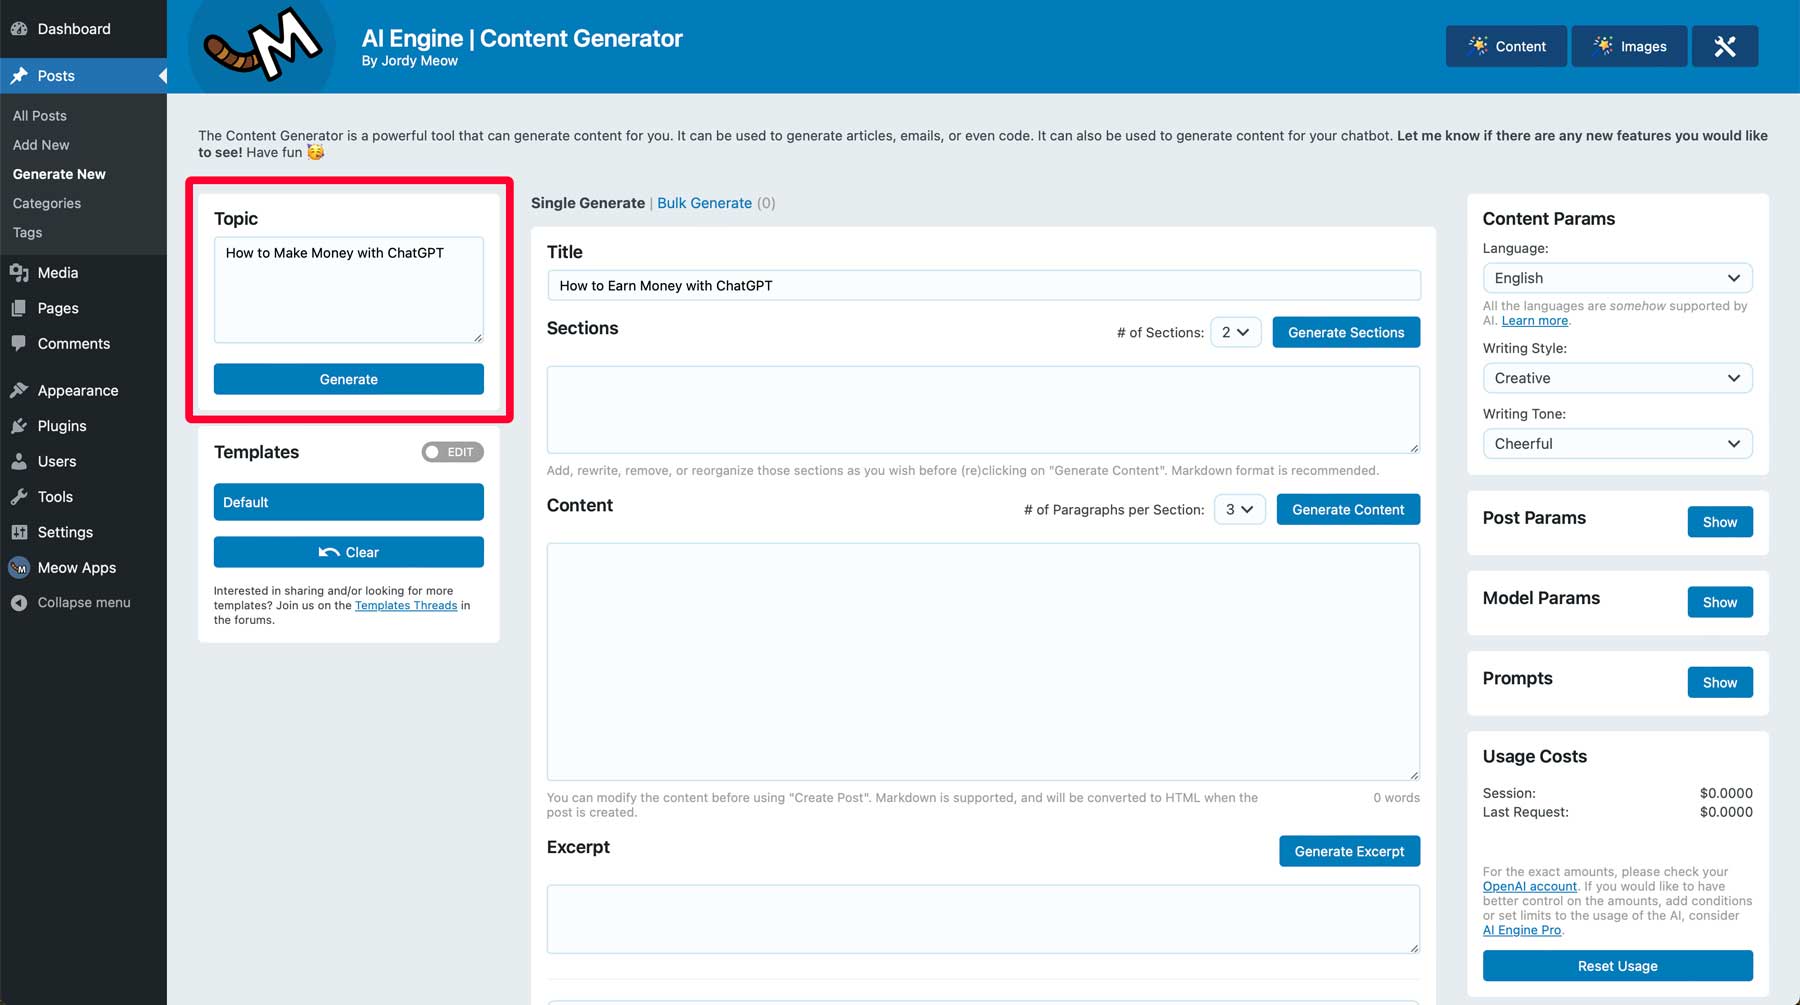
After clicking the generate button, AI Engine will enter a title based on the topic you entered. The next step is to create sections. Choose the number of sections you’d like. For this tutorial, we’ll set the number of sections to 3. Then click the generate sections button. ChatGPT will create them and add them to the page.
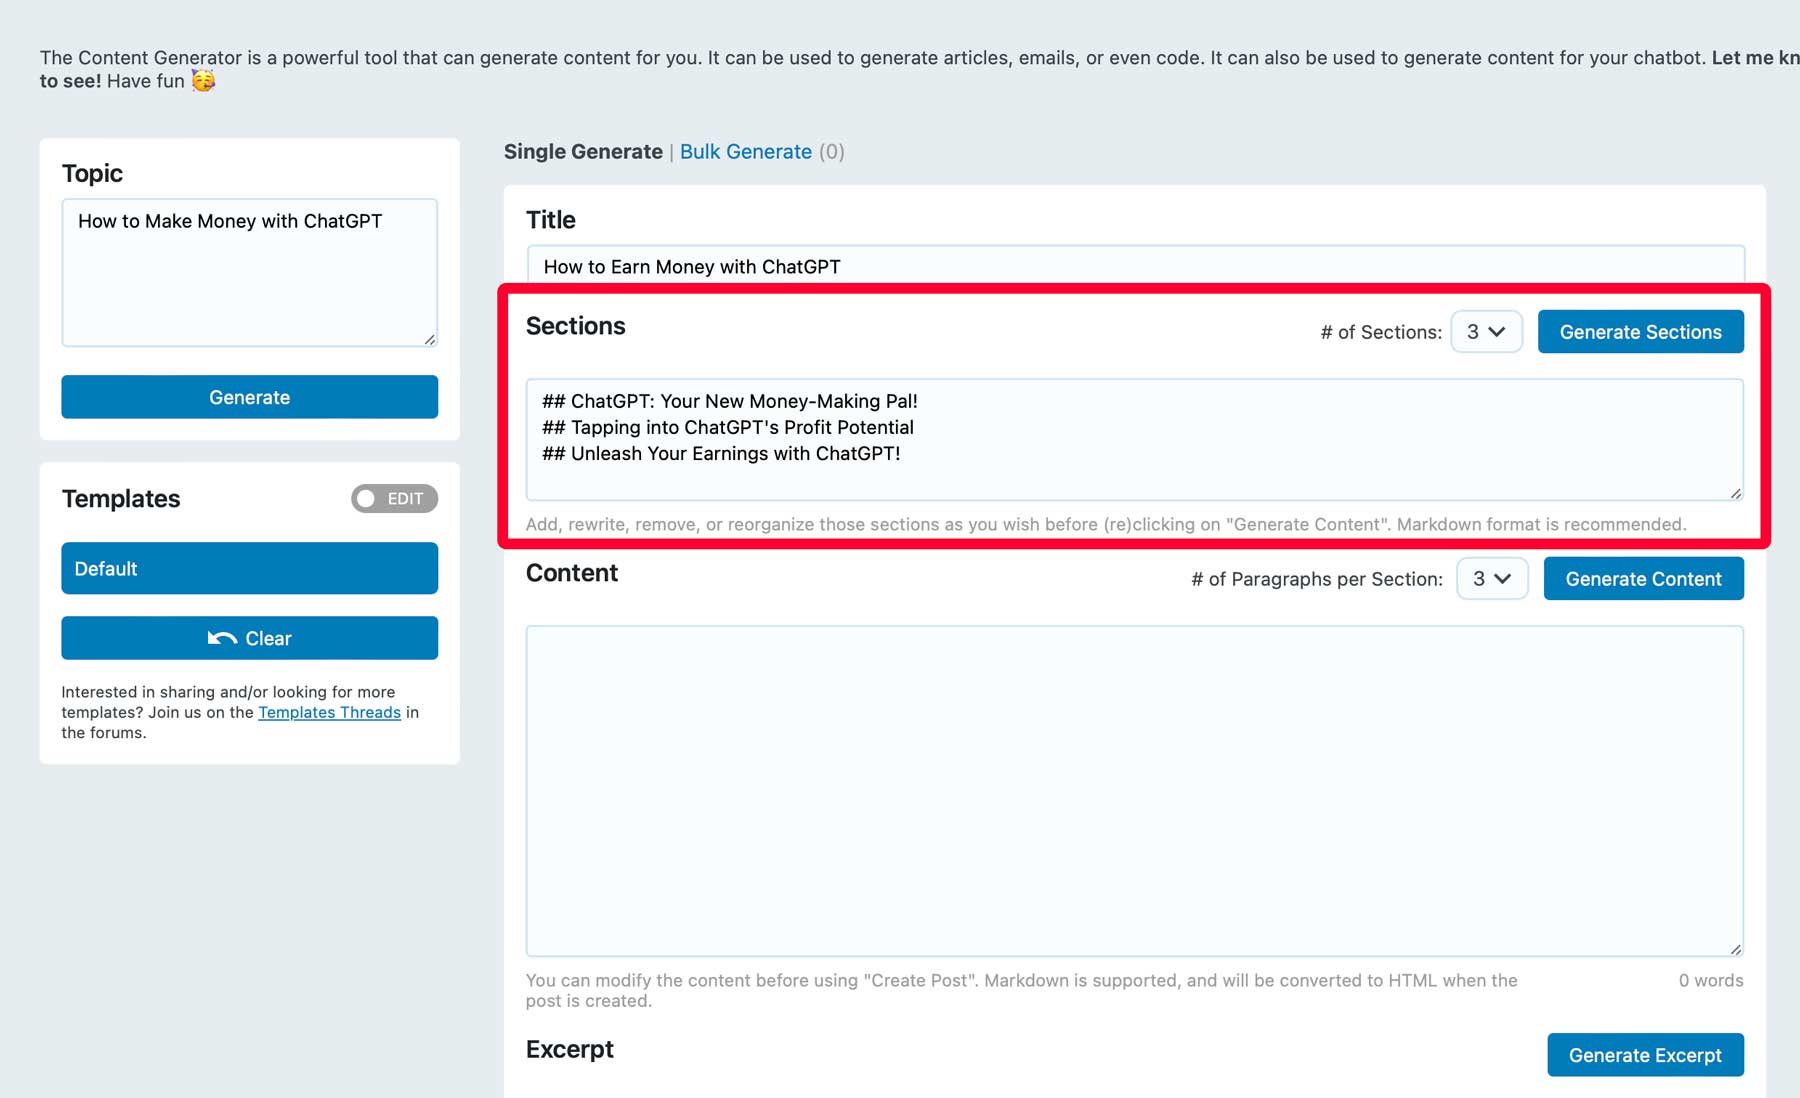
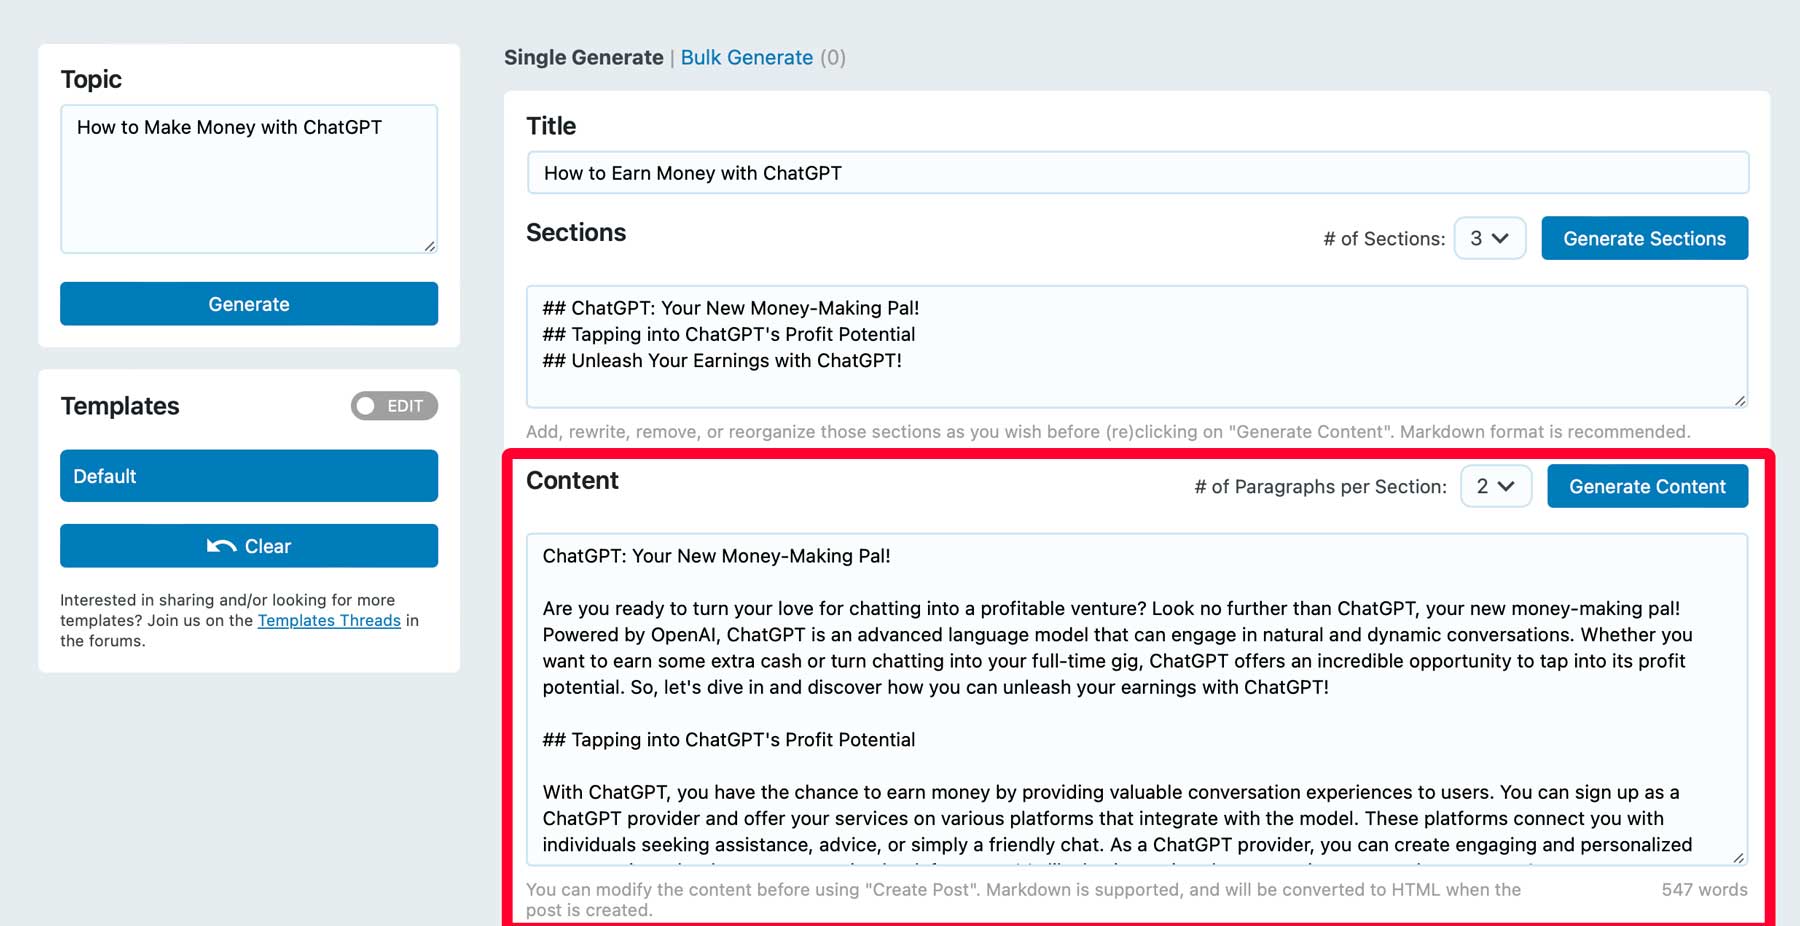
Next, choose how many paragraphs you’d like to generate per section, then click generate content. We’ll add two paragraphs per section here. Depending on how many you choose to create, it could take up to a couple of minutes.
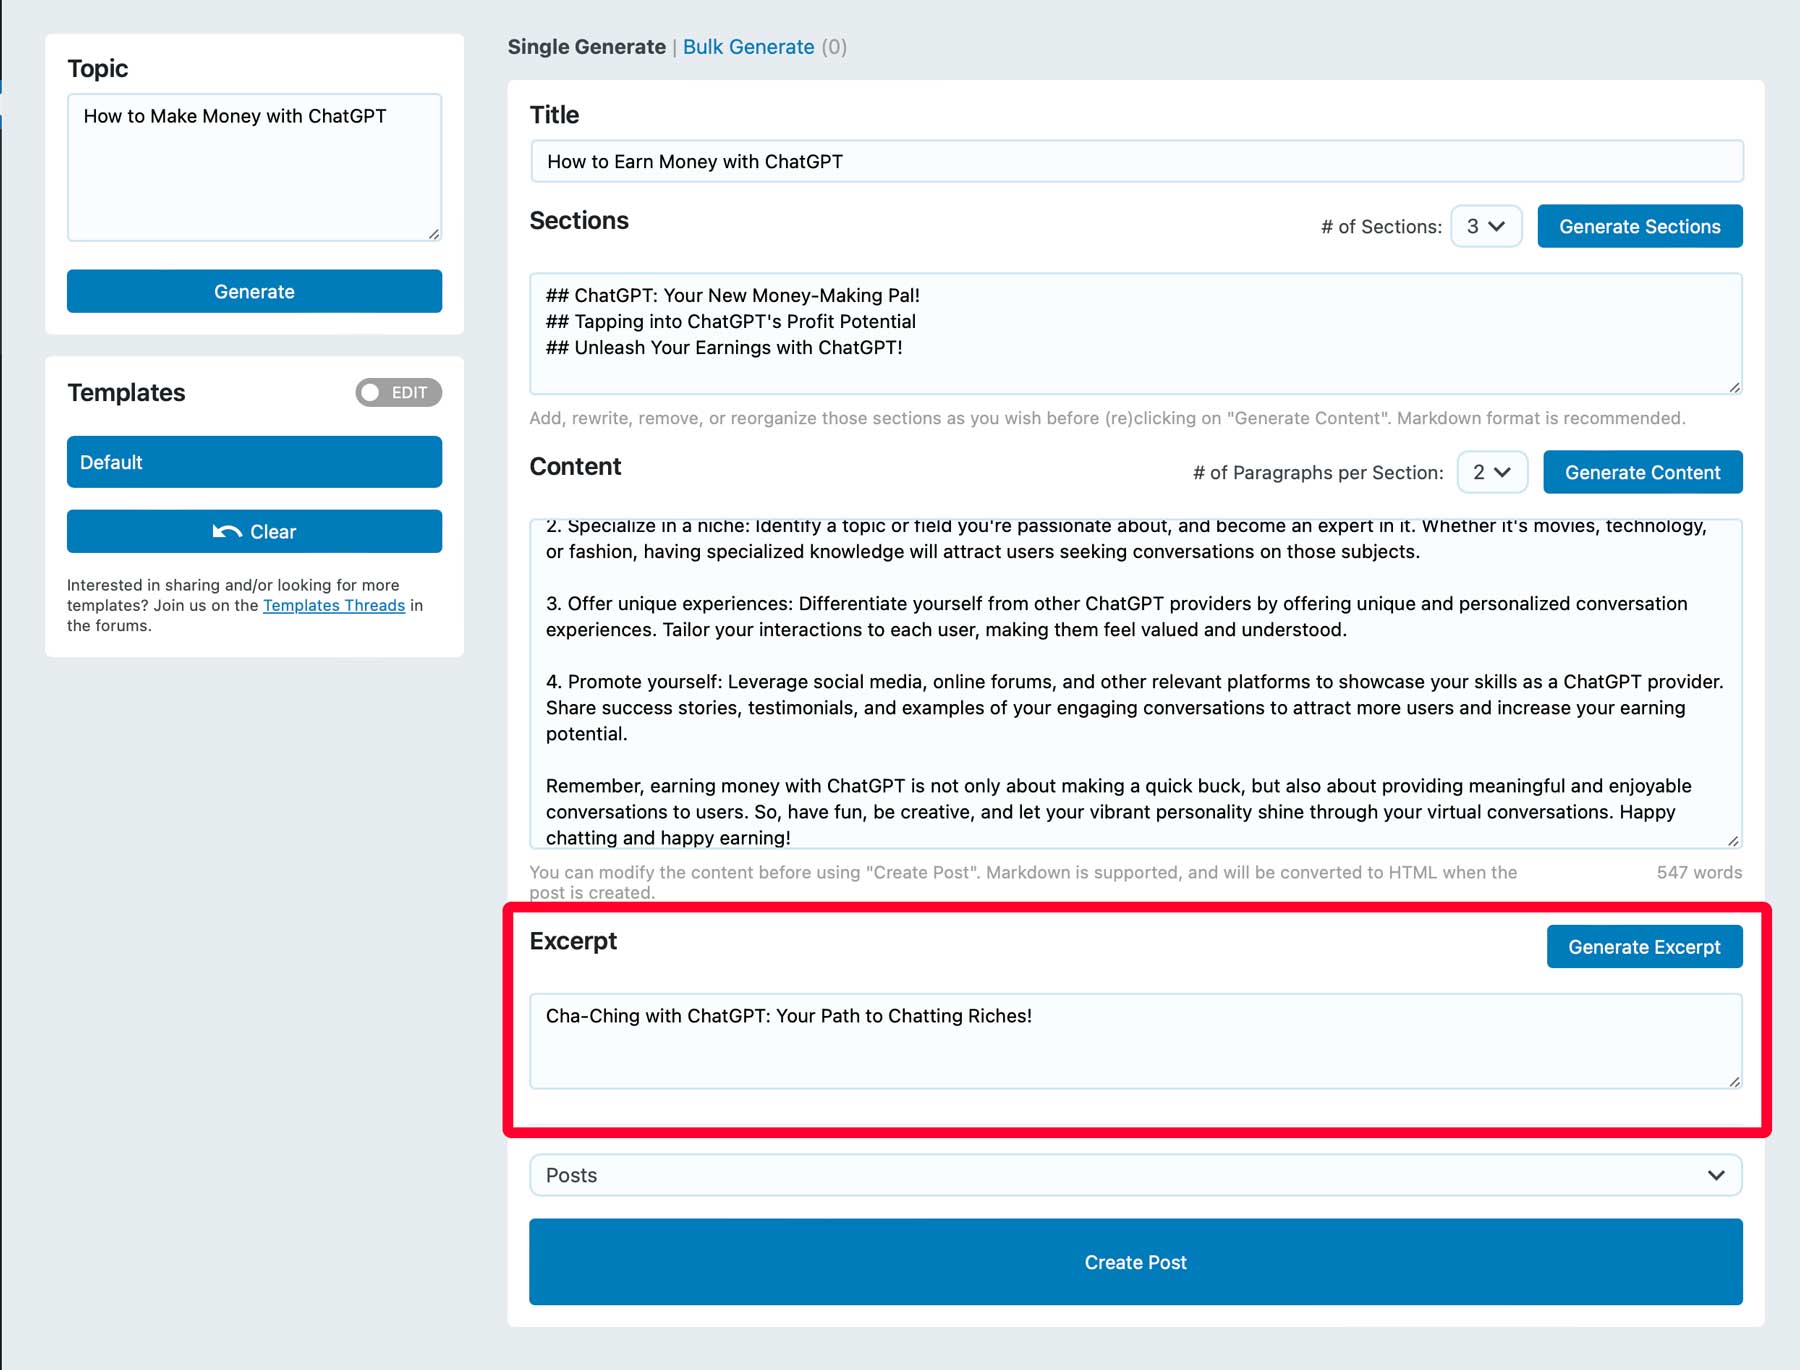
Then, you can generate an excerpt for your post based on the surrounding content.
Finally, choose whether you want your new content added as a post or a page. We’ll select posts (1), then click the create post (2) button.
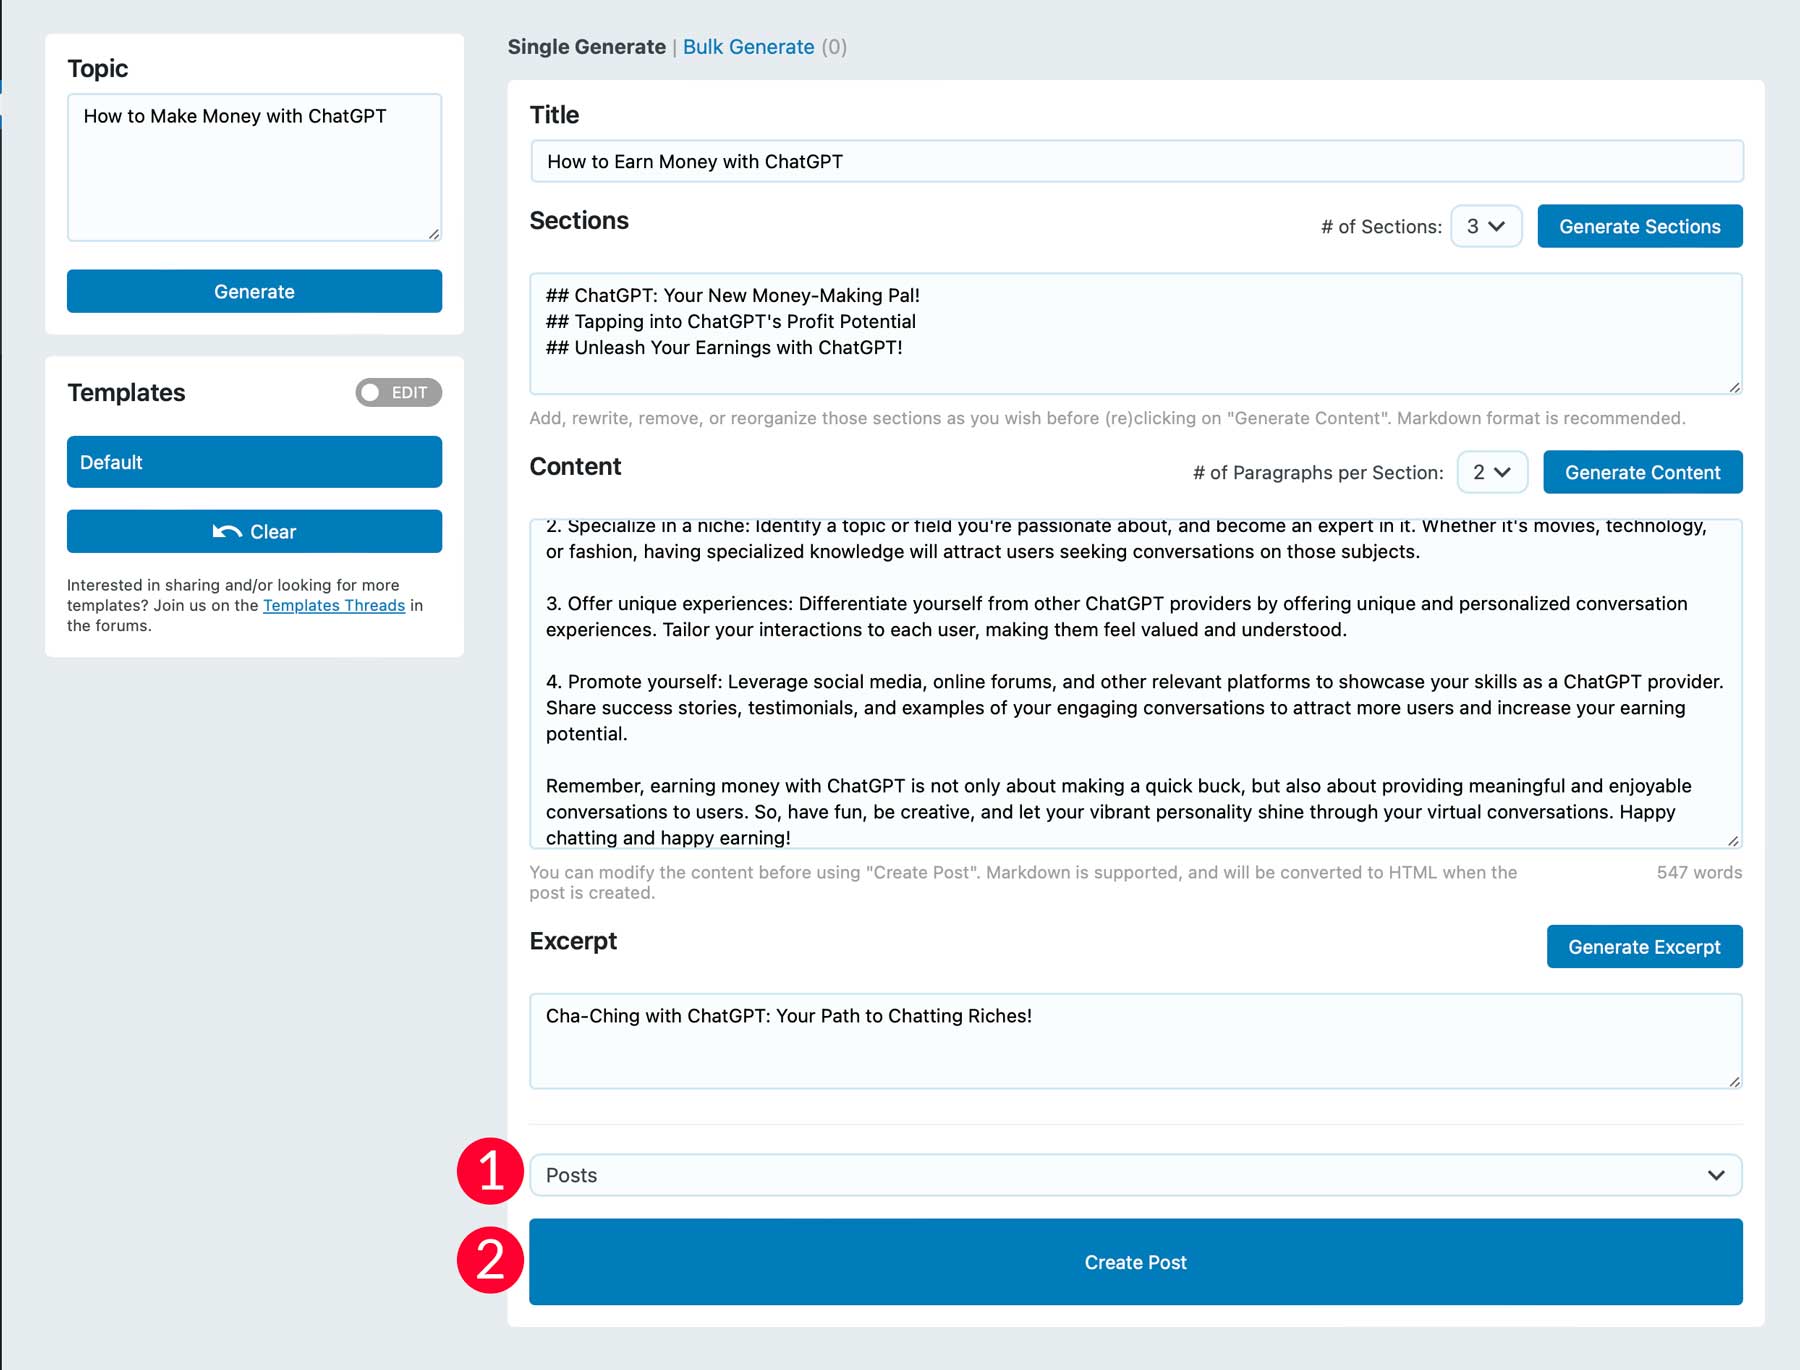
Your new post will be created as a draft, so you can go in and make edits, add images, and publish it at your convenience.
Adding a Chatbot to WordPress
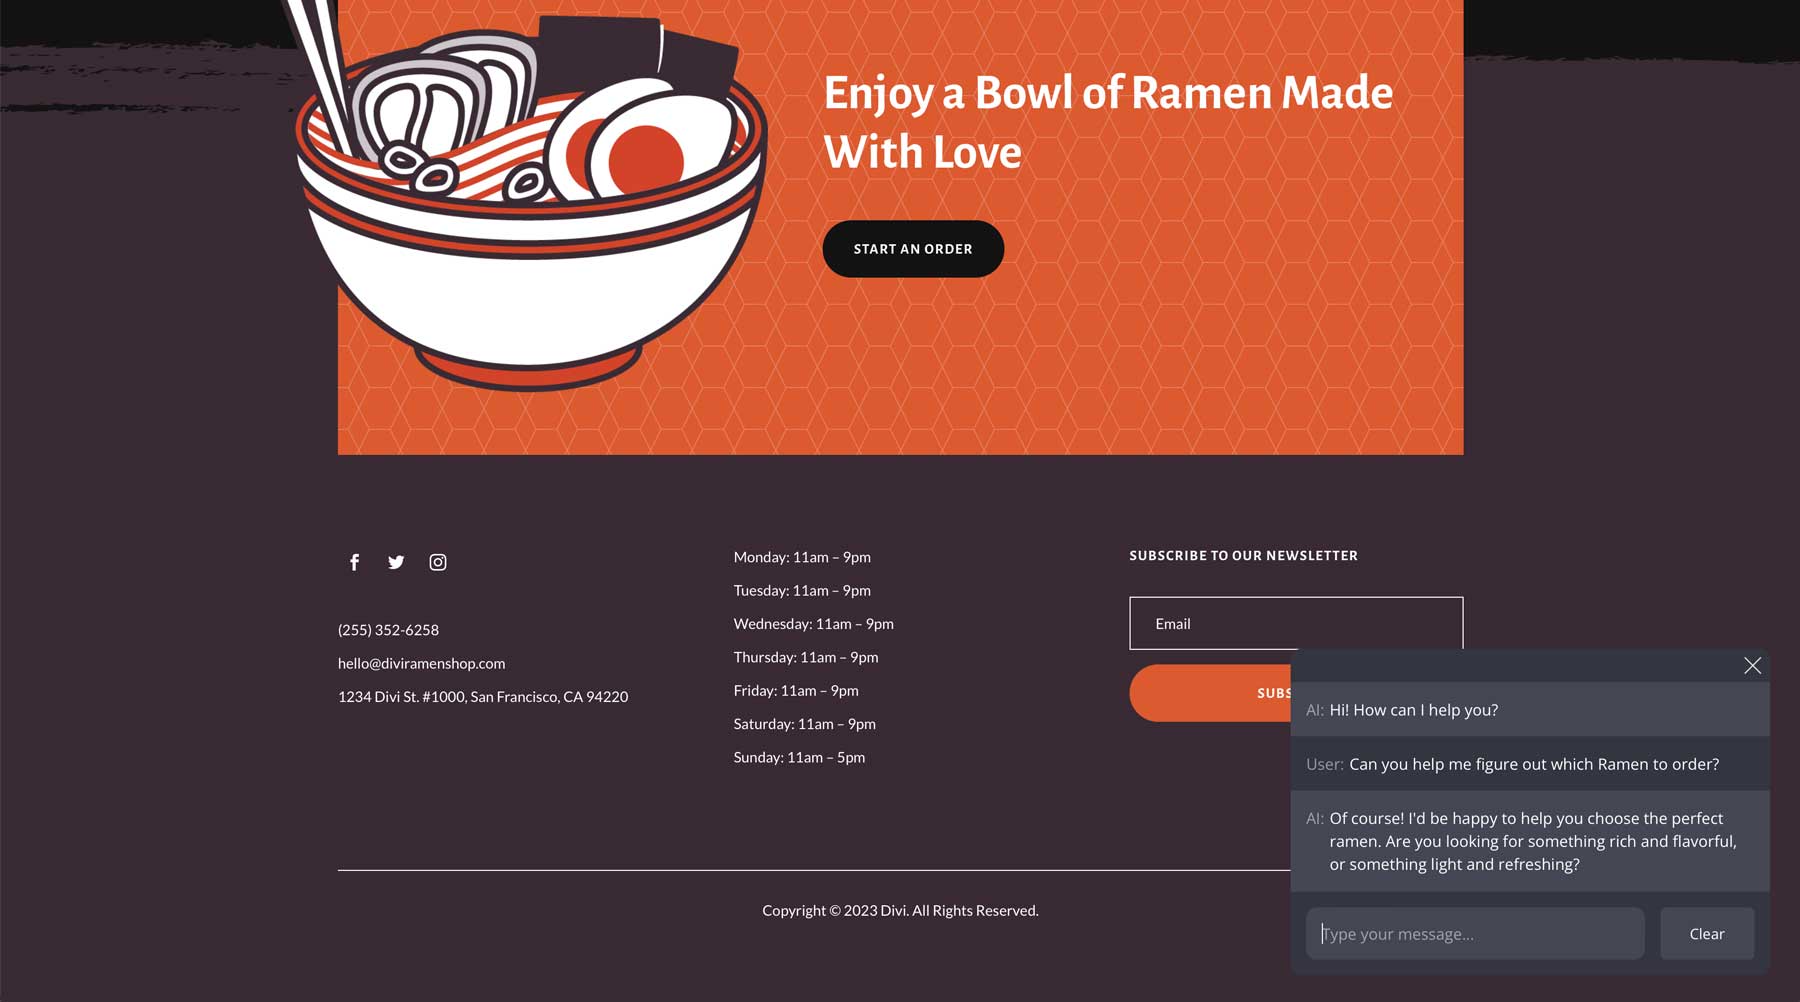
Another cool feature of AI Engine is the ability to create a chatbot to display on your website. It only takes a few minutes and can help with customer engagement by answering questions, pointing customers to a specific product or service, and more.
By default, AI Engine comes with a chatbot ready to integrate into your site, so to get it up and running, you can leave the settings as is and copy the shortcode to embed it wherever you wish. However, you can use some additional settings to make it more functional. For example, you can set it as a popup, make it full-screen, and style it to match your branding.
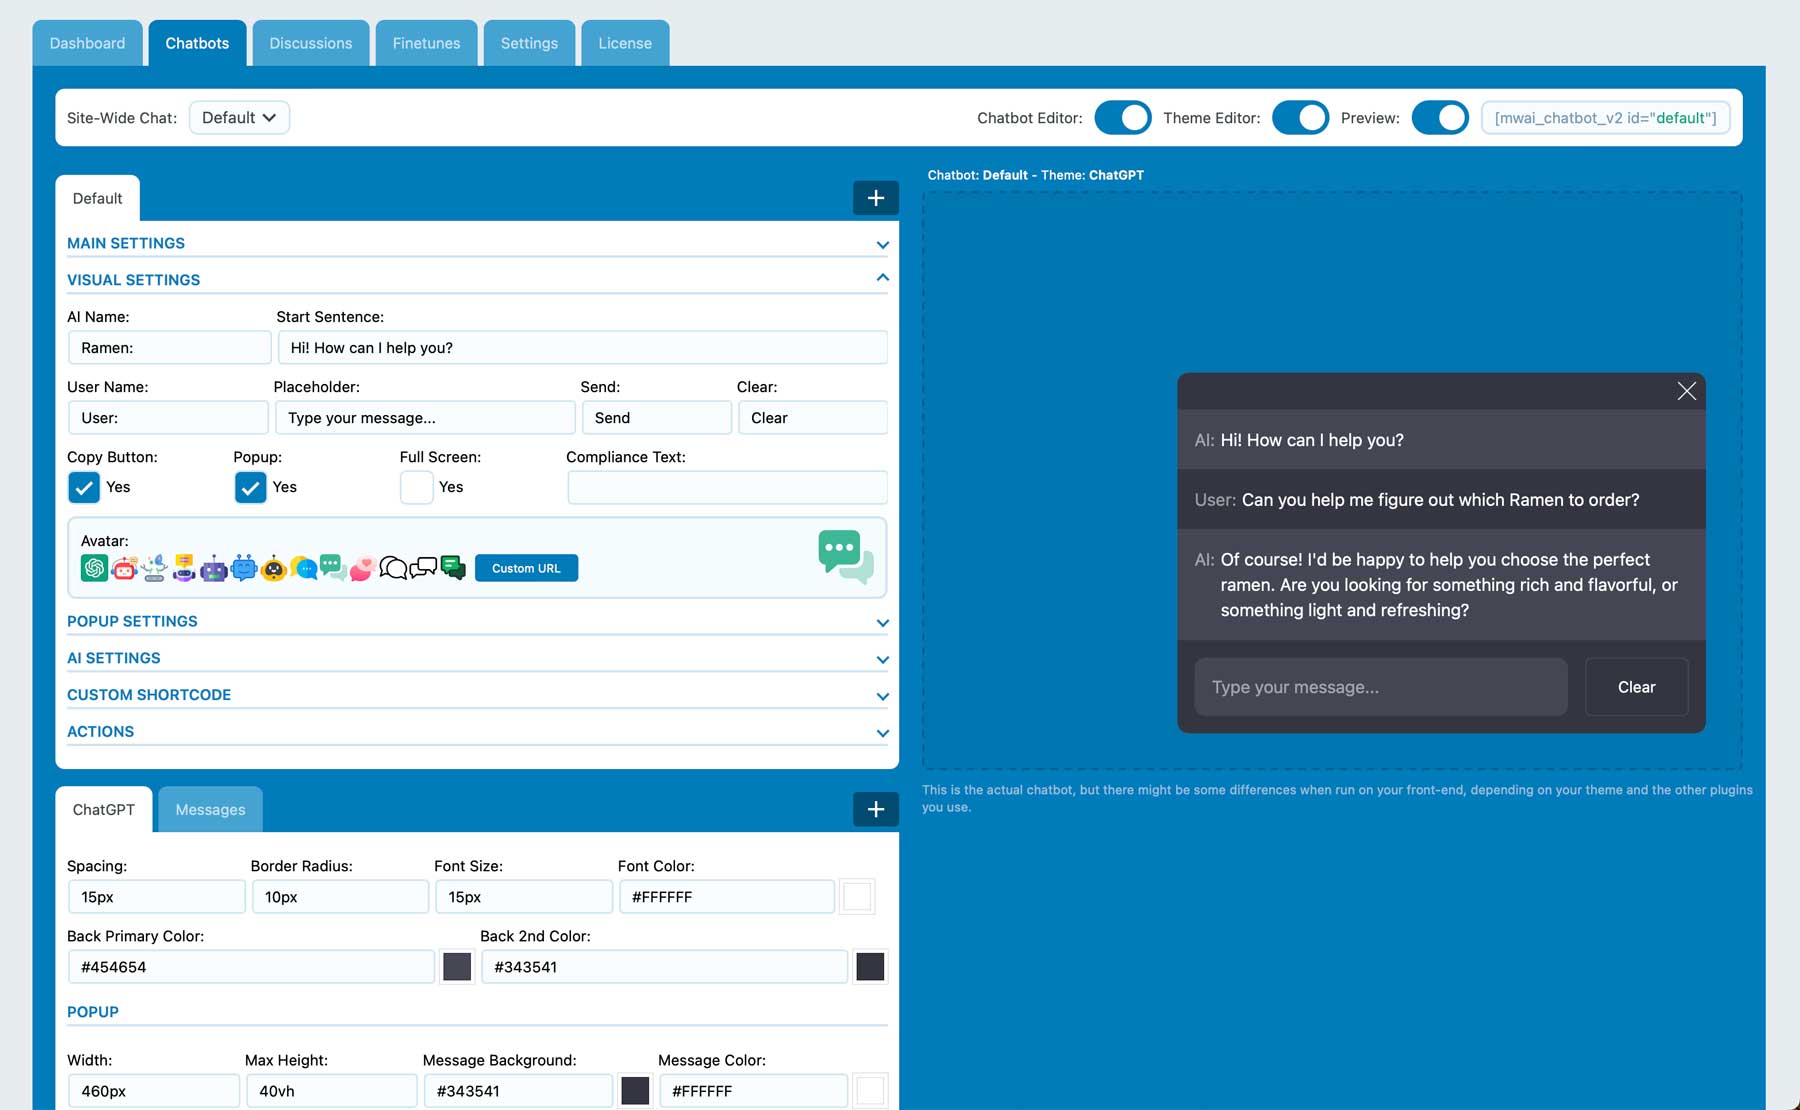
Whether you need to generate copy for your website or incorporate a chatbot to help with customer service, AI Engine is a great way to incorporate ChatGPT in WordPress.
Final Thoughts on Using ChatGPT in WordPress
The emergence of ChatGPT has significantly changed how business owners and creative professionals create content. It can handle many tasks, including making headlines and blog outlines to complete blog posts in minutes. The integration of ChatGPT in WordPress through breakthrough generative AI tools like Divi AI and WordPress plugins like AI Engine, stand to change the way we work within WordPress. These tools empower creators to efficiently generate high-quality content, enhance user engagement, optimize SEO, and more. As the partnership between the two advances, we should all look forward to the future of AI in WordPress.
Would you like to learn more about using AI? Check out a few of our AI-related posts:
- 8 Creative Divi AI Use Cases You Haven’t Considered
- How to Transform A Divi Layout Using Divi AI
- How to Use AI to Create Amazing Web Design with Divi (Using ChatGPT & MidJourney)
Featured Image via sofirinaja / shutterstock.com





Leave A Reply