Your website content is only powerful if your visitors find it and act on it. And your contacts are their most worthwhile if they find you worthwhile enough to take the next step. This means that you have to keep both plates spinning at the same time: Quality content that brings in traffic and converts customers who you nurture over time. When you pair HubSpot with WordPress, you can do just that.
- 1 What is HubSpot?
- 2 Why Would You Want a HubSpot-WordPress Integration?
-
3
How to Integrate HubSpot and WordPress Using the HubSpot Plugin
- 3.1 Installing the HubSpot WordPress Plugin
- 3.2 Setting Up Your HubSpot Account
- 3.3 Taking the Interactive Demo
- 3.4 Importing Your Contacts
- 3.5 Viewing Detailed Contact Information in the HubSpot WordPress Plugin
- 3.6 Adding Forms to Your Website With the HubSpot WordPress Plugin
- 3.7 Adding Live Chat to Your Website With the HubSpot WordPress Plugin
- 3.8 Sending Emails With the HubSpot WordPress Plugin
- 4 Even More Benefits of HubSpot: Keyword Tools
- 5 Final Thoughts About the HubSpot-WordPress Integration
What is HubSpot?
HubSpot is full-service inbound marketing software. It lets you optimize your website for lead generation and conversion (i.e., attracting people and getting them on the path to becoming a customer). With HubSpot, you can:
- Boost website traffic
- Capture leads
- Automate lead nurturing (i.e., build the relationship)
- Convert the customer by making a sale
While you can use HubSpot as a stand-alone tool, it’s also possible to integrate it with WordPress via the dedicated plugin. You can combine your content management system (CMS) information with your HubSpot data to have it all centralized.
Inbound Marketing
Inbound marketing is the method of attracting customers to you instead of you going after them. To do that, you create high-value content and experiences that are personalized for them. The opposite of this is outbound marketing, where you interrupt potential customers with messaging that they may or may not want. With inbound marketing, you figure out what your target audience is already searching for. You then create the content that they’ll be happy to find when they go looking.
Why Would You Want a HubSpot-WordPress Integration?
When you integrate HubSpot’s framework with WordPress, you combine two of your most powerful business tools. The visitors your website (and HubSpot’s marketing features) attract can be seamlessly turned into leads. Which can be converted into customers, loyal fans, followers, and/or promoters. P.S. In this article, we talk about integrating HubSpot with Divi. And there may be some surprising lead generation plugins that connect with Hubspot to make your WordPress website even more powerful.
How to Integrate HubSpot and WordPress Using the HubSpot Plugin
The HubSpot plugin has more than 200,000 active installations and nearly 150 almost-perfect ratings. It’s also updated frequently. Those are all good signs that you’re installing a reliable plugin. Let’s go over how to get set up with the plugin and what it can do for you.
Installing the HubSpot WordPress Plugin
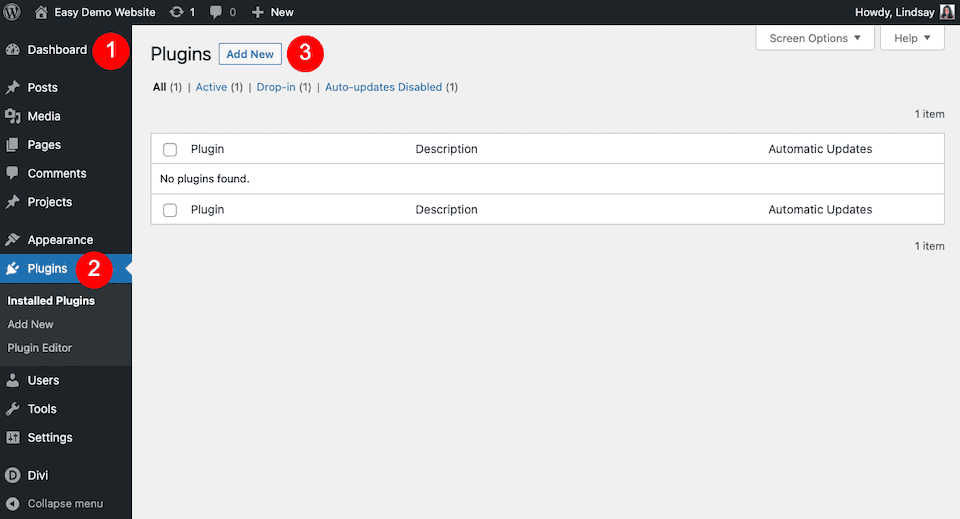
From your WordPress dashboard, click Plugins on the left sidebar, then click the Add New button toward the top of the page.
Type “HubSpot” into the search bar on the top-right of the page, then select the HubSpot – CRM, Email Marketing, Live Chat, Forms and Analytics plugin, which should be your first result.

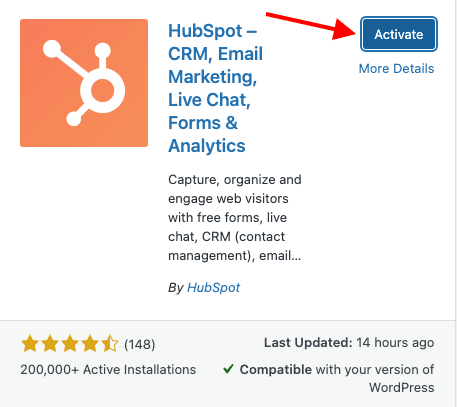
Click the Install Now button on the top-right of the plugin, then click Activate once it’s installed, which should just take a second or two.
Setting Up Your HubSpot Account
Once activated, you’ll automatically be brought to a page where you can create or sign in to your HubSpot account.
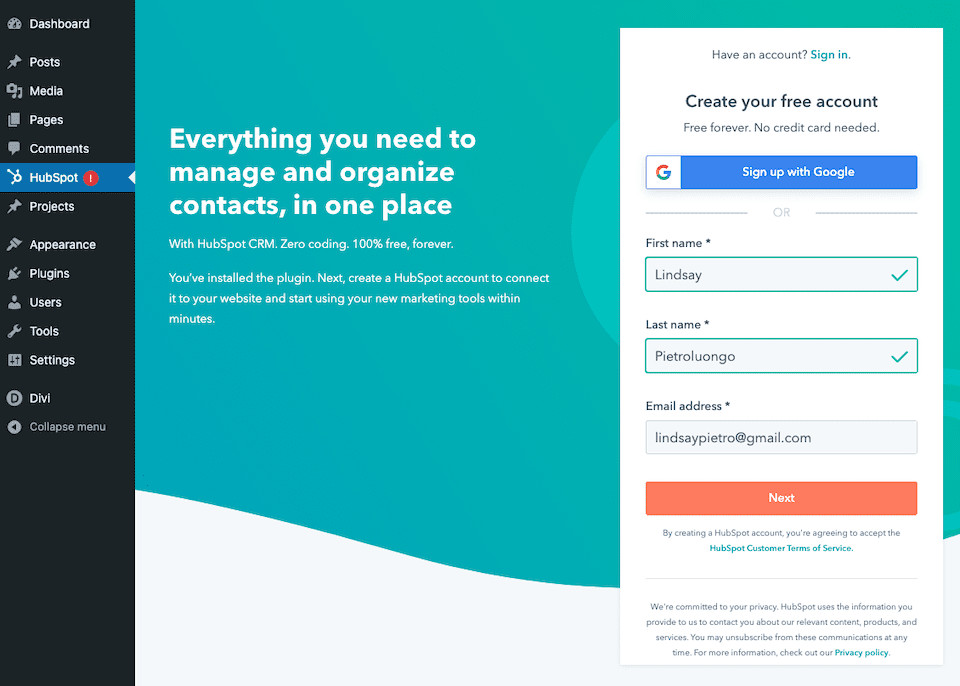
If you don’t have an account yet, you can either enter your name and email address, or you can connect your Google account. You’ll be sent a confirmation email with a link that you have to click to activate your account. After clicking that link, you’ll be brought to a page to create a password.
Next, you’ll finish setting up your account. The first step is to enter your company’s domain name and business name.
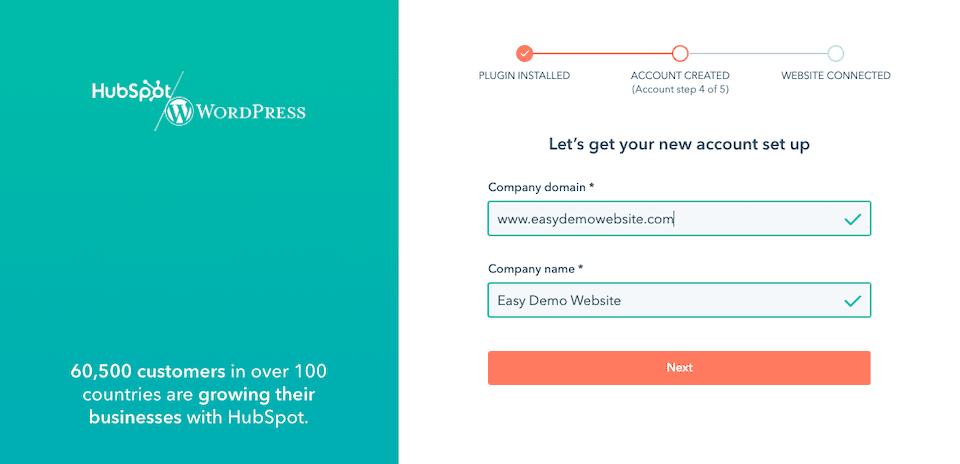
After that, you’ll be asked for more business specifics:
- The number of people who work at your company
- Your field of work (sales, admin/operations, marketing, services/customer support, or other)
- A description of your role (marketing director/manager, designer/developer, marketing/content creator, administration/operations, or other)
You’ll also be asked, “Which of these sounds most like you?” The options are:
- I have never used a CRM before
- I’m new to HubSpot, but I have used a CRM before
- I know my way around HubSpot pretty well
After that, you’ll be done with the sign-up process.
Taking the Interactive Demo
There’s a great interactive demo that you can start with if you want a quick guided tour around HubSpot. A pop-up should ask if you want to take it, but if you don’t see that or if you skip the demo at first, it’s easy to get back to it later. From your WordPress dashboard, click the HubSpot plugin link in the left sidebar. That will bring you to the User Guide, and you should see a link for the interactive demo toward the top.
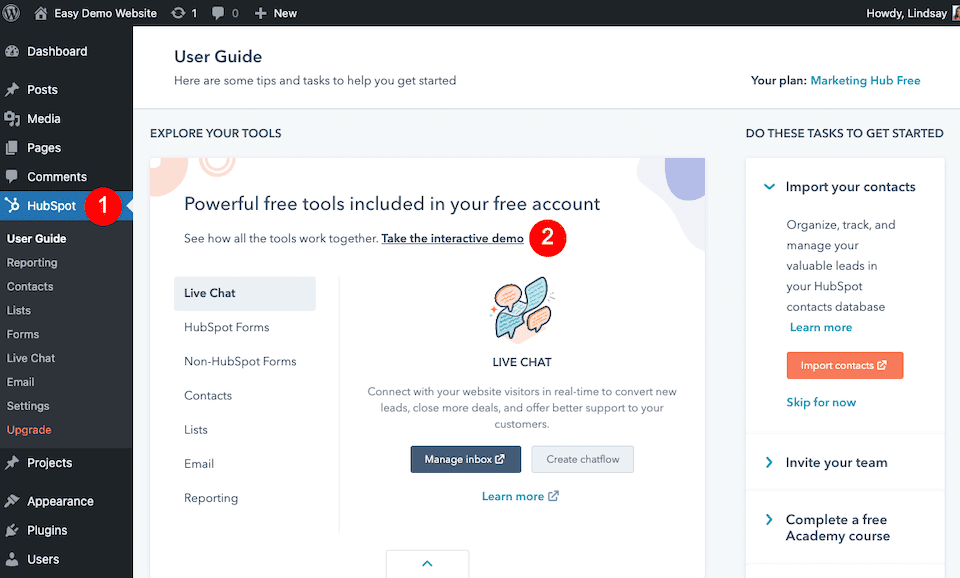
Importing Your Contacts
From the User Guide, you can click on the orange Import Contacts button on the right side of the page.
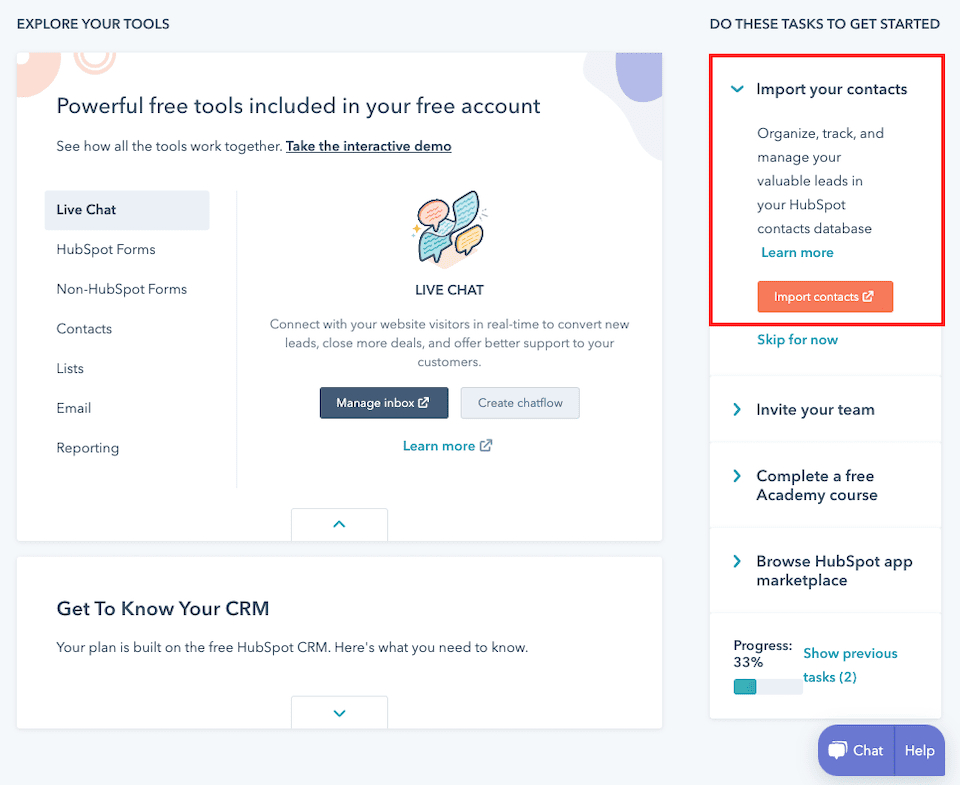
Alternatively, you can go to Contacts in the left sidebar, then click Import on the top-right.
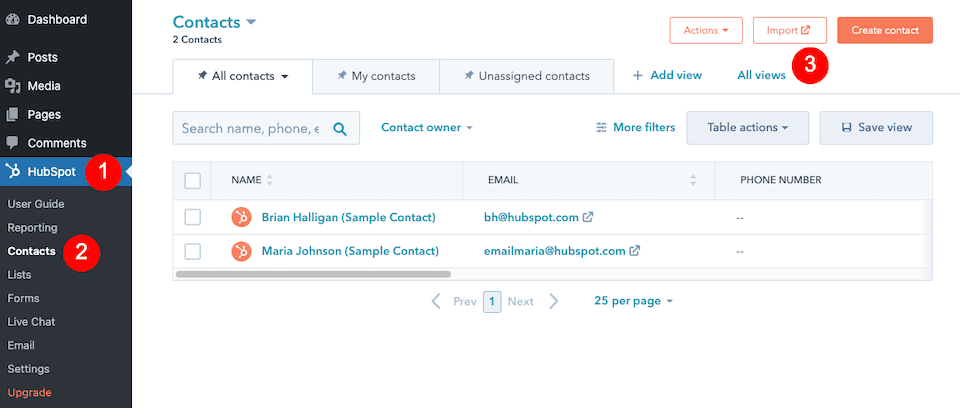
After clicking the import button, you’ll have two choices: Import or sync with an app.
Option 1: Importing Contacts
If you opt to import your contacts, you’ll have two options:
- Upload a CSV, XLS or CLSX file
- Import an opt-out list of people who should not receive emails.
To import a regular list of people who you want to have as contacts, click File From Computer, then click Next. You have the option to import one or multiple files, and then you have the option to import one or multiple objects. For example, a one-object file will have information on just contacts; a multi-object file will have information on contacts and companies. After making your choice, you’ll select the object or objects that you’ll be importing.
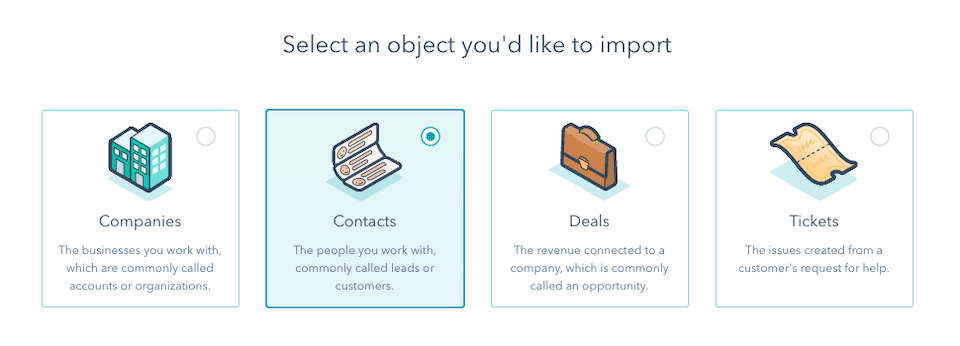
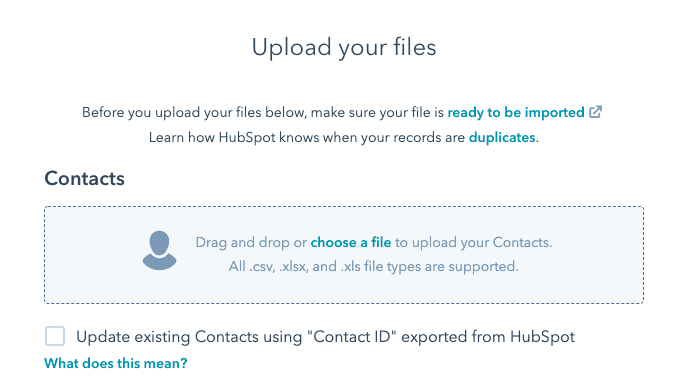
You’ll then drag and drop or upload a file to be imported. There’s a checkbox under the import field that says, “Update existing Contacts using ‘Contact ID’ exported from HubSpot.” If the file that you’re uploading includes information that you exported from HubSpot, check that box. That way, the information that’s already in your HubSpot will be updated according to the Contact ID.
After uploading your file, you’ll map columns to match the properties in HubSpot contact cards. Some data is mapped for you, which you can change, and other data has to be manually mapped. You can choose properties from the HubSpot Property drop-down menu, or you can create your own.

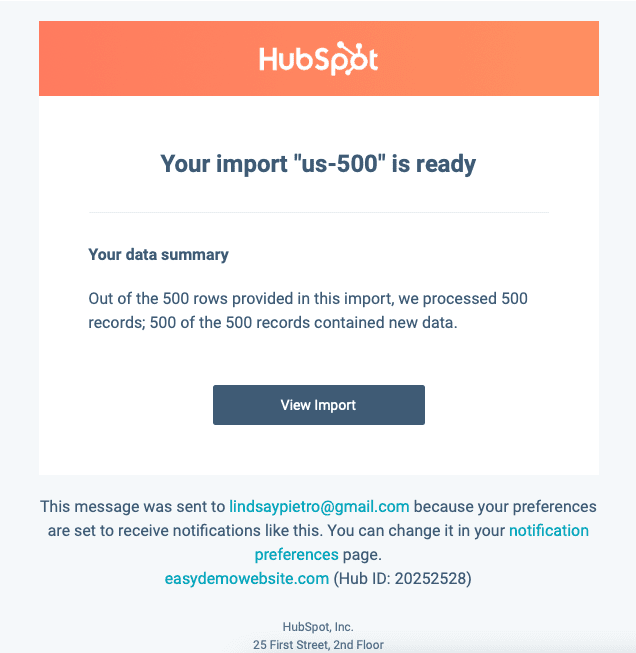
You also have the option to not import some information. For example, if your CSV has birthdays listed, but you don’t want to save that information, you can opt out of importing it by choosing Don’t Import Column from the HubSpot Property drop-down menu. Once the import is complete, you’ll get an email with an overview of how successful it was.
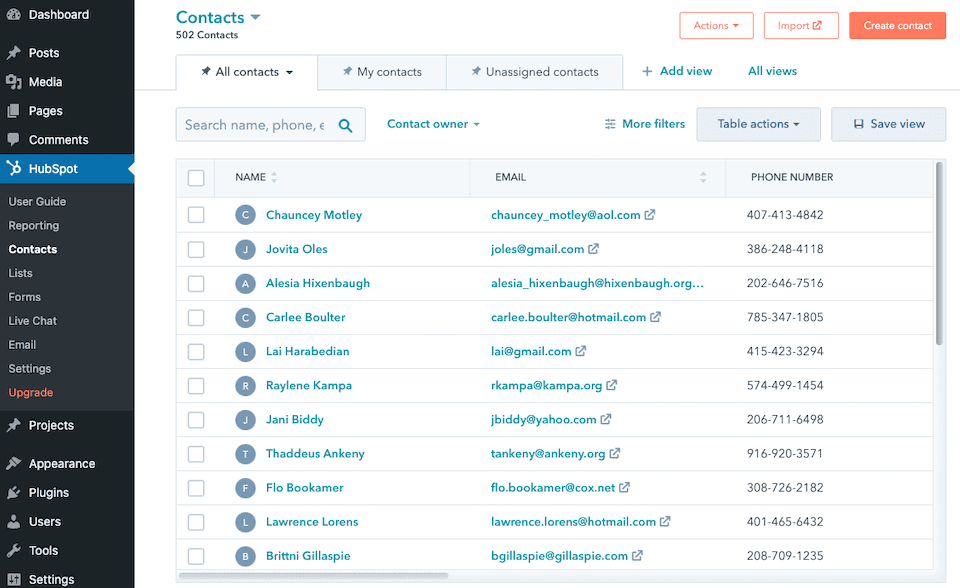
Then, if you click Contacts again in the left sidebar, you’ll see all of your contact information there.
Option 2: Syncing With an App
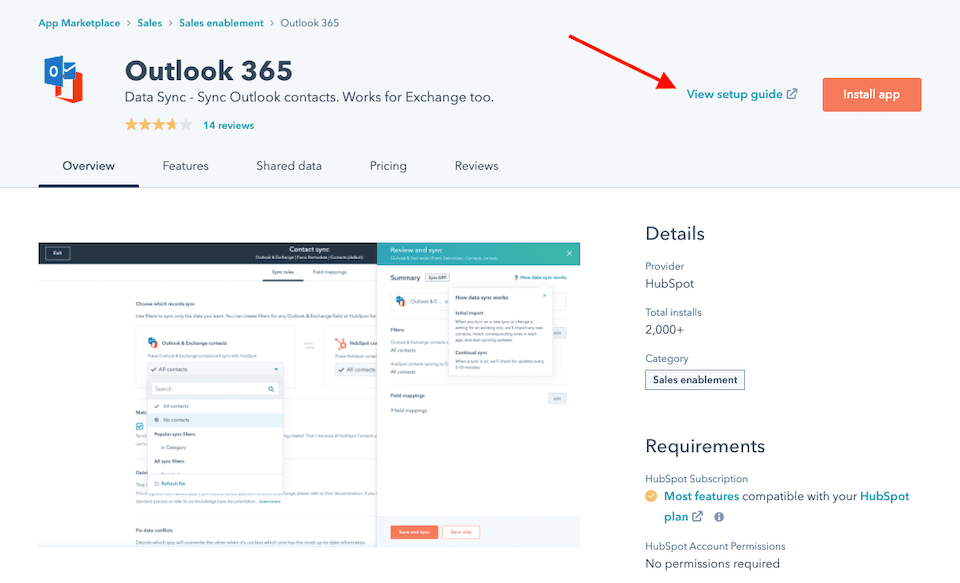
HubSpot has 41 apps that you can connect with to sync your contacts. Each app has its own setup directions, which you can find by clicking the View Setup Guide link on the top-right of the page.
Viewing Detailed Contact Information in the HubSpot WordPress Plugin
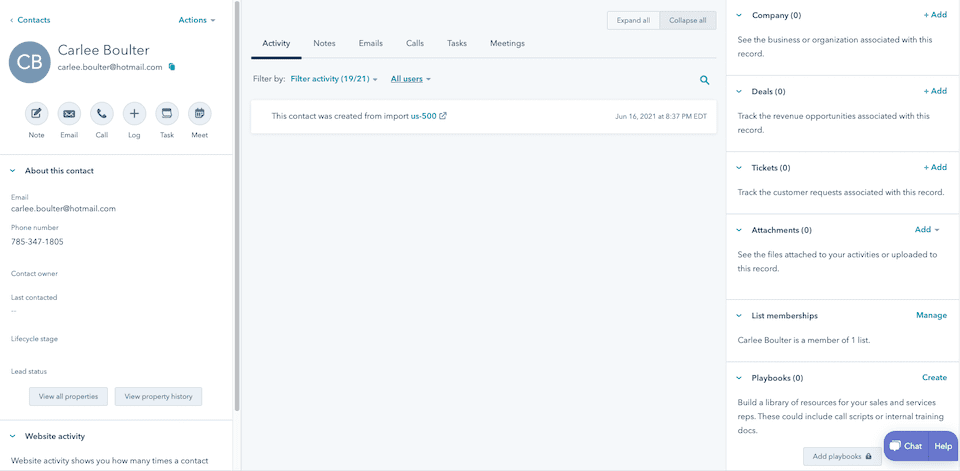
From your list of contacts, you can view more about one of them by clicking their name. Each HubSpot contact profile has detailed information, ranging from contact and employer information to actions they’ve taken on your website. For example, you can see which pages they viewed and when they viewed them; forms they submitted and when; and where they are in your marketing or sales funnel right now.
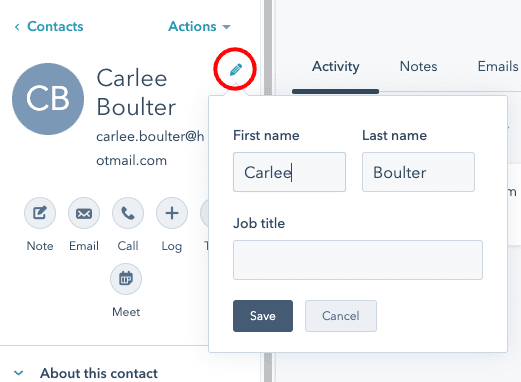
You can easily change or add information to any field in the contact card by hovering over the area and clicking the Pencil icon that pops up.
The Actions menu on the left of the card, above the contact’s name and a bit to the right, has a few helpful, quick-access options:
- View all properties, which puts all of the contact information in a list view
- View property history, which shows you everything that’s happened with the contact, like the first time you connected and average page views
- Search in Google
- Opt out of email
- Restore activity, which you can use if you’ve deleted information and want it back
- Merge
- Delete
The default view is Activity, which shows you a timeline of everything that’s happened between the contact and your company. On the right side of the contact card, you can see more details, like how many tickets they’ve submitted, attachments you’ve added to their record and which lists they’re on.
Contact Notes
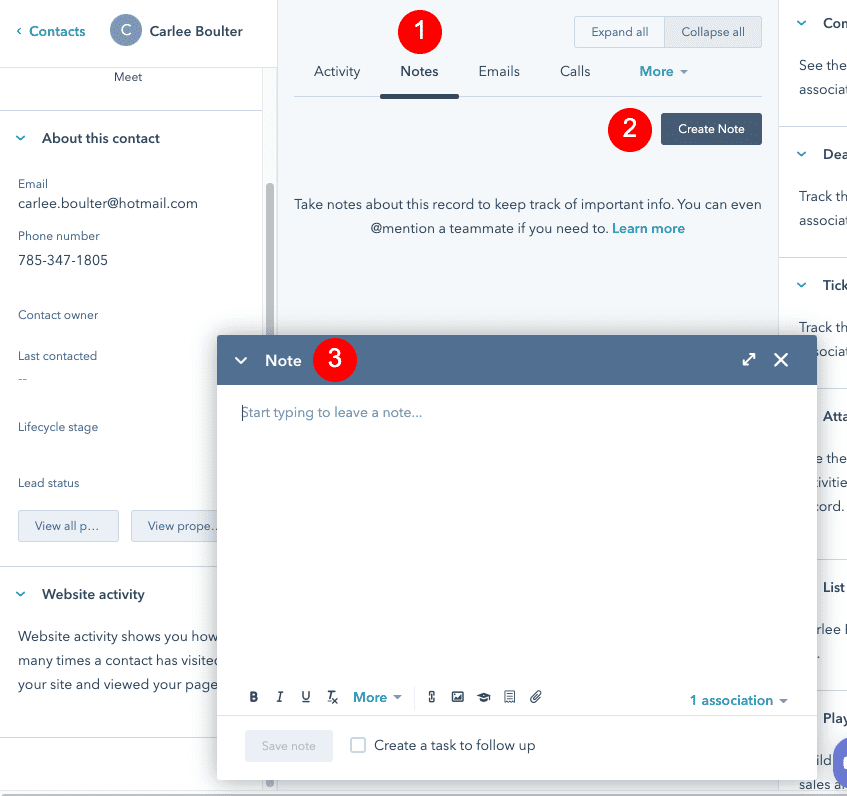
In the Notes section (in the center of the card), you can view or create notes to keep important info front and center. You can also create a task if you need to remember to follow up on the note.
Contact Emails
In the Emails section, to the right of Notes, you can log an email you sent or create a new one. To do this, you’ll have to connect Gmail or Office 365 or another service using IMAP.
Contact Calls
In the Calls section, you can log or make a phone call. Yup, you can actually make a phone call right from the HubSpot plugin. This lets you record call information and notes in the contact’s card. You have to meet some basic tech requirements for this to work, but we’re guessing most people won’t have an issue.
Contact Tasks
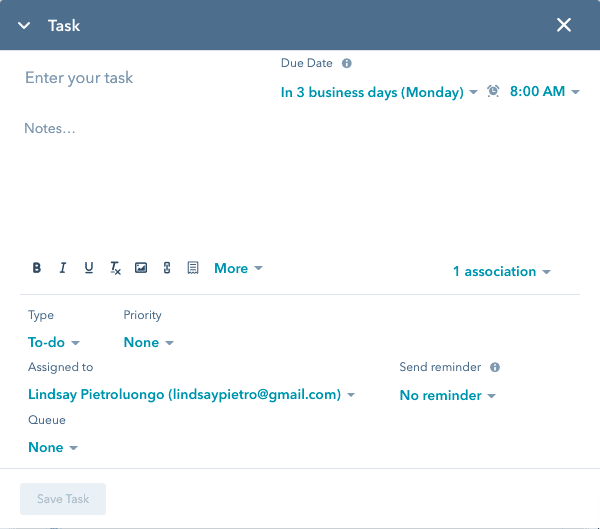
The Tasks section lets you view and add tasks. You can:
- Add a task name and notes
- Set the due date and time
- Choose the type, like a call or to-do item
- Mark the task as high-priority
- Automate reminders
Contact Meetings
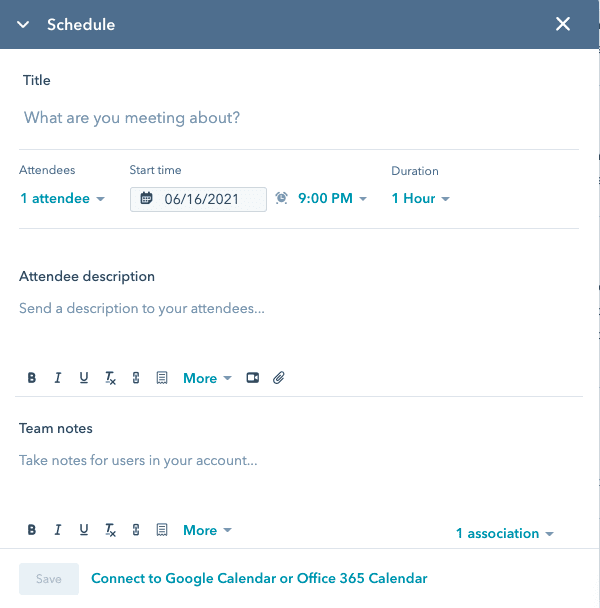
In the Meetings section, you can log or create meetings. When creating a meeting, you can add must-know information:
- Title, topic and description
- Attendees
- Date, time and duration
- Notes
Adding Forms to Your Website With the HubSpot WordPress Plugin
With the HubSpot-WordPress integration, you can create and display forms and different types of pop-ups to help capture information from visitors or encourage them to take the next step, like downloading an ebook or whitepaper. The drag-and-drop builder lets you easily add and remove modules for your form. Then, when a user inputs information, it will sync with your HubSpot account.
Choosing Your Form Type
There are different types of forms to choose from, ranging from embedded forms and stand-alone pages to pop-up boxes, drop-down banners and slide-in boxes. You can add multiple forms to your website, but you’ll make them one at a time, so you’ll choose one type to get started.
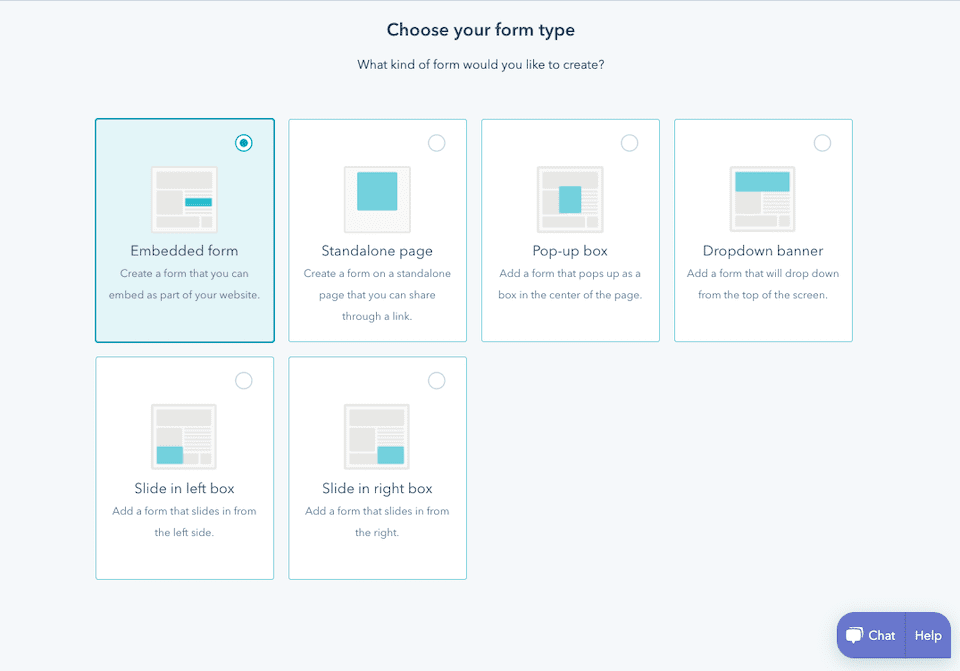
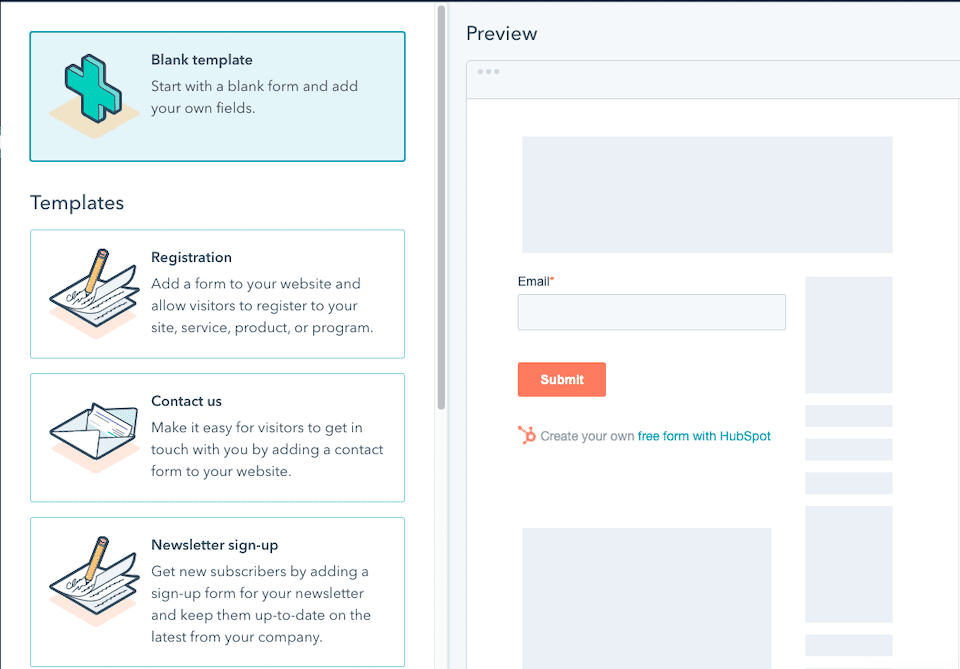
You can start with a blank template and completely design the form yourself, or you can choose a template and customize it from there. After making your selection, click the orange Start button on the top-right.
Customizing Your Form
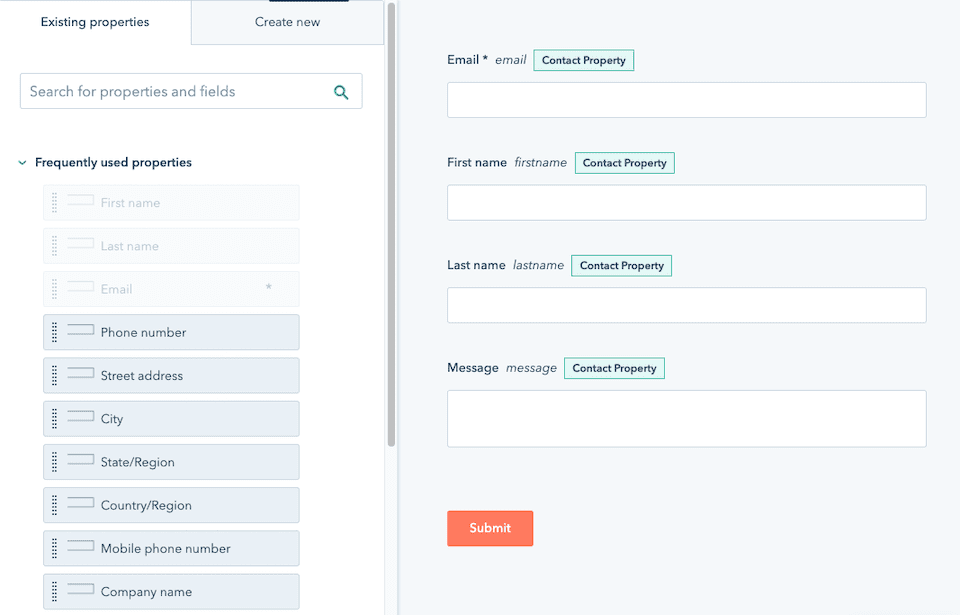
The forms can be designed and customized with a drag-and-drop builder. There are a few steps to this process. First, you’ll add or remove properties. There may be required properties, like email for a contact form, and then suggested and frequently used properties. You can also create your own property.
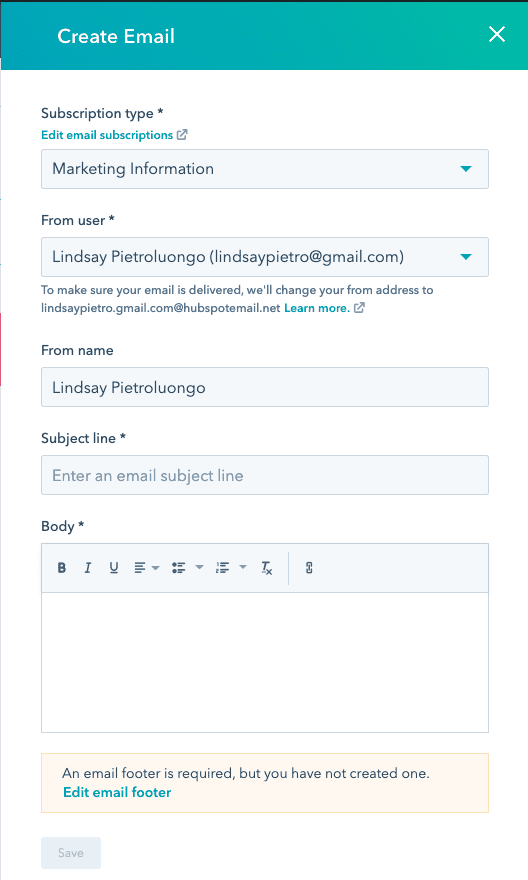
Next, you have the option to add a follow-up email that will automatically be sent to the user once they fill out the form.
After that, you’ll come to the Options page. Here, you can:
- Opt to display a custom “thank you” message or redirect the user to a different page
- Decide if you want to send notifications to the contact’s owner, which is the team member assigned to the contact (if there is one)
- Set the language of the form and error message
- Opt to always create a new contact for email addresses that don’t yet exist in your CRM
- Choose your settings for pre-populated content
- Auto-create tickets, which is helpful for service-based forms
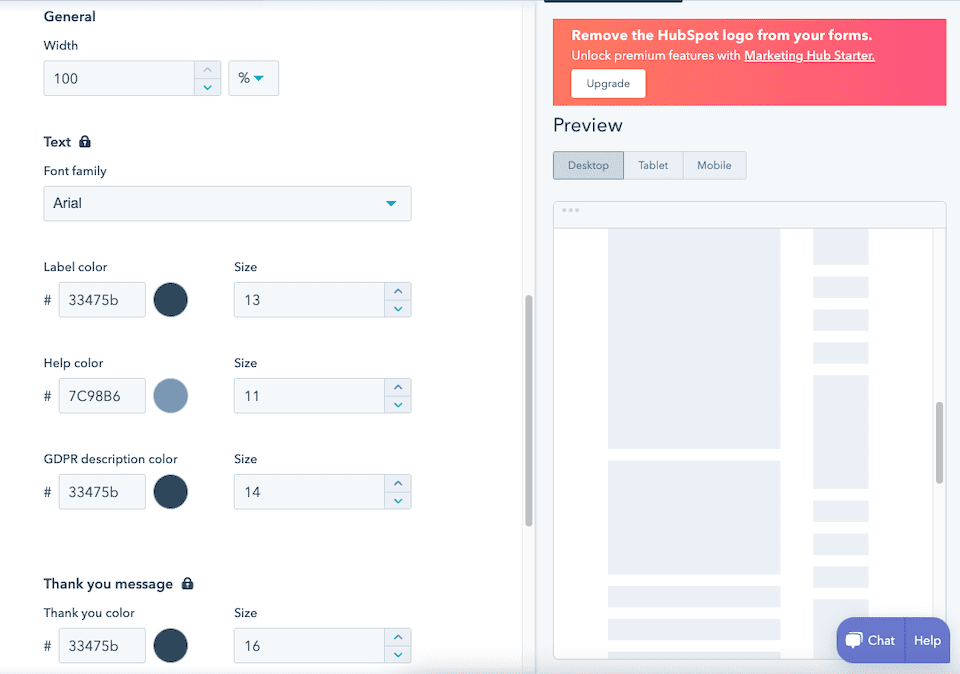
The last step is Style and Preview. Here, you’ll decide how you want the fields and submit button of your form to look. You can change colors, font family and sizes, alignment and other aesthetics here. You’ll also be able to preview the form on desktop, tablet and mobile.
One Last Forms Tip
Depending on your payment tier with Hubspot, you may be missing some features with Hubspot forms. Hubspot does integrate with many popular and feature-rich newsletter opt-in form plugins. This can give you unlimited flexibility by creating forms with A/B testing, conditional display logic, and unlimited design options while still having all your new subscribers ported over to your Hubspot account.
Adding Live Chat to Your Website With the HubSpot WordPress Plugin
Your WordPress website can have chatbots manning it around the clock, which lets you automate lead capture and support. You’ll create a chatflow based on if-then rules, and then you’ll decide when the chat appears and exactly what it’ll look like.
Go to Live Chat on the left-hand sidebar of the WordPress dashboard. The first thing you’ll do is style the chat by selecting an accent color.
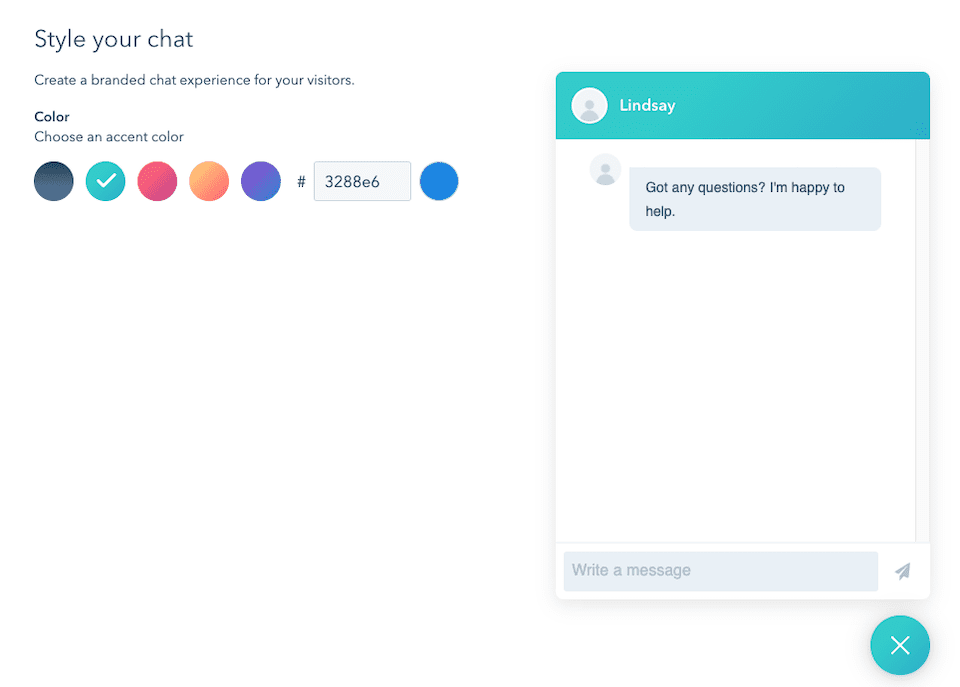
Then, you’ll create a chatflow. You’ll choose a header, which can be a custom name and avatar; a specific user or team; or a contact owner. Next, you’ll write a welcome message; decide if you want to auto-assign conversations to specific employees; and opt in or out of displaying the chat’s welcome message as a pop-up prompt.
On the next page, you’ll set your chat availability. Here are your options:
- During Business Hours: You’ll set work days and hours, and then set Availability Behavior (what to do when the chat is available, a team member’s away or it’s outside business hours).
- Based on Team Member Status: If at least one team member has marked themselves as available, the chat will be available. You can also set behavior for when all team members are away.
- Always: Your team will always appear as though they’re available to chat. You’ll set your typical reply time.
Lastly, you’ll preview your live chat on desktop, tablet, and mobile to make sure it’s perfect before finalizing. And just like that you have a powerful live chat solution for your site.
Sending Emails With the HubSpot WordPress Plugin
HubSpot also lets you design and send emails and newsletters. The drag-and-drop builder makes creating a newsletter practically foolproof. Click Email in the left-hand sidebar of your WordPress dashboard. Your first step is to select a template.
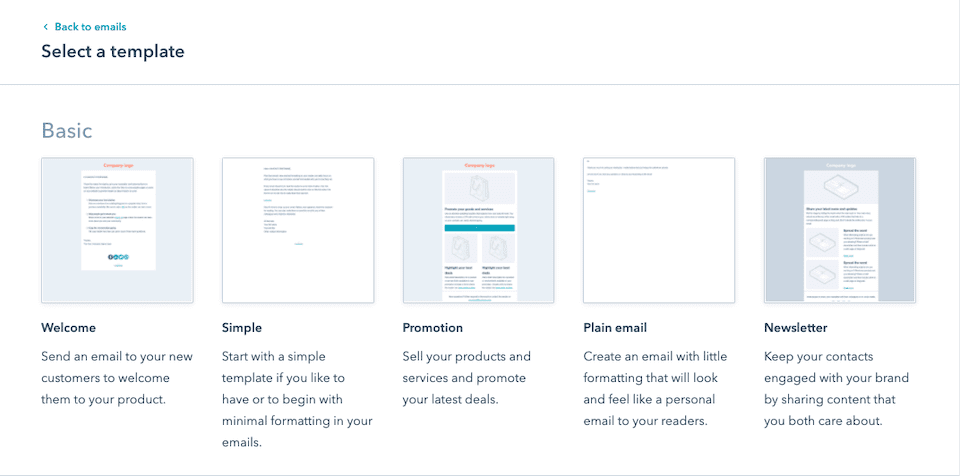
You’ll then be able to customize the email using the drag-and-drop editor. In addition to adding and removing fields, you can click Design on the top-left of the module to make aesthetic decisions. Set the background color, choose your font family, customize the style of the buttons, etc.
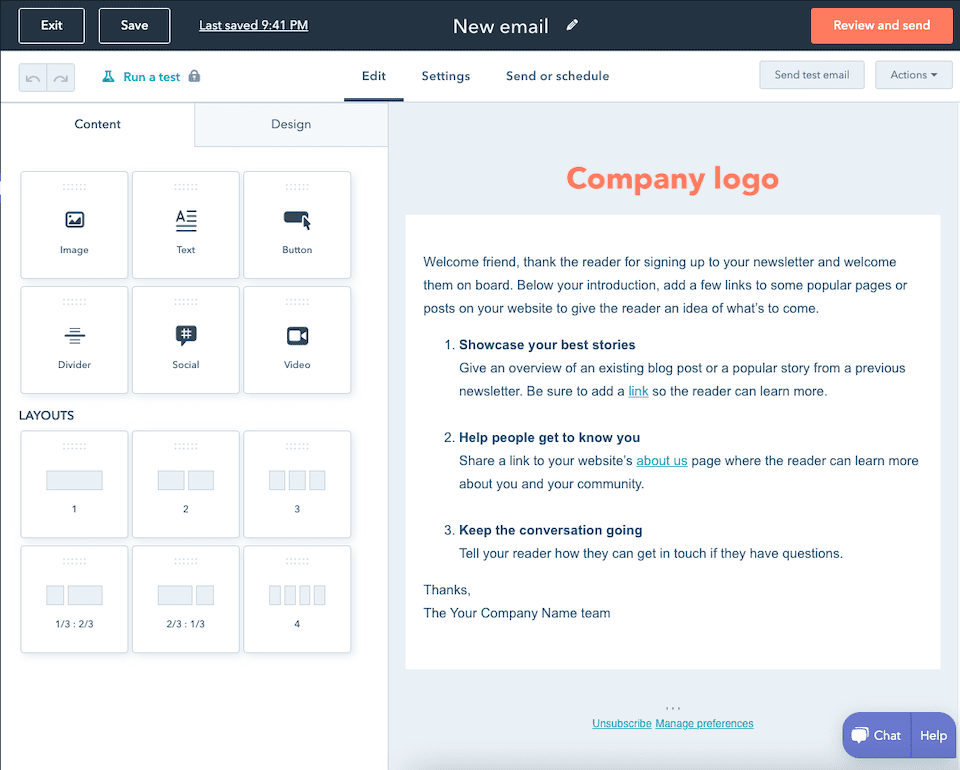
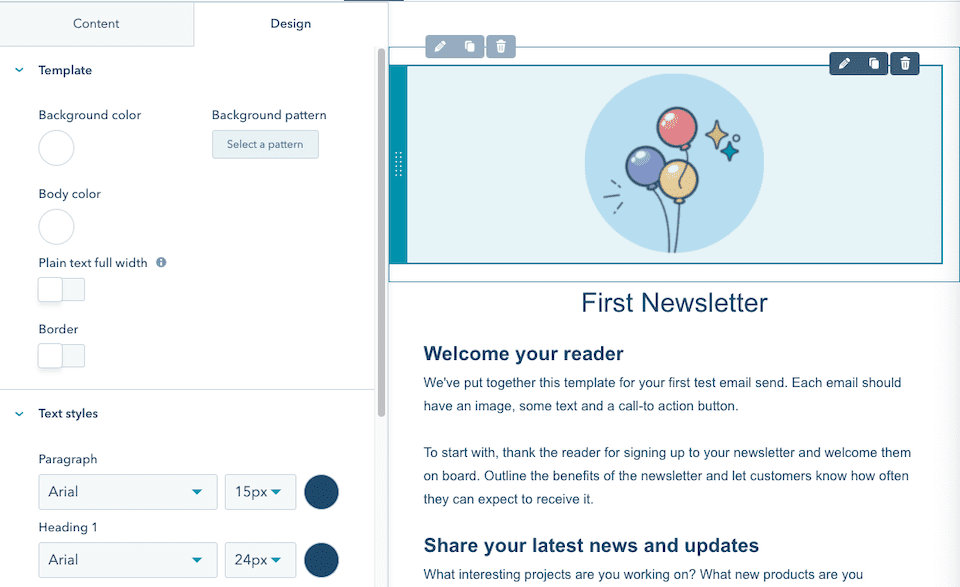
On the Settings page, you’ll set:
- From name and address
- Subject line
- Preview text
- Internal email name
- Language
- Subscription type
Emails can have personalization tokens too, which automatically add personal details to the email based on who it’s going to. This way, you can send one email to an entire list, but each one will be customized to the person receiving it.
- Refer to them and/or their business by name
- Feature something they’ve shown interest in, like a product or topic.
- Say congrats for something they’re celebrating, like an anniversary or a birthday.
When you’re finished, you can send a test email to make sure everything looks right. Once you’re happy with the email, you can send it or schedule it for later. As soon as you send an email, you’ll be able to see delivery and engagement rates ASAP.
Even More Benefits of HubSpot: Keyword Tools
In addition to everything you can do with the HubSpot plugin for WordPress, the software has powerful keyword tools that you’ll find helpful when optimizing your website. The goal of any website owner is to rank their content for the keywords that are most important to their business and audience. HubSpot lets you discover the keywords you’re currently ranking for as well as additional keywords you should consider adding to your content.
Get Suggestions From a Keyword or URL
If you’re not sure what keywords to target, their tool will let you type in a keyword or a URL and then get a list of the best keywords to try. The URL option is especially helpful if you’re trying to compete with a particular website. You can enter the website’s URL and then find a list of keywords that you should use on your site.
Maximize Low-Difficulty Keywords
You can also see low-difficulty keywords. That means that a page of your website is already ranking, just not very high – maybe it’s on page two or three instead of page one. By adding just a bit more SEO, you can improve the ranking of those pages and possibly get them to the first page of search results.
Follow On-Page SEO Recommendations
Lastly, HubSpot offers on-page SEO recommendations and tells you why there are certain suggestions for your site.
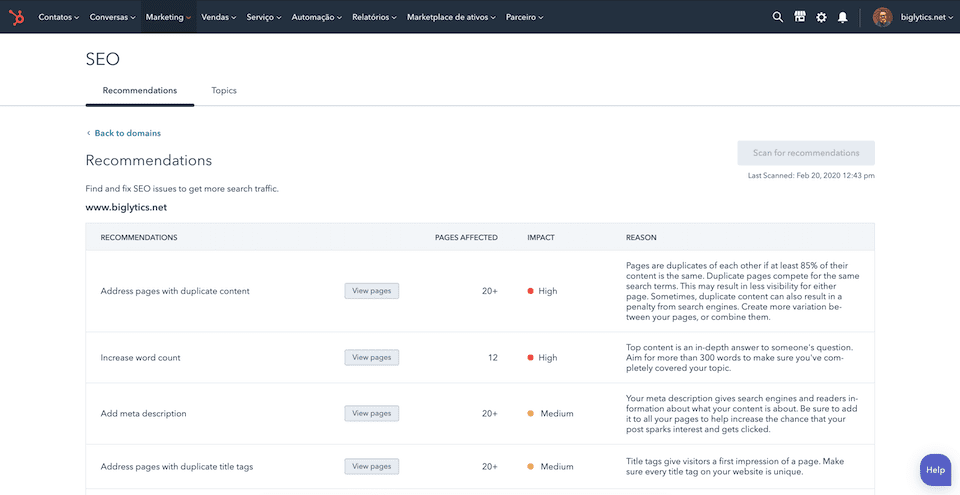
Source: HubSpot
Final Thoughts About the HubSpot-WordPress Integration
The HubSpot WordPress plugin is as sleek as it is powerful. For such a robust plugin, it doesn’t feel overwhelming or bloated in the least. The super-easy-to-follow tours will show you exactly what you can do with each of the plugin’s features, but it’s all so user-friendly that you can probably figure it out on your own.
Ultimately, this is a rich one-stop shop for all of your CRM needs. And while you’ll have a HubSpot account to use whenever you want, you can do so much with the plugin that you may rarely have to leave WordPress. You can even make calls to contacts without navigating away from your site – that’s true convenience.
We can’t help but love the HubSpot plugin for WordPress, and the fact that you can access so much of its features for free is a major steal. However, if you want to explore other options, check out our blog post with the top five WordPress CRM tools and plugins.


brand awareness of Hubspot is very high I guess, the name hubspot has been hit on my mind since 2019 and Now in 2021 I’m using it, its just because of their value creation and brand awareness, thanks for article.
I started using HubSpot CRM (free version) for online appointments on my website visitors. It analytics also helps to understand customer behaviour on my website and have email tracking to check whether appointment automated emails are being opened or not. I strongly recommend Hubspot for those who are finding it difficult to maintain their prospects and customer interaction.