Lists may seem simple, but they powerful tools. If you’re running a website, lists enable you to share information in a way that’s easier to digest than long, unending paragraphs. They enable you to cut to the chase and give users the exact information they’re looking for. In other words, lists are one of the most powerful tools at your disposal to build engaging content.
Creating a list is easy enough, and if you use WordPress, you’ll have access to a dedicated List block that enables you to customize this element in several ways. For this article, we’ll talk about the List block, explain how it works, and go over some tips to help you create better lists.
Let’s get to it!
How to Add the List Block to Your Post or Page
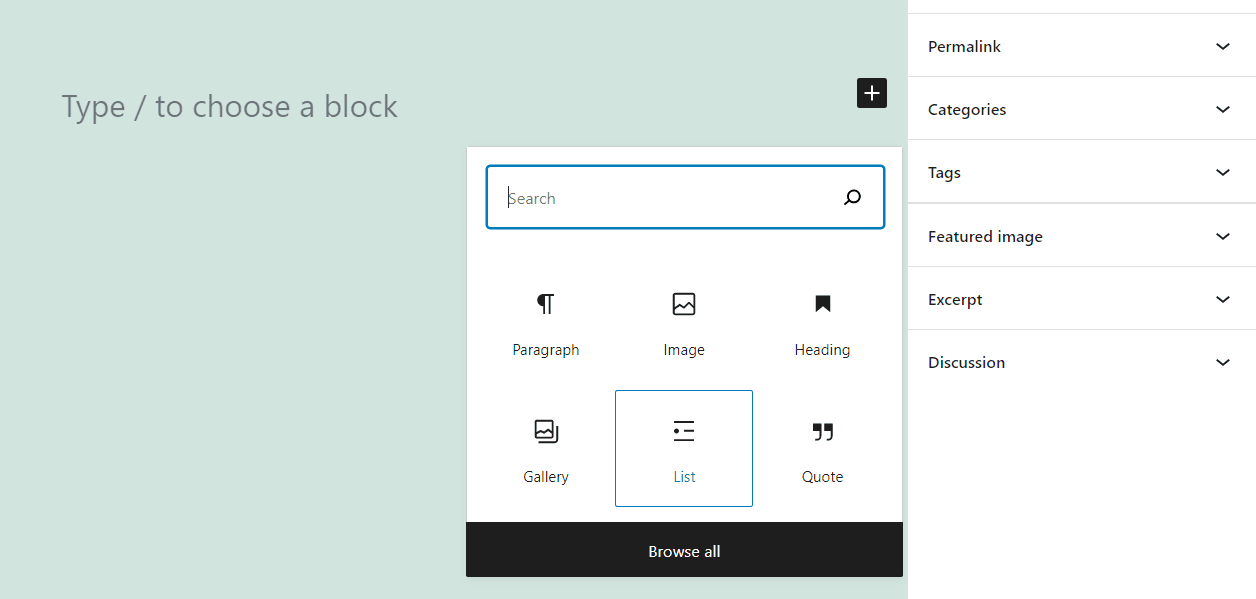
Adding a block in WordPress is a simple task. Go to any post or page where you want to add the List block, and find it using Browse all option or the search bar:
Once you select the List block, you’ll be able to start working on your new list. The next part of the process is simple. You can select between an unordered (bullet point) or ordered (numbered) list, and start adding entries until you’re satisfied:
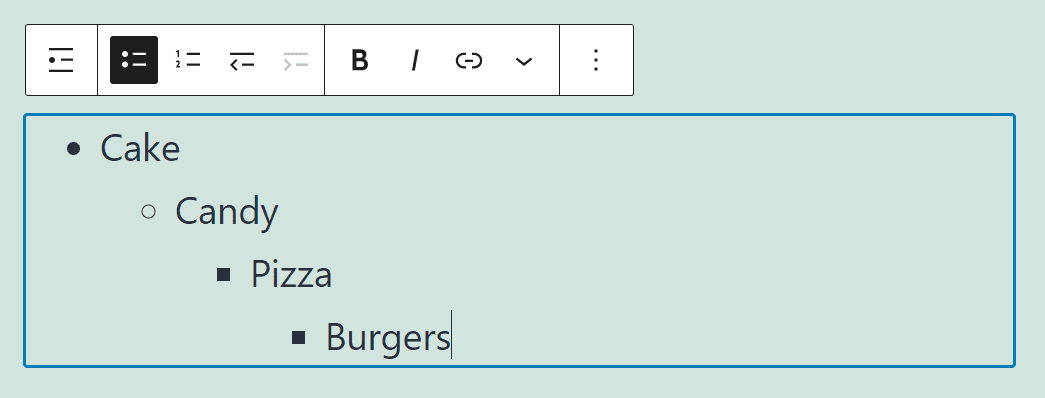
As you can see in the menu above, the List block includes a broad range of other settings. Let’s check out what those options are.
List Block Settings and Options
There are two sets of options for any element that you add using the Block Editor. If you mouse over any block, a menu will show up that typically includes basic formatting options. You also get access to a block-specific Settings menu if you click on the gear icon on the top-right corner of the screen:
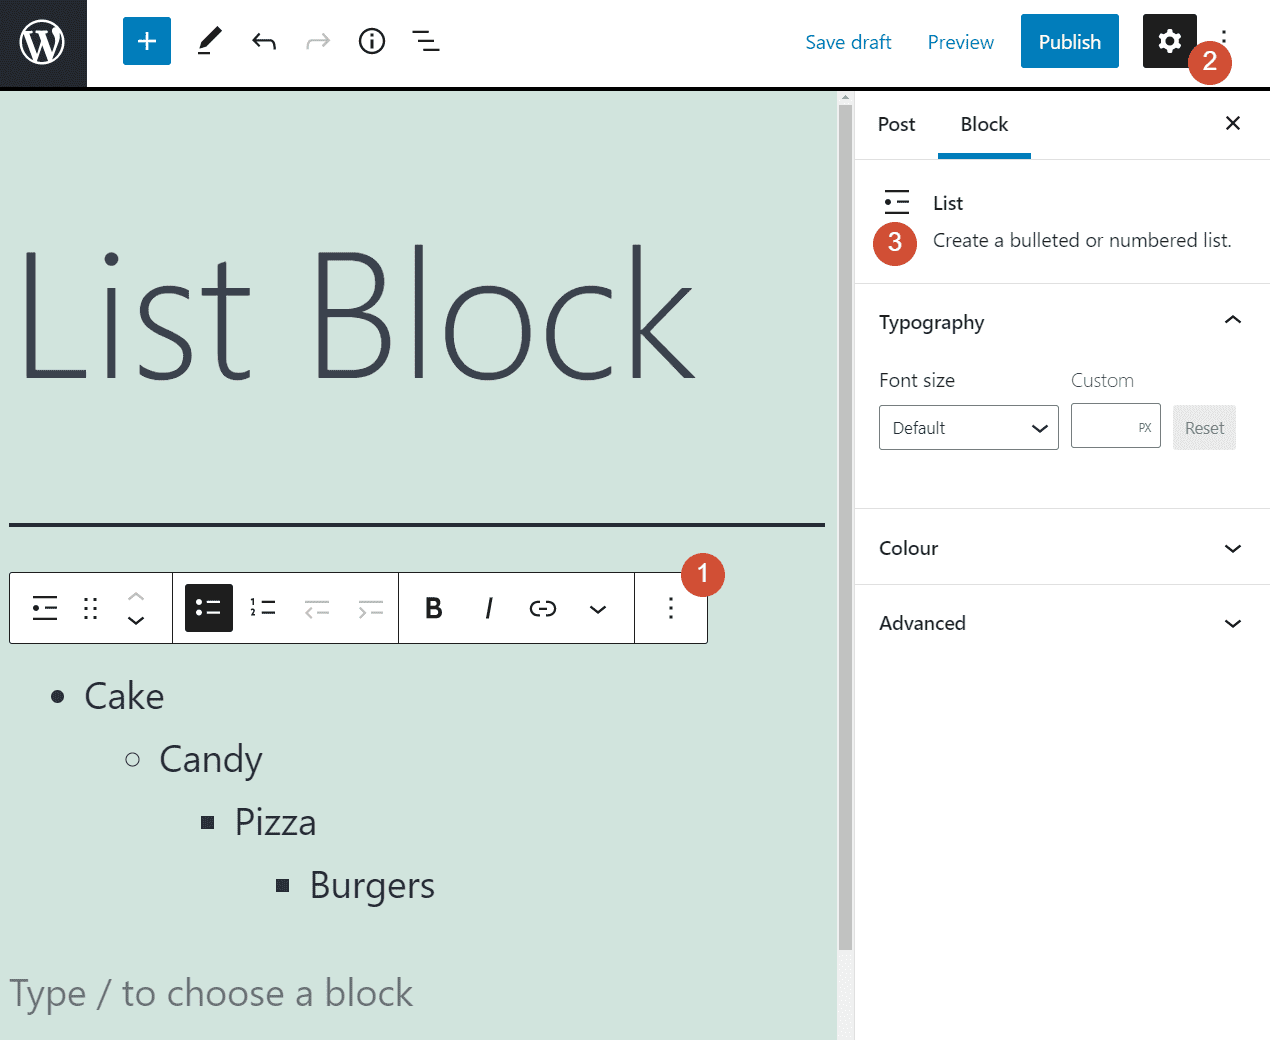
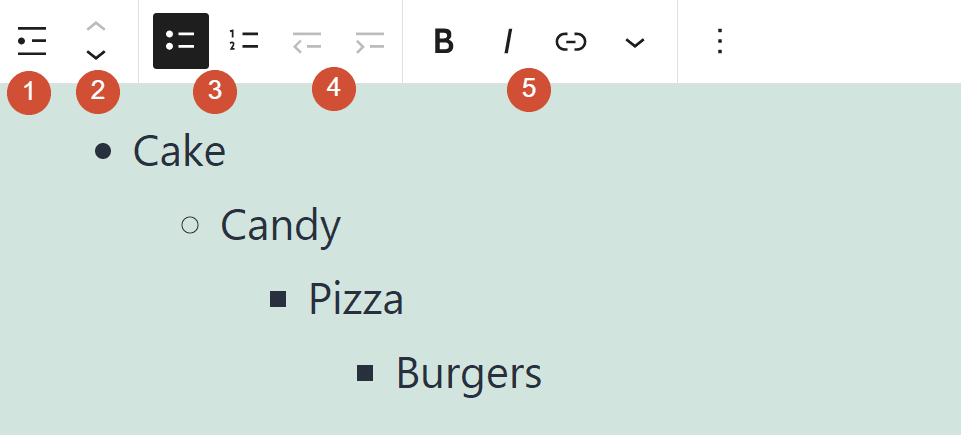
Let’s start by going over the quick settings access menu that appears when you mouse over the List block. Starting from the left end of the menu, you have access to the following settings:
- Changing the type of block you’re using
- Moving the block up or down a spot
- Selecting between unordered and ordered lists
- Adding or removing indentation from list entries
- Bolding, italicizing, or adding a link to parts of the text
Here’s a quick cheat sheet showing what menu entries correspond to each of those options:
Adding formatting to the List block works much the same as with any other text-based element. You can bold or italicize specific entries or even just parts of them, and the same applies to links.
You’ll also notice an additional option at the far right side of this menu. The down arrow includes more advanced formatting options, such as adding inline code, images, “strikethrough text”, text colors, and more:
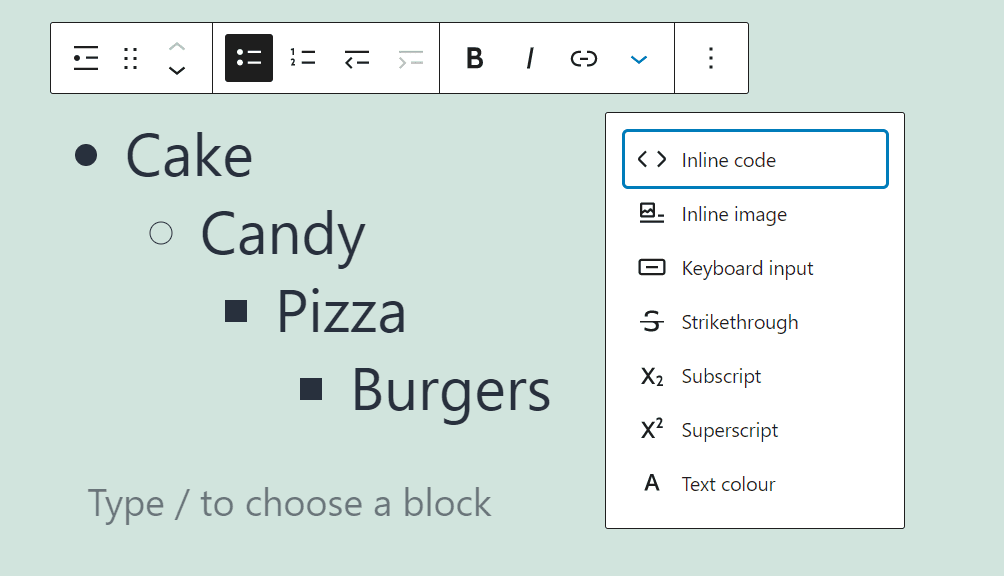
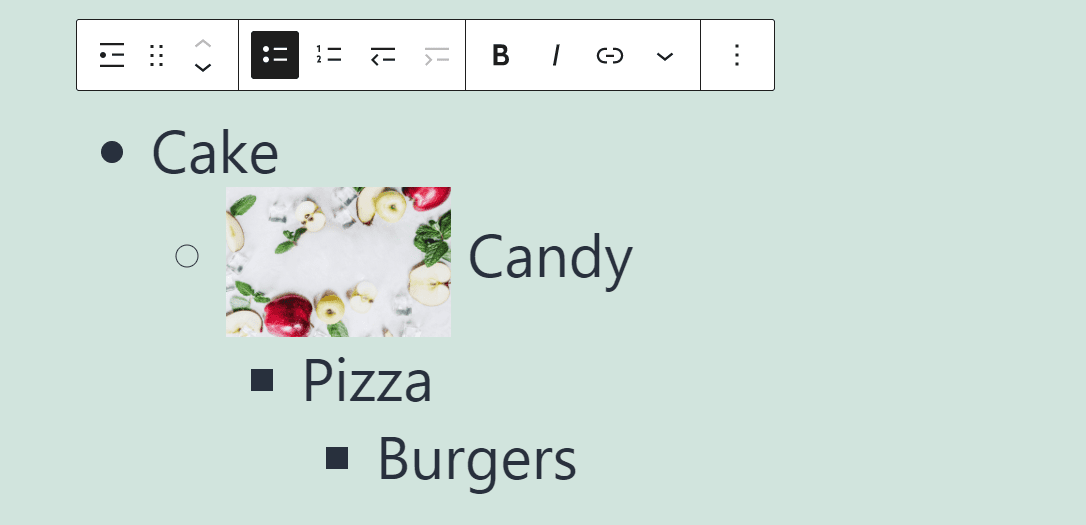
Note that while it’s possible to add images to a List block, the results tend to look rather awkward (you’re better off using a dedicated Image block):
Moving on, once you open the Settings menu at the right side of the screen, you get access to more advanced configuration options. There you can change the font size for your entire list, as well as choose both text and background colors:
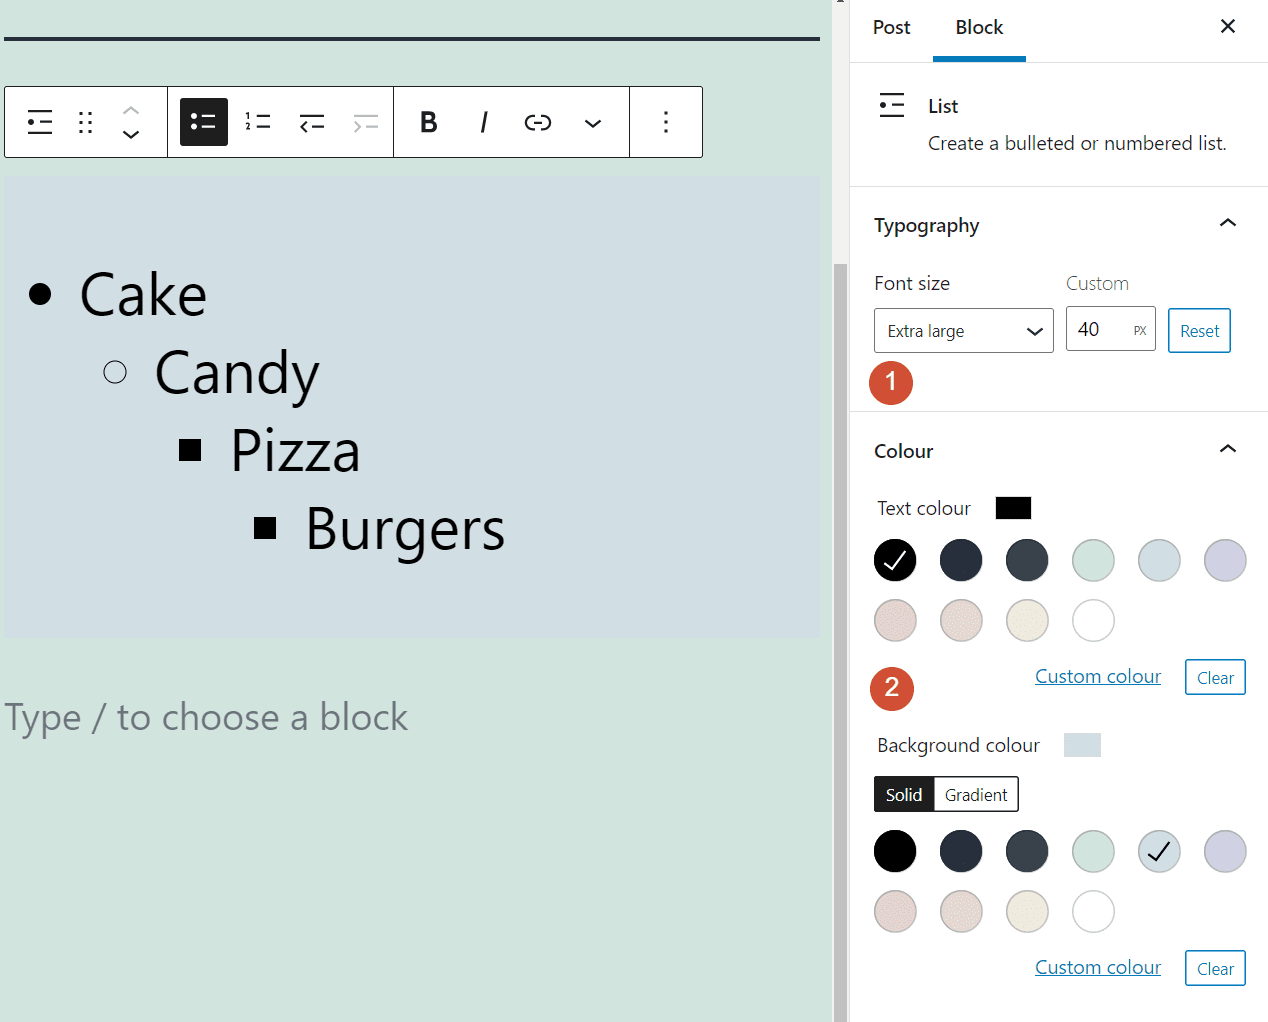
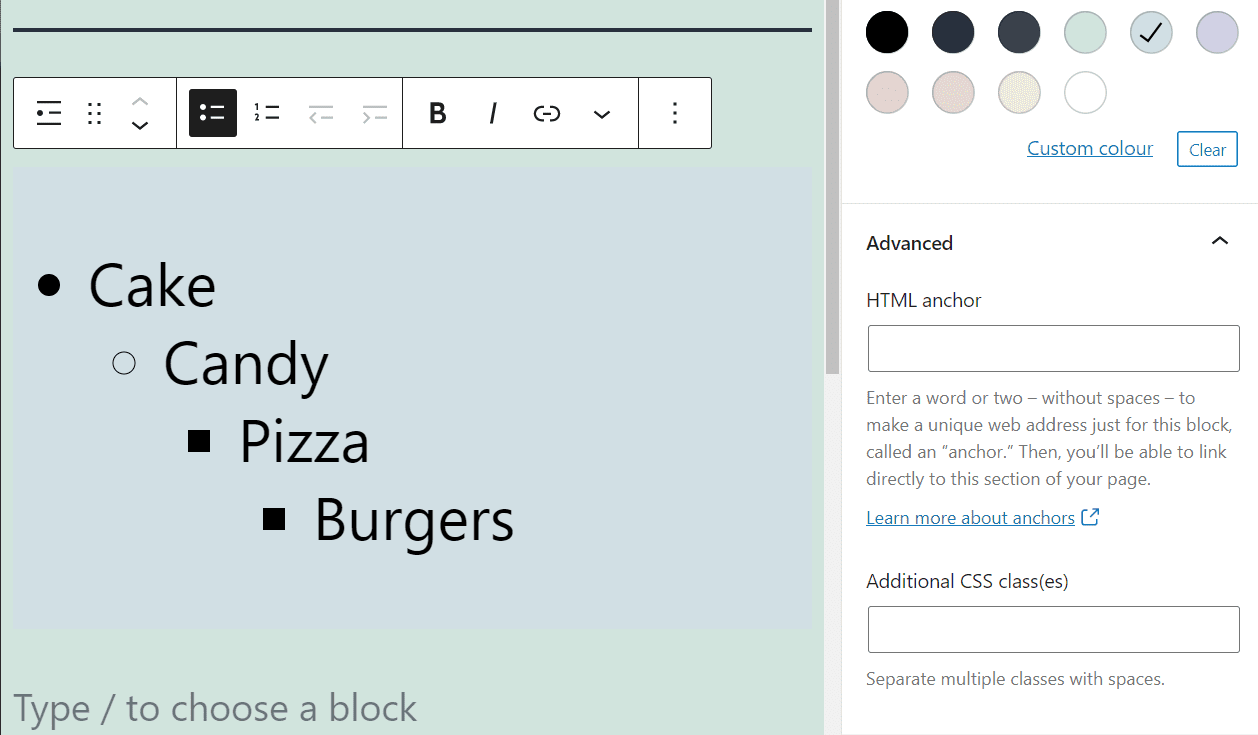
Keep in mind that font size and color settings apply to the entire list, and not to individual entries. If you want to customize the style of your lists even further, you’ll need to use CSS classes and HTML anchors. To do that, open the Advanced tab under the Block settings menu (it’s right below the font size and color options):
That covers all the basics of how to use the List block in WordPress. However, a lot more goes into creating engaging lists than just basic formatting and styling. Let’s talk about how to make sure your lists hit home.
Tips and Best Practices for Using the List Block Effectively
There are a lot of tips and tricks you can use to create more engaging lists. Since we have a lot of experience working with the List block, we’re going to share some of our favorite tips using a list of our own. Here’s what to keep in mind when working on a list in WordPress:
- Use lists whenever you need to share critical information that you can break down into easily-readable points.
- Avoid adding images to your lists, since they can pull attention away from individual entries and break the formatting.
- Don’t start each entry in a list with the same words, so lines don’t blend in together.
- Use consistent style and formatting for every entry in your list.
If a list goes on for too long, users may start ignoring some of its entries. To keep things clear, you can use the following style for lists that require additional explanations for each item:
- Highlight the start of the entry. By highlighting the initial phrase or sentence, you can give each list item its own heading, and then use regular text to expand on that point.
- Lists are fantastic. There’s nothing quite like a good list to drive a point home.
Although lists can be incredibly effective, it’s important not to overuse them. If you’re working on a post or page with a lot of content, there should be a healthy balance between text, images, lists, tables, and other types of elements. That variety will keep visitors engaged. Plus, it will ensure that when you do use a list, readers pay attention to it.
Frequently Asked Questions About the List Block
By now, you know pretty much everything there is to know about the WordPress List block and how to use it. However, let’s go over some of the most frequently asked questions about this block to make sure that you don’t miss any key information.
Where Do I Find the List Block in WordPress?
You can find the List block by using the search feature or the Browse all option when you add a new element to your page or post. Keep in mind that there are other blocks that include the word “list”, such as Post List and Page List. However, those blocks offer an entirely different set of features.
What Do the Page List and Post List Blocks Do?
You may have noticed there are more than one type of “list” block in WordPress. The Page List and Post List blocks are what’s called “Theme Building” blocks. They’re intended to be used very differently than the standard List block we’ve gone over in this post. They add lists of your site’s pages and posts as elements wherever you place them. Unlike most other blocks, those two don’t include any formatting or styling options.
Traditionally, most users add Page List and Post List blocks to sidebar or footer widgets. That way, you can direct visitors towards other parts of the website that they might find relevant. However, neither element has much in common with the traditional List block.
Can I Add Lists Anywhere in WordPress?
You can add the List block anywhere you have access to the Block Editor. That includes posts, pages, and your WordPress widgets. When editing WordPress widgets, you get access to the Block Editor and all of its elements, including the List block and options such as Page List and Post List.
Conclusion
You might not think of lists as very glamorous, but you’d be wrong. Lists are one of the most basic elements in any type of engaging content, but they become particularly useful when you’re working on pages and posts. Regardless of what type of content you publish on your WordPress website, lists can make it easier to share critical information and get visitors’ attention.
WordPress gives you access to a powerful List block with plenty of formatting and styling options. You can place lists anywhere you want on your website, including posts, pages, and widgets, and we recommend that you take full advantage of this ability.
Do you have any questions about the Lists block in WordPress? Let’s talk about them in the comments section below!
Featured Image via olesia_g / shutterstock.com




Am I missing something? When you use divi to build sites, the option to build using WordPress blocks disappears- right? Im confused!
Hi Yvonne,
The Divi builder offers a very different experience from the Block editor. If you’re using Divi, you get access to building modules instead of blocks. Divi includes a Text module that works similarly to a full-blown text editor. Instead of standalone paragraphs and list blocks, it’s all combined within the Text module.
When using the Divi theme, you can choose between the Divi builder and the default editor (the Block editor) when creating a new page. Overall, the Divi builder offers a much more visual experience when working on a website, but it’s up to you to decide which editor you prefer.
I think there’s a lot to be discovered in these block editors. The list block looks better than manually added bullets.
Hi Aditi, I totally agree! 🙂