The method you use to showcase your WooCommerce products can help drive conversions and increase sales. If you want to promote items and advertise them at discounted prices, you could benefit from using the On Sale Products WooCommerce block. This element displays a grid of the discounted products and customizes the information that appears alongside them.
In this post, we’ll explain how you can add the On Sale Products WooCommerce block to a post or page and walk you through its various settings. Then we’ll provide you with some tips for using the element effectively and answer some frequently asked questions.
Let’s get started!
- 1 How to Add the On Sale Products WooCommerce Block to Your Post or Page
- 2 On Sale Products WooCommerce Block Settings and Options
- 3 Tips and Best Practices for Using the On Sale Products WooCommerce Block Effectively
- 4 Frequently Asked Questions About the On Sale Products WooCommerce Block
- 5 Conclusion
How to Add the On Sale Products WooCommerce Block to Your Post or Page
If you have the WooCommerce plugin installed on your WordPress site, you can access dozens of useful blocks to customize your online store. One of those elements is the On Sale Products WooCommerce block.
This block displays a grid of all of the products you currently have on sale. You can also configure which information it showcases, such as titles, prices, and ratings.
Adding the block to a post or page is simple. First, navigate to the post or page that you want to use it in. Next, (1) click on the Add Block button, (2) search for “on sale products”, (3) then select the first option:
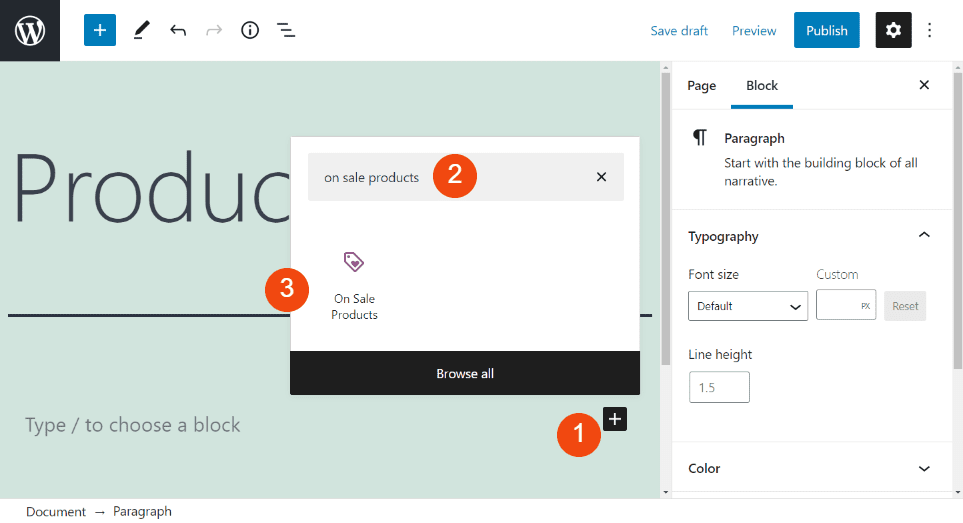
You can also insert the block by typing “/on sale products” into a Paragraph block in the editor, then hitting your Enter key. Once you add the element, a toolbar menu will appear along the top of it.
On Sale Products WooCommerce Block Settings and Options
When you use the On Sale Products WooCommerce block, it automatically grabs any products listed as “on sale” from your store. It then presents them in a standard grid that you can filter by category. However, you can also customize the block to change its appearance:
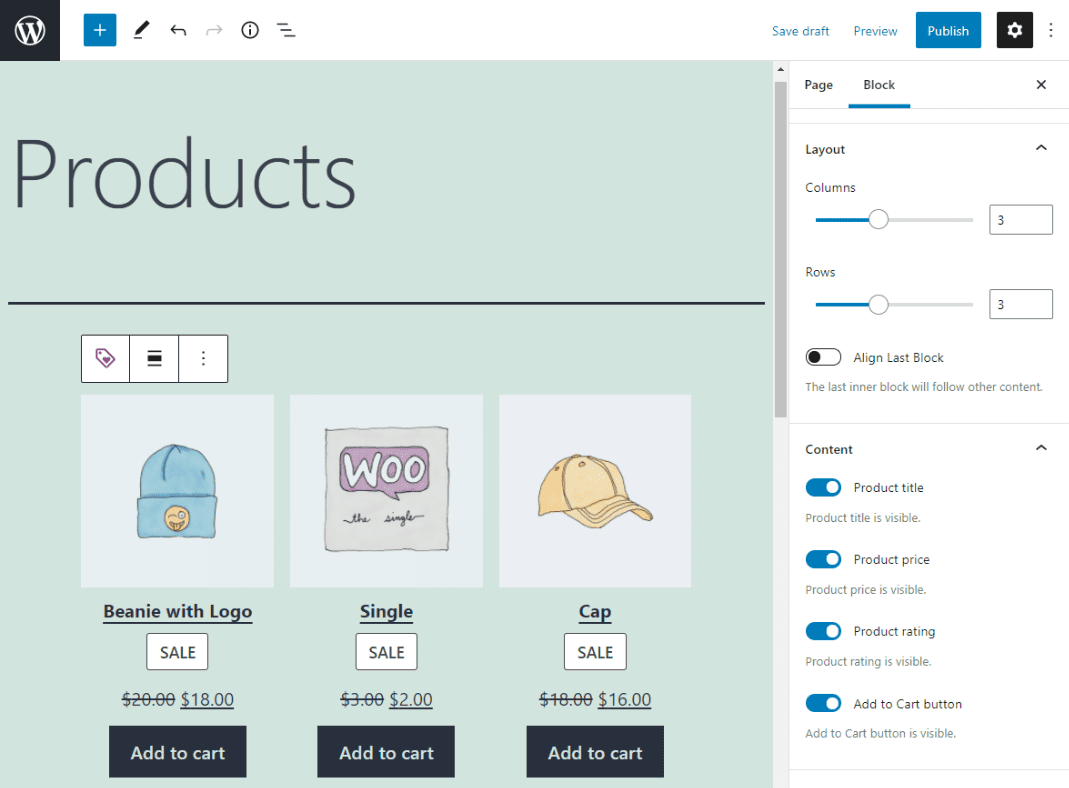
For example, you can adjust the number of columns and rows and show or hide the titles, prices, and ratings. Let’s take a look a closer look at each of these settings.
The first icon enables you to transform the block into different elements. There are a handful of options:
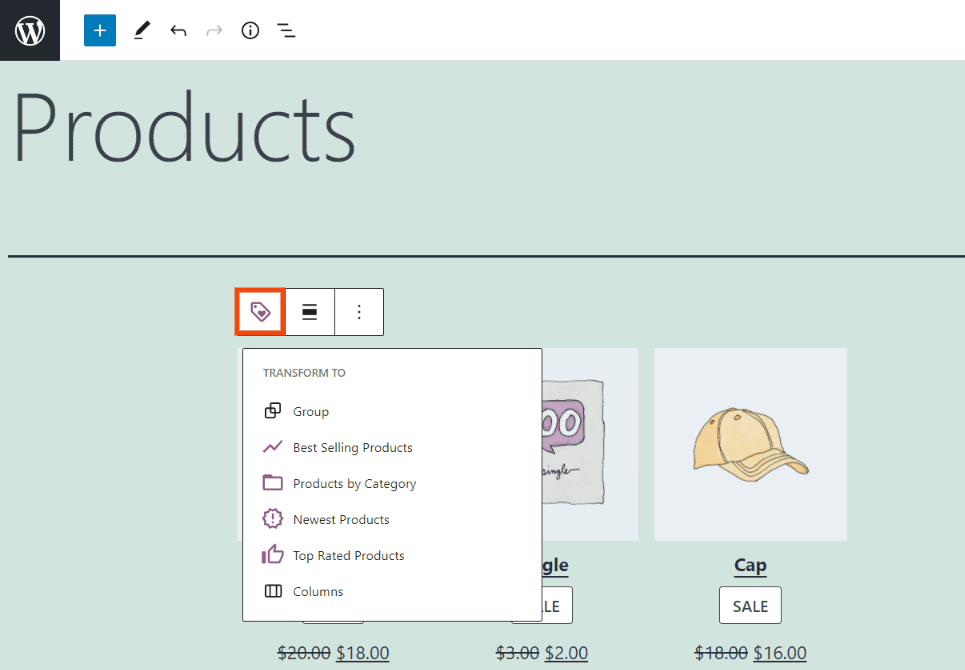
As you can see in the above example, you can transform the element into a Best Selling Products, Newest Products, or Top Rated Products block.
Furthermore, the middle icon can adjust the block’s alignment. Here, you can switch it to select full or wide width.
If you click on the three vertical dots, you’ll find a settings menu. Here, you can insert another block before or after the element or add this one to your Reusable Blocks.
Now let’s move on to the settings on the right-hand side of the screen. Under the Layout section, you can change the number of columns and rows that appear within the grid:
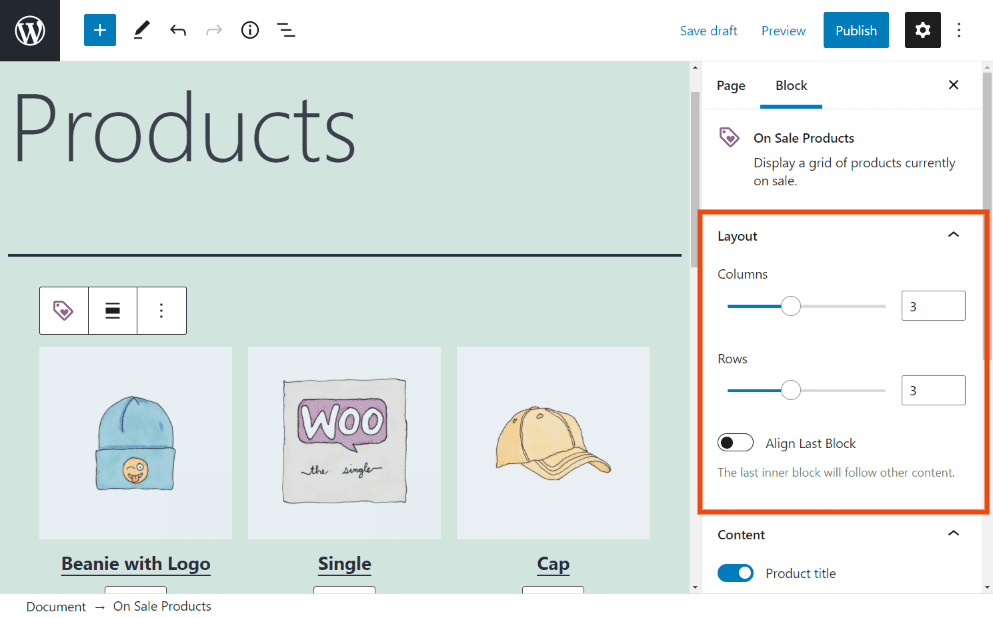
You can use the drag-and-drop scroll function or enter the numbers in the text fields. You can also toggle the Align Last Block option to ensure that the last inner block will follow other content.
Next is the Content section:
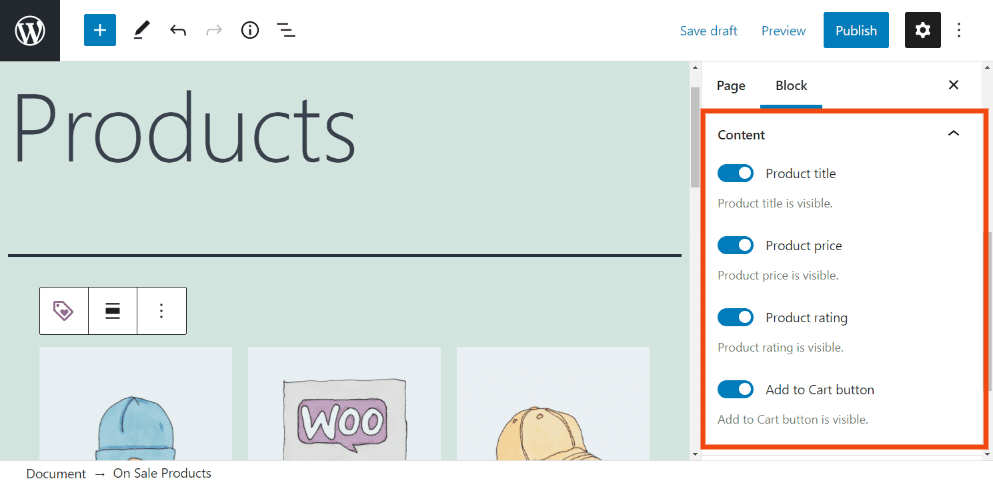
Here, you can choose whether to show or hide the following elements:
- Product title
- Price
- Rating
- Add to Cart button
If you wish to remove any of these details, you can do so by simply switching off the toggle next to the respective setting.
Under Order by, you can change the listed order of the products. When you click on the dropdown menu, there will be multiple options, including Newest (default), Price, Rating, etc. You can also filter items by product category.
Tips and Best Practices for Using the On Sale Products WooCommerce Block Effectively
As you can see, using the On Sale Products WooCommerce block is pretty straightforward. However, there are some tips and best practices you may want to keep in mind to ensure that you’re utilizing the element effectively.
Some tactics can help grab shoppers’ attention when promoting products, such as sales items. You could strategically place the highlighted products in parts of your store that visitors are most likely to notice them. For example, in addition to your standard shop page, you might also consider adding this block to your homepage or checkout page.
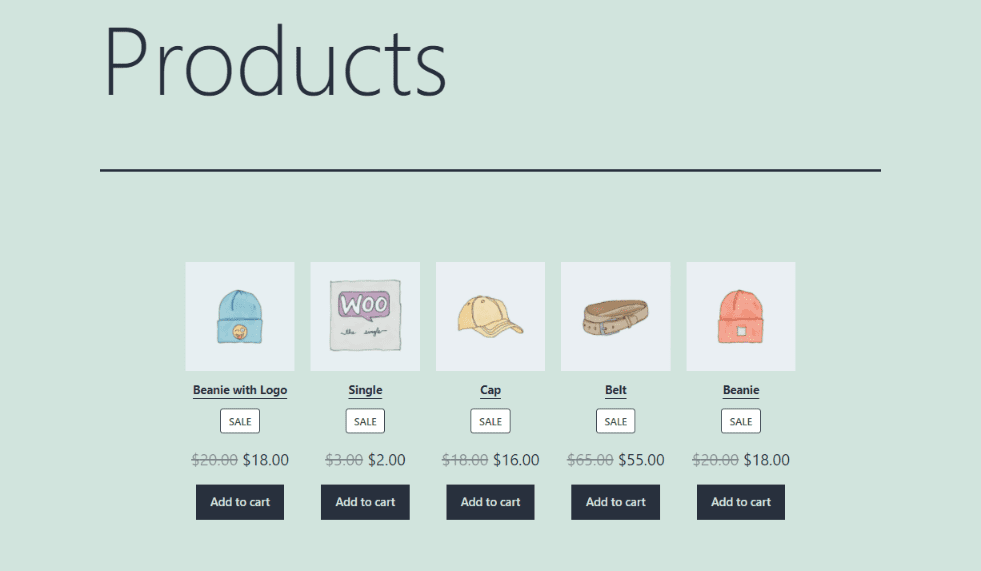
However, depending on how many items you have on sale (and, therefore, how large your grid is), this may not be the most straightforward task. If you only have a few products, you might consider adjusting the column and row settings of the block so that all the items are in one row:
Additionally, you might consider what information you display with the products. Giving your customers all the details they need upfront can be helpful.
However, information overload can look crowded and messy, especially if you have multiple on-sale products. Therefore, you might want to consider hiding some of the information.
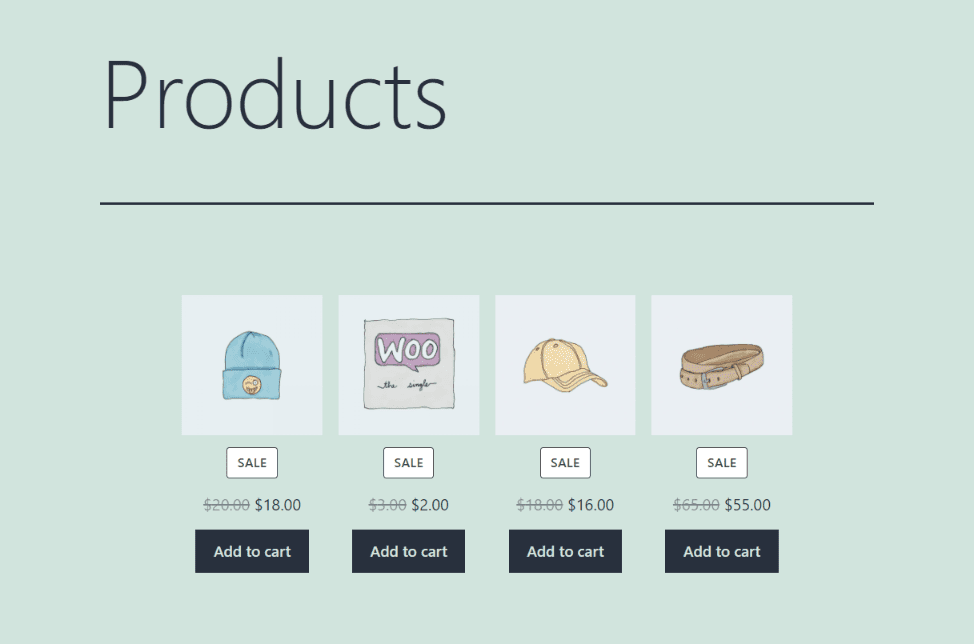
For example, while you’ll likely want to display product images, you may not need the titles as well:
Furthermore, hiding the item prices might incentivize shoppers to click on the product pages. That way, they can learn more about the items and why they should buy them.
Finally, you might consider hiding the product ratings if your items lack reviews. Positive customer reviews can serve as social proof that encourages and increases trust. However, there’s little point in displaying them if your products don’t have any consumer feedback yet.
Frequently Asked Questions About the On Sale Products WooCommerce Block
At this point, you probably have a solid grasp of what the On Sale Products block is and how to use it. However, to make sure we cover all the bases, let’s answer a few frequently asked questions.
Where Can I Use the On Sale Products WooCommerce Block?
You can use this block on any WordPress post or page. Additionally, you can insert it anywhere across your site that lets you access the Block editor. For example, you can create a WordPress widget for the element and then add it to your footer or sidebar area.
Can I Rearrange the Order of the Products Within the Grid?
You can’t manually reorder the items. However, the block settings enable you to control the order in which products appear. For example, you can display them based on price (lowest to highest or highest to lowest), product ratings, or newest to oldest.
Can I Change Information About the Products Using the Block?
Unfortunately, that isn’t an option. If you want to update any details of a particular on-sale product, such as the image, name, or price, you need to do so on the specific product page. You can find it by navigating to WooCommerce > Products > All Products.
Conclusion
If you have items in your online store that you want to put on sale, it’s essential to make sure that they’re noticeable to your shoppers. Fortunately, WooCommerce blocks can help showcase certain items, such as discounted products.
As we discussed in this post, the On Sale Products WooCommerce block is a helpful element that can highlight discounted items to customers. You can easily place it anywhere on your site that uses the Block Editor. Then, you can customize the size of the product grid and choose which information to display.
Do you have any questions about using the On Sale Products WooCommerce block? Let us know in the comments section below!
Featured Image via Julia Tim/ shutterstock.com






really great topic, helping me understand the woocommerce. thanks alot
You’re welcome 🙂
Amazing blog!!! Was very helpful.
Thank you 🙂