The ability to embed video into your blog posts on WordPress opens a variety of possibilities for how you present your content. In the WordPress Block Editor, users have the option to add a quick and easy Vimeo embed to their blog posts. This is a fantastic option for content creators who want to incorporate video into their content marketing strategy. The Vimeo embed block is one of several video embed blocks available in WordPress, including VideoPress, TED, WordPress.tv, Dailymotion and YouTube.
An embedded video or social media post can greatly enhance your WordPress blog post or webpage. This article will walk you through the steps for embedding a Vimeo video via WordPress.
Subscribe To Our Youtube Channel
What Is Vimeo?
Vimeo is a video platform and marketing tool that shares some similarities with YouTube. If you’re incorporating video in your content marketing, then you’ll want to consider the pros and cons of each platform before jumping in. Both can be used effectively for marketing purposes.
A Vimeo embed isn’t the only kind of embed you can incorporate into your WordPress site. For example, you can embed Twitter blocks, YouTube and TikTok videos, Facebook posts, and a host of other features, too. A Vimeo embed can add more context to an informative article. Alternatively, you can give your website visitors multiple ways to get to know you, both through text and video.
Why Use A Vimeo Embed Block On Your WordPress Site?
Including multiple media types in one post, such as audio, video, and text, can give your readers plenty of content to spend time on. Embedding content like a video can also prompt your readers to follow you on the linked platforms.
Whether you have your own video content to share or want to share video from another content creator, the Vimeo embed block on WordPress makes it simple and straightforward. You don’t necessarily have to use your own videos. The Vimeo embed block will work with any video on the platform that’s set to be viewed publicly–all you need is the URL.
Let’s take a look at the exact steps you need to take to get Vimeo videos to display on your WordPress site using the Block Editor.
Using The Vimeo Embed Block: A Step-By-Step Guide
Ready to add a Vimeo embed into your own WordPress site? It’s easy to add a video to your blog post or web page using the WordPress Block Editor.
How To Add a Vimeo Embed Block
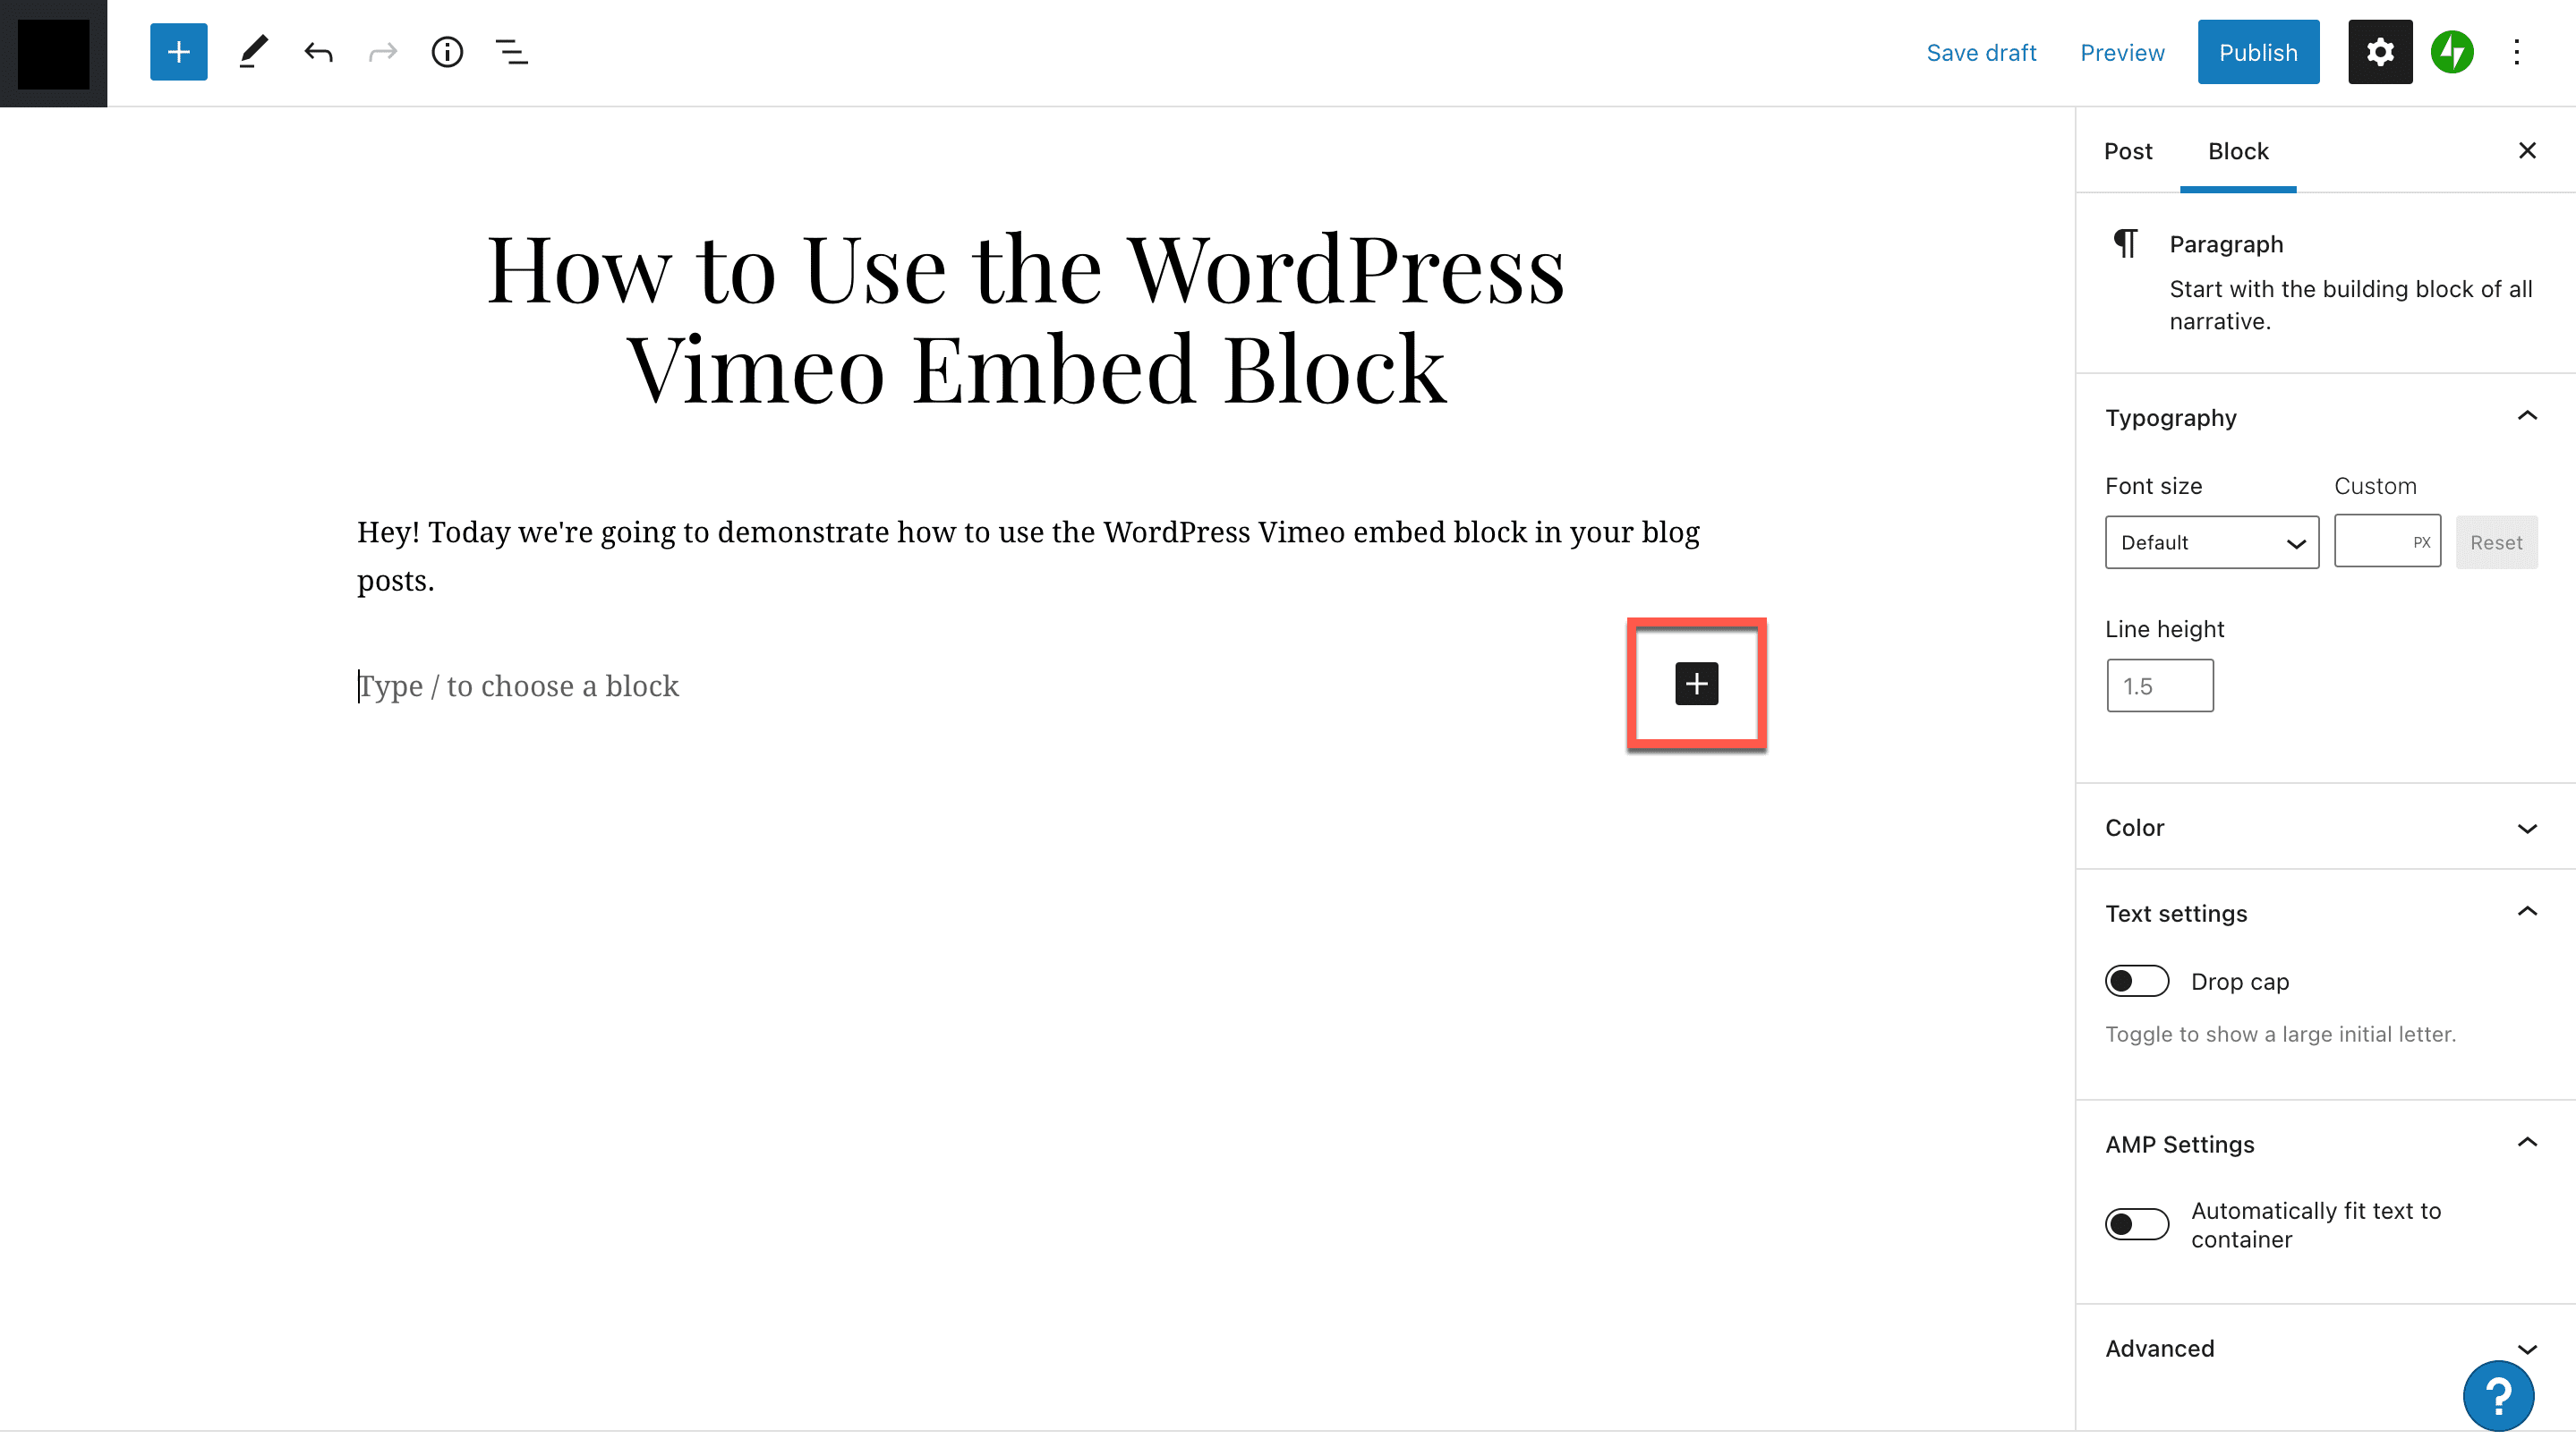
Create a new blog post on your WordPress site, and ensure it’s set to the Block Editor. Once you’ve added your title, you can create and type in a text block. When you’re ready to add the block that will contain your Vimeo embed, just click the black plus sign.
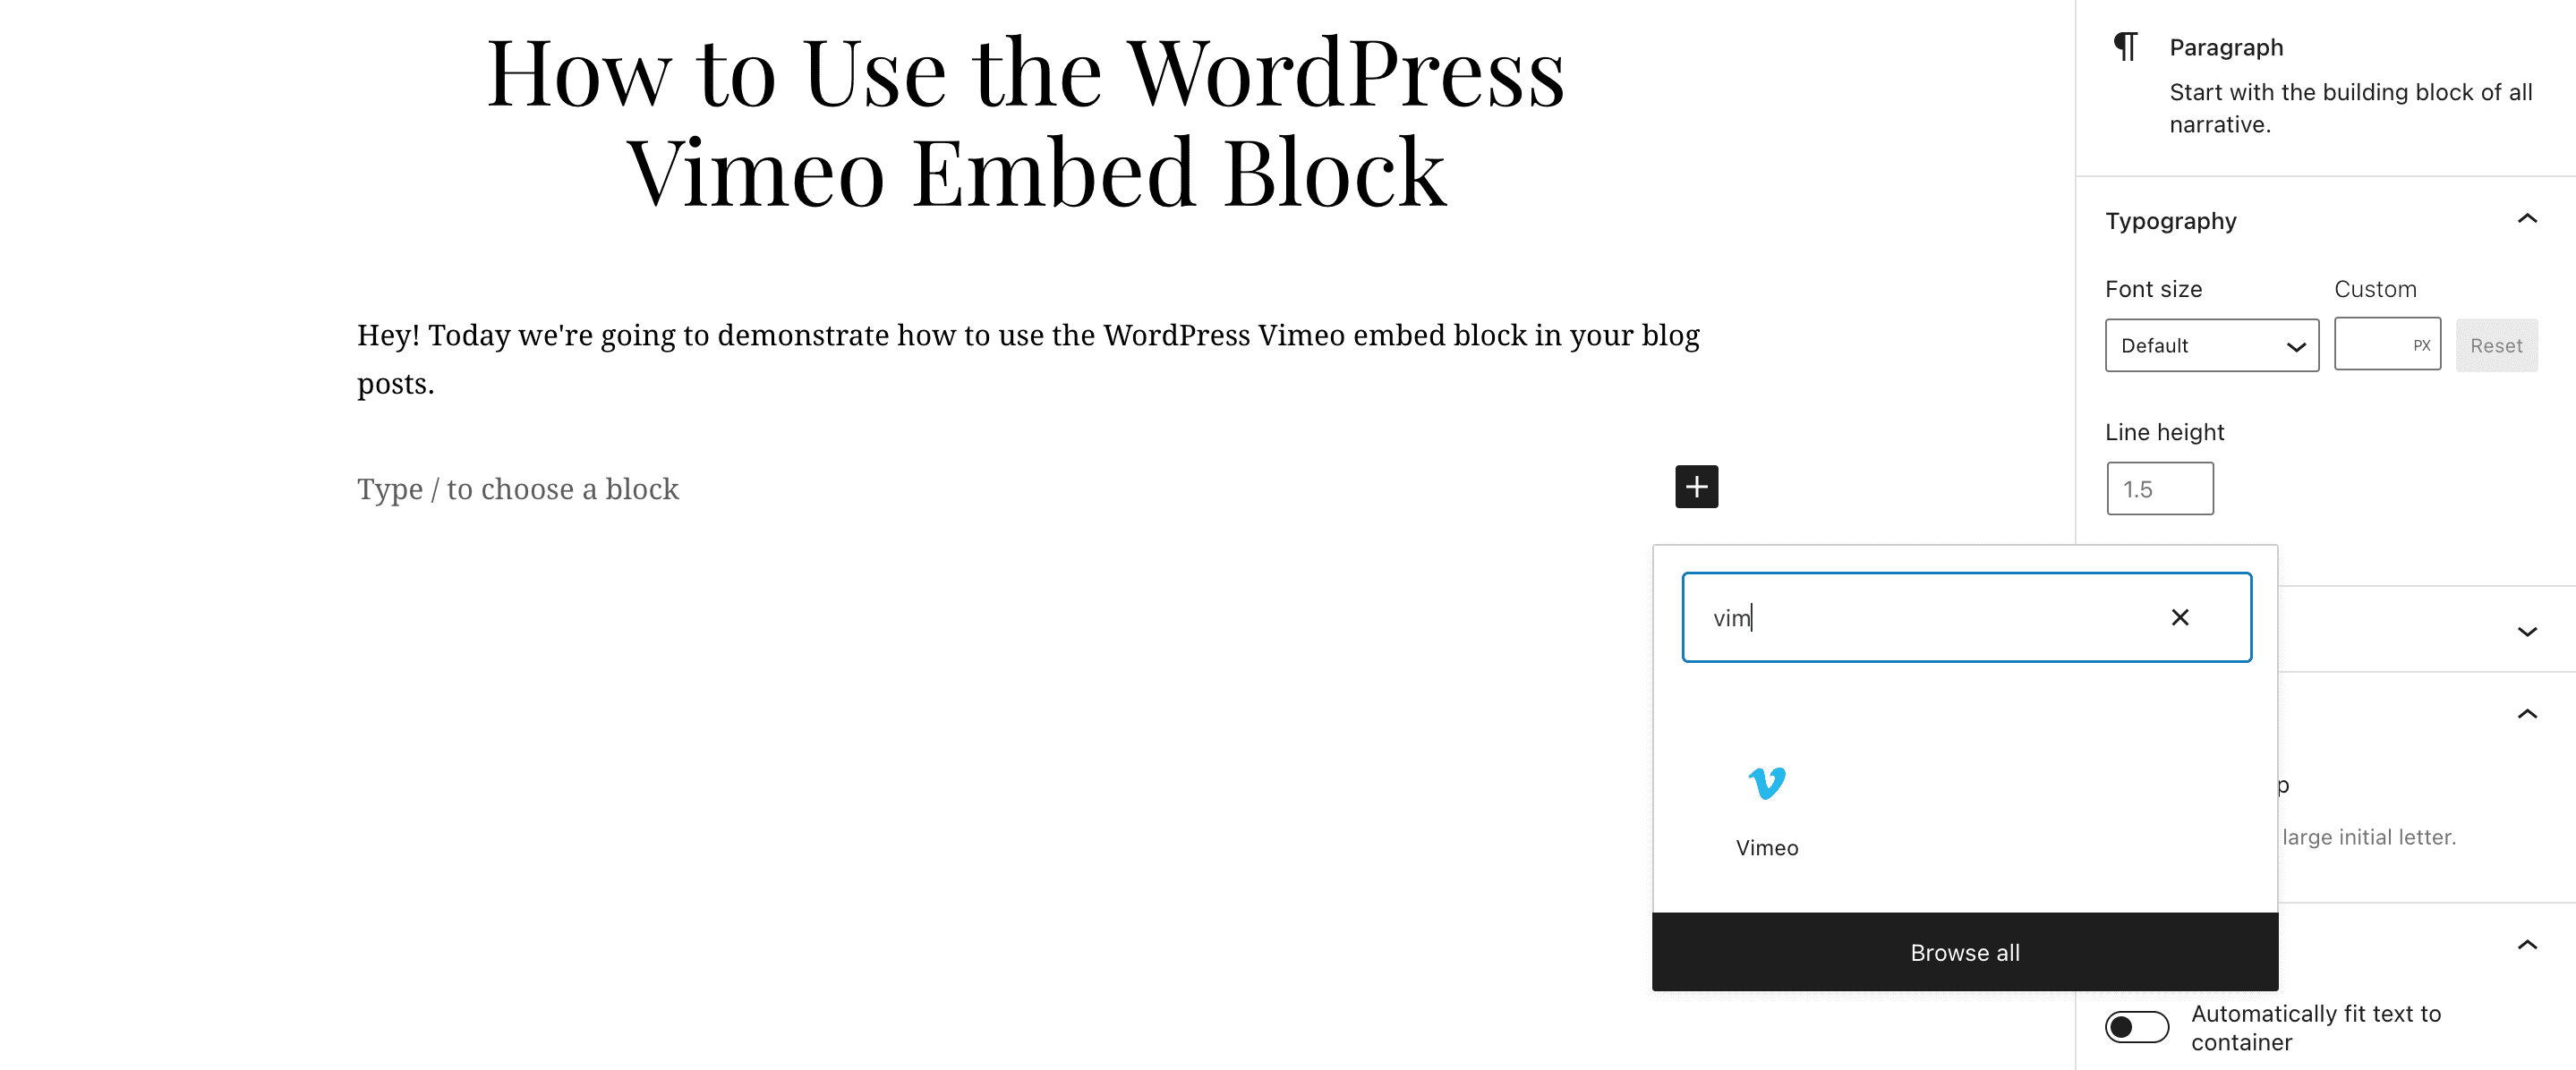
You’ll get a drop-down dialog where you can search for the tool you want to use. If you type “vim” in the search box, you’ll see the Vimeo icon displayed in the box. Click that to open the embed tool.
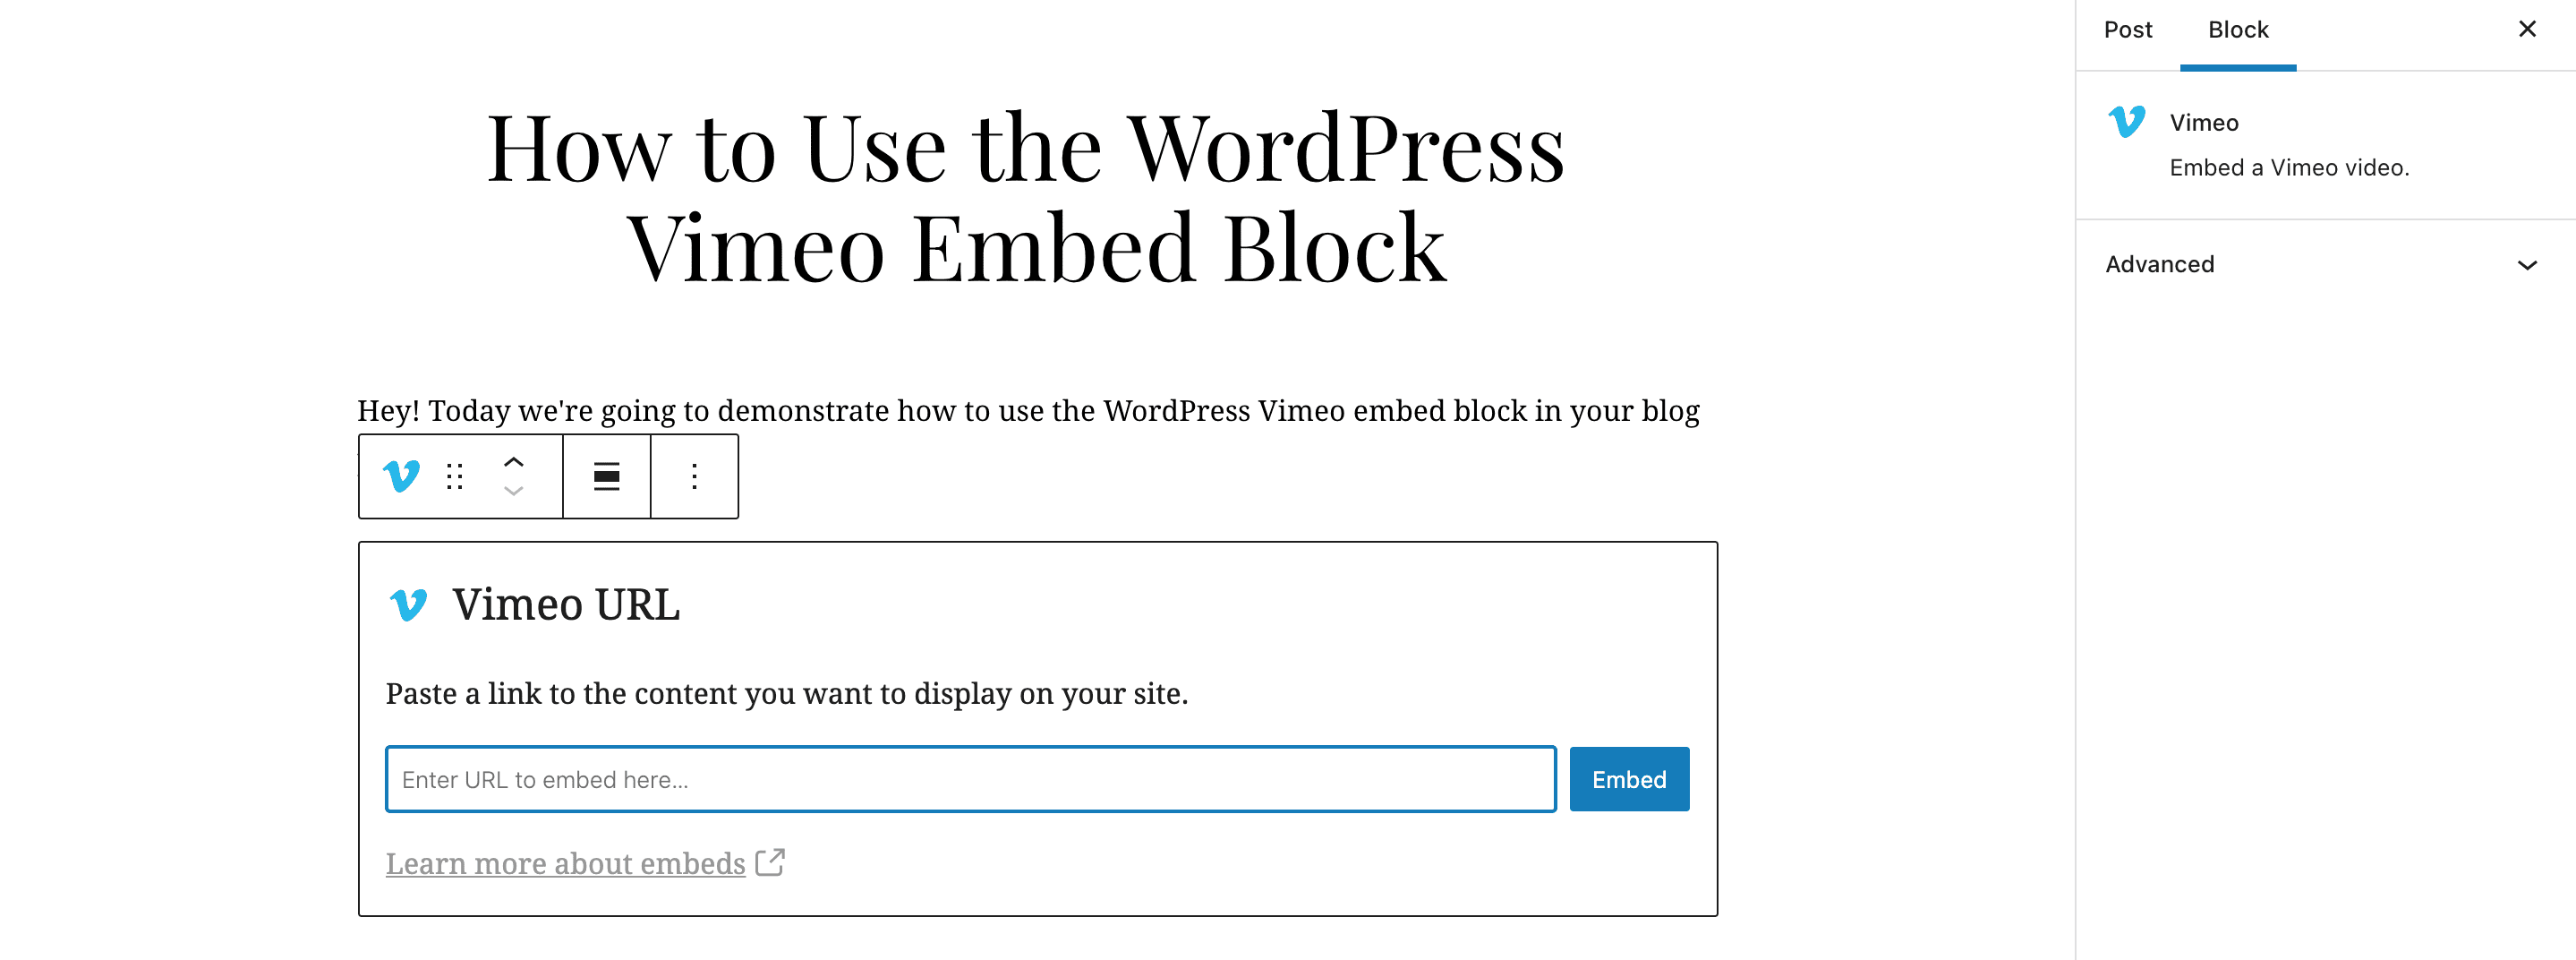
Next, the Vimeo embed tool will display on your screen. You’ll see a prompt to enter the Vimeo URL for the video you want to embed.
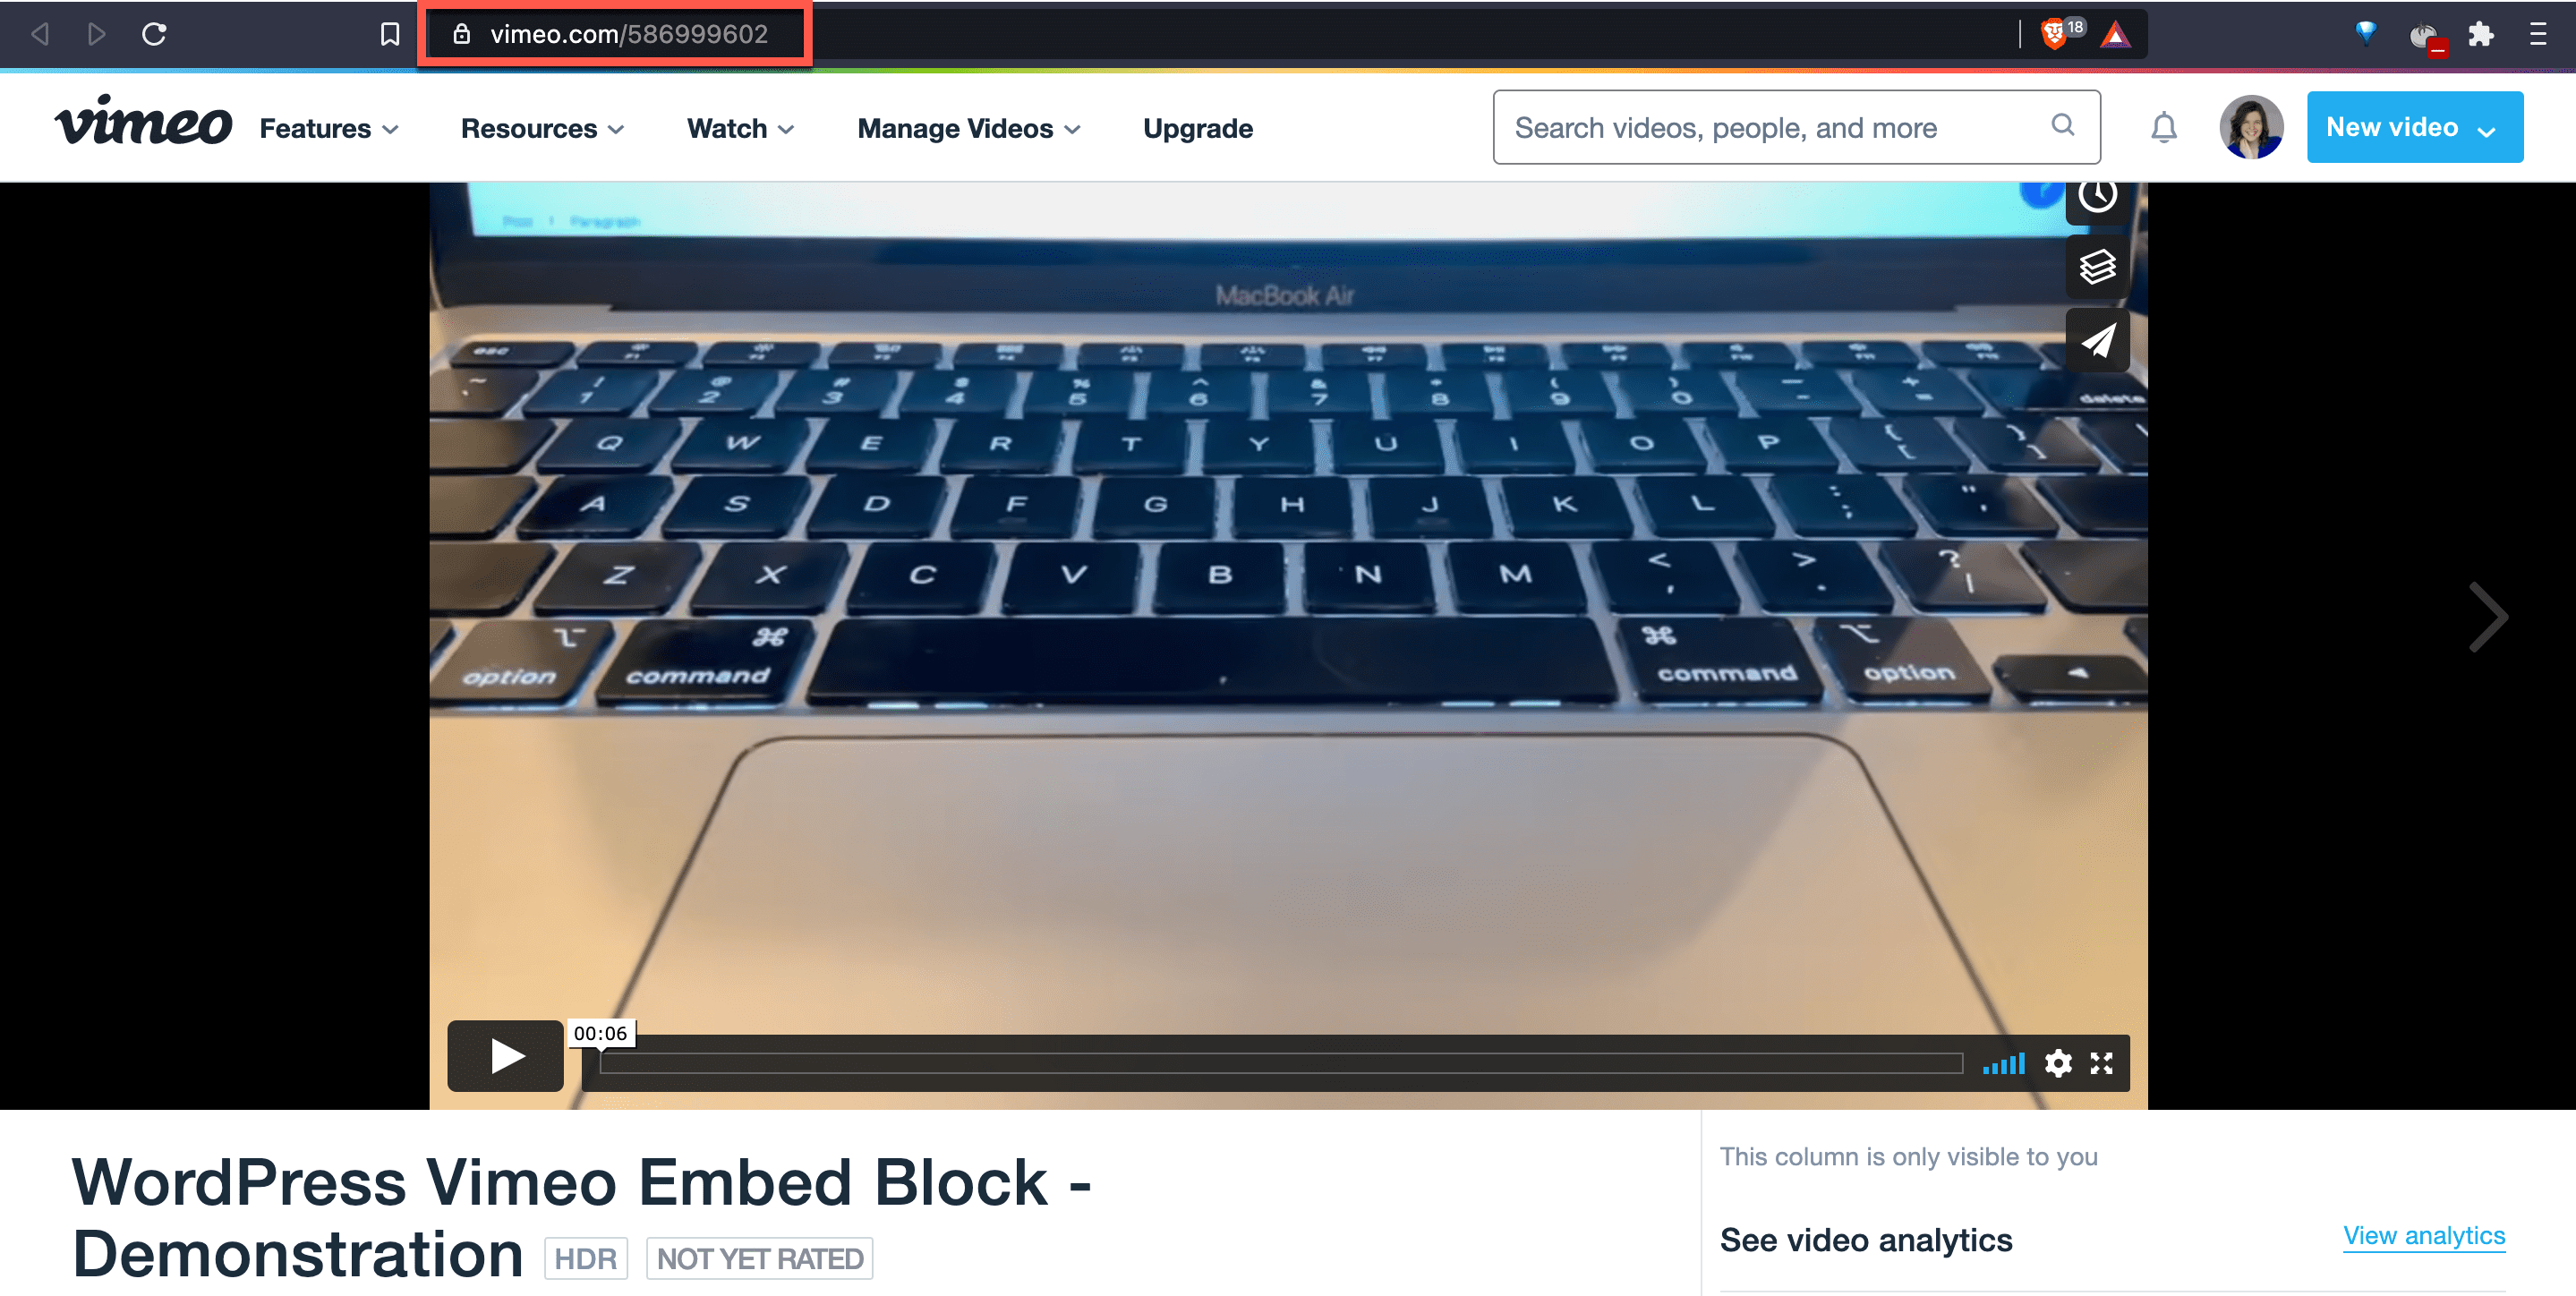
Now, navigate out to the Vimeo video you want to share on your site. Go up to the navigation bar, then highlight and copy the video URL.
Head back over to your WordPress tab and paste the Vimeo video URL into your Vimeo embed tool. Then, click the blue Embed button.
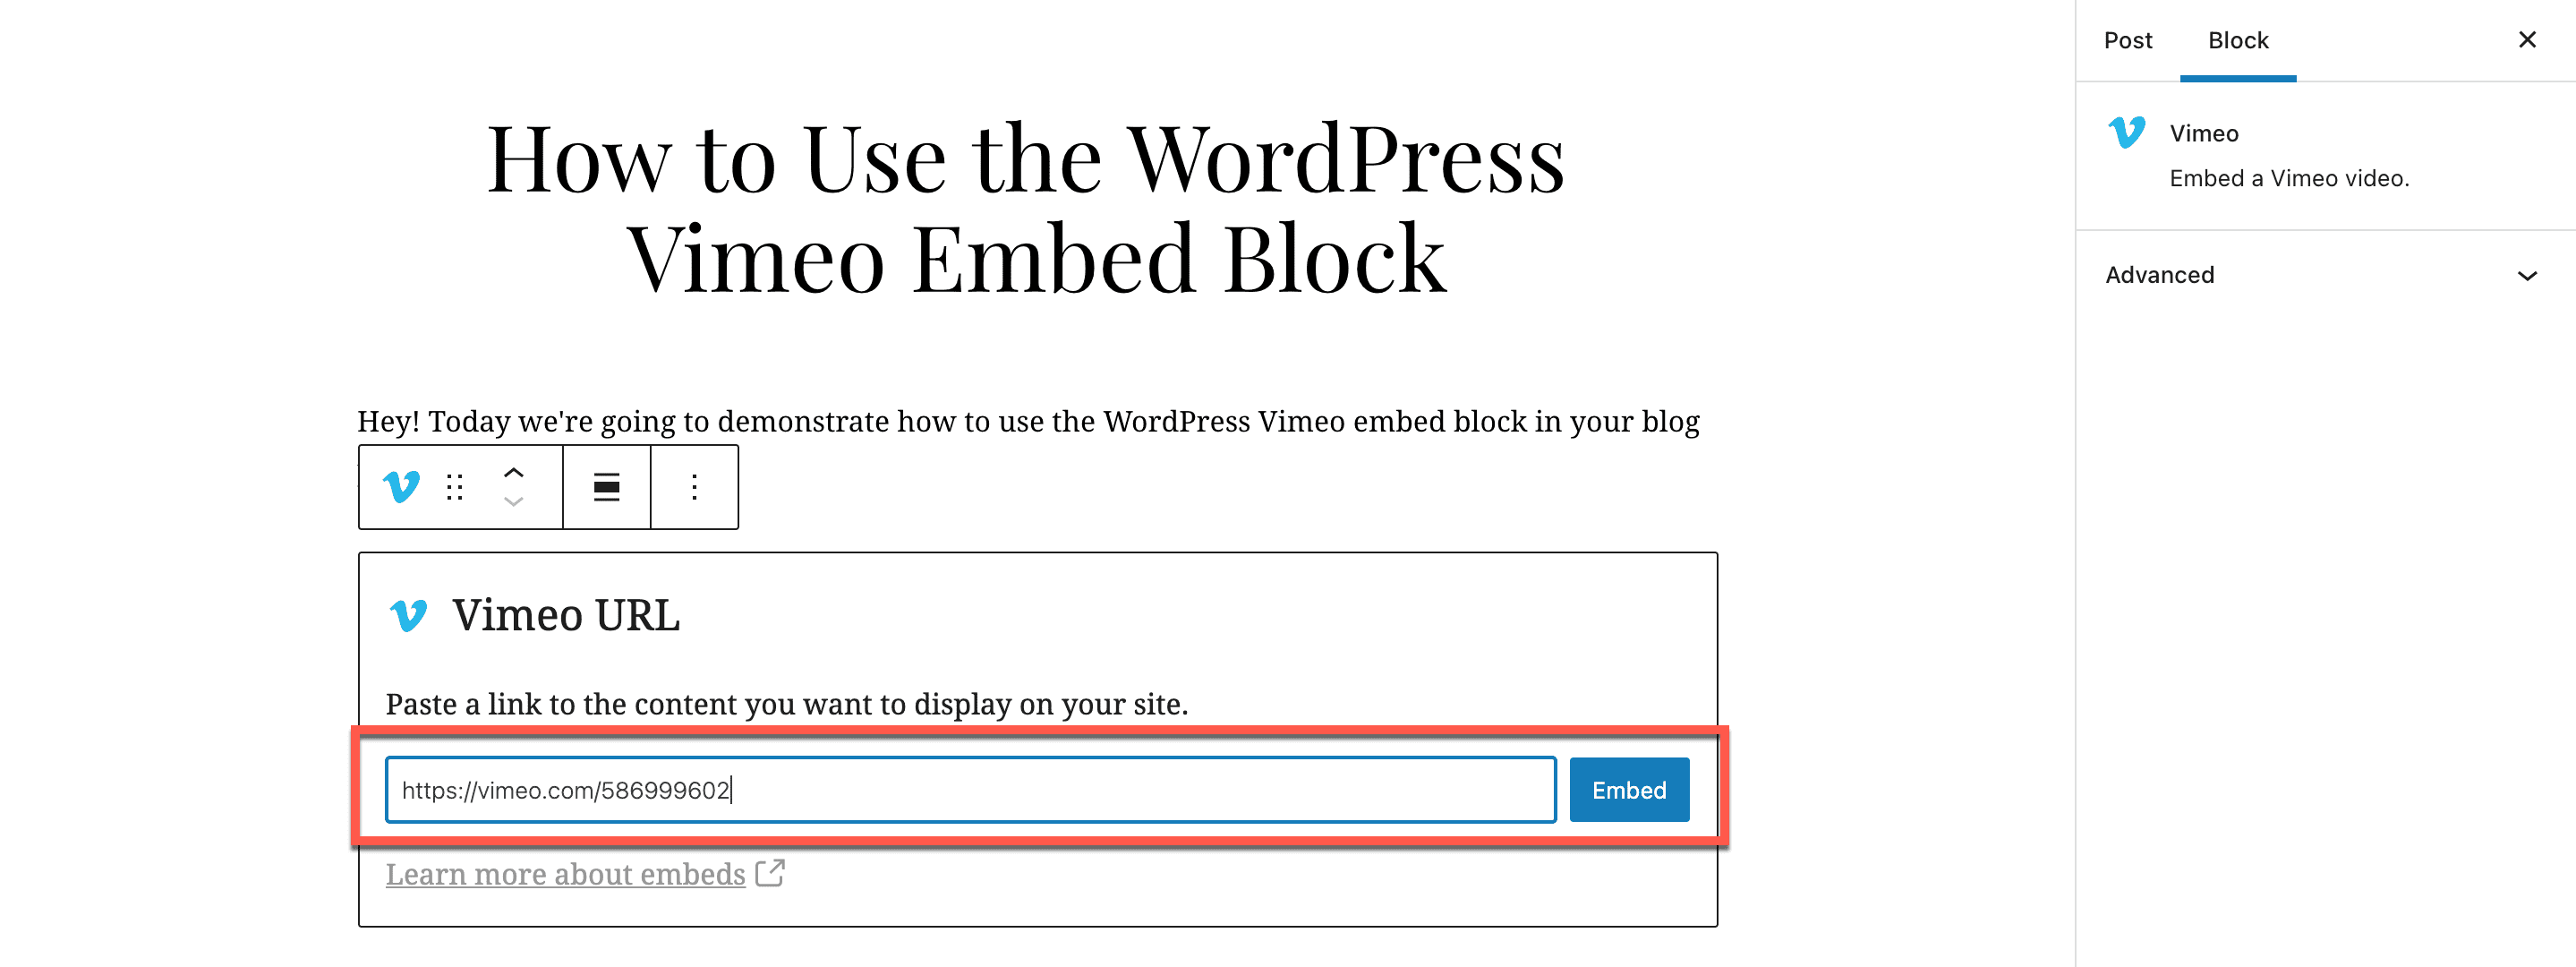
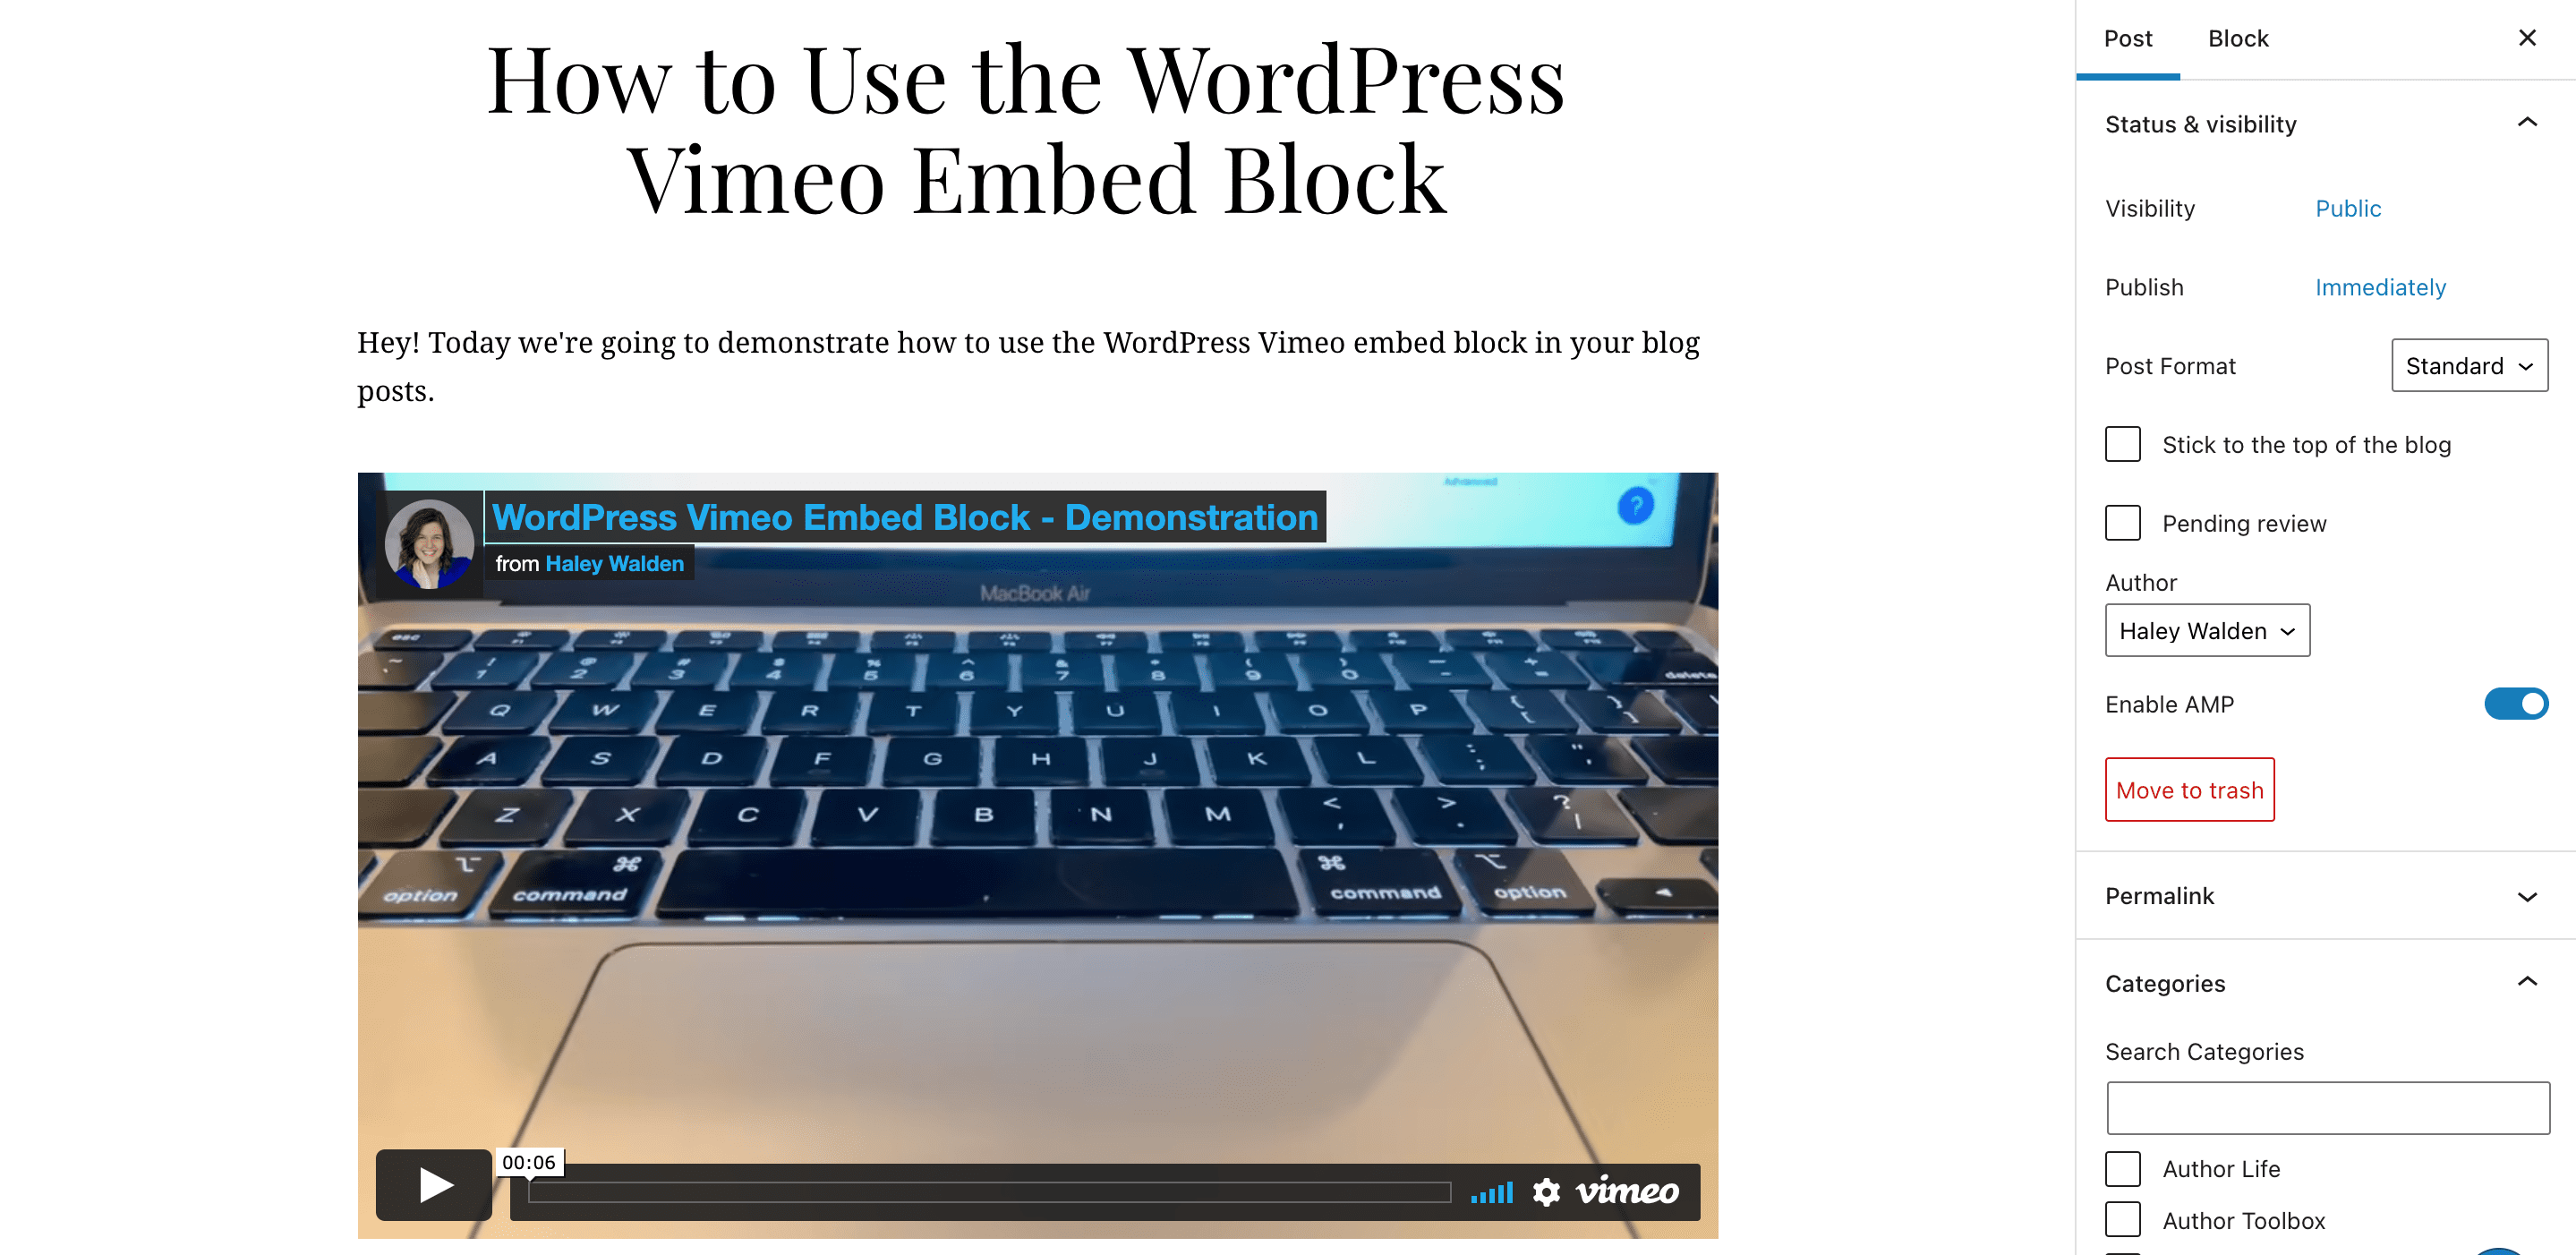
Once you’ve added your video URL, the Vimeo embed should show up on your screen. If, for some reason, the video cannot be embedded on your site, you’ll get an error message or the URL will appear in plain text. You then have the option of linking it in the text via the URL, if there’s not an alternative video you can include instead.
Optimizing Your Vimeo Embed
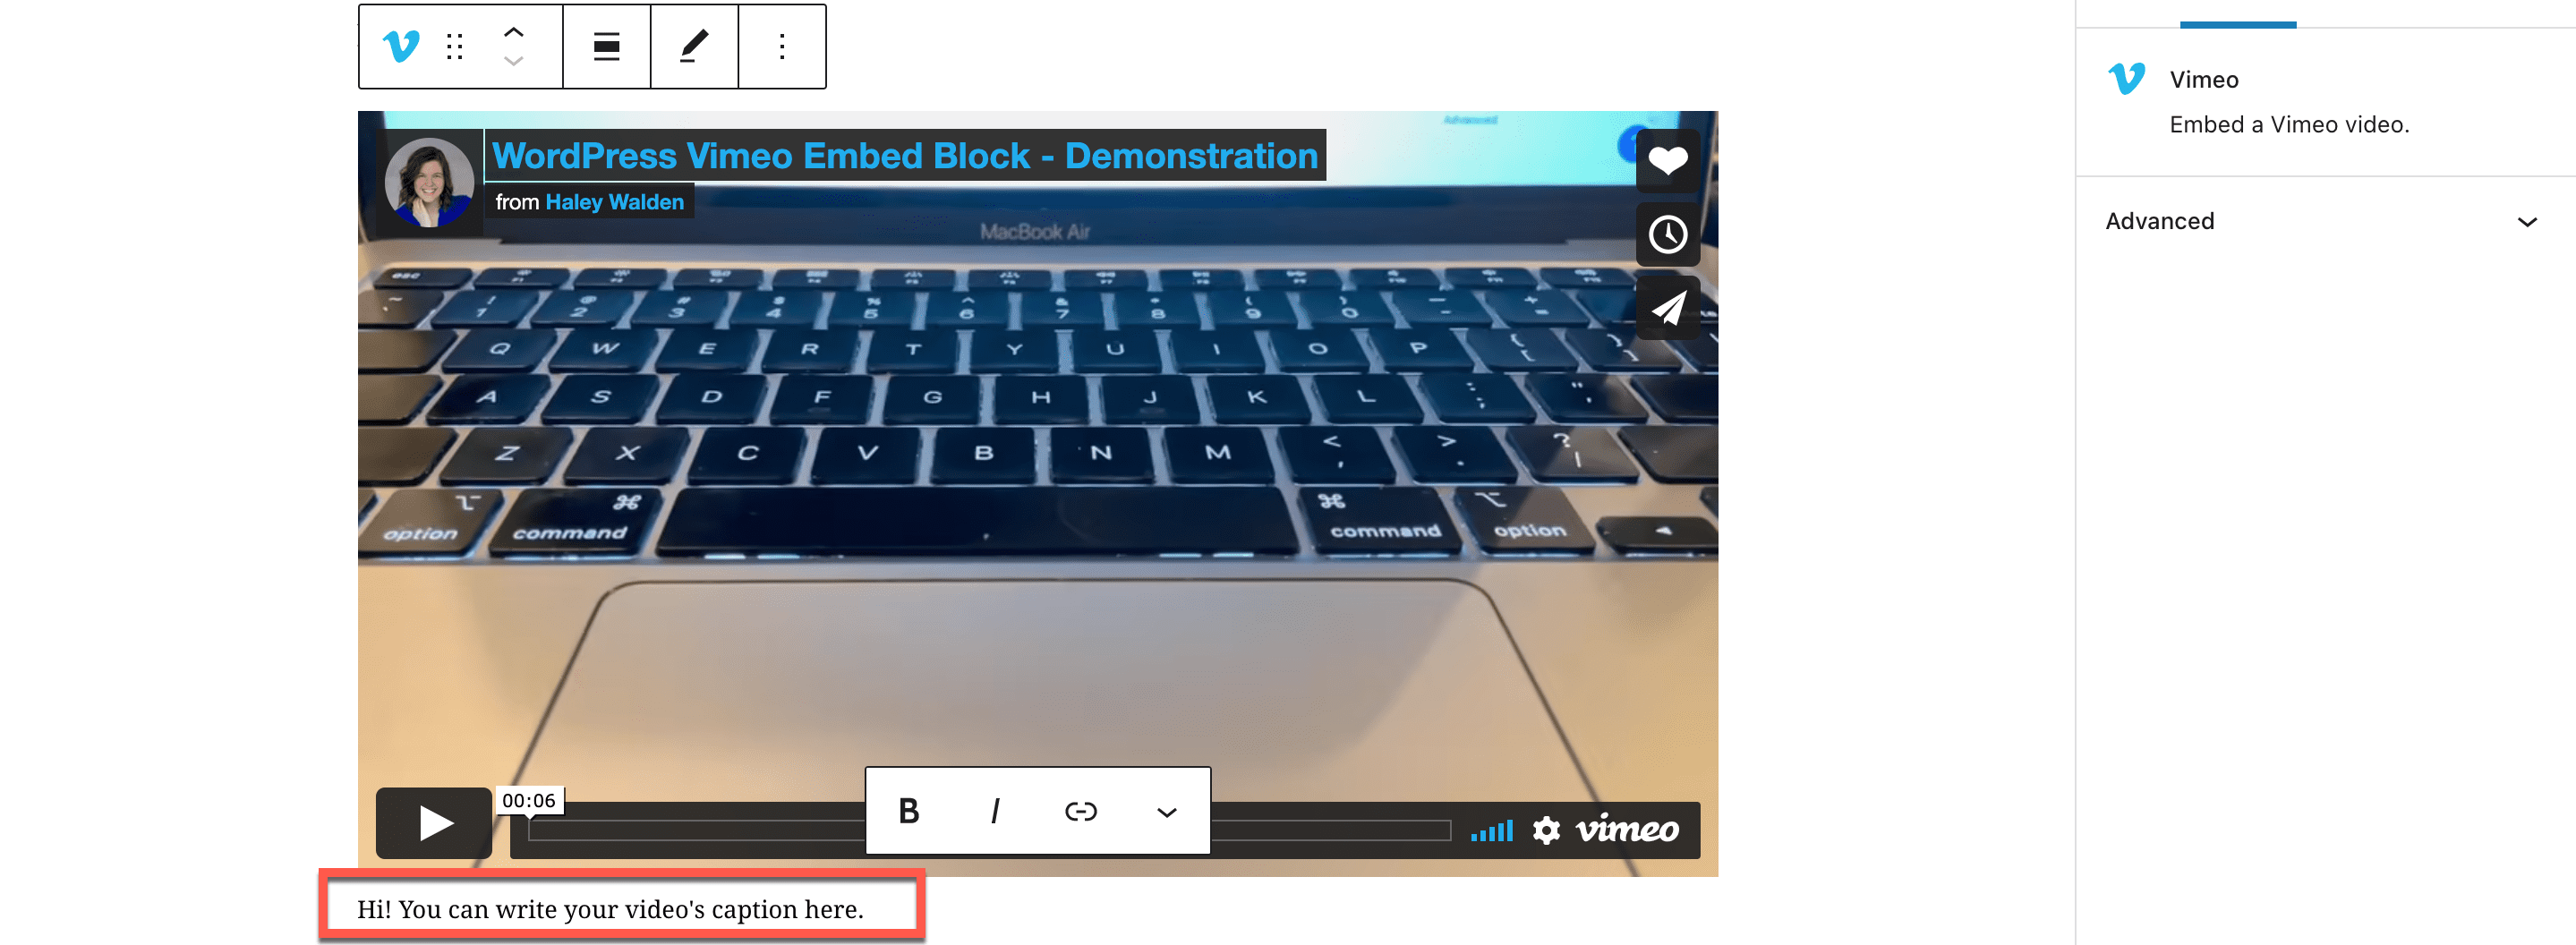
Click beneath your video preview. You’ll see a text box and the option to enter a caption that describes your video. Captions can add context to the content on your site, so use them when you can.
Now, hover over the toolbar at the top left of your Vimeo embed. You’ll see a list of icons and buttons.
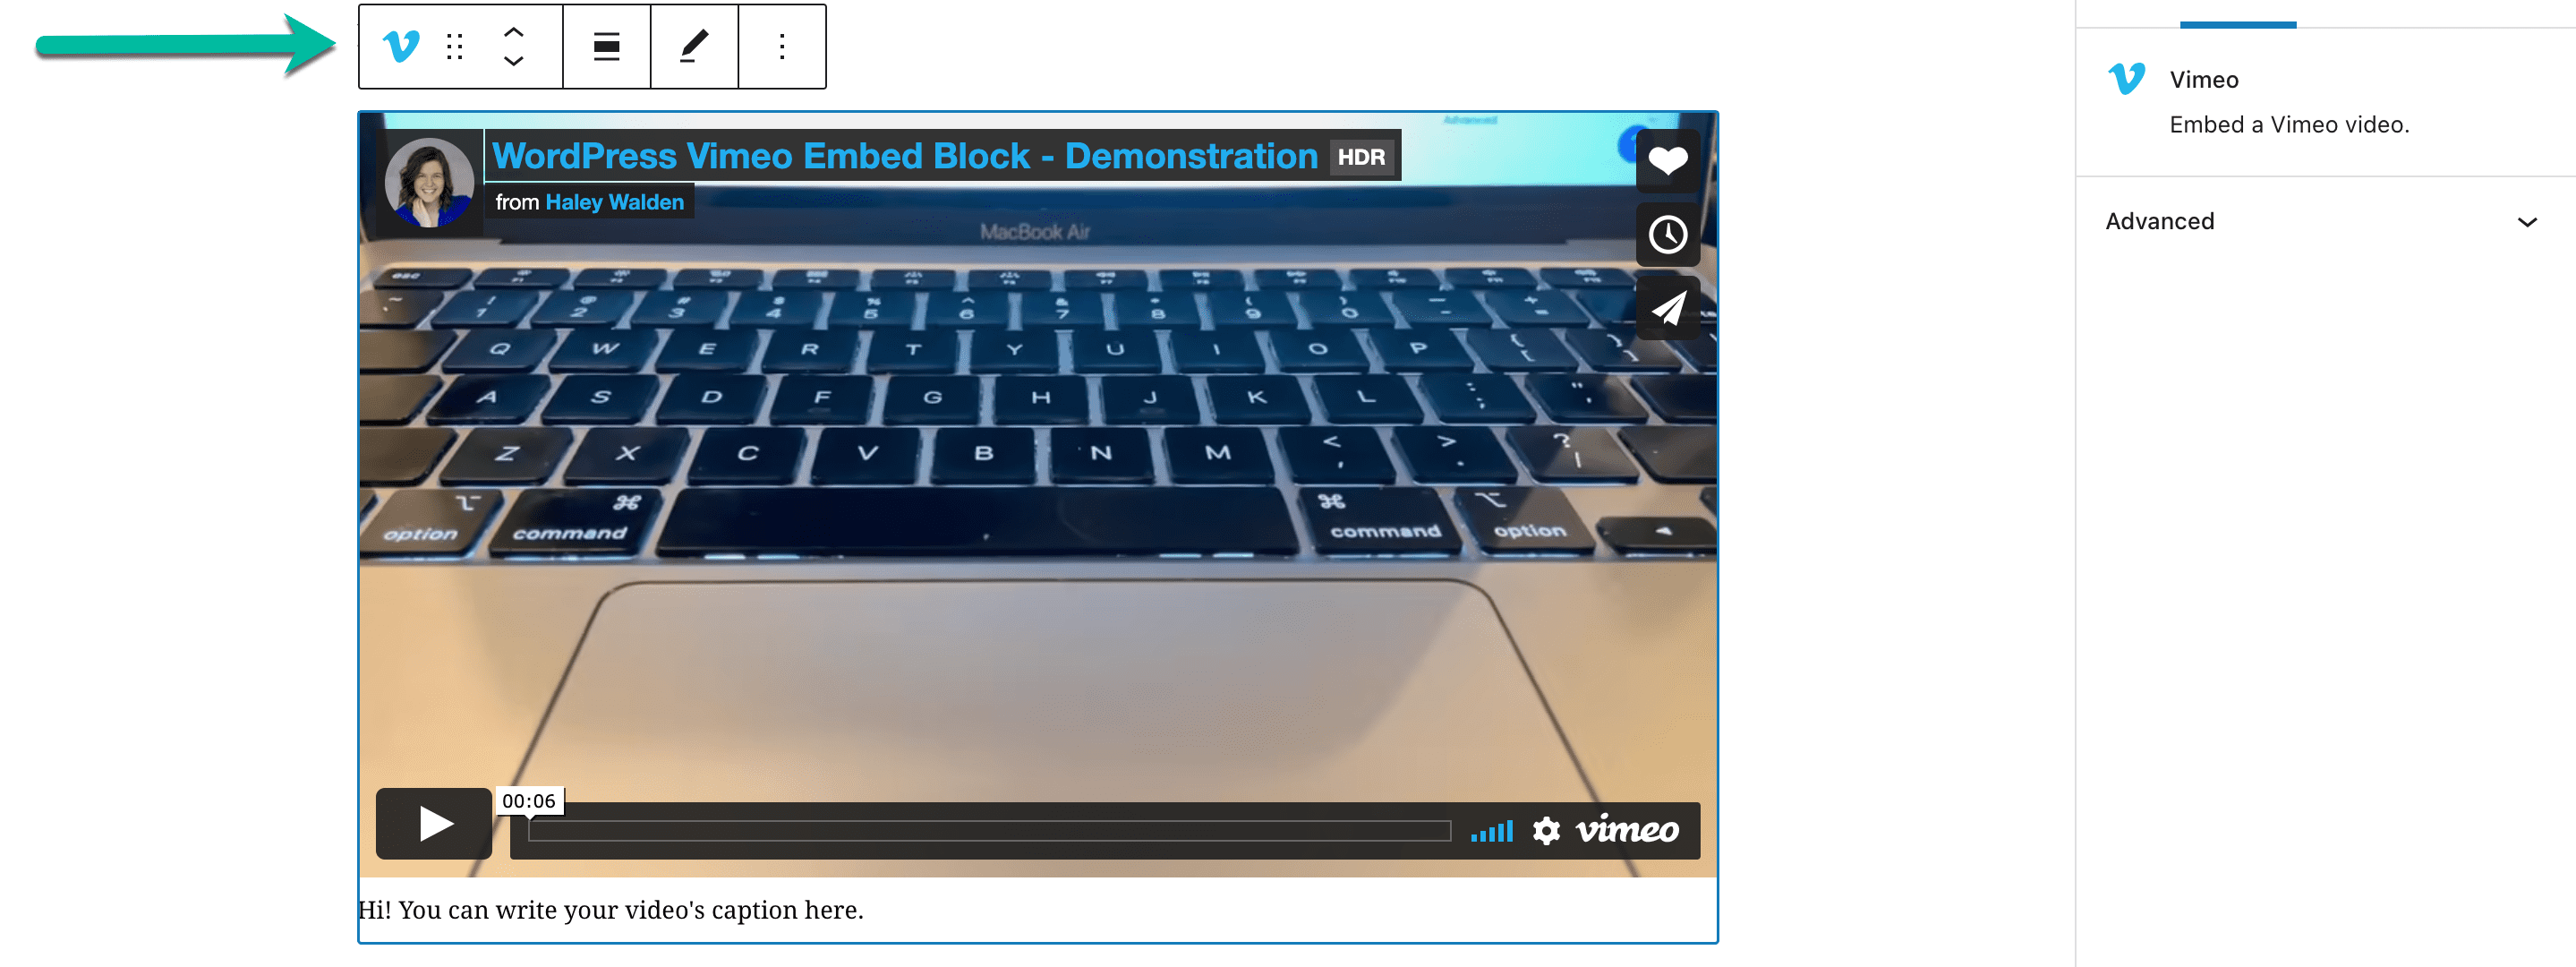
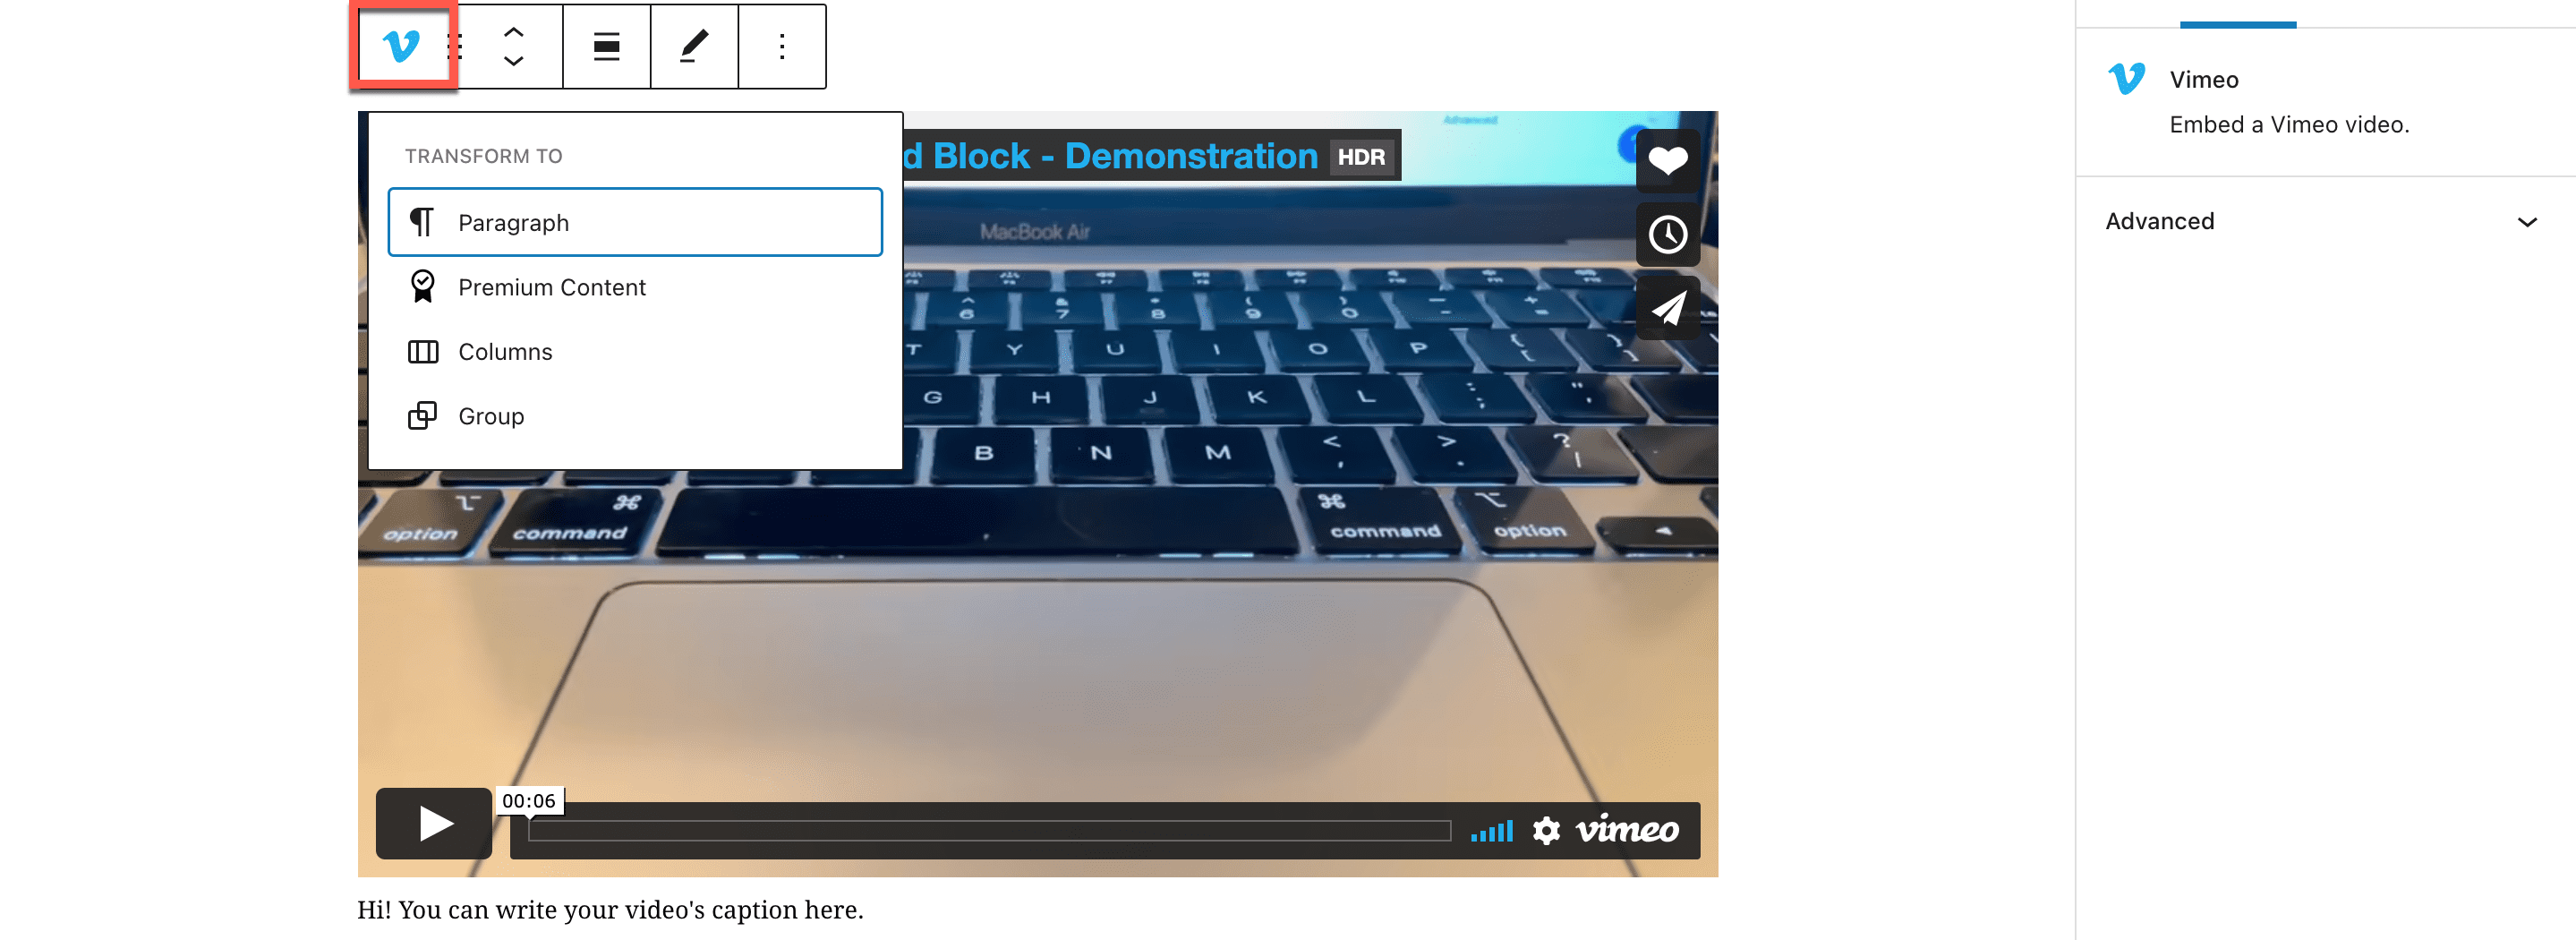
If you click the blue V on the left-hand side, you’ll see a drop-down menu of options for transforming your embed. You can transform a Vimeo embed into premium content, columns, or a group, depending on how you’re planning to arrange your post or page.
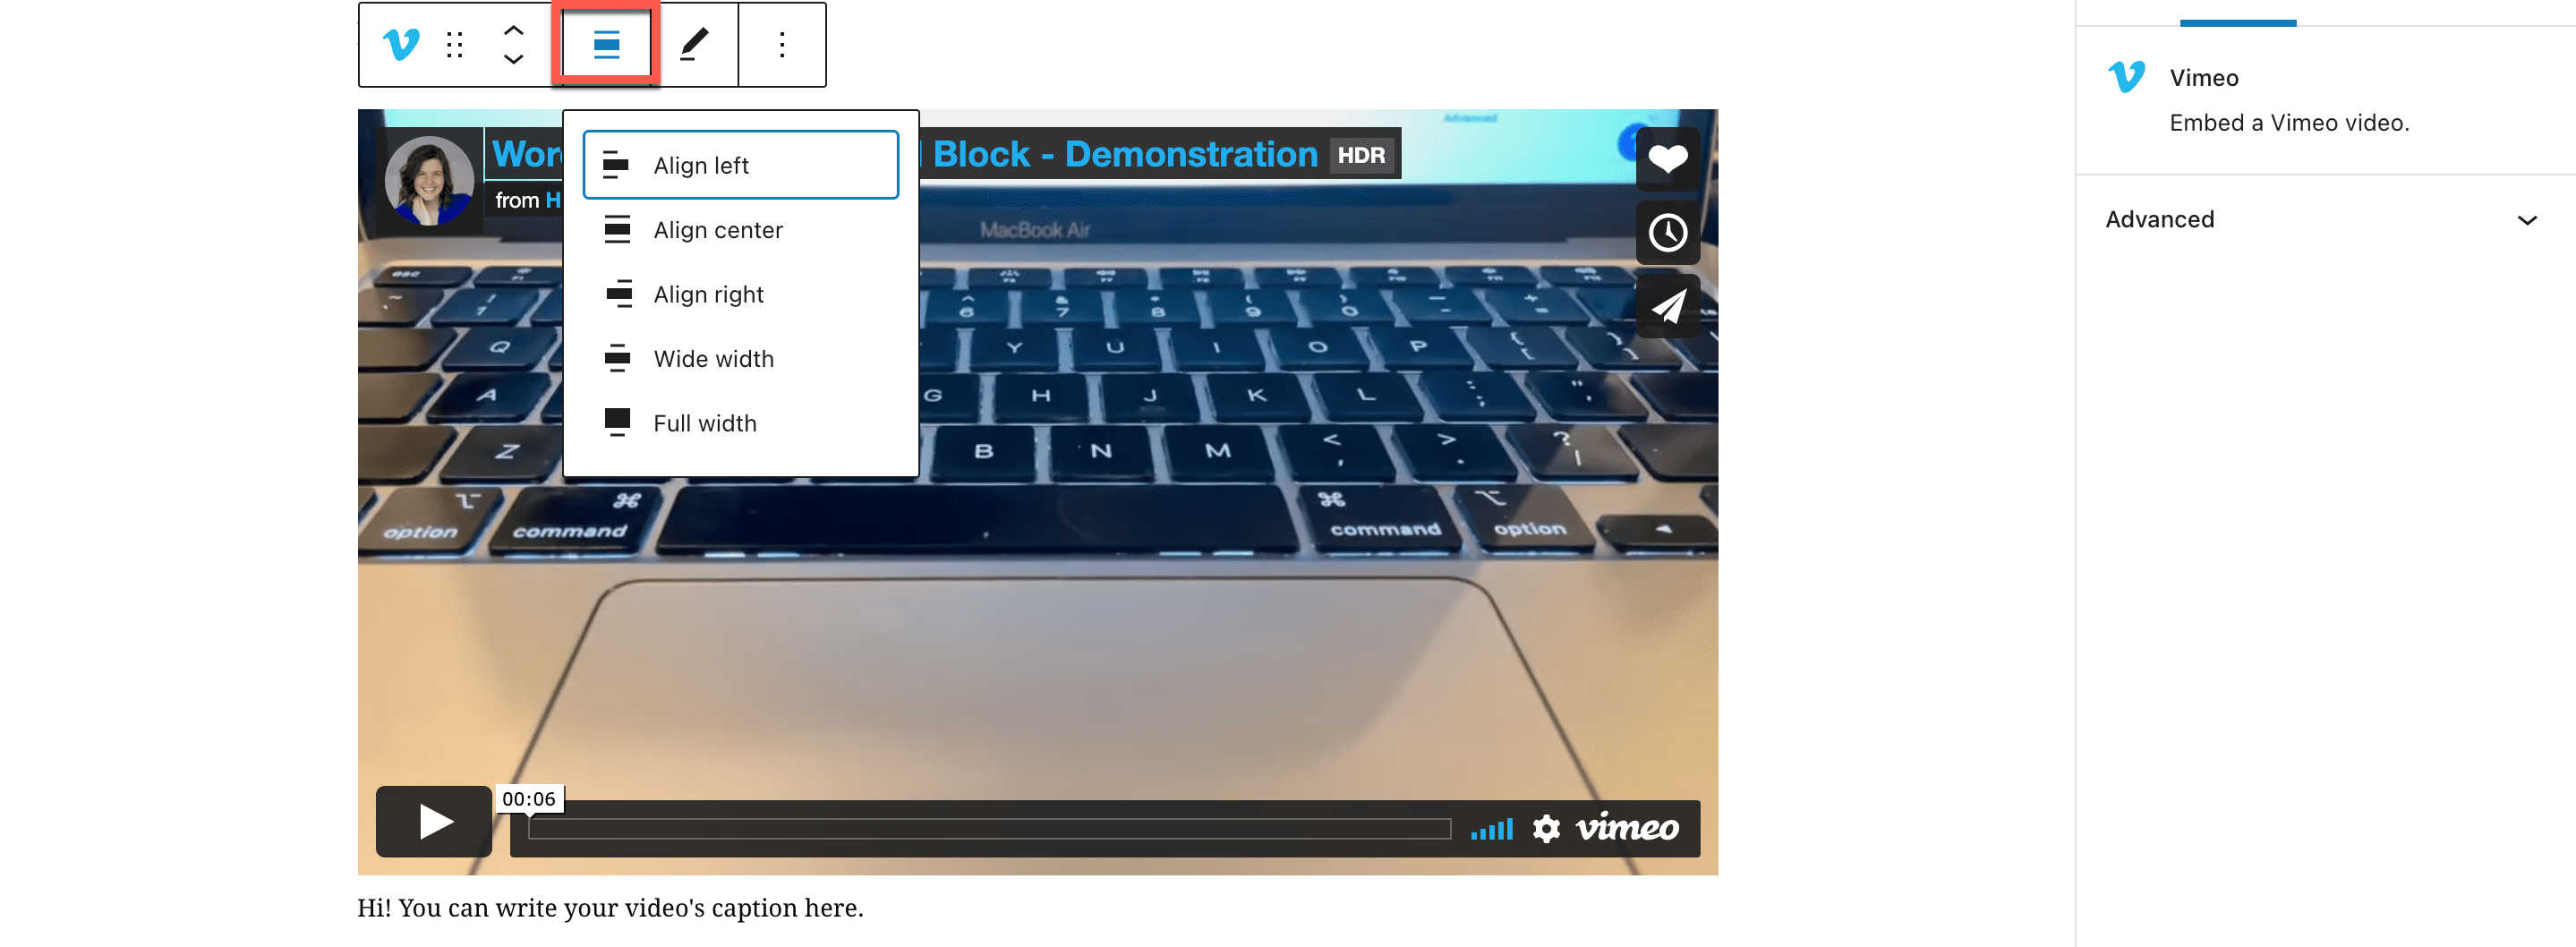
From the left, the next two options allow you to either drag the block or move it up and down within the page. When you click the alignment button, you’ll see options to align your video to the left, right, or center of the page. Alternatively, you’ll be able to display the Vimeo embed as wide width or full width.
The pen icon allows you to edit or change the video’s URL.
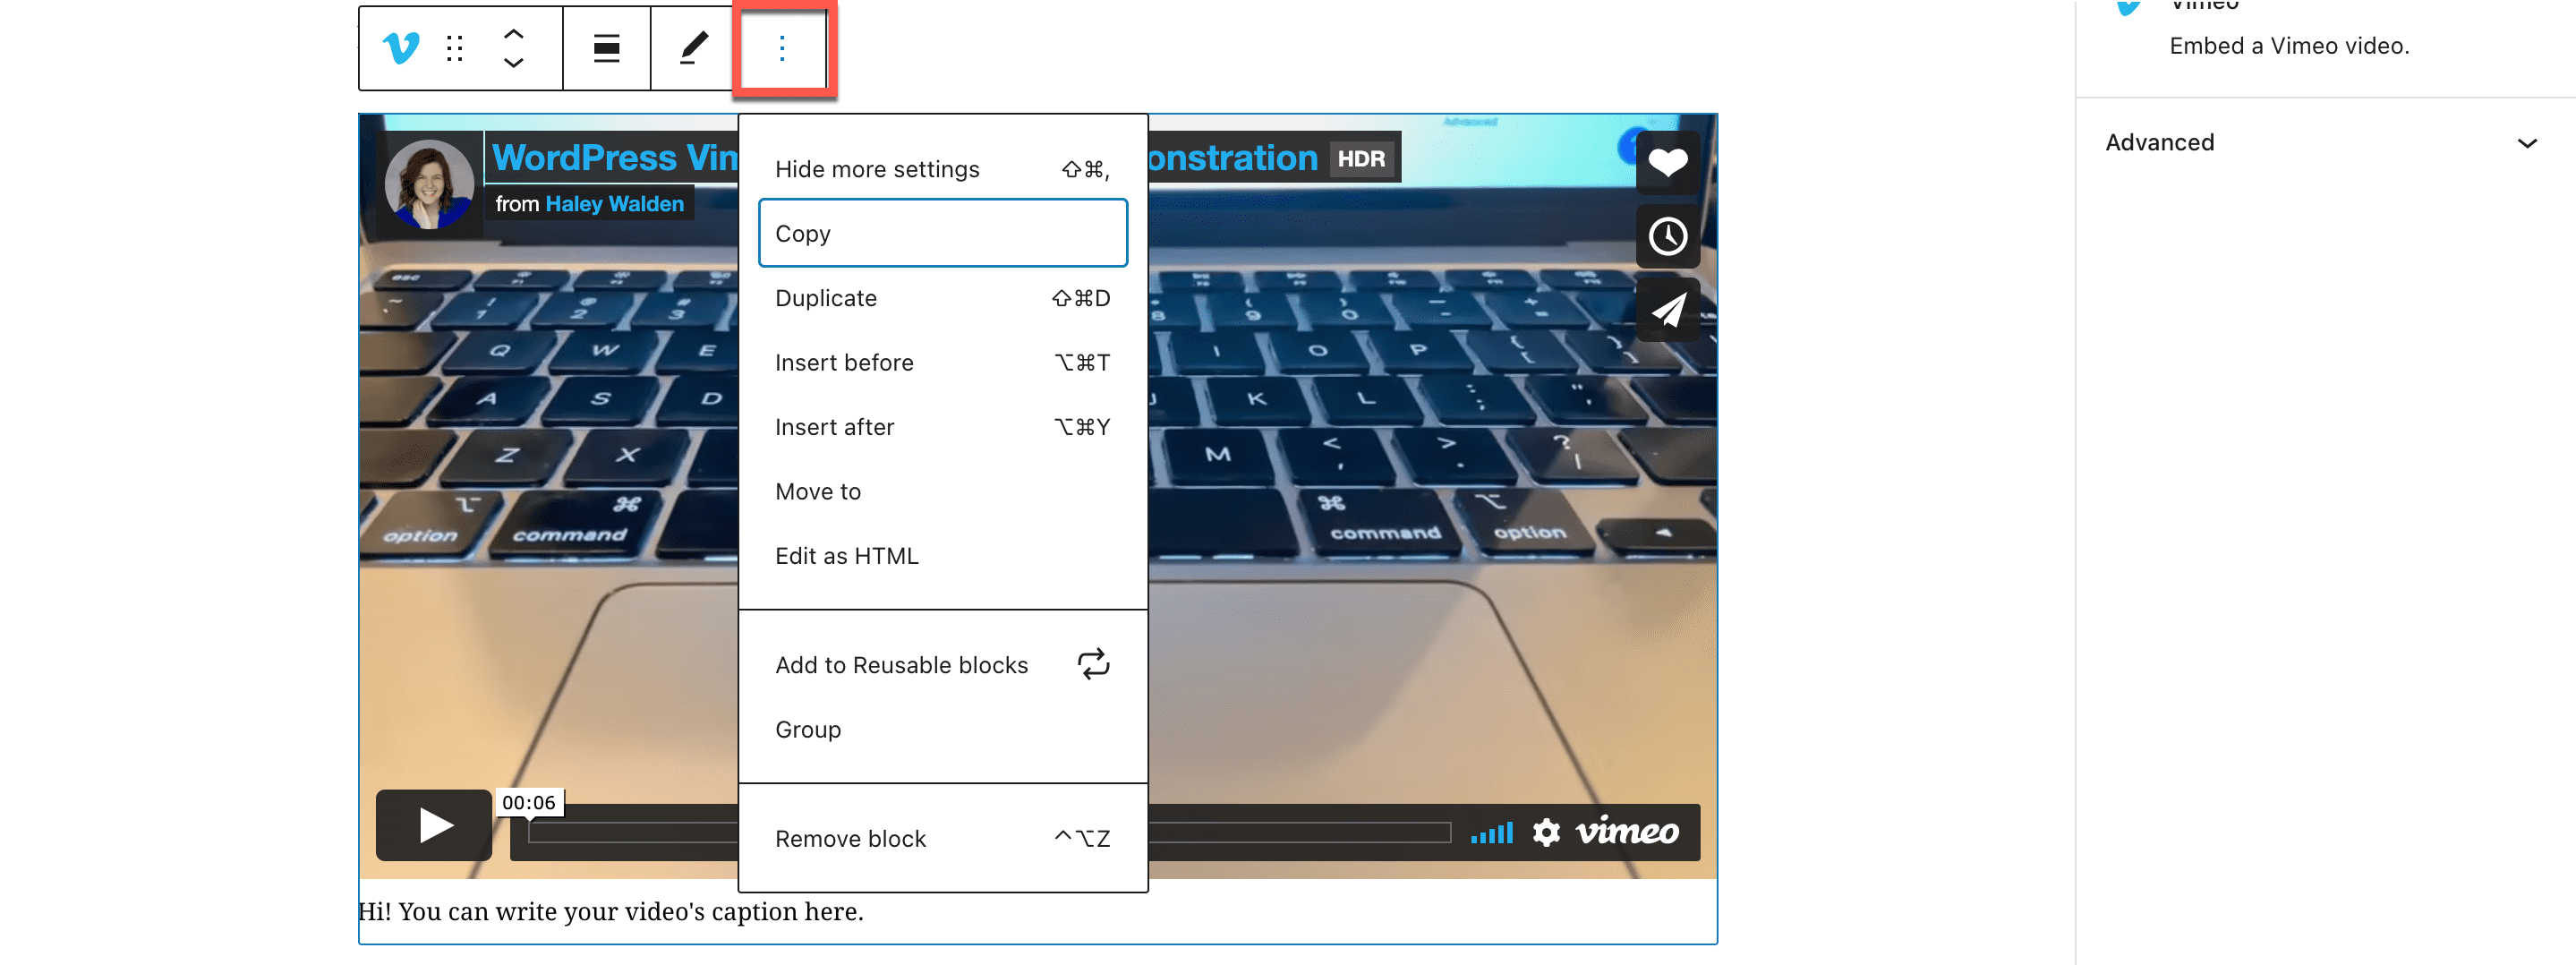
Finally, click the far right button on the Vimeo embed toolbar. You’ll see a list of block settings and options, including:
- Hide more settings
- Copy the block
- Duplicate the block
- Insert a block before or after the selected block
- Move the block
- Edit the block as HTML code
- Add to a list of reusable blocks
- Group
- Remove block
Adding Background Color To A Vimeo Embed Block
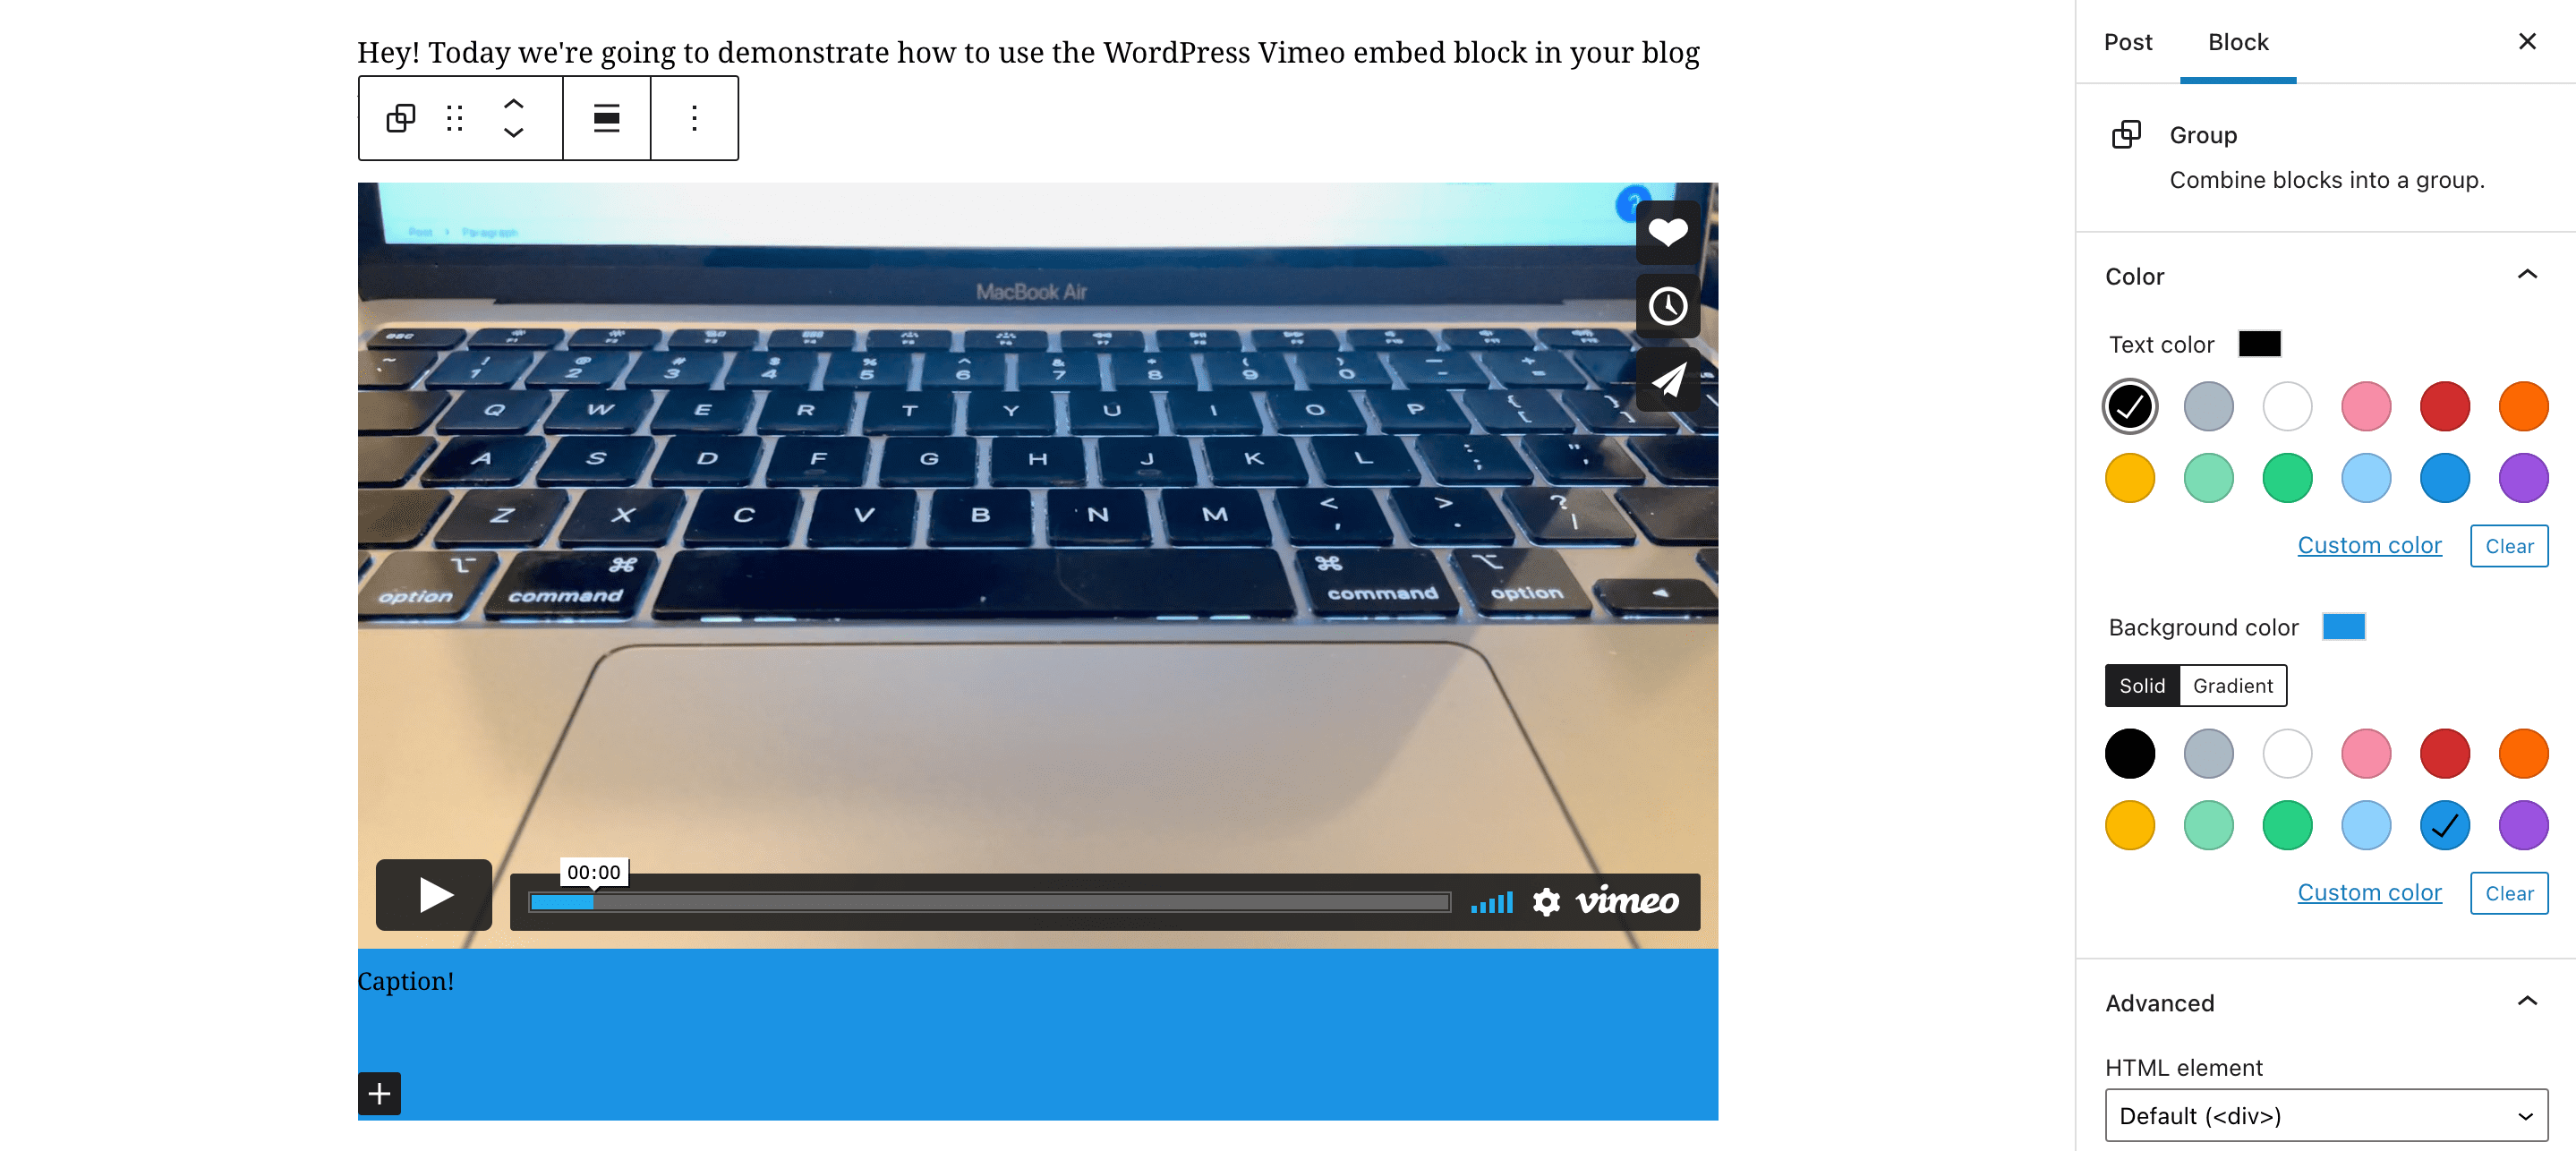
If you want to add a background color to a Vimeo embed block, it’s possible to do so by transforming the video embed into a group.
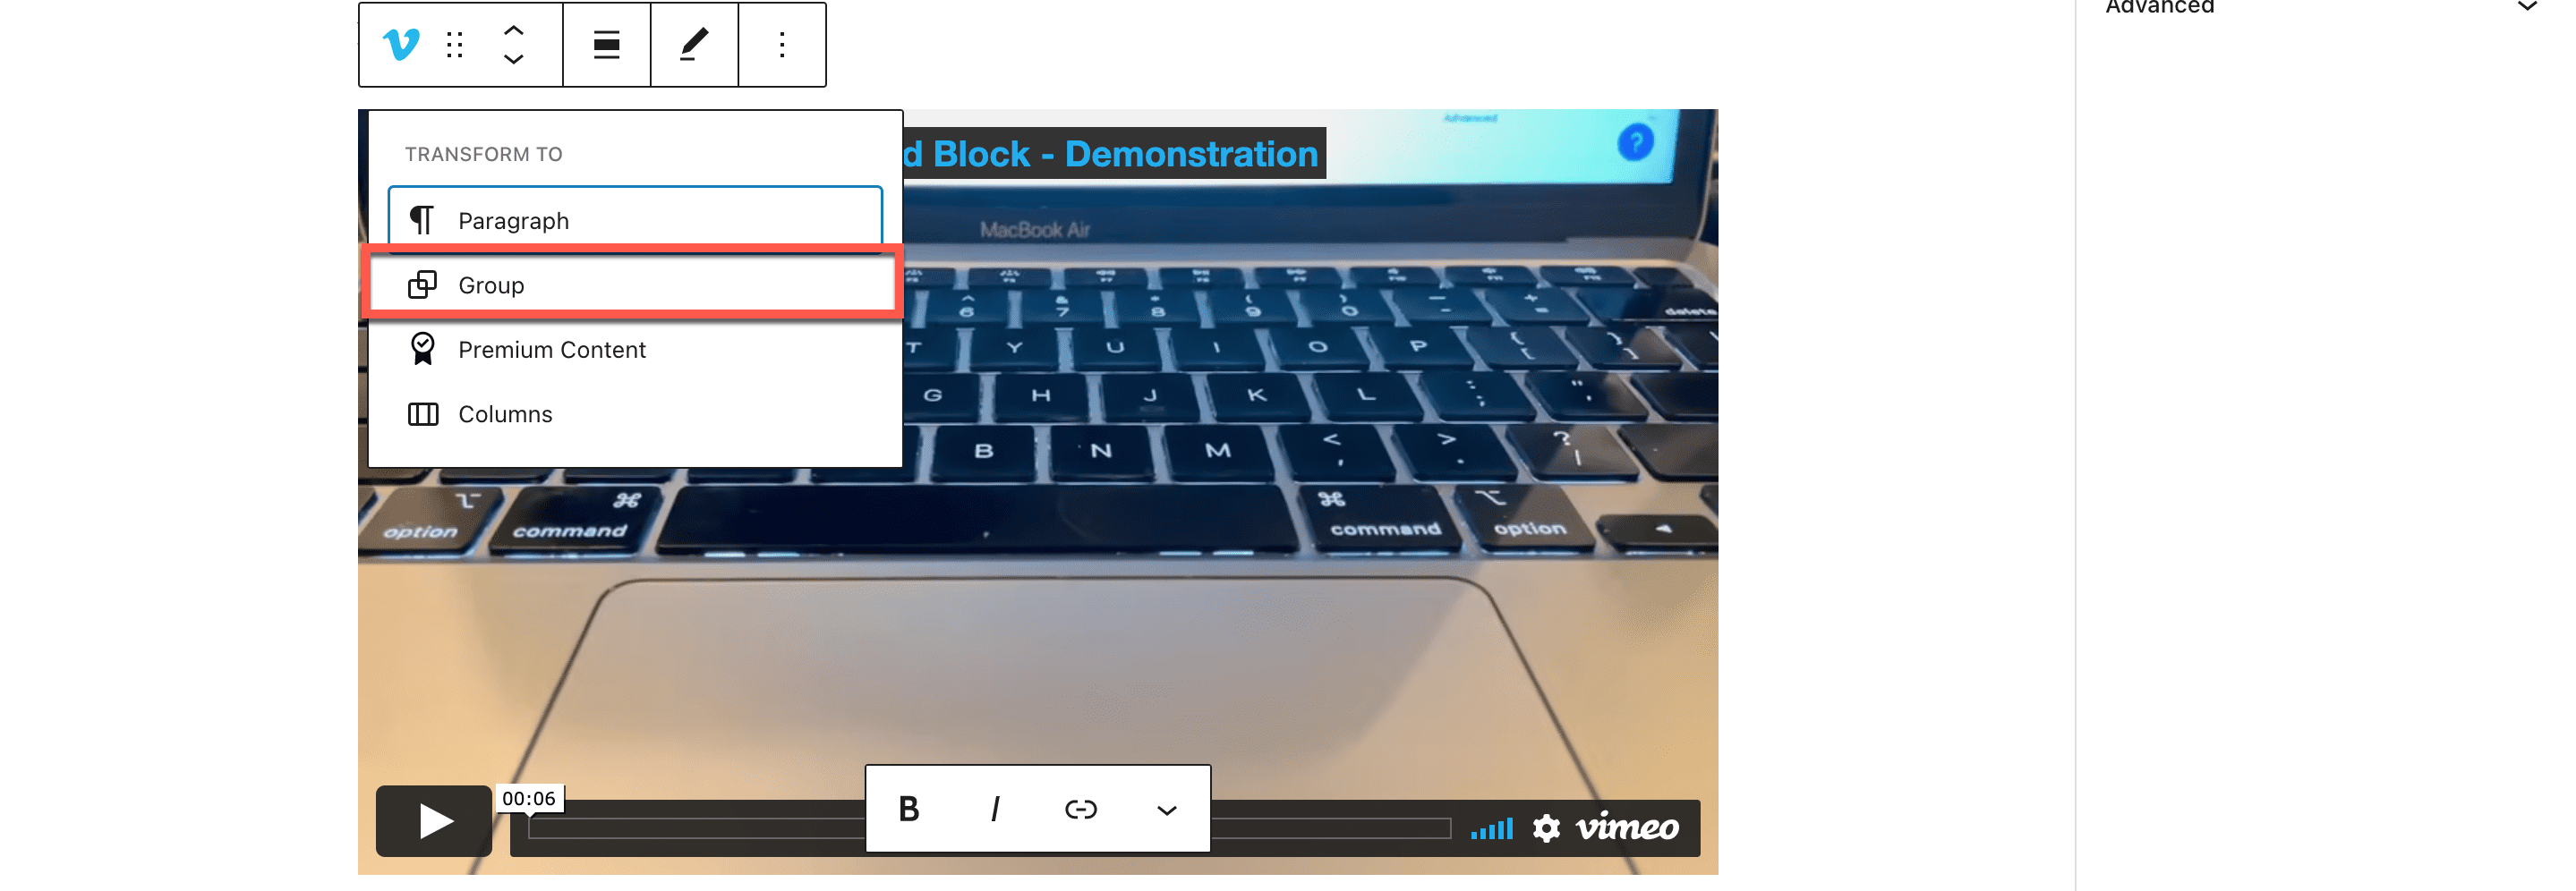
Once you’ve done so, you can click on the embed block to see a selection of colors on the right-hand side of the screen. For my example, I selected blue, and it appeared below the Vimeo embed, where the caption is.
Wrapping Up
Now that you know how to use the Vimeo embed block in WordPress, it’s time to start adding video to your content! Remember to follow standard best practices for sharing videos, paying extra attention to high quality video that’s easy to understand and view. Whenever possible, share accessible videos that include captions is ideal so more people in your audience can enjoy the content on your site.
Do you plan to share videos on your blog or website? Would you prefer to use YouTube or Vimeo embeds? Why or why not? Comment below to share your thoughts.
Featured Image via ST.art / shutterstock.com



Leave A Reply