Adding live chat functionality to your WordPress website is easy and quite beneficial. Live chat has evolved considerably in recent years by incorporating powerful communication and automation features found in popular AI chatbots. Whether you’re looking to boost sales conversions or integrate AI into your customer service process, using a live chat plugin or software on your WordPress site can be crucial to success. In this guide, we’ll show you the benefits of live chat, walk you through how to add live chat to your website, and look at the options available for live chat and WordPress.
Benefits of Using a WordPress Live Chat Feature on Your Website
Many rewards come with using live chat functionality on your website. Here are a few examples of what they can allow you to do:
- Interact With Your Customers in Real-time – As the name implies, live chat takes place in real-time. Therefore, you can meet the needs of customers and visitors to your website as they come to your site. Your storefront may have set hours, and your phone line limited hours, but you can serve your customers at any time when they interact with your live chat.
- Provide High-Quality 24/7 Support to Visitors to Your Website – If someone lands on your website after hours, your live chat can still service them. You can give your customers the help they need without getting out of bed through AI and automated responses.
- Increase Conversions and Add Leads to Your Sales Funnel – Many live chat plugins allow you to add forms and collect information about customers who use the chat. To nurture later, you can retarget and add these customers’ information to your CRM, mailing list, or sales funnel.
- Powerful AI Features for Various Automated Solutions – With the advancement of AI, some live chat solutions provide much deeper functionality and can help you create automated human-like conversations for a better customer experience.
I’m sure you get to experience other benefits of live chat first-hand once you add it to your site. On that note, let’s get to it!
How to Add Live Chat to Your WordPress Website
Subscribe To Our Youtube Channel
Now that we’ve seen some of the benefits of live chat, let’s look at how we can bring this feature to your WordPress website.
1. Choose a Live Chat Platform
If you’re unsure which platform to use, check out our list of the best live chat plugins. There, you’ll find several plugins that could meet your specific needs. We’ll use the Tidio platform for this walkthrough, as it has a good mixture of features, support, and positive reviews.
2. Create a Tidio account
We must create an account before we add our Tidio live chat to our website. Visit Tidio and create your account by entering your email, website, and password.
Once you have created and verified your account, you’ll see the Tidio dashboard.
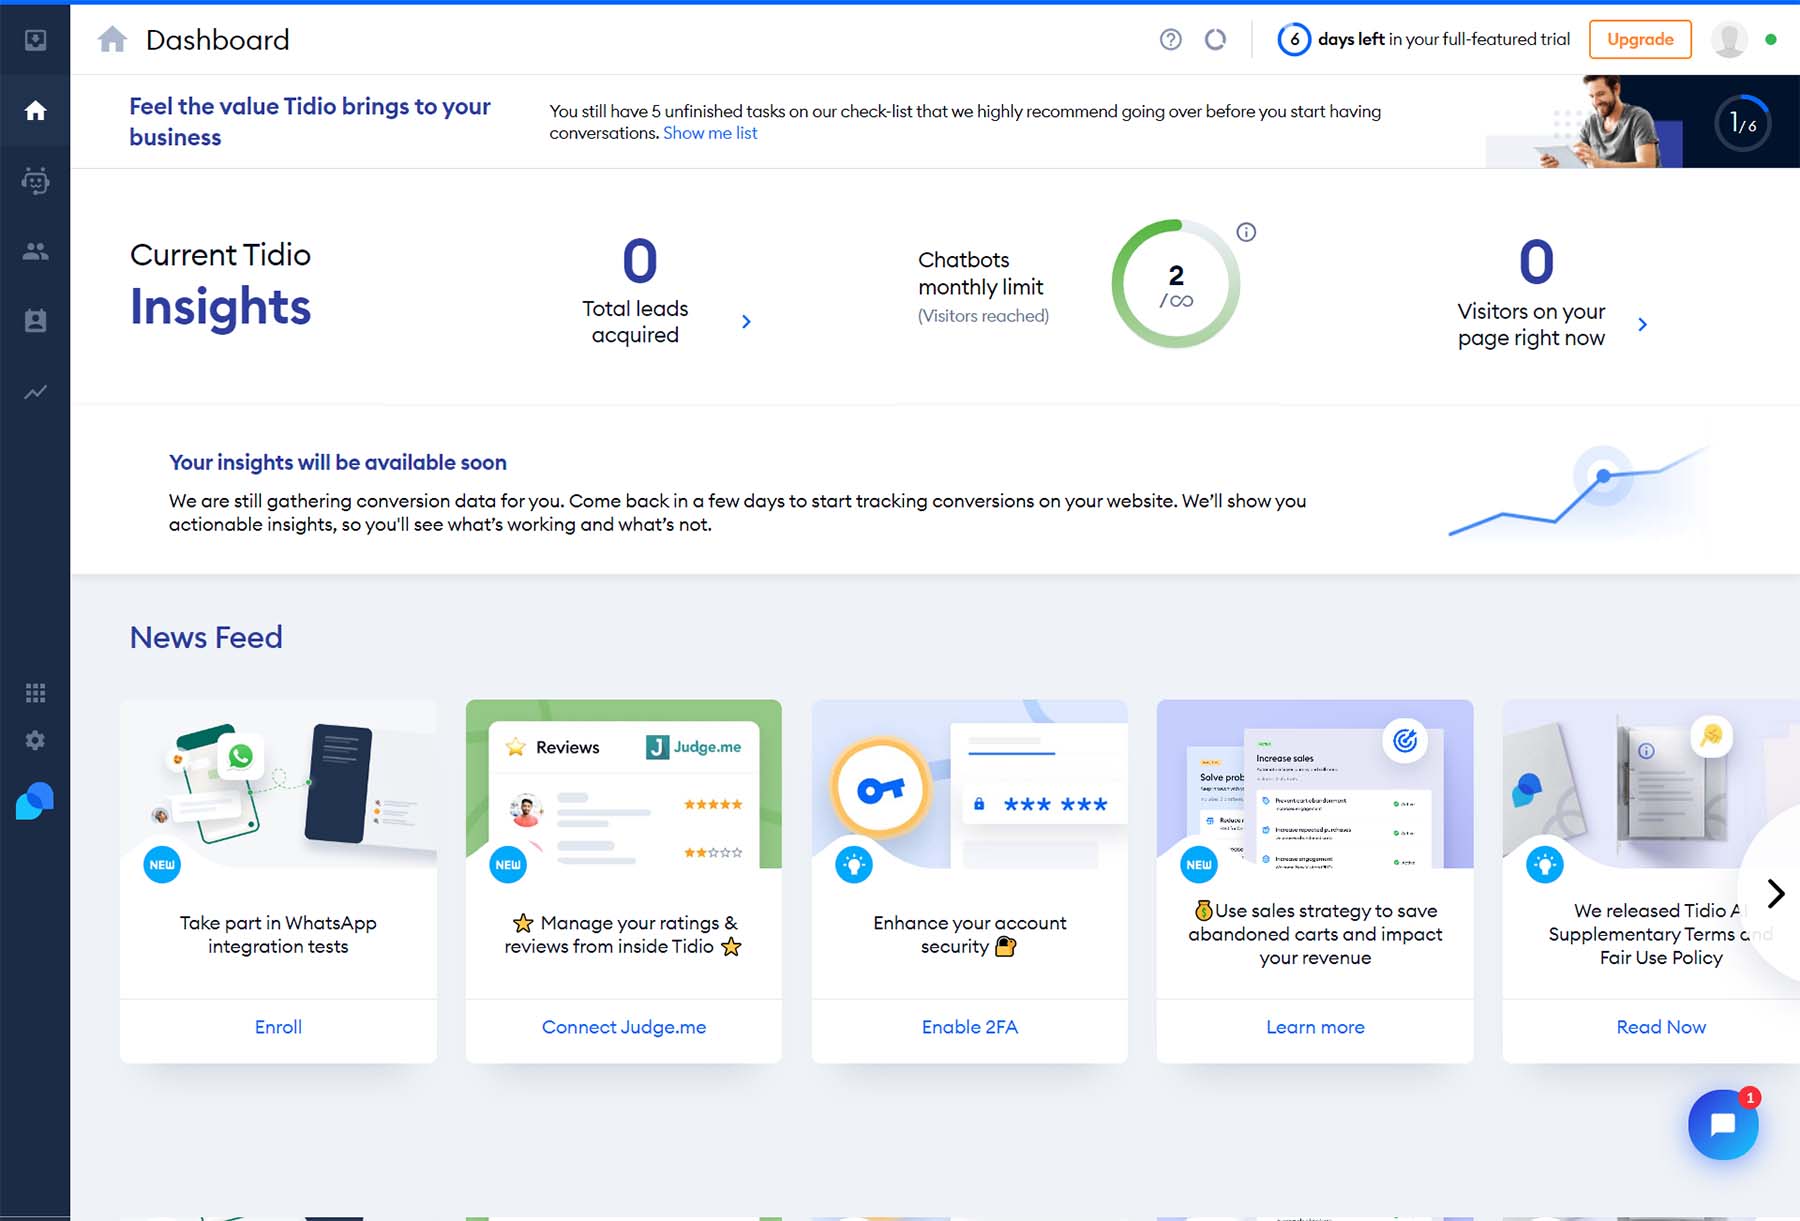
Now, we’ll move to our WordPress site to install and connect our Tidio account to our website.
3. Install Tidio Plugin
To install the Tidio plugin, hover over the Plugins menu item. Then, click Add New. Search Tidio in the plugin search field. Click Install Now next to the Tidio card.
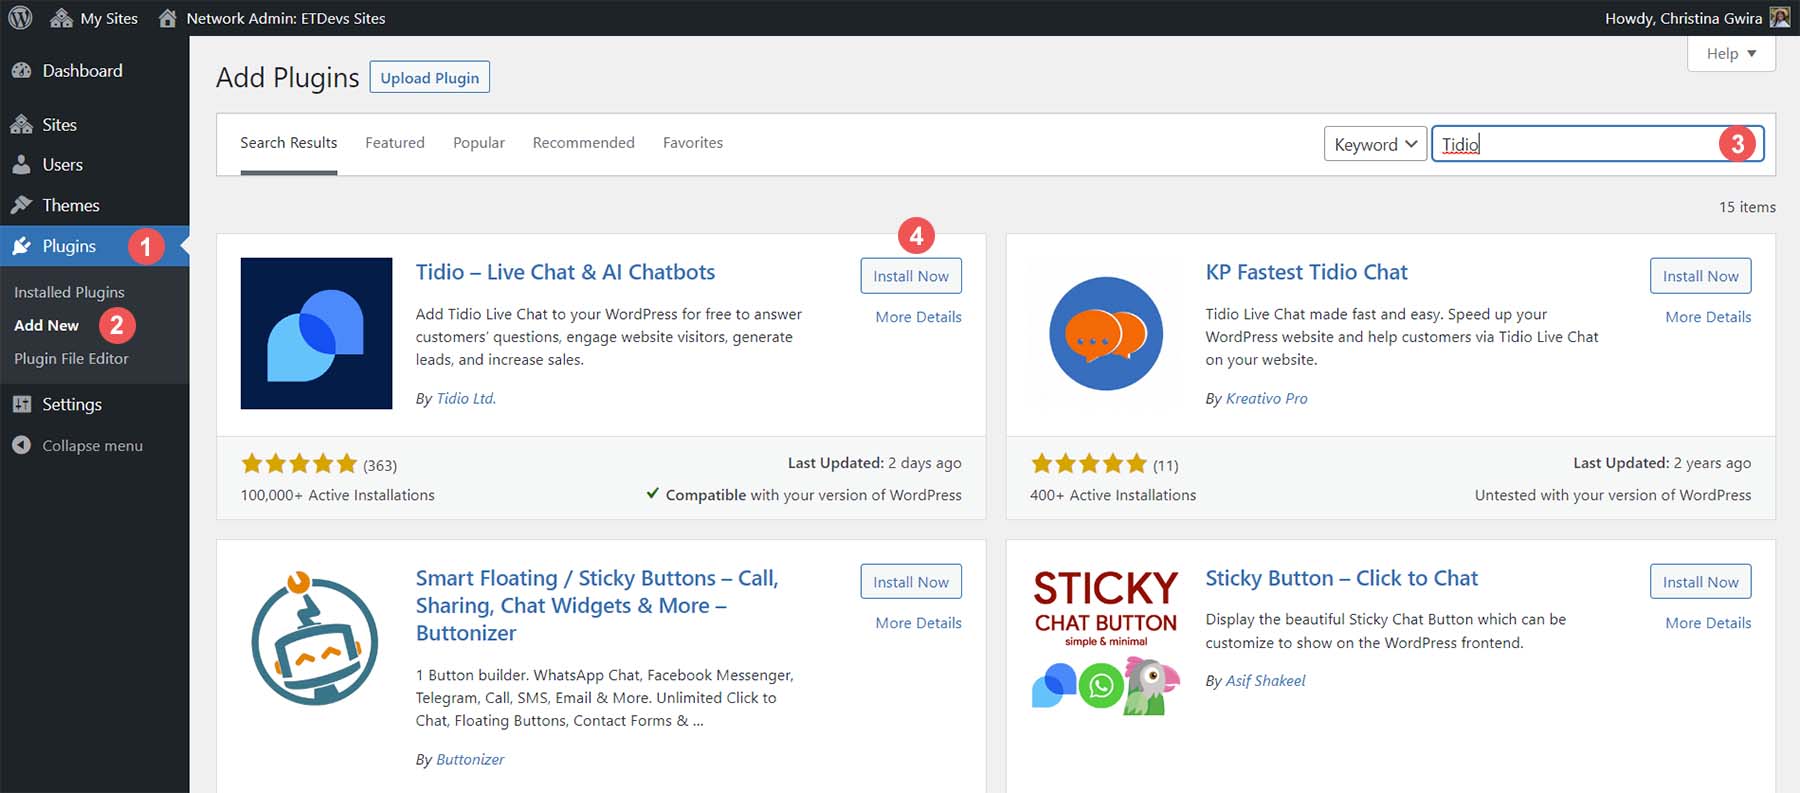
Afterward, click Activate to complete the installation of the plugin.
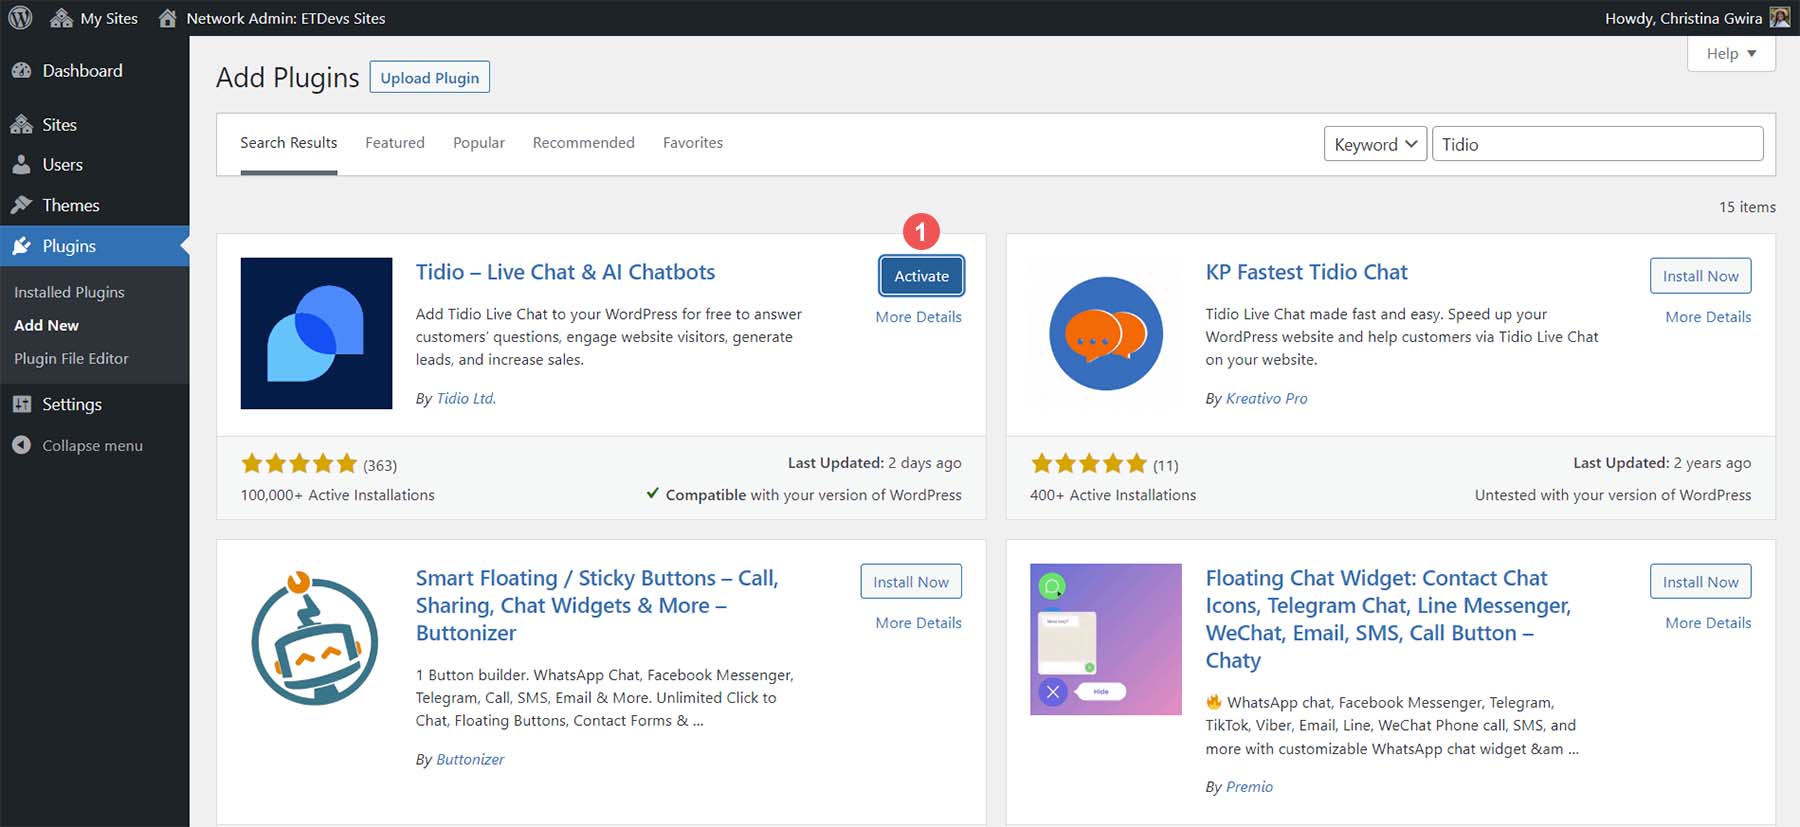
Now that our plugin is installed, we can connect our website to our Tidio account.
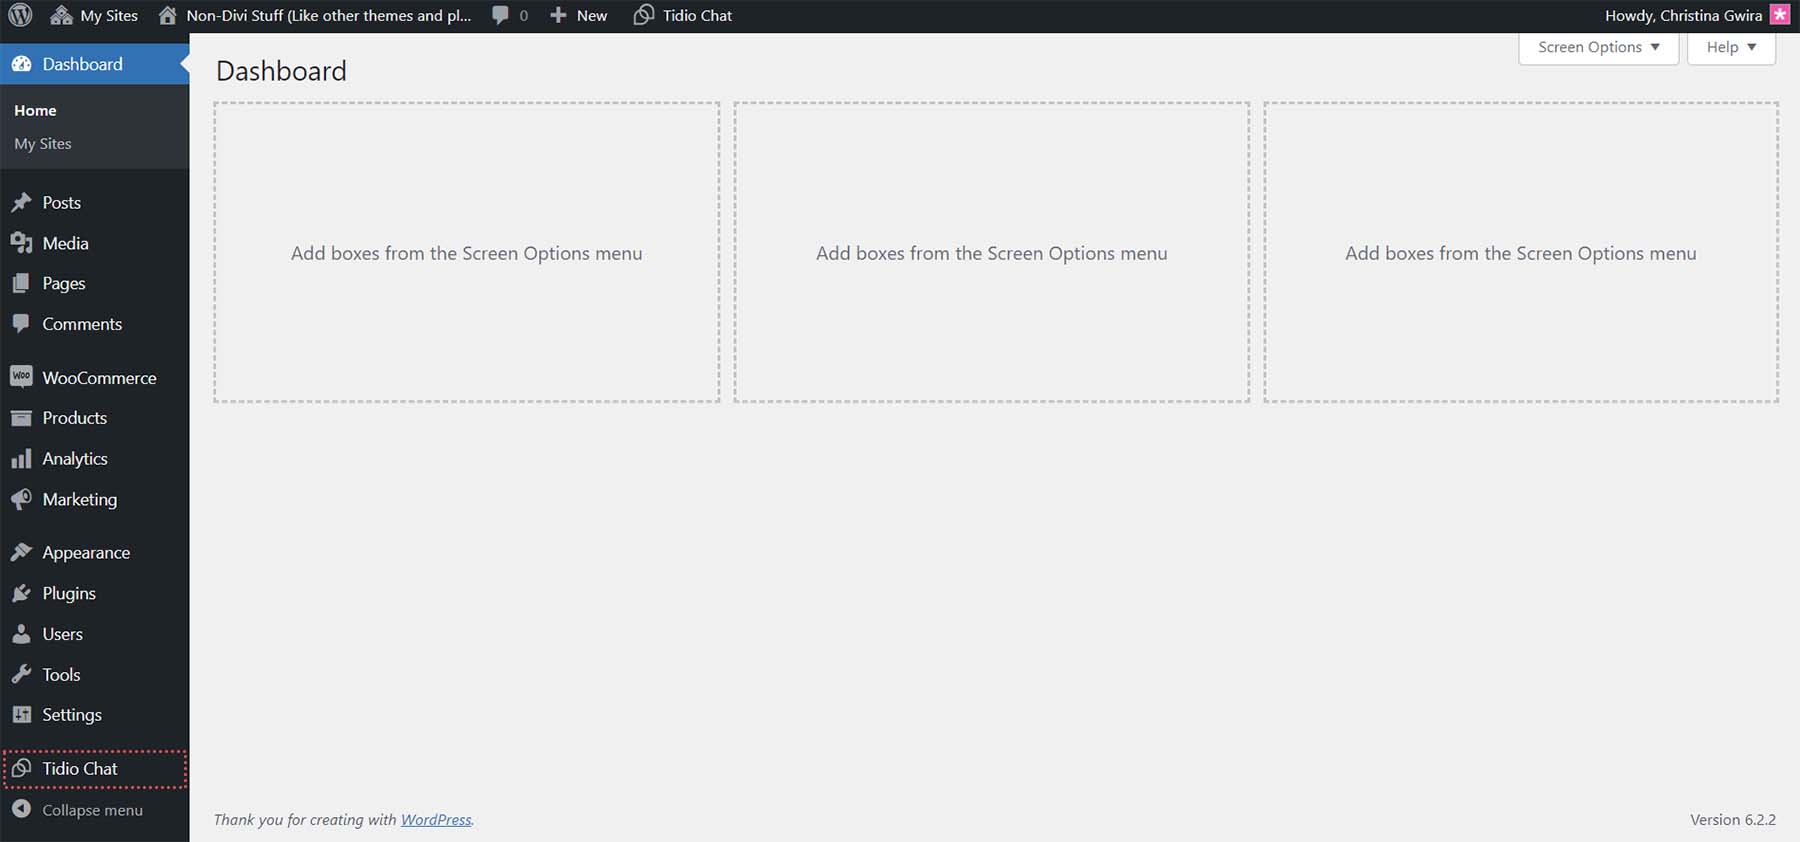
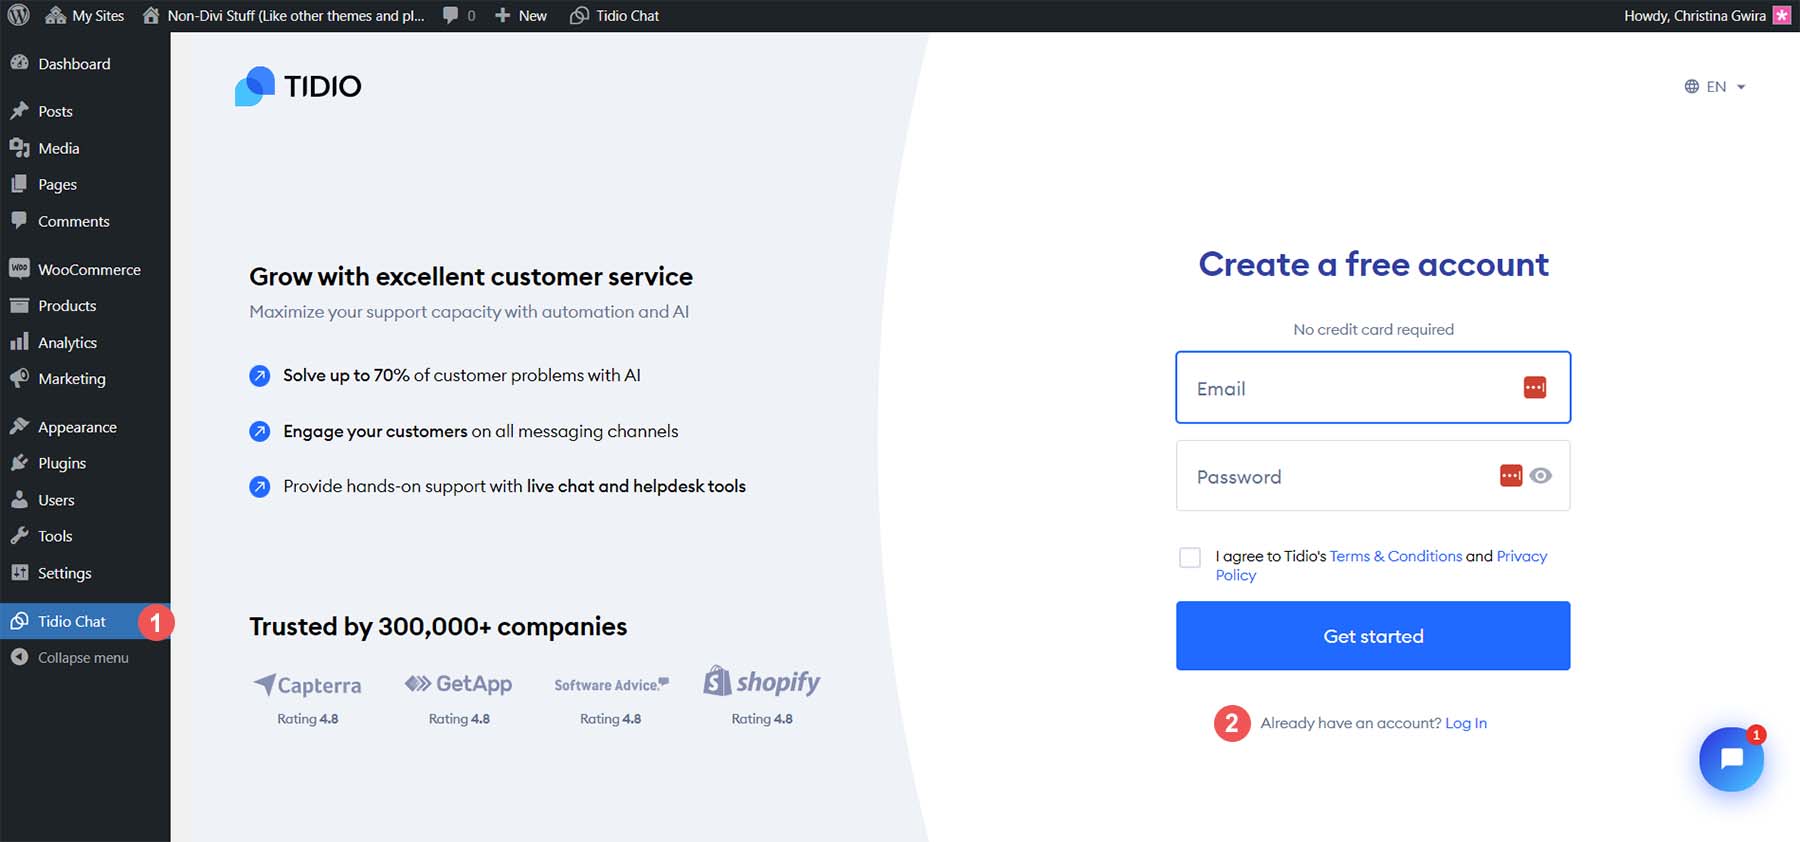
Notice we have a new menu item just for accessing our Tidio settings.
4. Add API to WordPress website.
From your WordPress menu, click Tidio. Then, click on the Login link under the signup form.
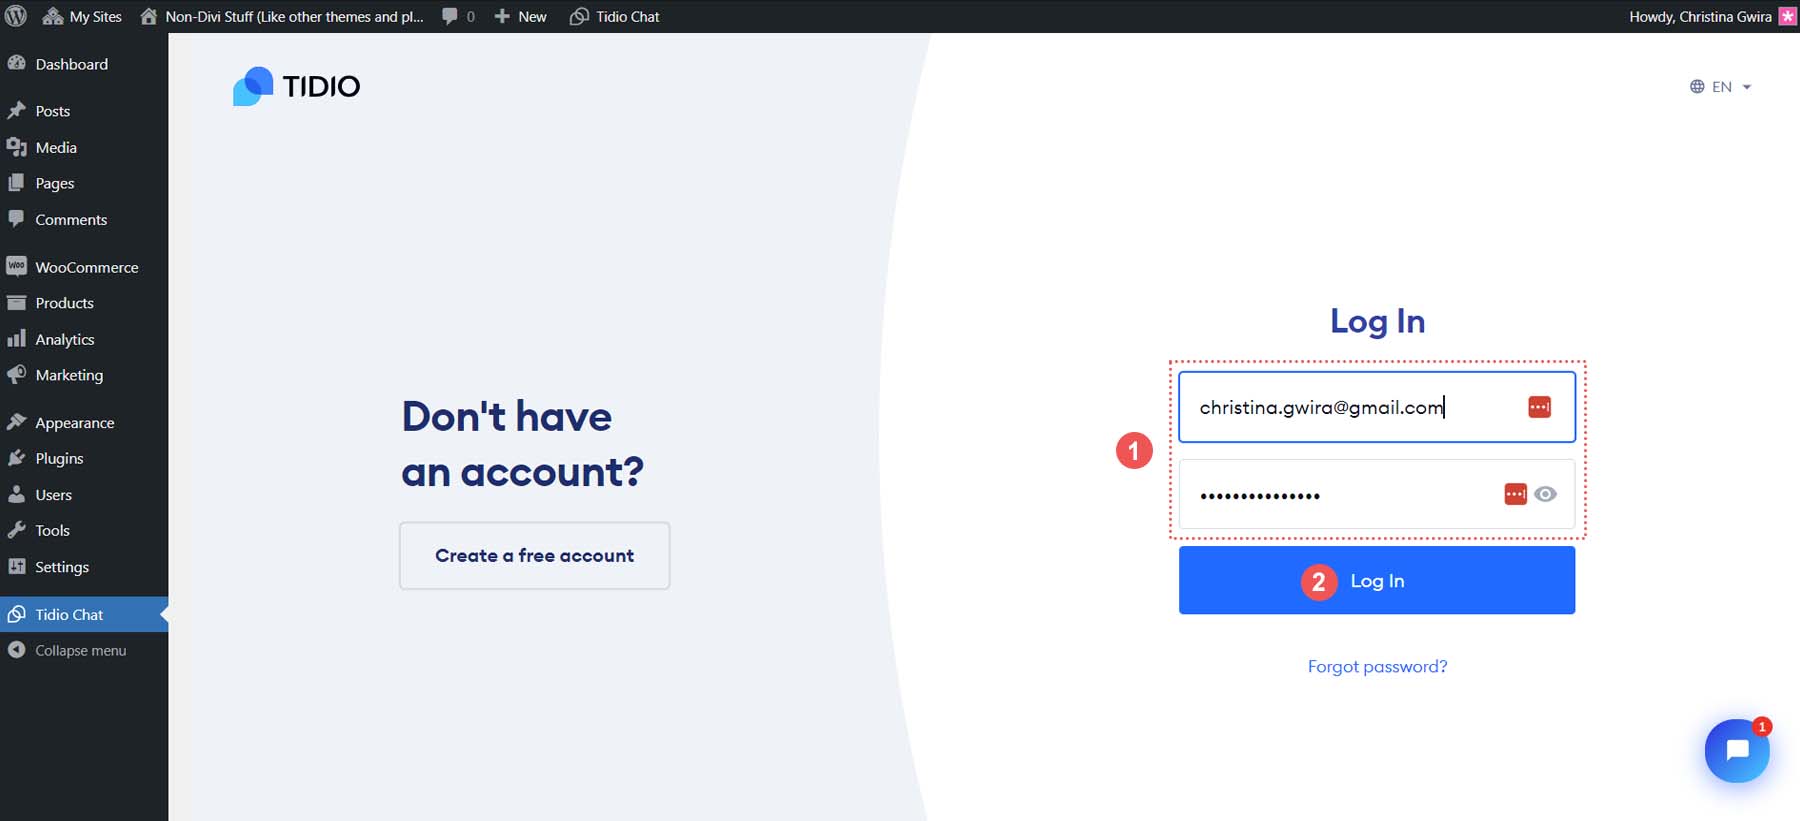
Enter your Tidio account credentials and click Login.
Once logged into your account, you can start your chat widget’s customization process.
5. Create a New Chat Widget
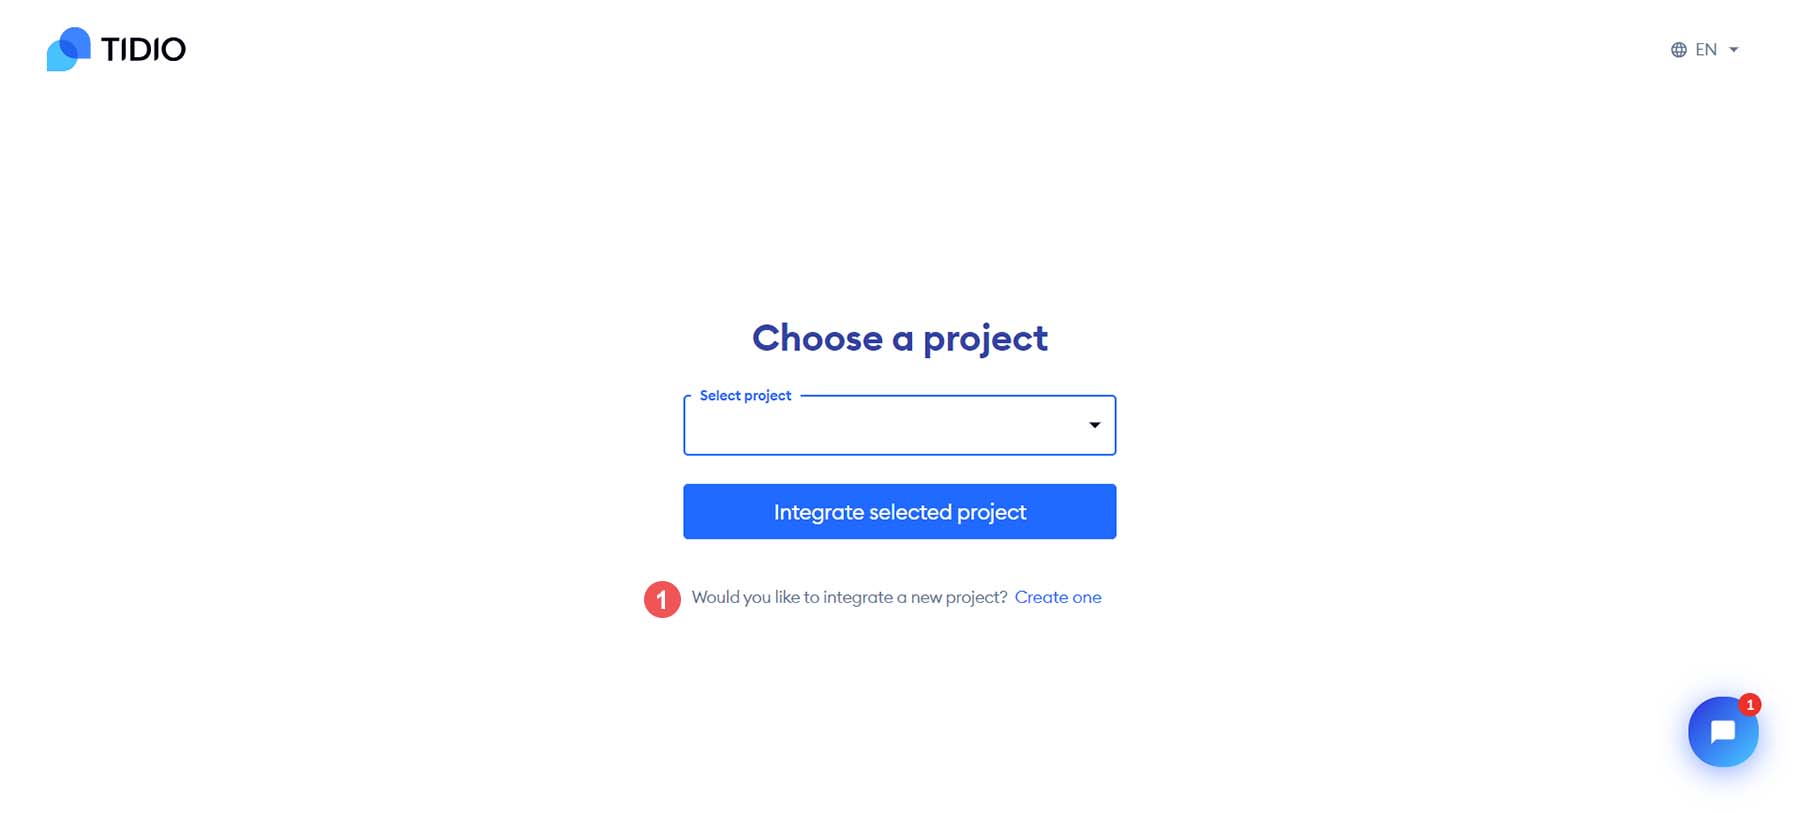
To begin, you’ll need to create a new project in Tidio. Click on the Create One text link and give your new project a name.
After creating and naming your new project, you’ll have the opportunity to customize your chat widget.
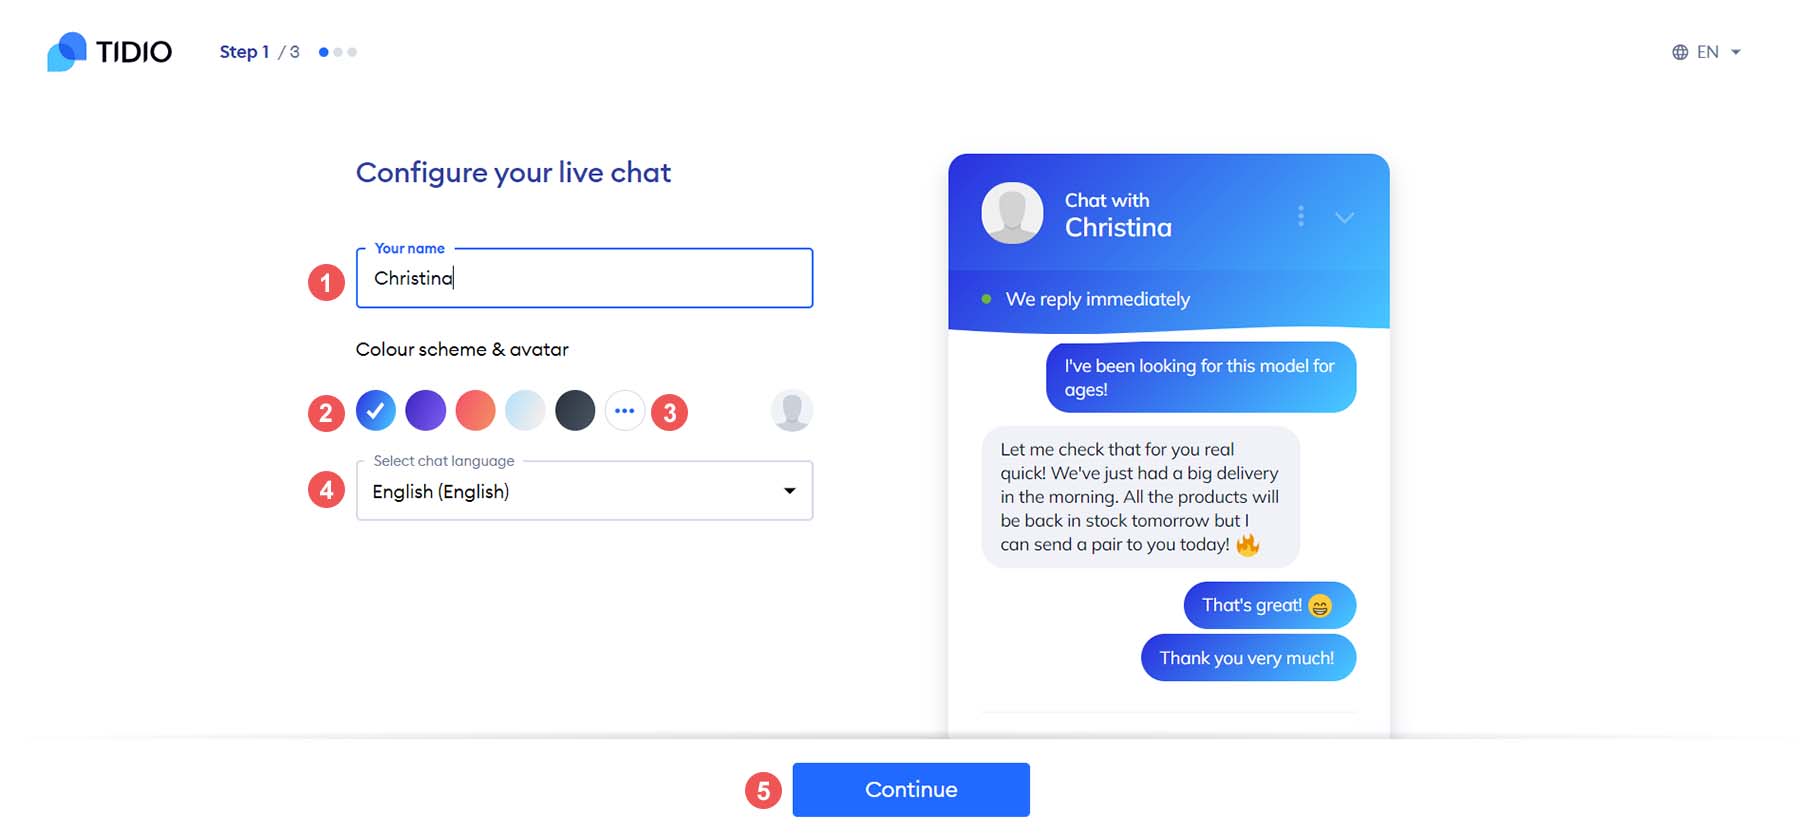
You can assign a name to your chat agent and choose a solid or gradient color scheme. Additionally, you can set your chat language and upload a custom avatar to your chat widget.
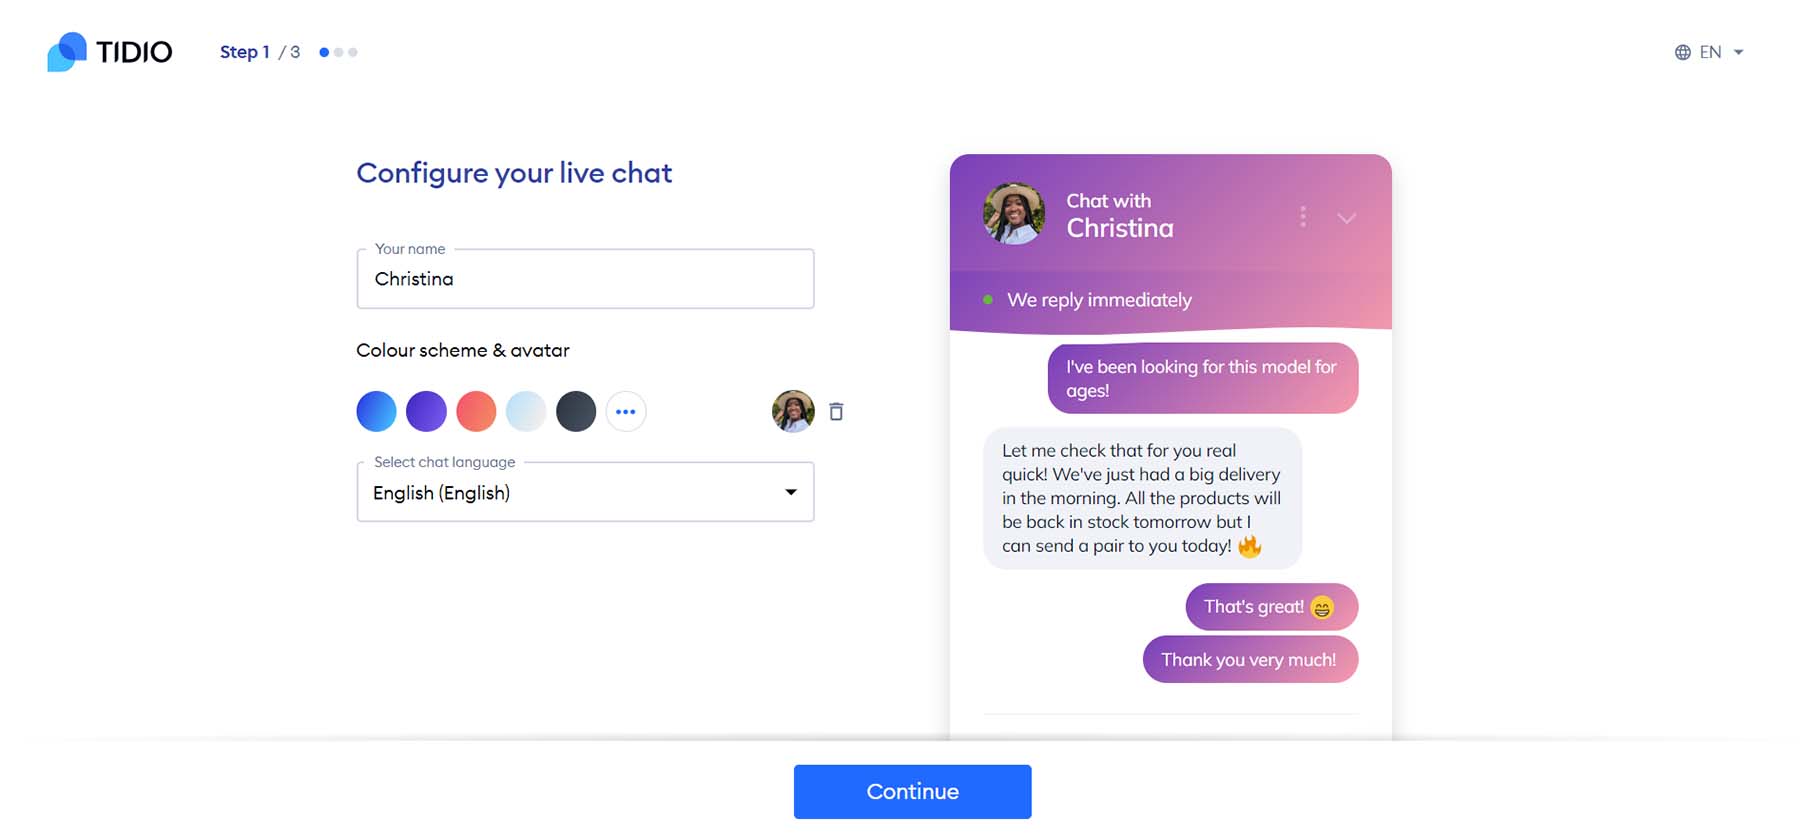
6. Adjust Chat Settings
Now, click on the blue Continue button. You’ll now be faced with a short questionnaire. This will help Tidio know how to personalize your experience as you maneuver through the platform.
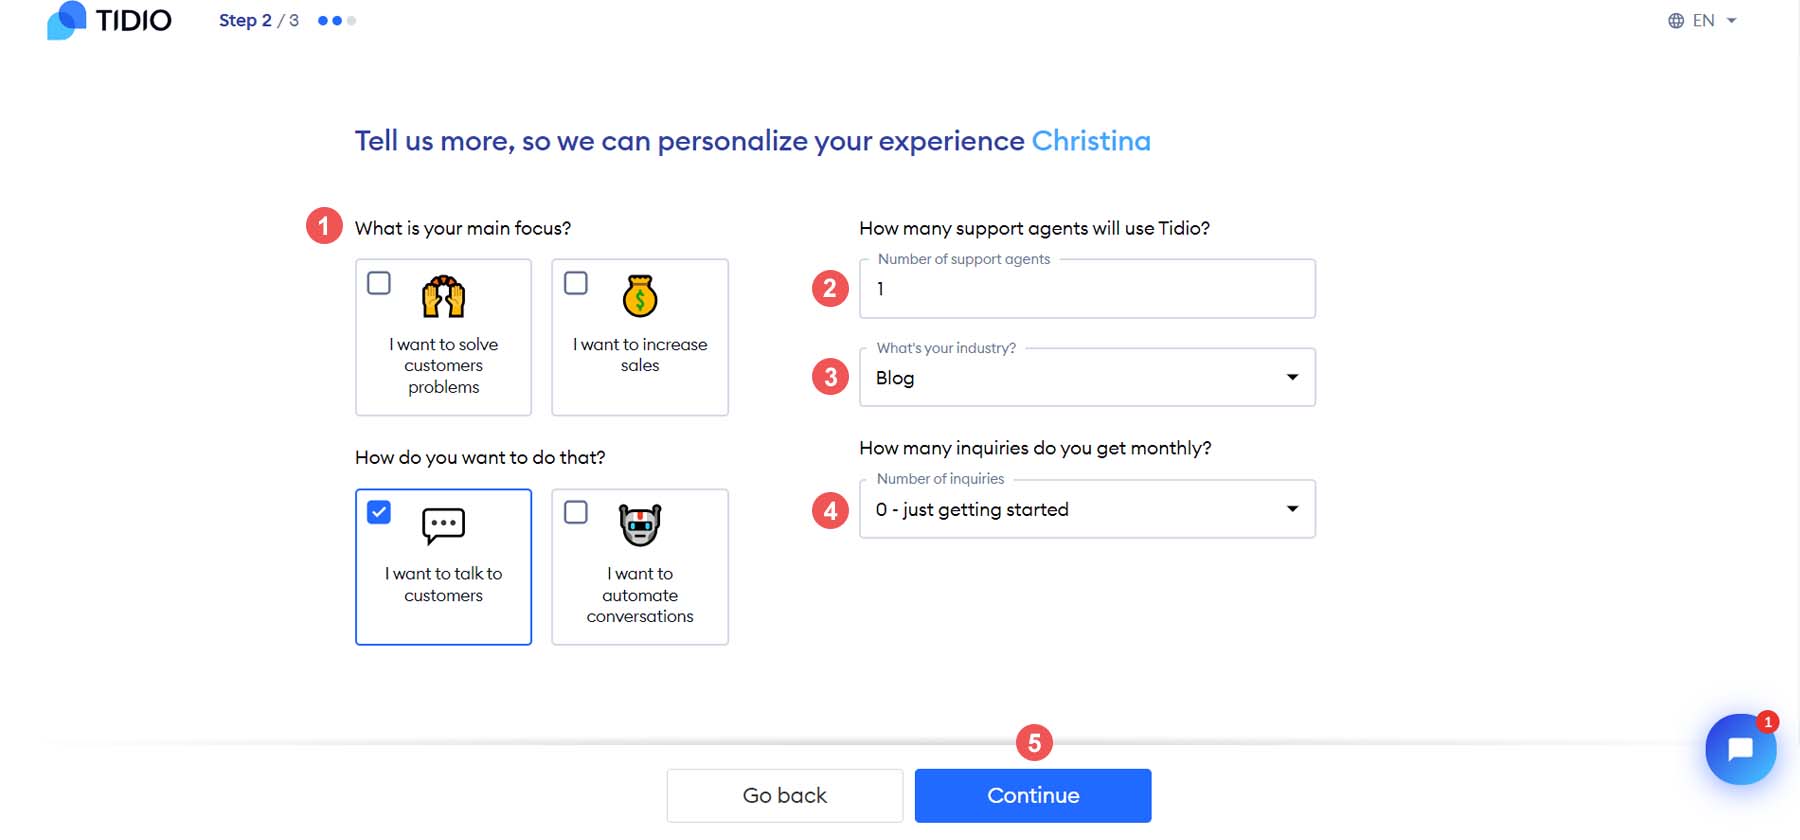
Select the focus, add the number of agents, select your industry, and finally, the number of inquiries your site gets. Next, you’ll want to set up your welcome message. You can customize your message to say something that is on brand with your website by clicking the Customize this message text link.
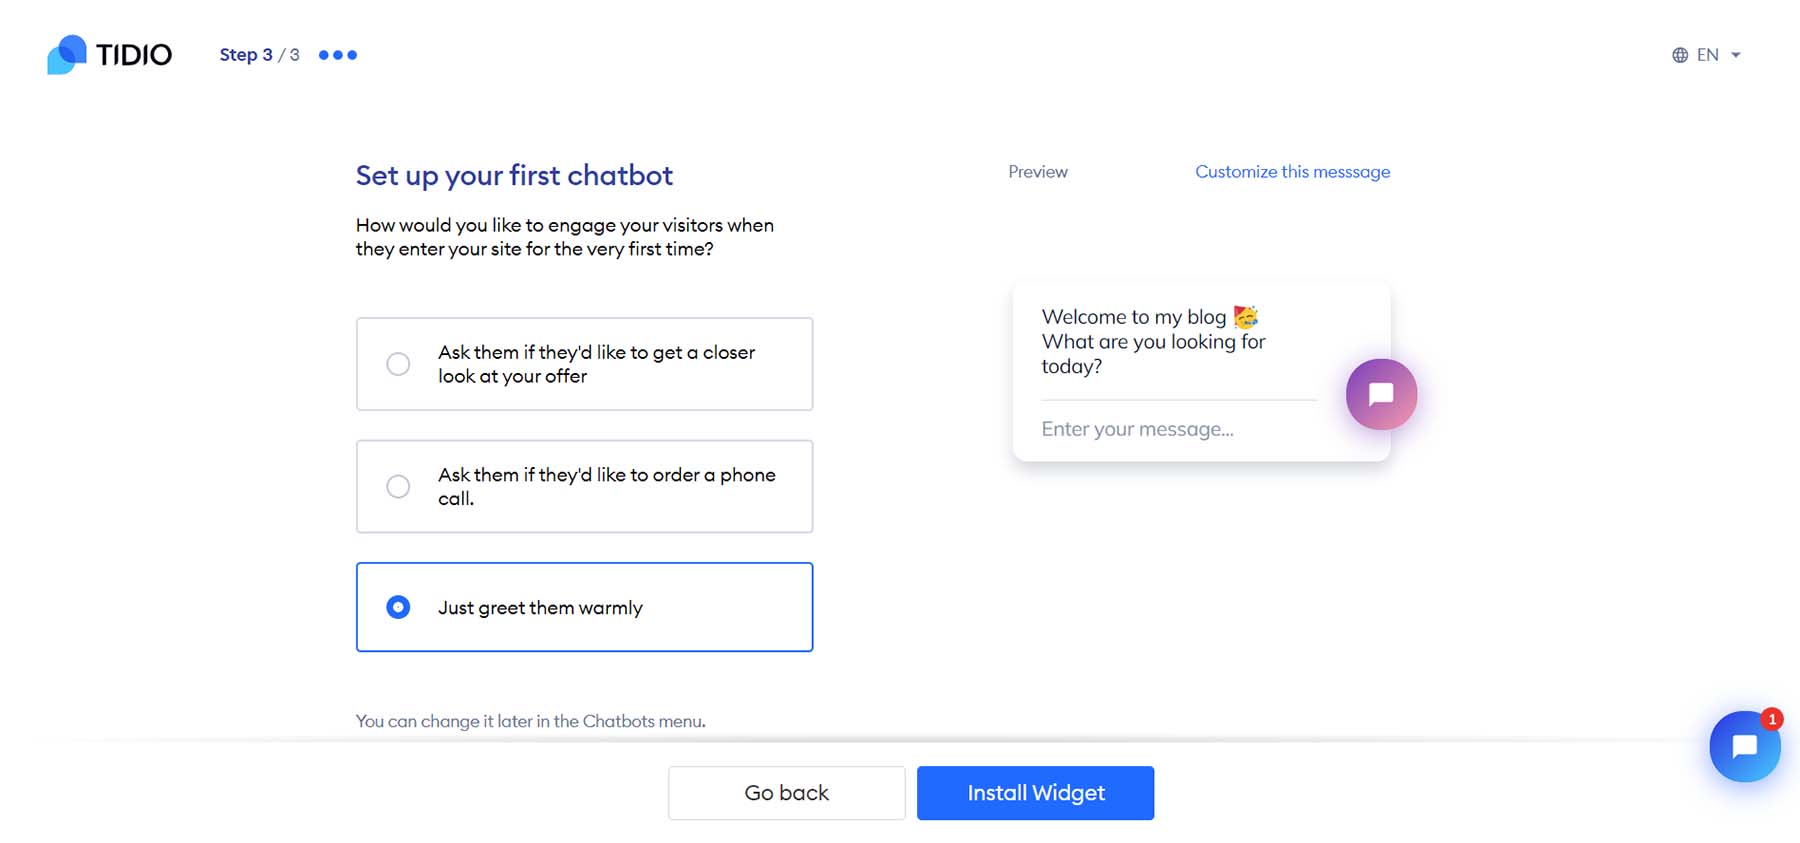
After setting your welcome message, click on the blue Install Widget button.
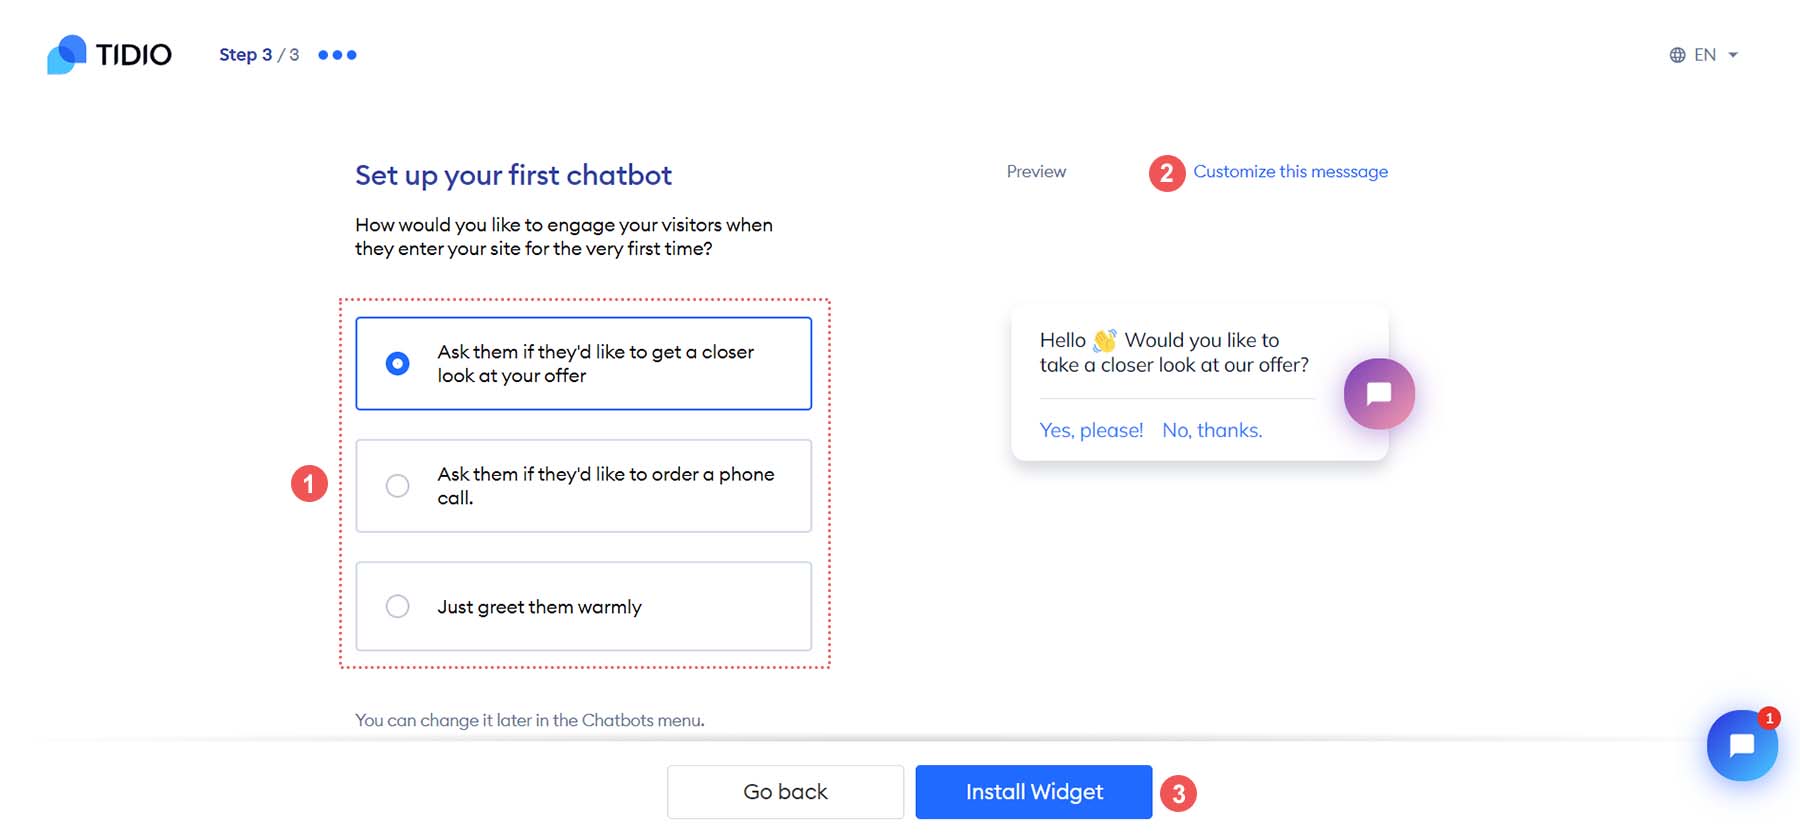
You’ll be redirected to your WordPress website once you click the Install Widget button.
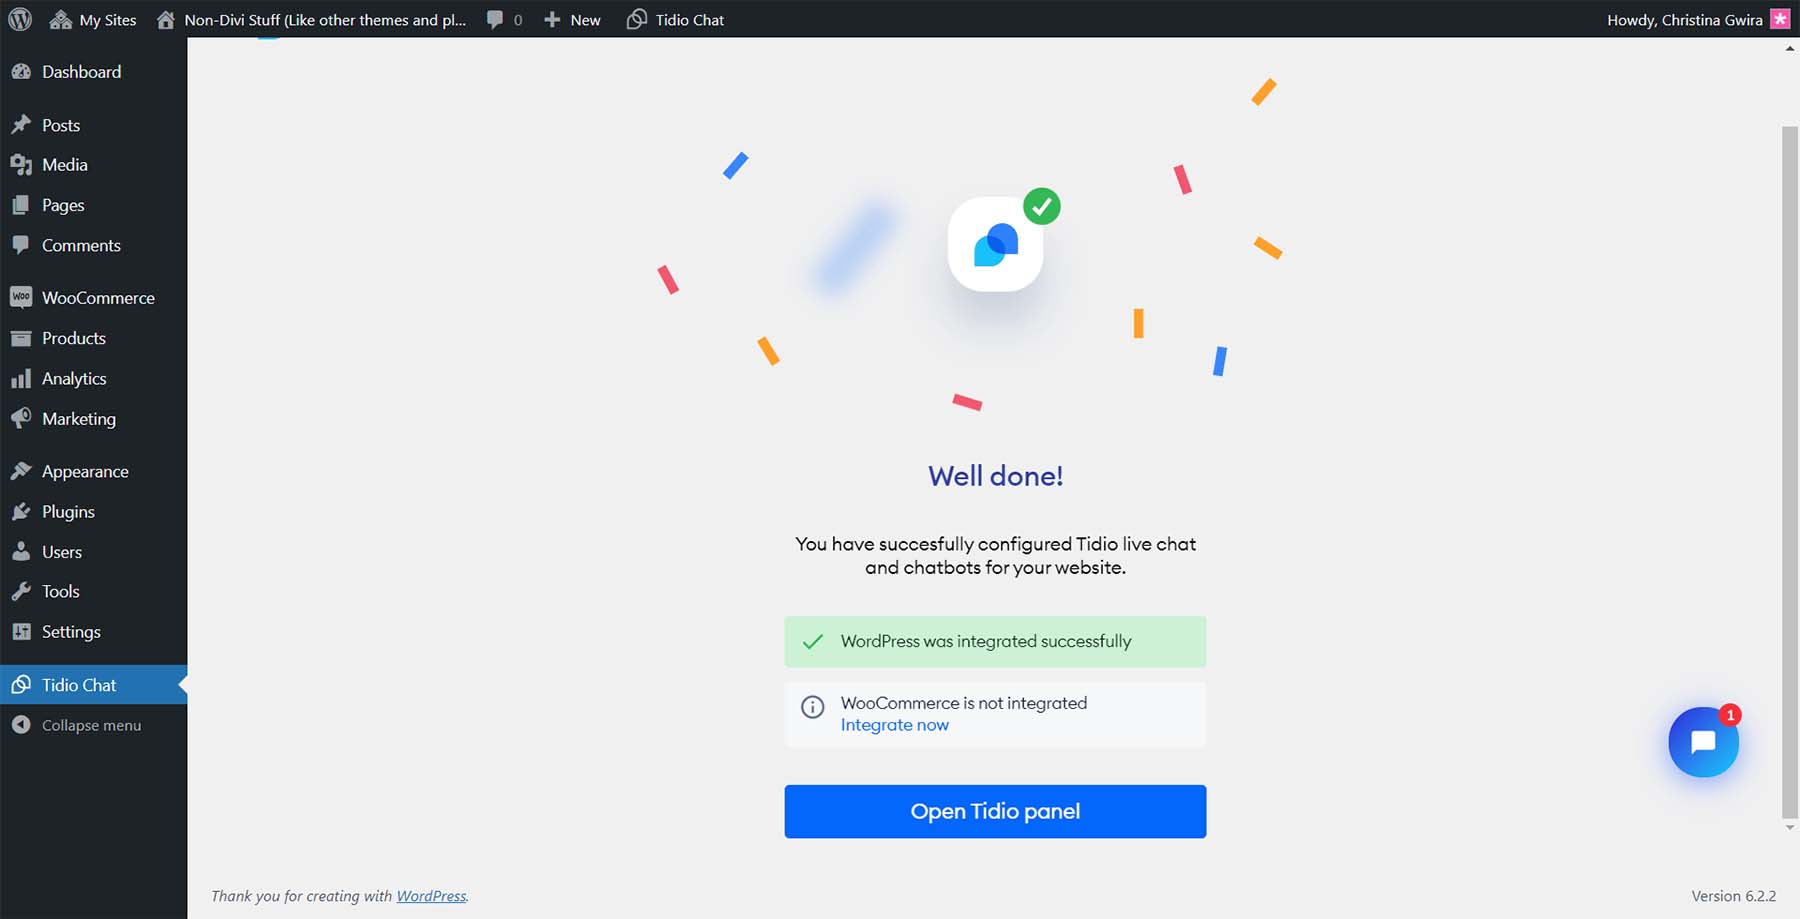
7. Test Live Chat Widget
As with WordPress, testing the new feature you’ve added to your website is a good practice. To do this, navigate to your homepage and see if the Tidio chat widget appears on your homepage.
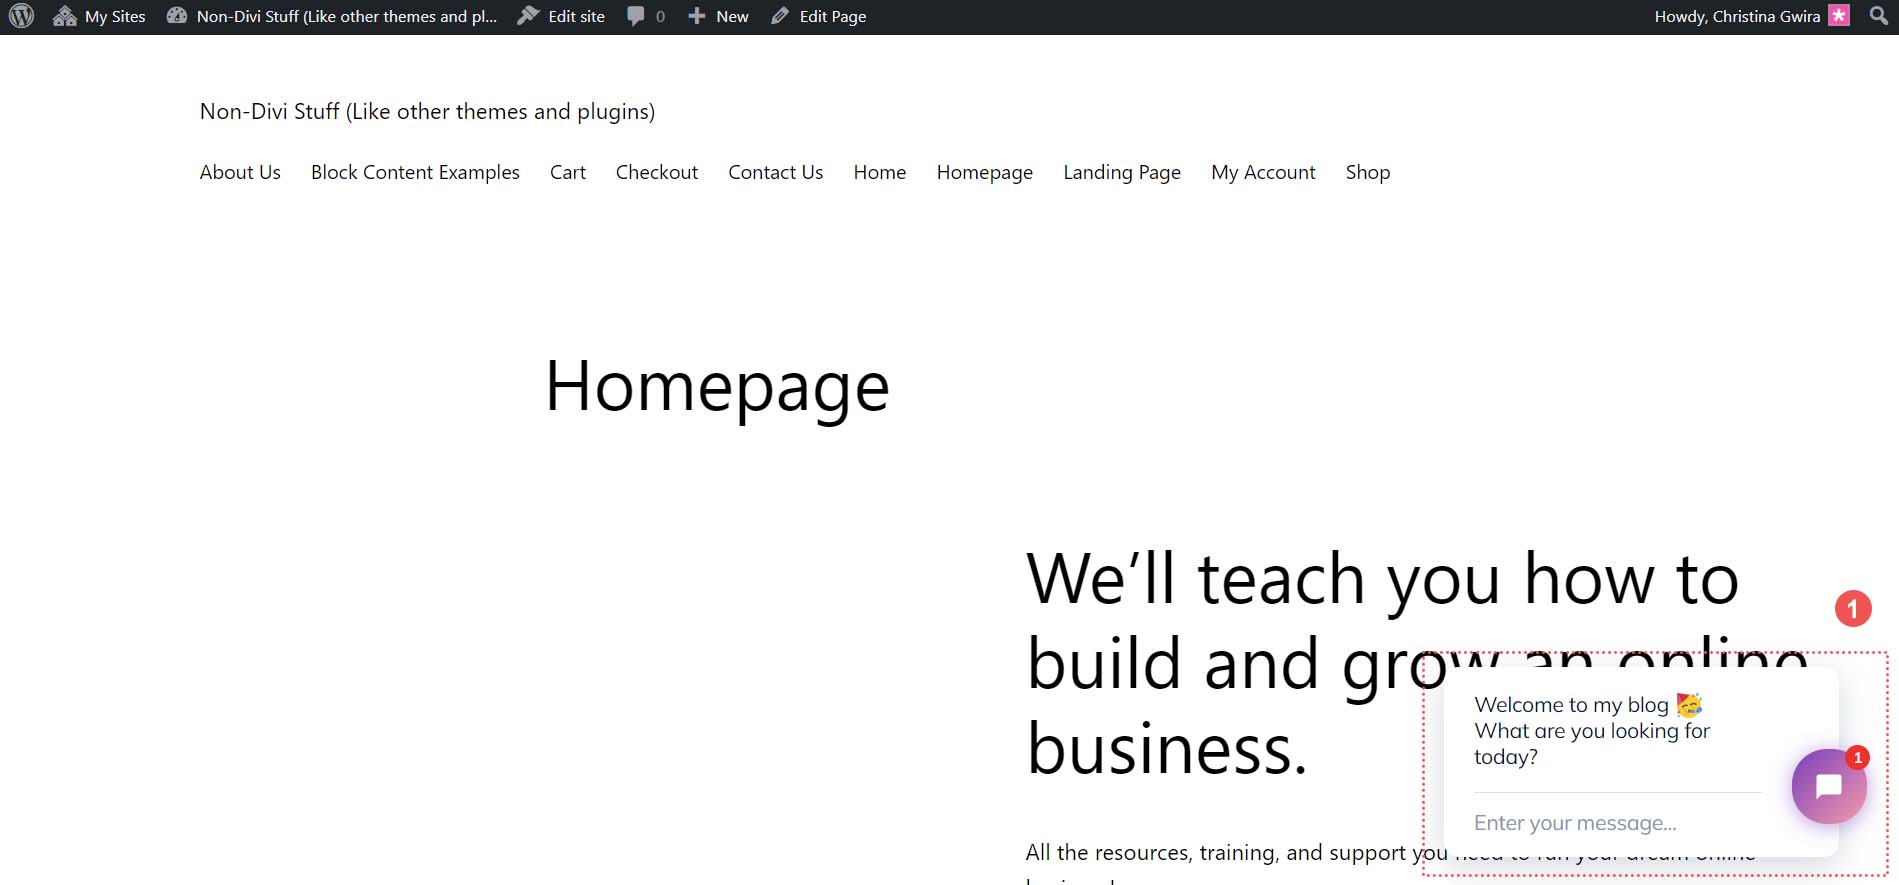
Try sending yourself a message to see what that process looks like for your guests.
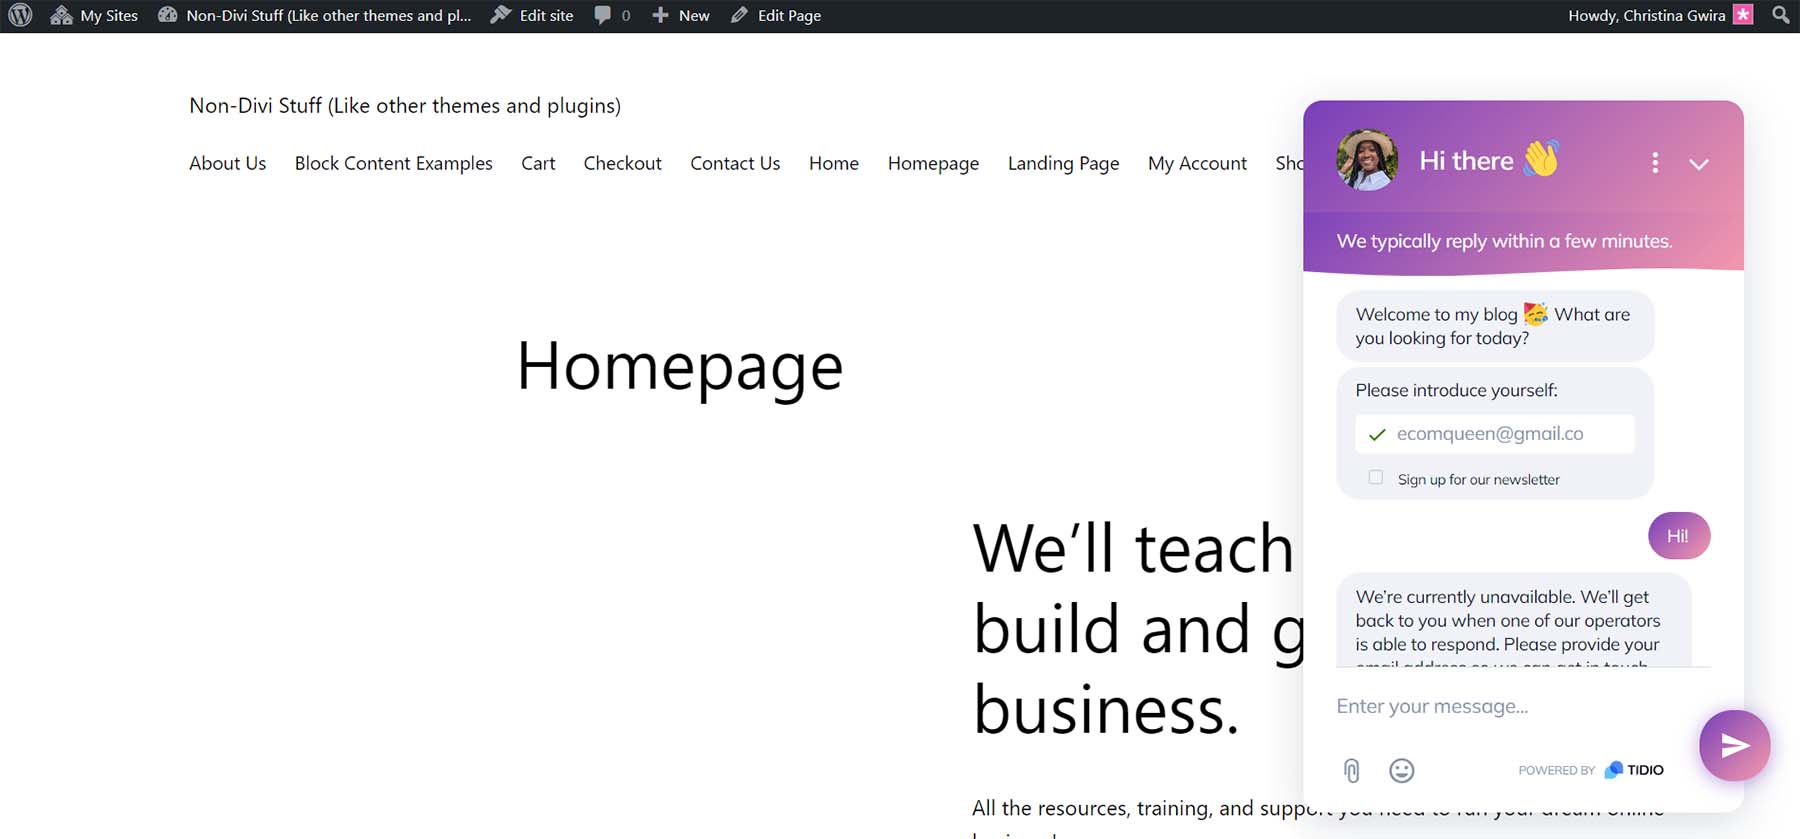
Now that we know our chat is installed and working on our WordPress website let’s look at some advanced settings and features we can implement with Tidio.
Additional Settings and Personalizations
With your new live chat installed, responding to visitors on your site is very simple. As you log in to your Tidio dashboard, you’ll see the mailbox icon in the top right. This is where you can see visitors on your site in real-time and respond to their messages. You can also see your chats on social networks should you connect them to your Tidio account.
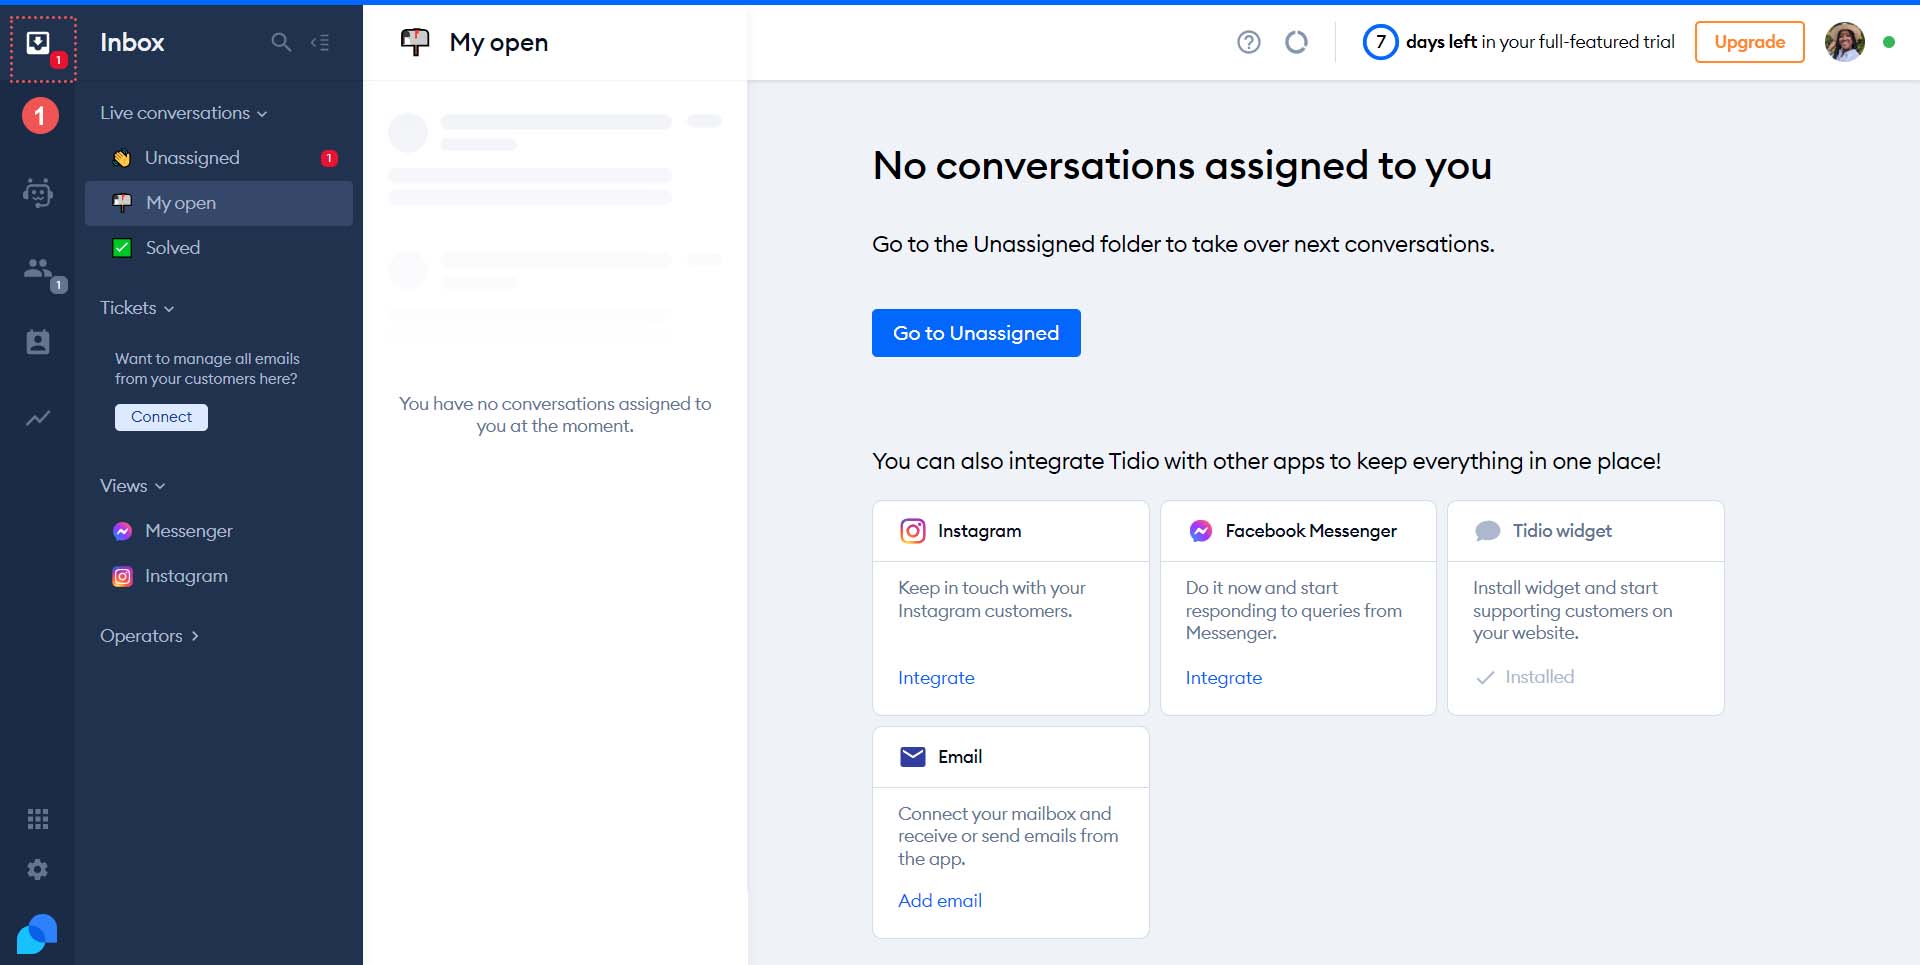
Personalize Templates from the Tidio Chat Template Library
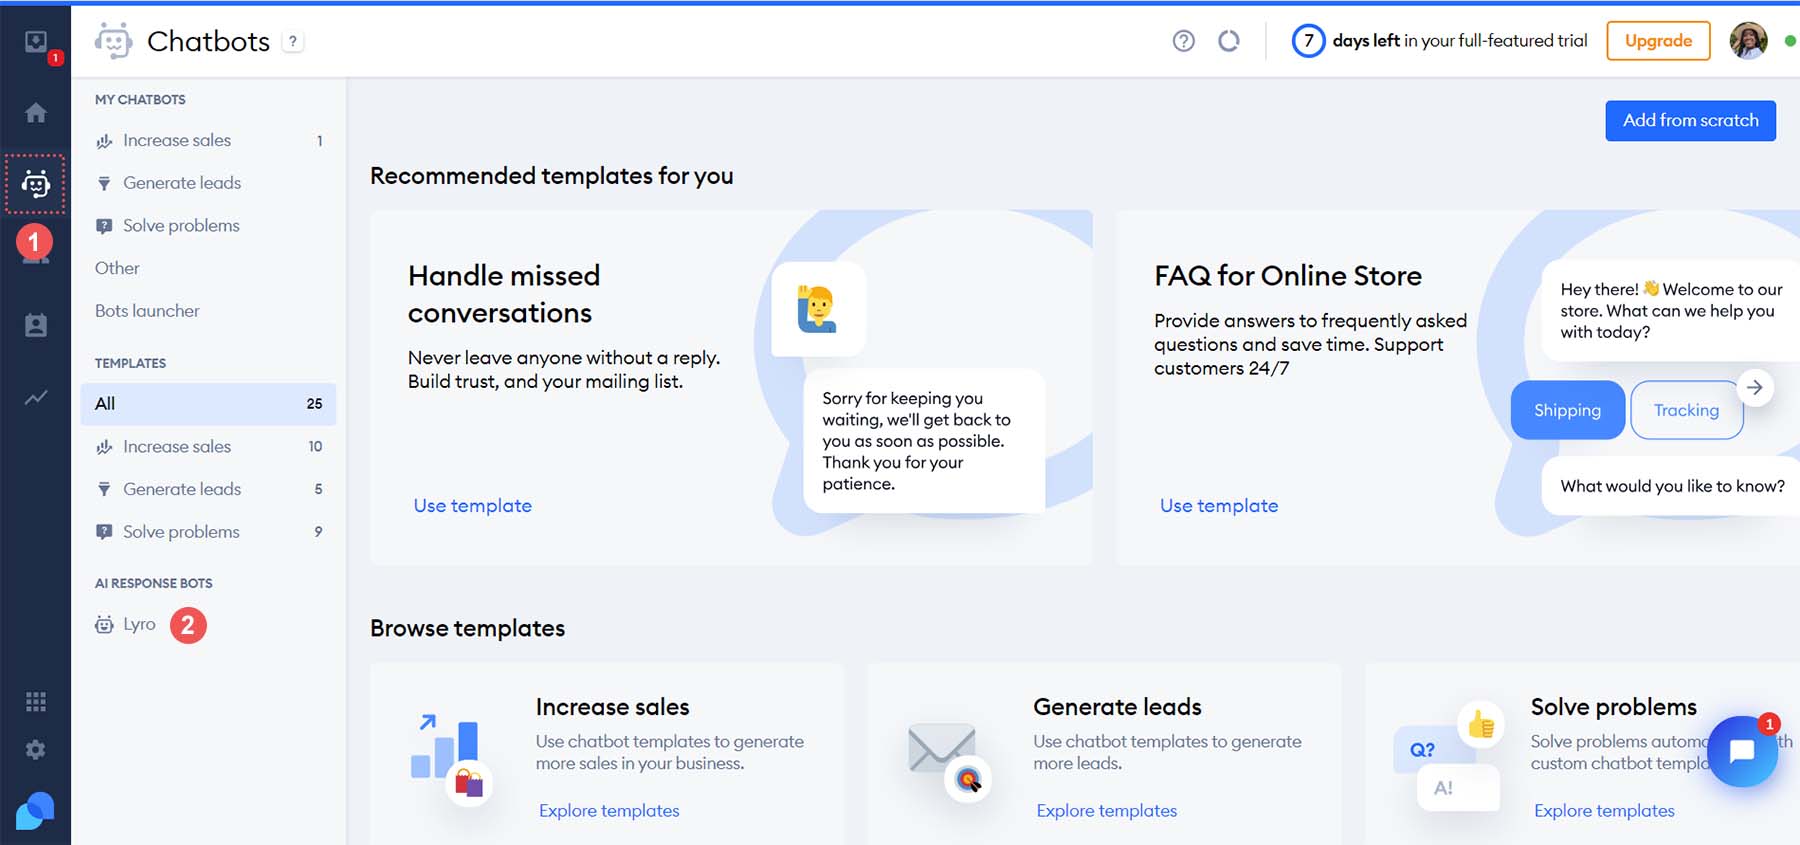
Tidio comes packed with templates that you can use to increase sales, generate leads, and solve your customers’ problems via live chat. To access these templates, click on the robot icon from the left-hand menu. Here, you can customize your automated responses for a smoother WordPress live chat experience for your customers.
Canned Responses and Notifications
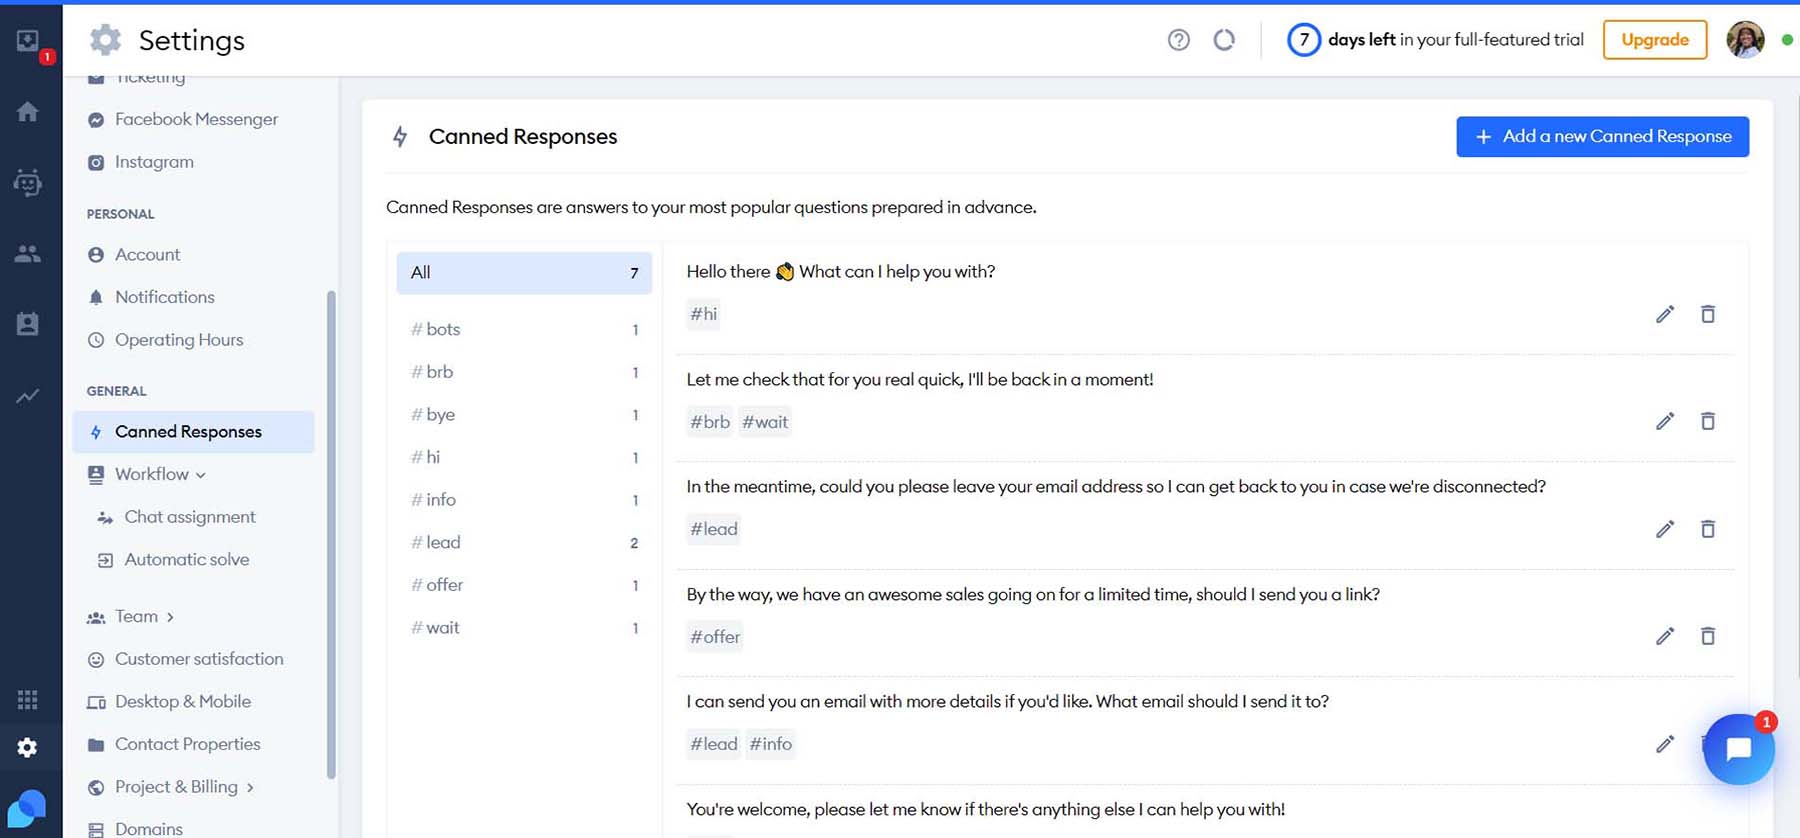
You can access more complex features and settings of Tidio by clicking the gear icon at the bottom of the left-hand menu. Your frequently asked questions can be answered with custom canned responses. Under the General heading, click on the Canned Responses menu link. This is where you can edit and add new preset answers to your customers frequently asked questions. Here, you can refine your live chat process by having a library of premade responses that can solve your users’ questions on the fly.
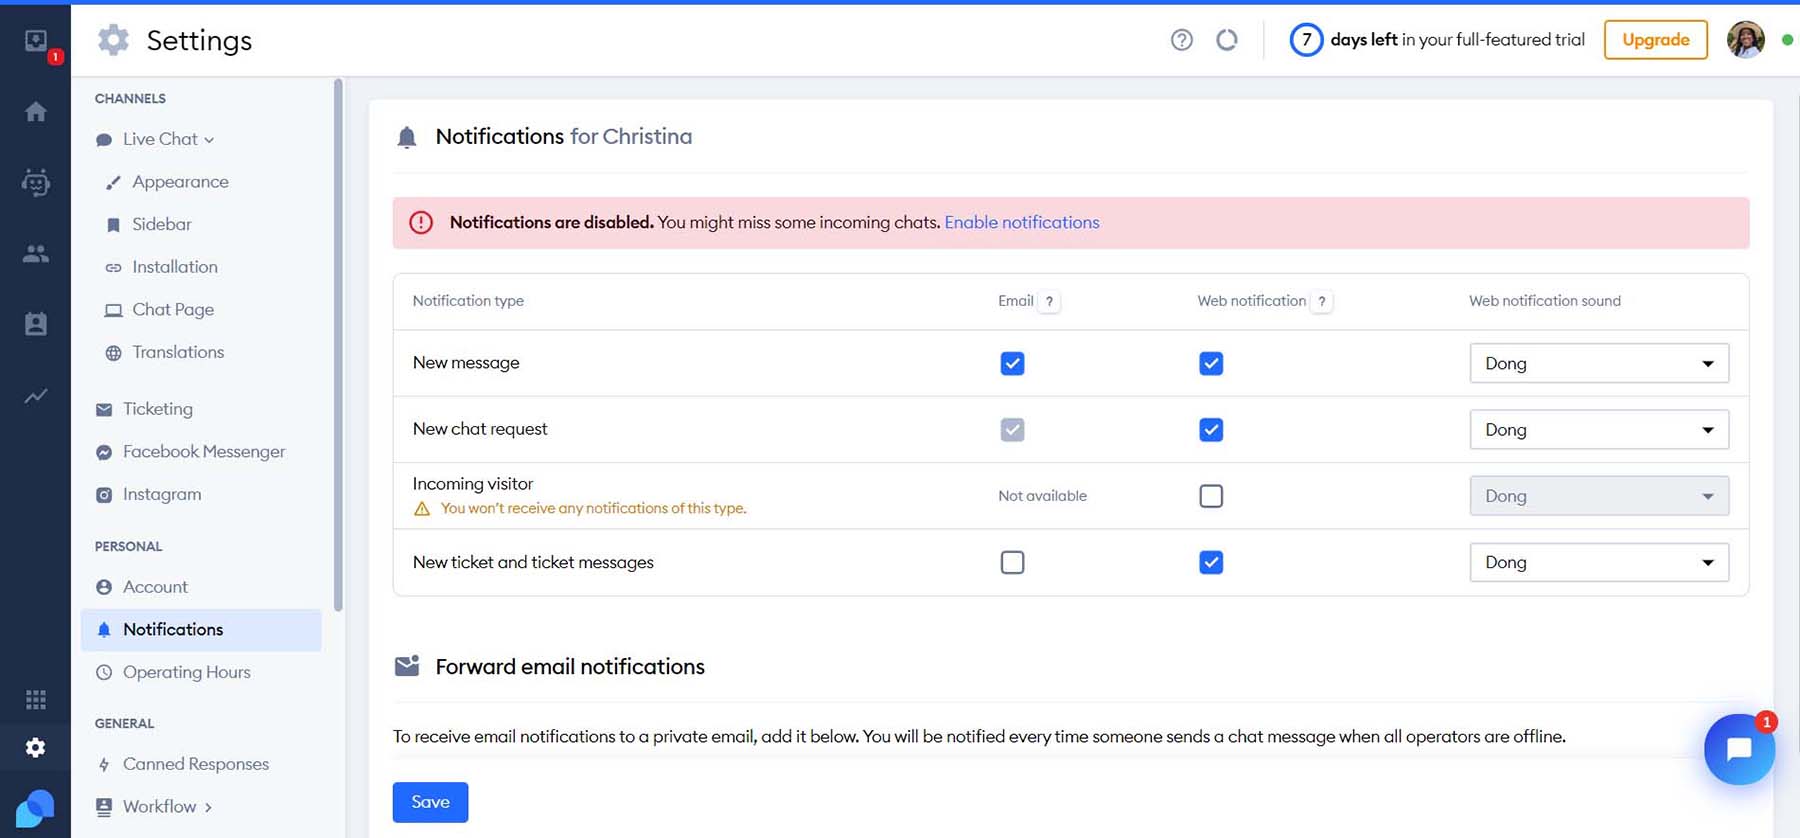
Notifications can also be customized when using Tidio. You can choose how you’d like to be notified when a visitor lands on your website (email or web notification), and you can also determine what actions trigger notifications and the web notification sound.
Build an AI-Powered Chatbot
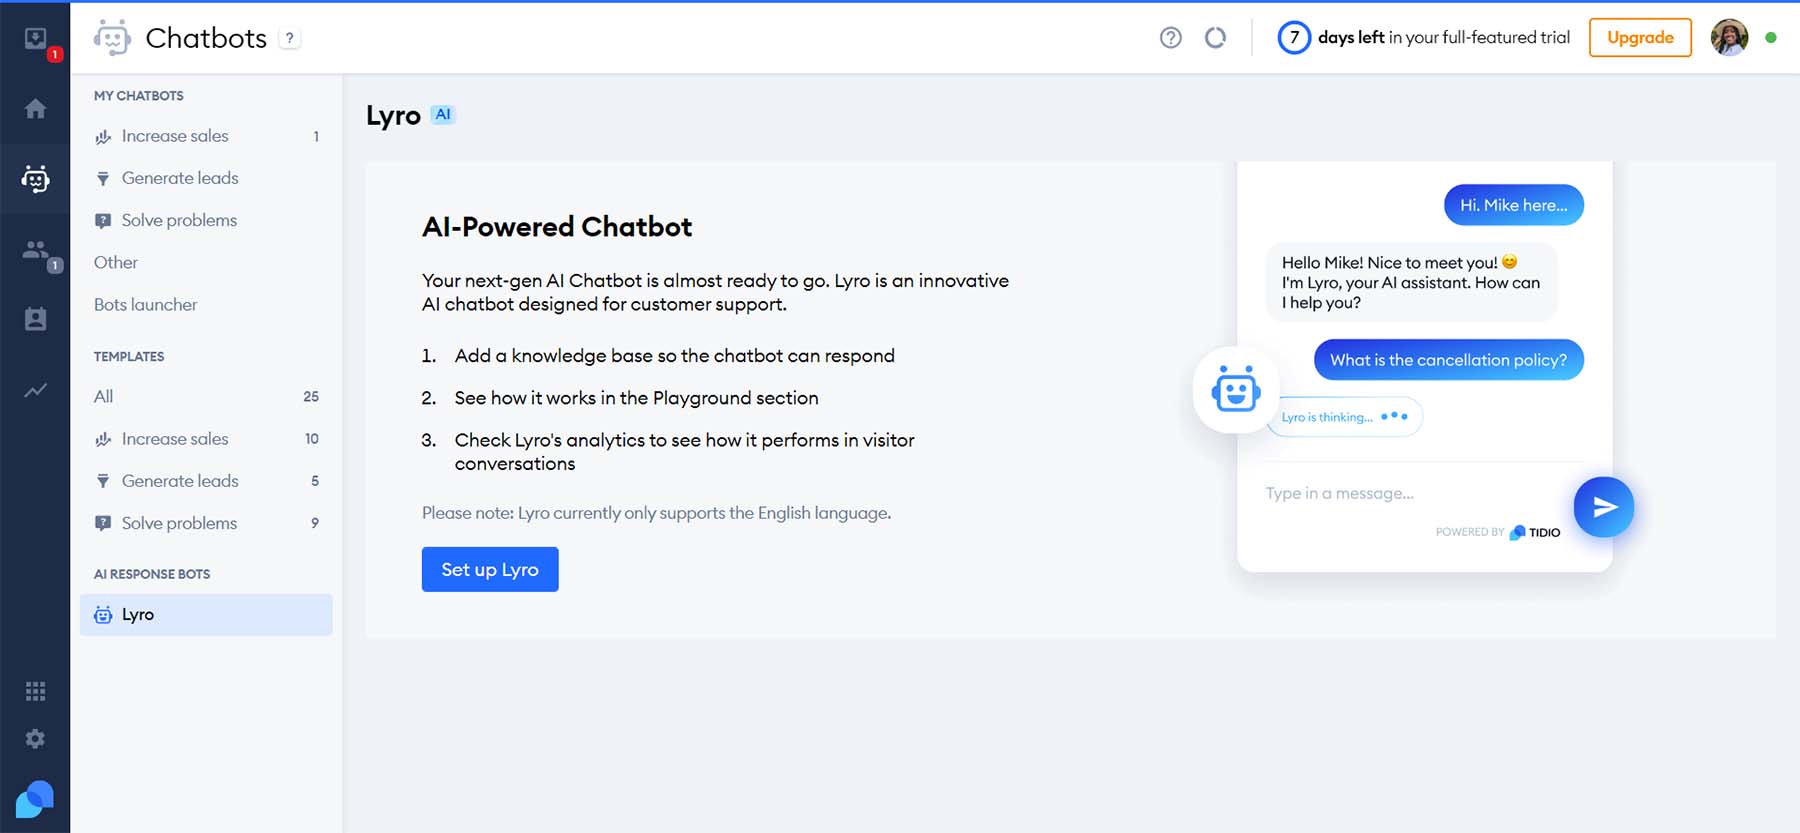
AI chatbots can help make customer service a breeze, and Tidio is on the front lines of adding AI to the WordPress live chat sphere. With a Tidio+ plan, you can implement their AI chatbot Lyro, which can help you create innovative chat experiences for visitors to your website.
Establish Your Visual Branding
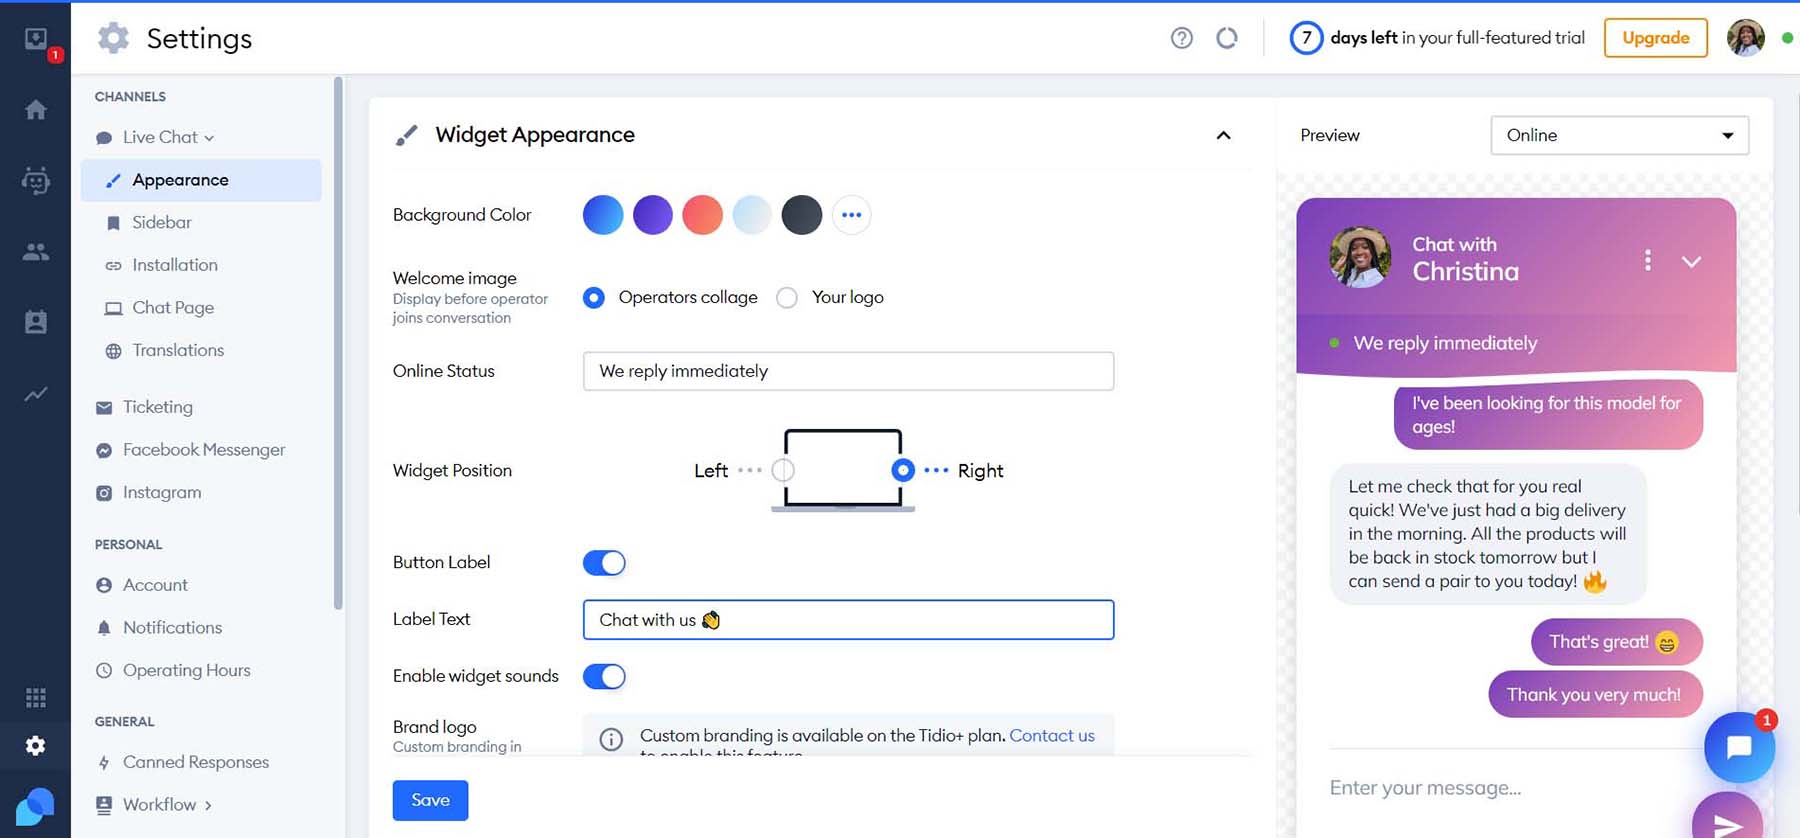
Further customization options for your widget are also available within Tidio’s advanced settings. Change your widget’s screen position, appearance, and more. Additionally, you can add custom branding to your widget, like your brand’s colors and logo, to mesh your chat widget with your WordPress website’s theme.
Set Your Live Chat’s Hours of Operation
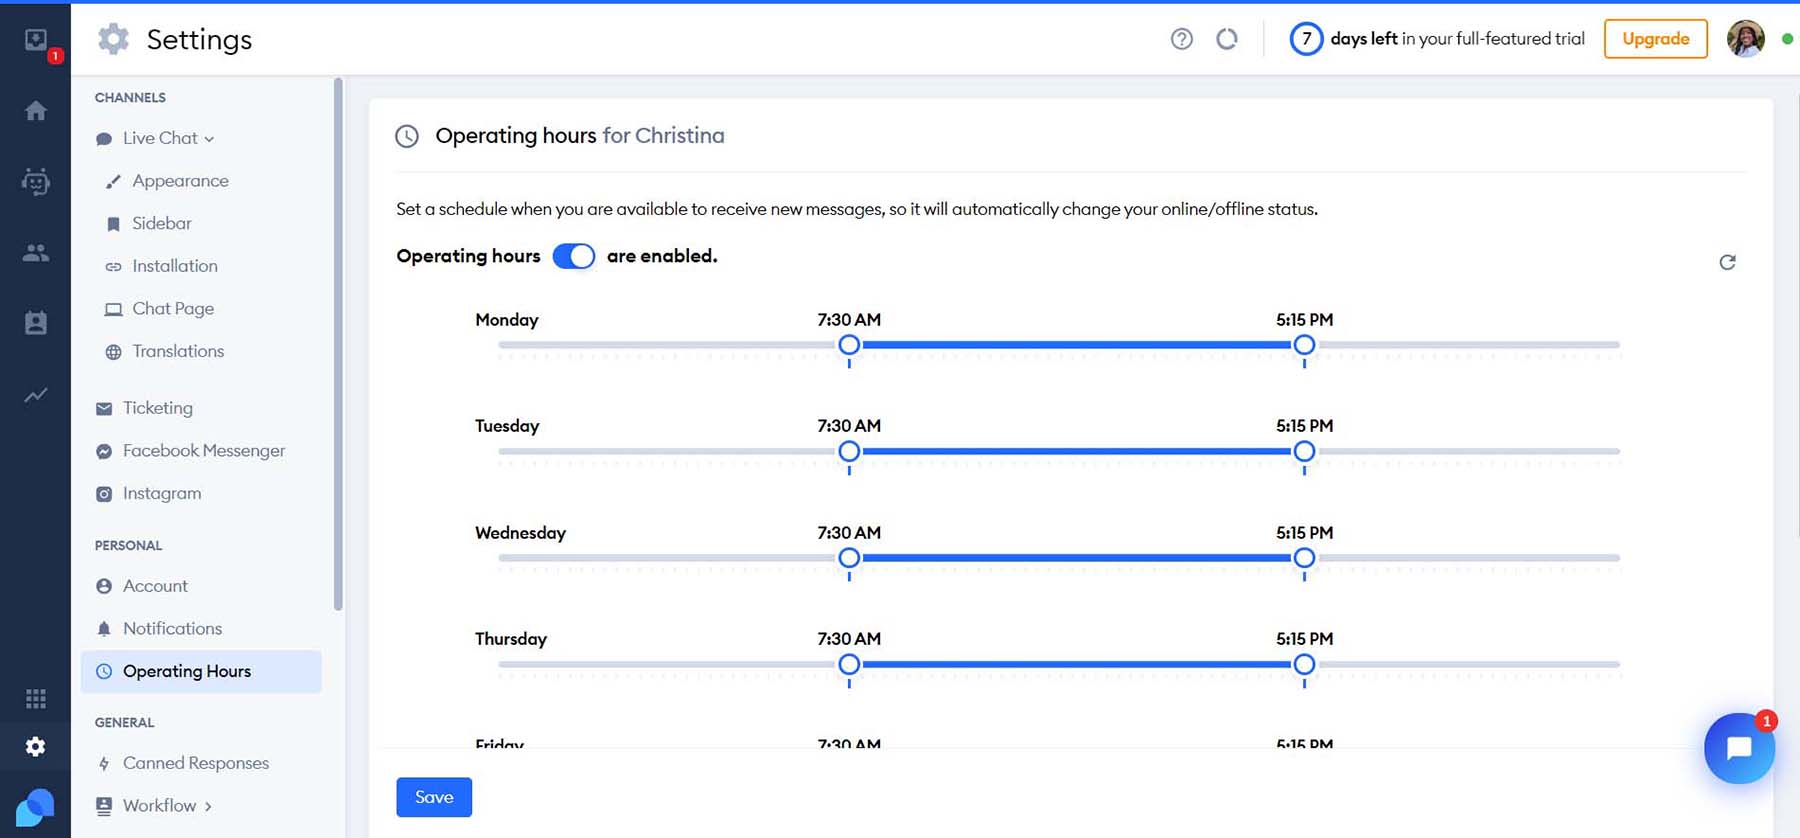
While your live chat allows for 24/7 contact with your customers, you may want to set hours of operation for your chat widget. Tidio enables you to customize your operating hours individually for each day of the week. Additionally, you can customize your away message or attach a lead form that appears when a visitor encounters your site after hours.
That’s it. Now, your site is equipped with live chat!
Other Live Chat Options for Your WordPress Website
Tidio is a solid WordPress live chat plugin. However, you may need a different set of features that it may not cover. Here are some other WordPress live chat plugins and solutions that may be a better fit for your needs:
- HubSpot: The ultimate marketing platform, Hubspot has live chat functionality that is heavily integrated with other parts of its feature-rich CRM solution.
- JivoChat: An all-in-one business messenger plugin that brings together live chat, phone, email, and social media chatting platforms. Additionally, you can make and receive phone calls through its live chat widget.
- LiveChat: With integrations to eCommerce solutions like Shopify, WooCommerce, and BigCommerce, if you are running an eCommerce storefront, this is your live chat solution.
- Live Chat by Formilla: File sharing, real-time monitoring, and multilingual capabilities are just a few features that you can find with this live chat plugin.
- Tawk.to Live Chat: Managing multiple websites, agents, and chats is where this chat plugin shines. Use your computer or mobile devices to stay connected to your website visitors.
- Chatra: Live chat, chatbots, email & social messaging can all be handled effectively with Chatra, a popular live chat solution that works with WordPress and as a standalone platform.
For more, check out the best live chat software options out there.
Conclusion
Live chat adds a powerful interactive feature to your WordPress website. Giving your customers a way to connect with you anytime is a great way to nurture client relationships and increase conversions. With the power of AI, the options are endless, and you can customize your WordPress live chat process in many ways. Tidio is a great option for bringing live chat to your WordPress website. From AI to customizable automated messages, easy widget styling, and email marketing tools, Tidio is a solid choice for bringing live chat to your WordPress website. Live chat functionality has come a long way. Now, you have a large selection of live chat tools that you can bring to your website. Have you added live chat to your website? What platform did you use? Let us know in the comments section below!





This is the first time, I hear about this chat plugin, but it definitely is something else. Without a doubt, I will test it on my website. The features fit every requirement I have.