One of the most essential parts of running a WordPress site is branding, and nothing stands out more than a logo. Your logo defines your brand, so you need to use it properly. In this post, we’ll tell you how you can implement a logo into your website using the WordPress site logo block. We’ll also cover the block settings available and give you some helpful tips for using a logo effectively.
- 1 What is the WordPress Site Logo Block?
- 2 How to Add the Site Logo Block to your WordPress Header
- 3 Site Logo Block Settings and Options
- 4 Tips and Best Practices for Using the Site Logo Block Effectively
- 5 Frequently Asked Questions About the Site Logo Block
- 6 Using Divi to Add a Site Logo to Your Global Header in WordPress
- 7 Conclusion
What is the WordPress Site Logo Block?
The site logo block in WordPress is one of many site blocks available in the WordPress editor with the rise of full site editing. The block gives you the ability to add your site’s logo to a page template or main header in WordPress.

The site logo block is also dynamic because it can pull your site logo from your website’s data as dynamic content. So changing your site logo via the site logo block or on the backend will automatically update all iterations of the site logo block throughout your site. Furthermore, when using the site logo block on a template, you have easier control over your global logo design.
It’s important to note that the Site Icon, the smaller image seen in your dashboard and browser tabs, etc., is distinct from the Site Logo. However, the site logo can also serve as the site icon if you choose by updating the block settings tab which we’ll get into further below.
How to Add the Site Logo Block to your WordPress Header
For this example, we will show you how to add or customize the site logo on your WordPress header in a template using the Twenty Twenty-Two theme. Here’s how to do it.
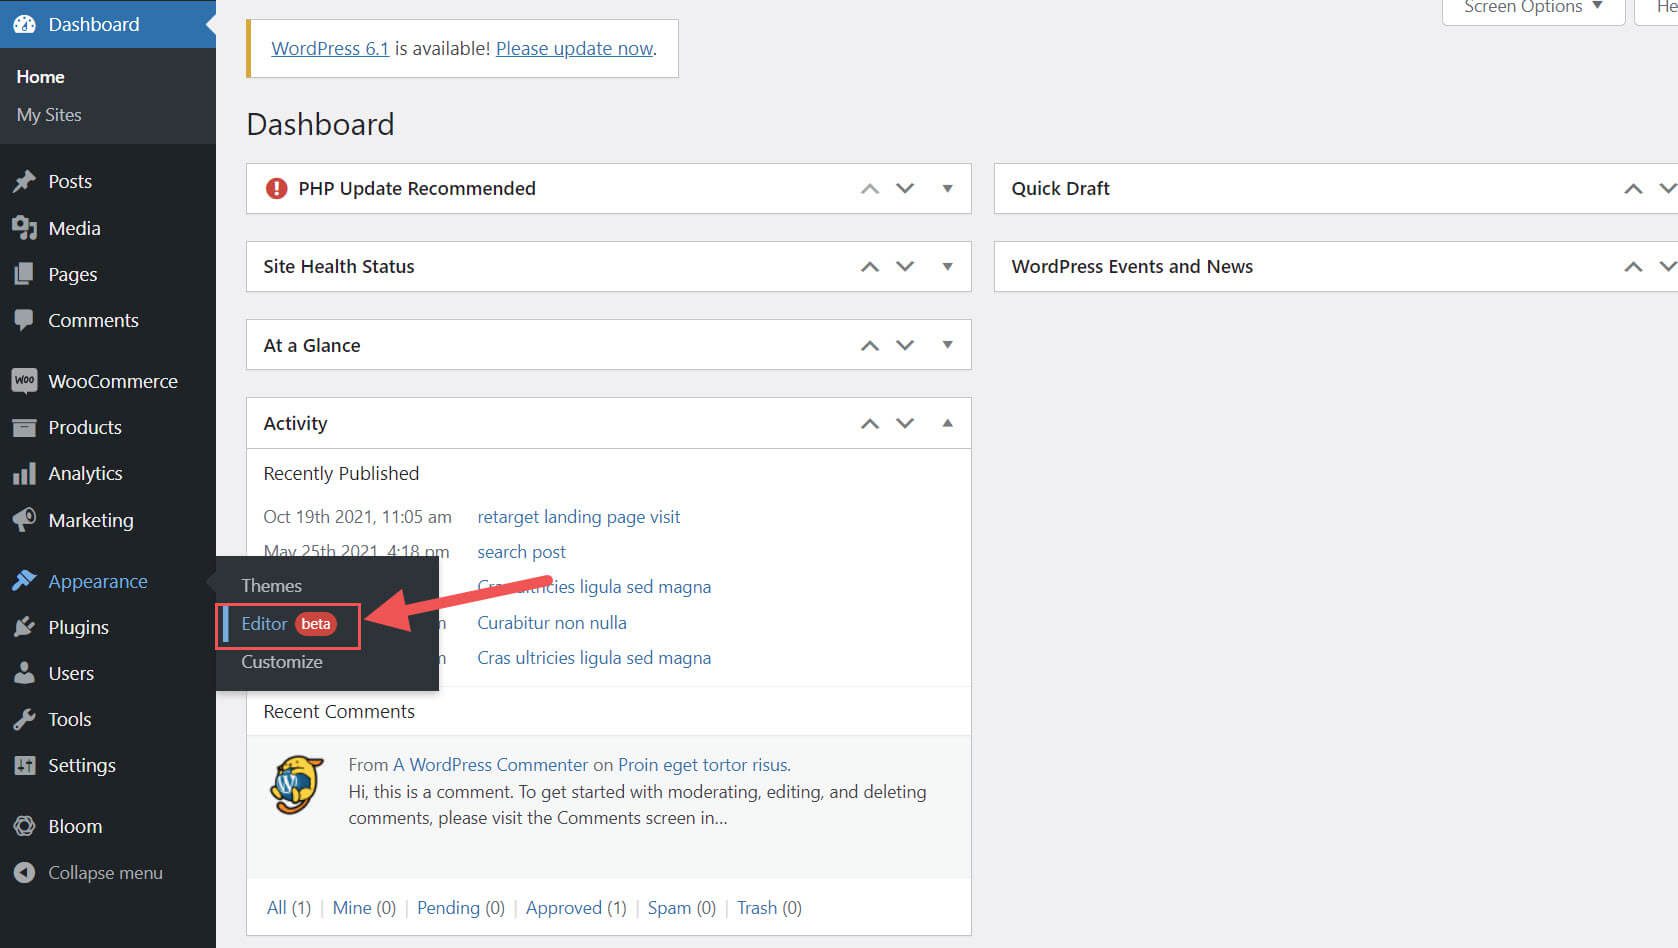
From the WordPress Dashboard, navigate to Appearance > Editor.
There should already be a site logo inside the header area of the page template on the left of the Site Title. You can also open the list view to find it as well.
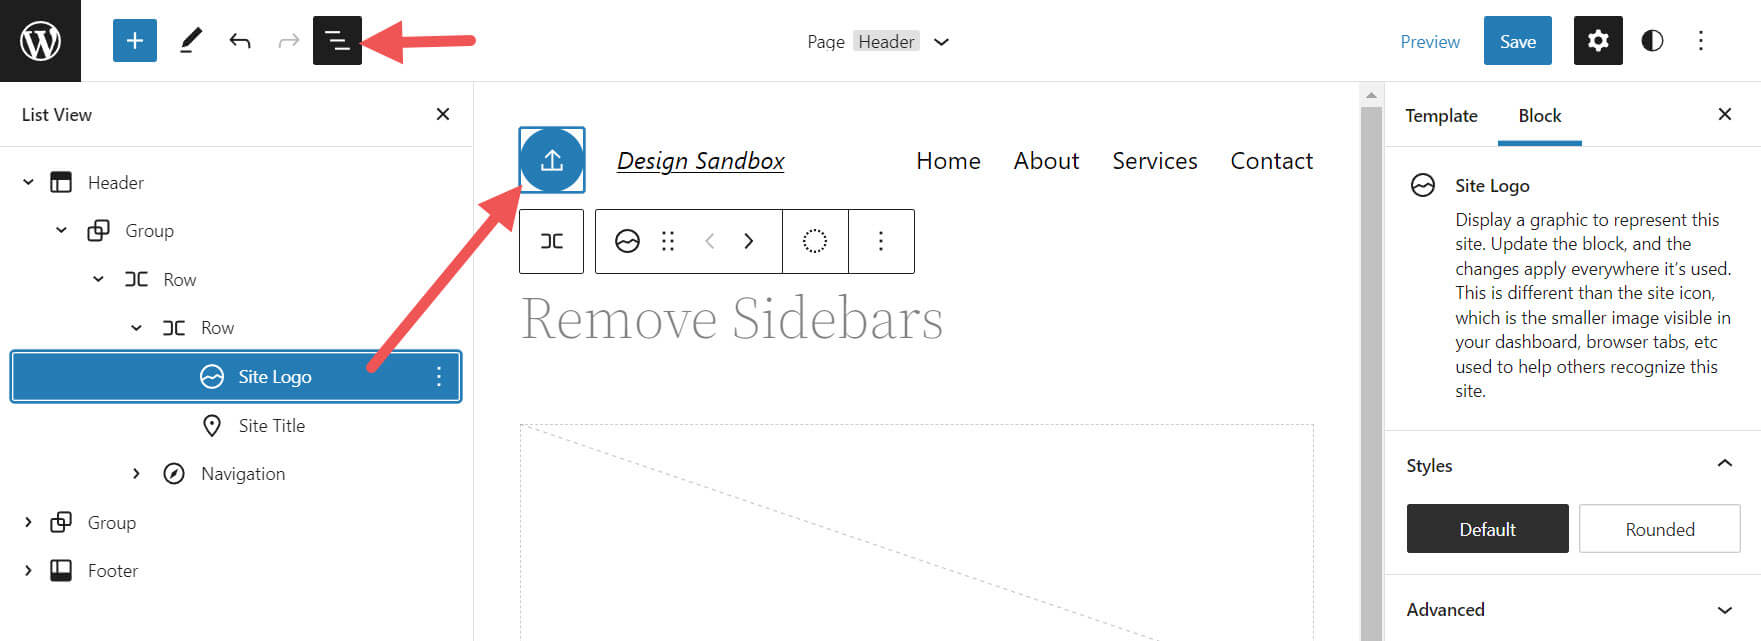
If you want to add the Site Logo block to the template, you can click on the + block inserter icon.
![]()
Then search for “Site Logo” and click on it and/or drag it to your desired location to add the block to your page.

If you haven’t set your logo, you can upload it after clicking the upload sign on the Site Logo Block.

Once you change your site logo via the site logo block, all other copies of the site logo will display the same image. This is the dynamic functionality of the block in action.
Site Logo Block Settings and Options
The Site Logo Block comes with additional settings and options that make it easy to customize for your website. Here is a brief overview of the settings available.
Toolbar Settings
If you hover over the block, you’ll see a formatting menu that includes the following options:
- Transforming the block into another type of element
- Adjusting the shadow, highlights, or tone of your logo
- Changing the zoom, aspect ratio, and rotation of your logo
- Replacing your logo and image
- Shows more advanced options such as copy, duplicate, move, lock, group, add to reusable blocks, or remove the block.

As you may have noticed these tools can help you adjust the look of your logo so that you can get the placement and design to match your website’s style.
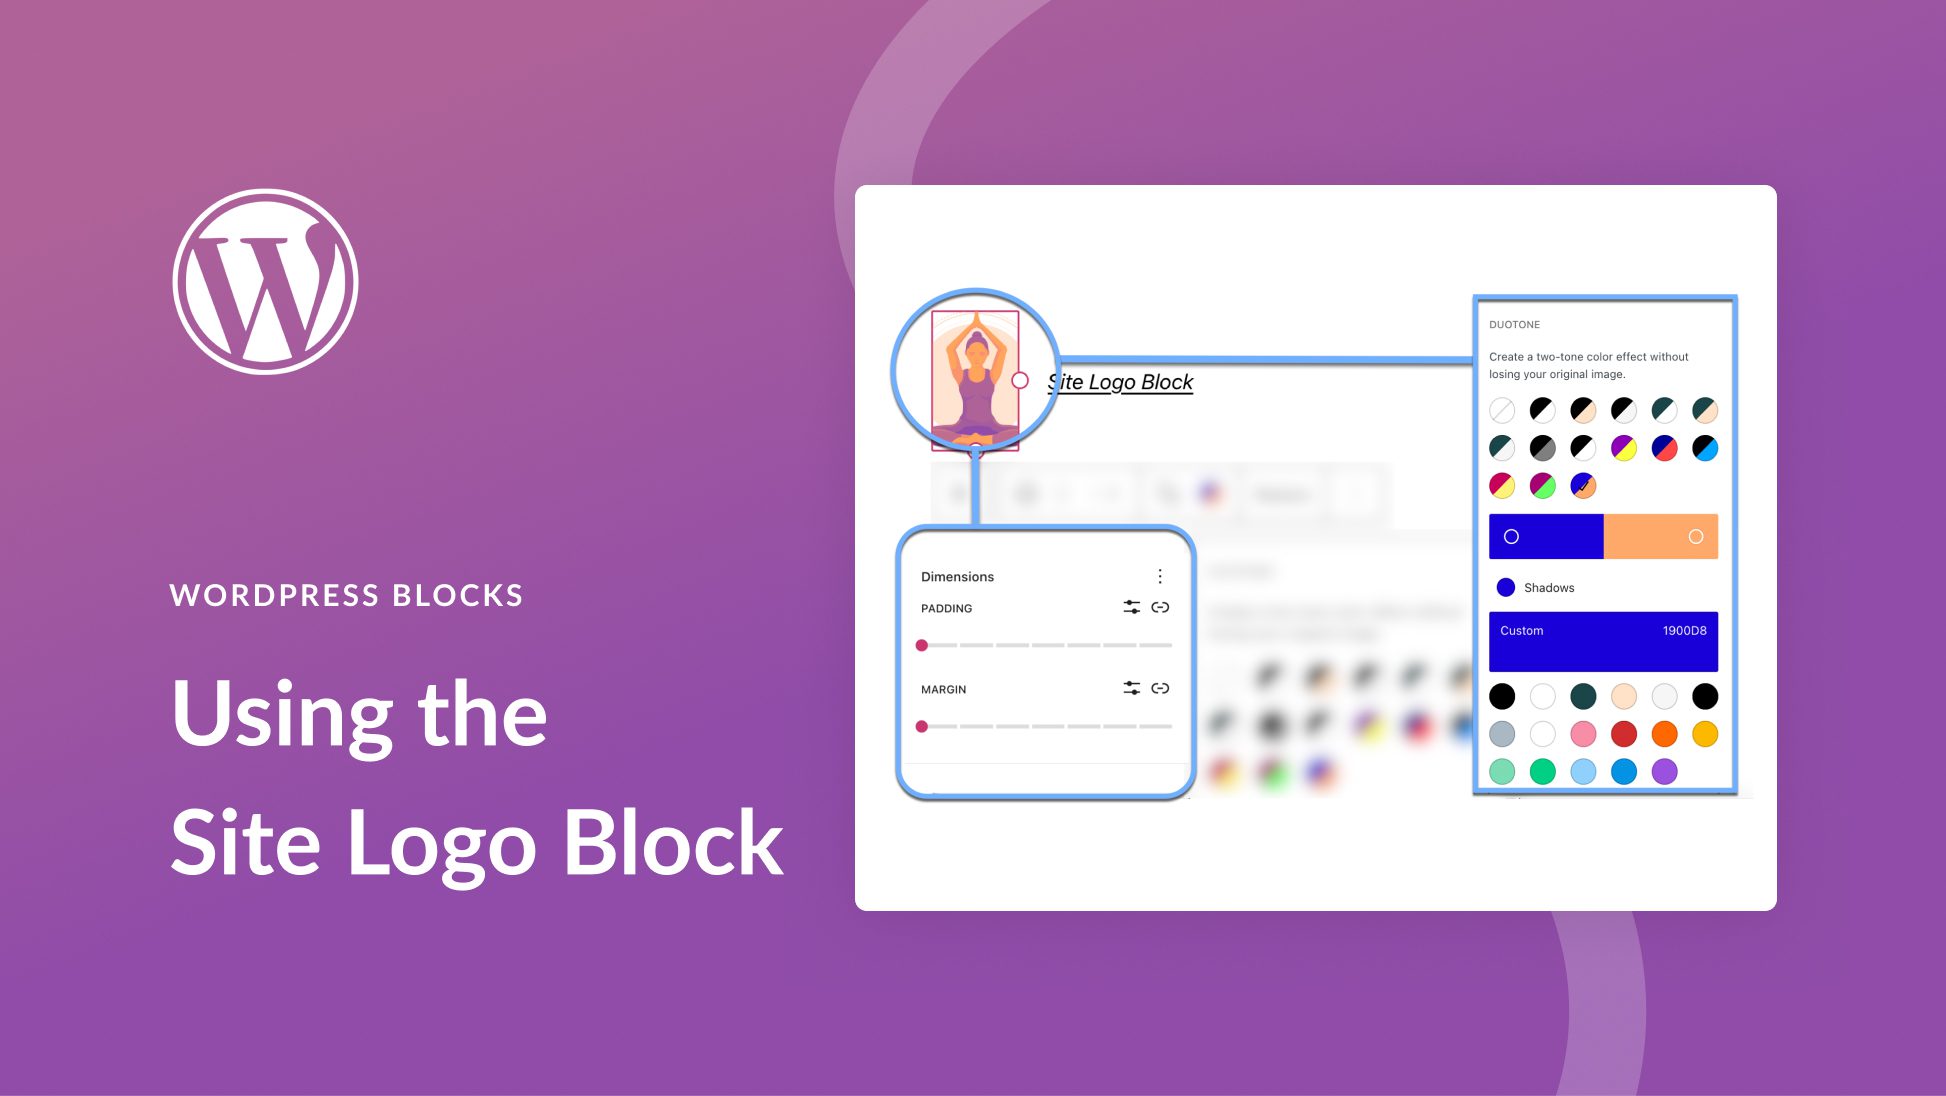
To change the color of the logo image click the duotone tool and select your desired color scheme.
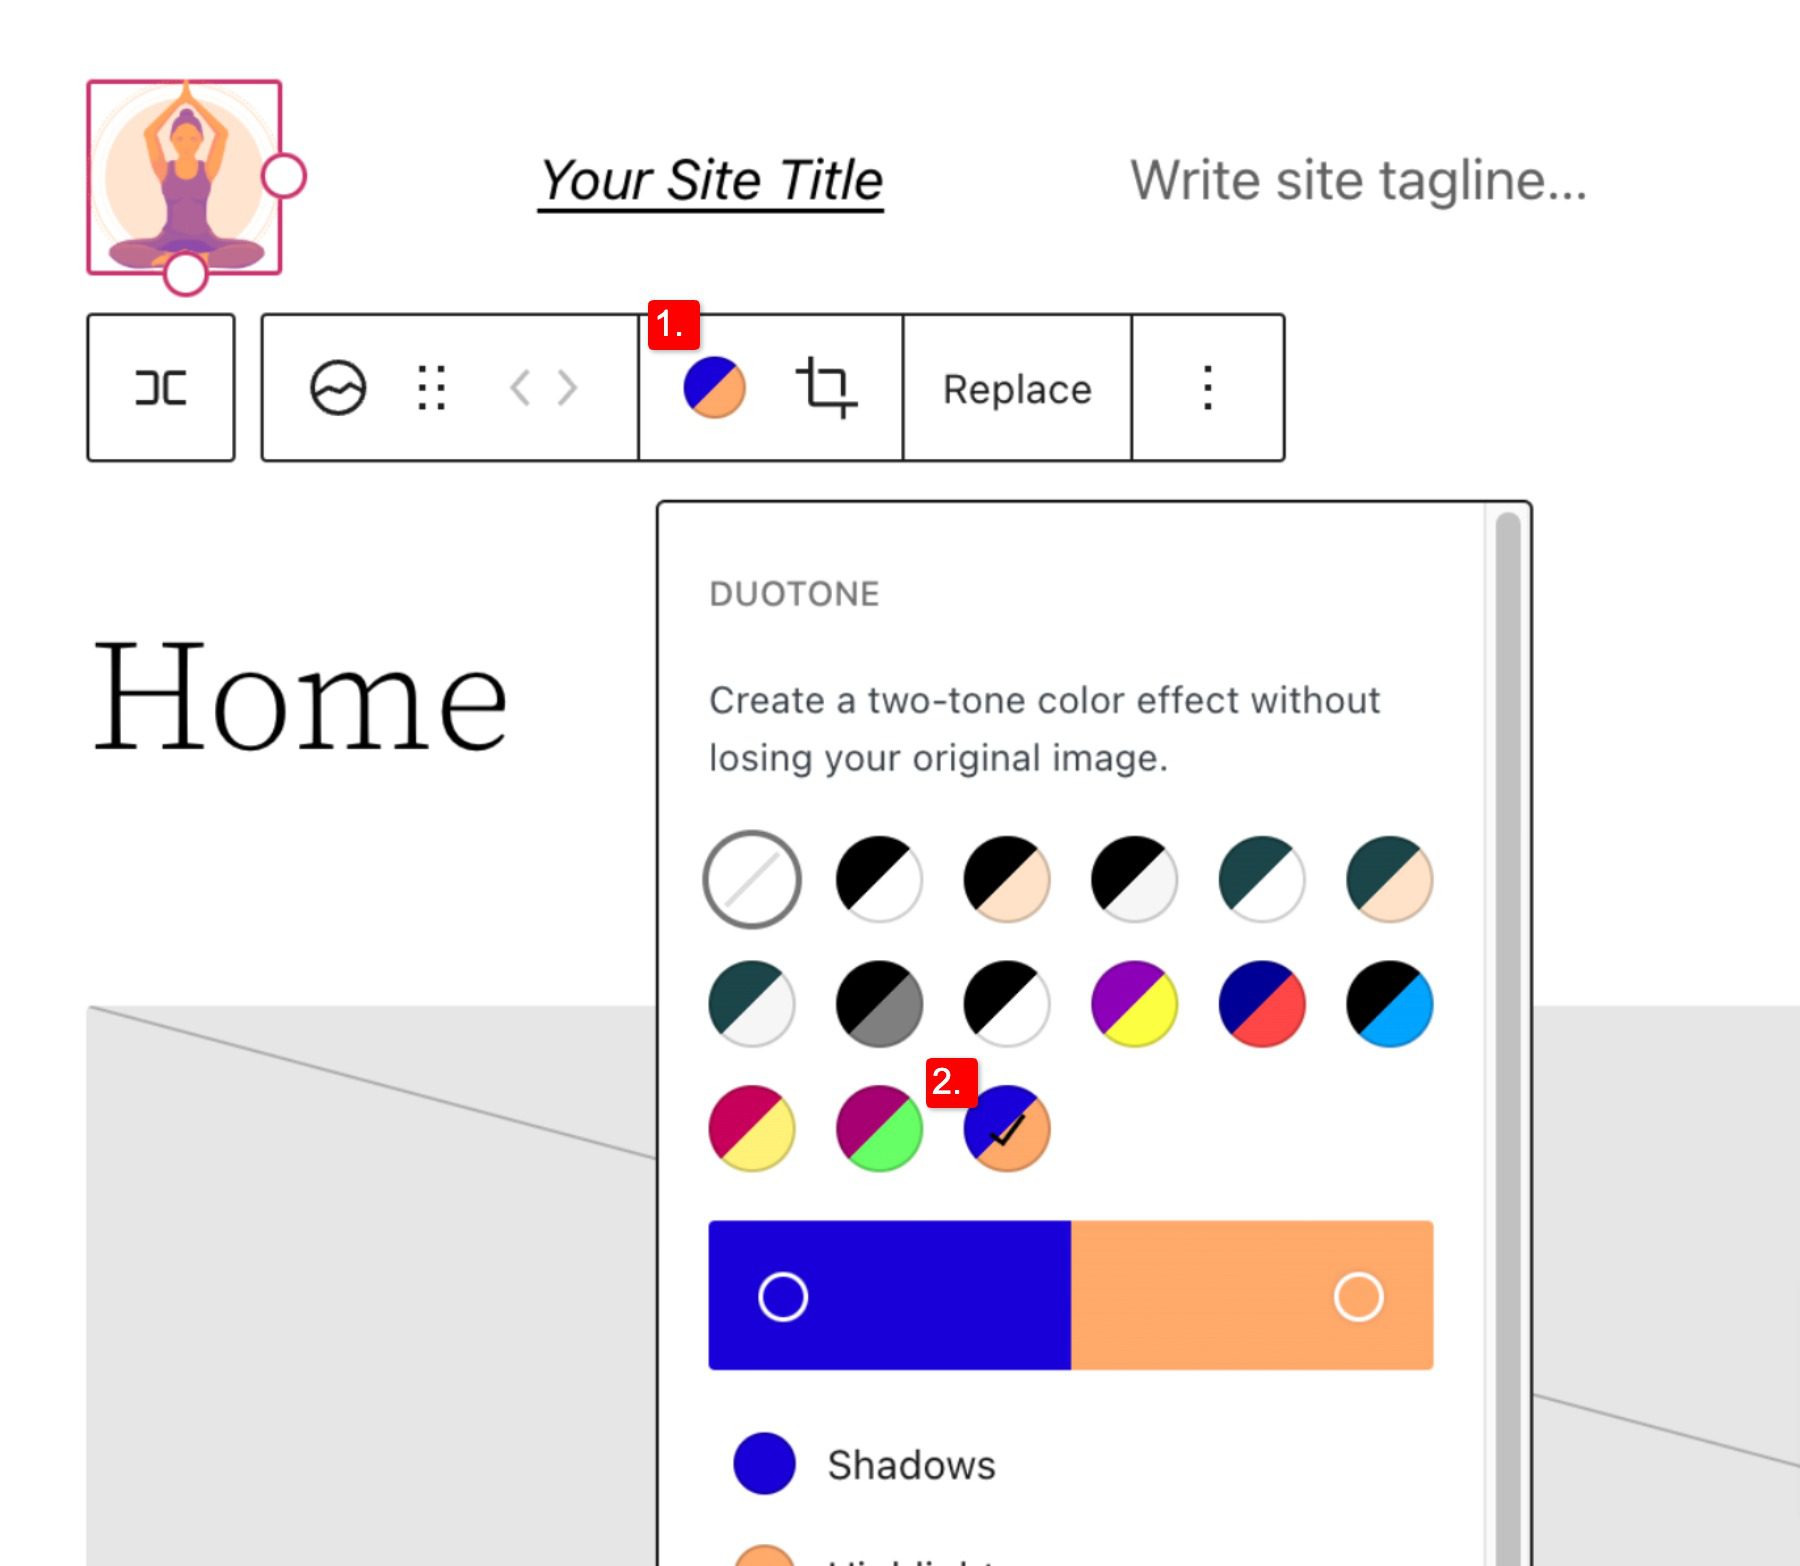
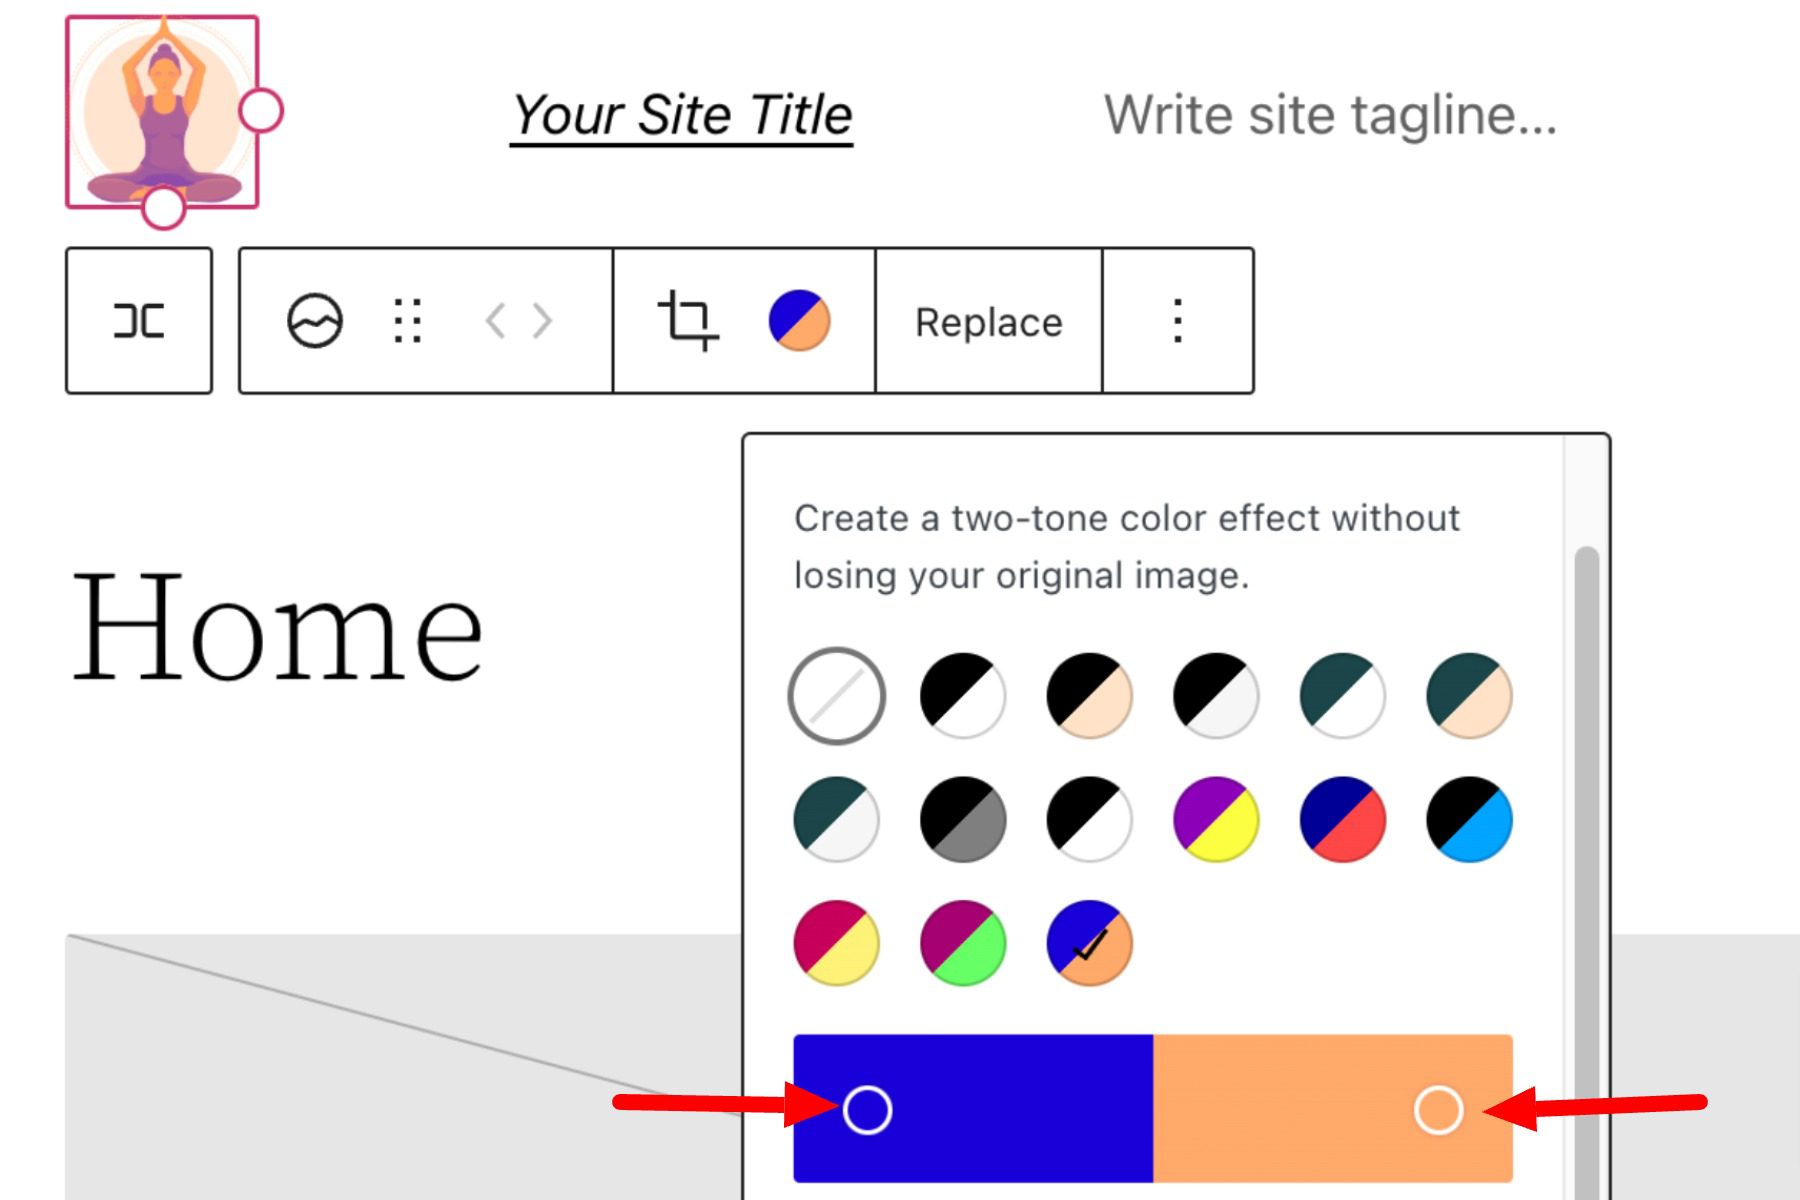
To set your colors, select the dots within the color bars:
Site Logo Block Settings
If you open the additional options or block settings toggle in the sidebar, you can find more block settings you can customize.
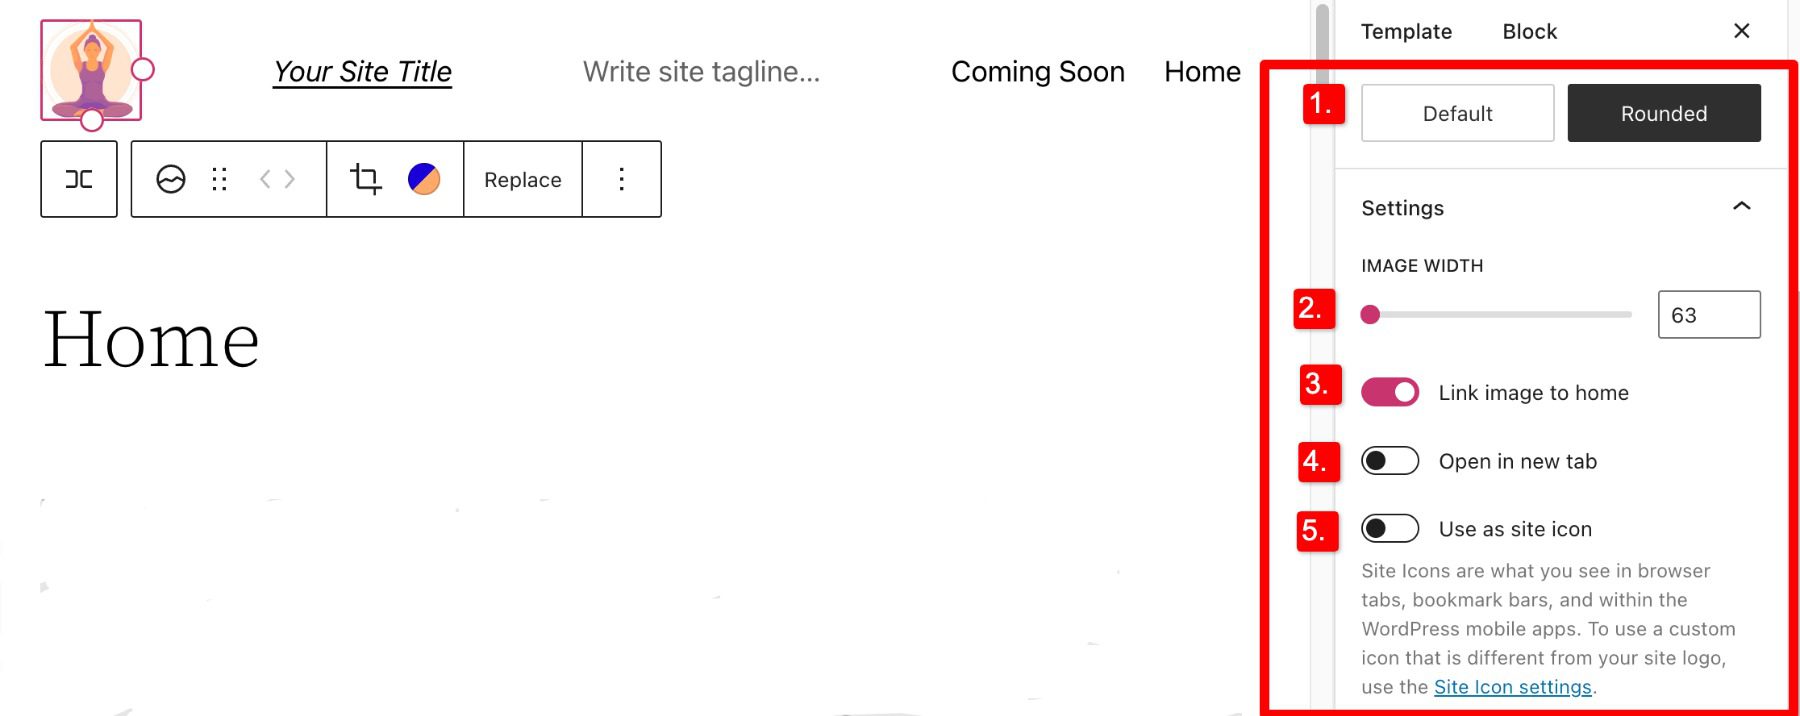
From here you can change your logo to:
- Appear rounded instead of the default square or rectangle setting
- Adjust the image width to create a larger logo (it’s important to choose the best size for your logo)
- Link image to home, if enabled will navigate users back to your home page when your logo is clicked
- Open in a new tab, if enabled will open your home page in a new tab
- Use as site icon, if enabled will use your logo as the site icon or favicon
Below the settings section, you can find the dimensions tab where you can adjust the padding and margin of your logo.

That covers everything you need to know about the settings available for your logo block, so you can customize your logo’s style to match perfectly to the rest of your site’s aesthetic. Now, let’s delve into some tips for how to use this block effectively.
Tips and Best Practices for Using the Site Logo Block Effectively
Using the site logo block is pretty straightforward to use, but it’s still important to keep some things in mind.
Optimize the Logo Image Before Uploading
Just like with any image uploaded via WordPress, it’s important to optimize your logo before you upload it to your site logo block. This will improve your load speeds and be beneficial for image SEO as well. Your logo should be a PNG, and the file shouldn’t be too big, we recommend using a web tool like TinyPNG, to help compress your image without losing quality in the process.
Match Your Website’s Style
Assuming your website already has a design and scheme, your logo mustn’t contrast too much with the style already in place on the rest of your site. So take a look at the colors and layout of your website and see if you can work your logo in as seamlessly as possible.
Prominently Display Your Logo
Making sure you use your logo properly after creating it is an essential step in effectively branding your website. In most cases, your logo should be displayed on your WordPress header area/template so that it can be seen on all the pages of your site. Also, it’s best practice to make your logo link back to your homepage to help with user flow and to constantly draw the user’s eye to your logo.
Frequently Asked Questions About the Site Logo Block
After you complete the difficult task of creating your logo, using the logo block in WordPress is relatively hassle-free. Still, as with anything, some questions need answering. Here are some answers to frequently asked questions about the logo block.
How Do I Change The Site Logo?
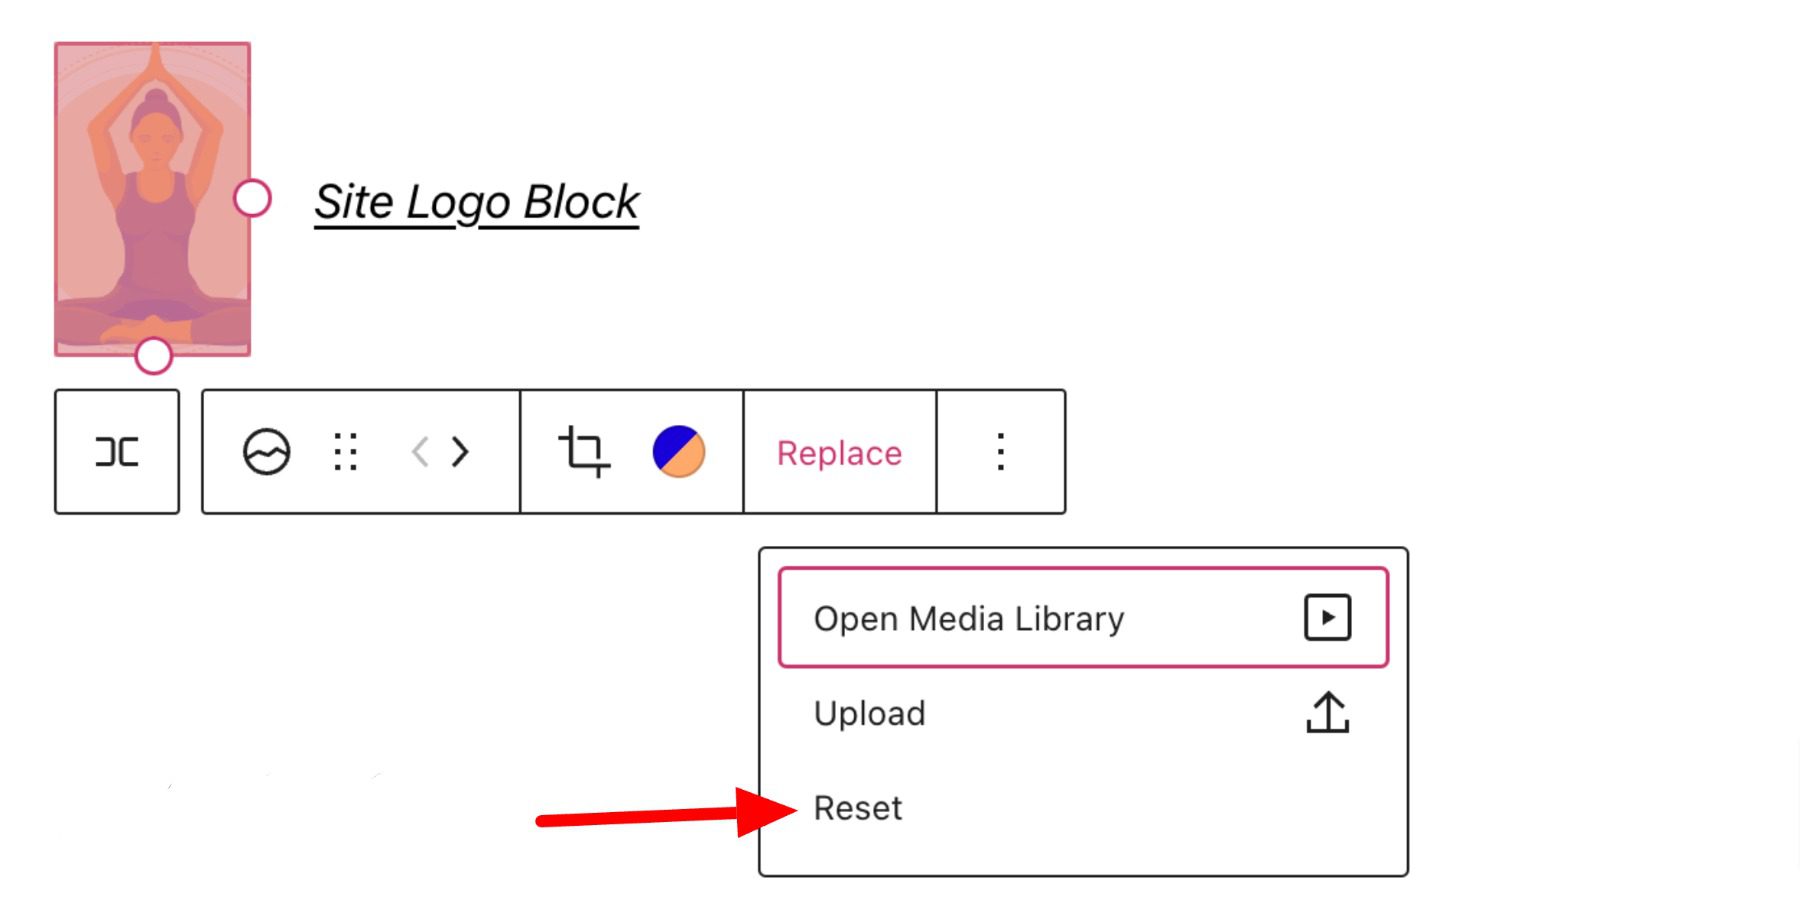
To replace the site logo, click on the site logo block and then click on Replace in the toolbar settings. There you can add one from your media library, upload a new one, or reset the site logo to the default.
When Should I Use the Site Logo Block?
Your logo is the symbol that represents your website and, therefore, should be prominent on nearly every page of your site. This is why we recommend putting your logo in the header area, where it can be used for both navigation (Home button) and branding purposes.
What’s the Difference Between a Logo and a Site Icon?
A site icon is used as a browser and app icon for your site; you may see it next to the tab in your browser. The logo for your site isn’t necessarily used as the site icon but can be activated in the logo block’s advanced settings.
Using Divi to Add a Site Logo to Your Global Header in WordPress
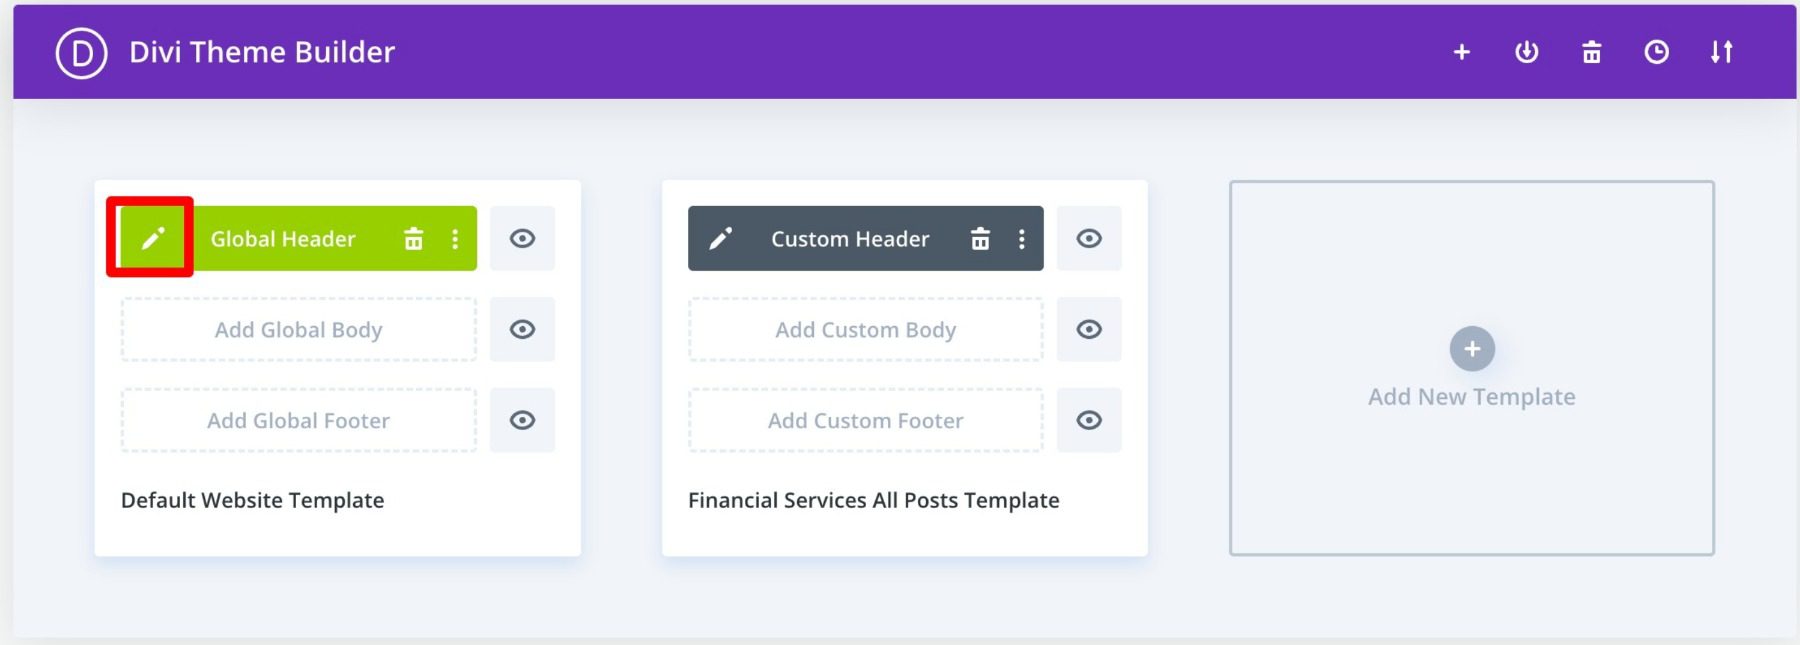
When using Divi, you can use the Divi theme builder to add a site logo to your global header in just a few easy steps. You can start by clicking the edit button next to Global Header in your default website template.
Now, you simply add an image module to the header and select the Use Dynamic Content option in the top right corner.
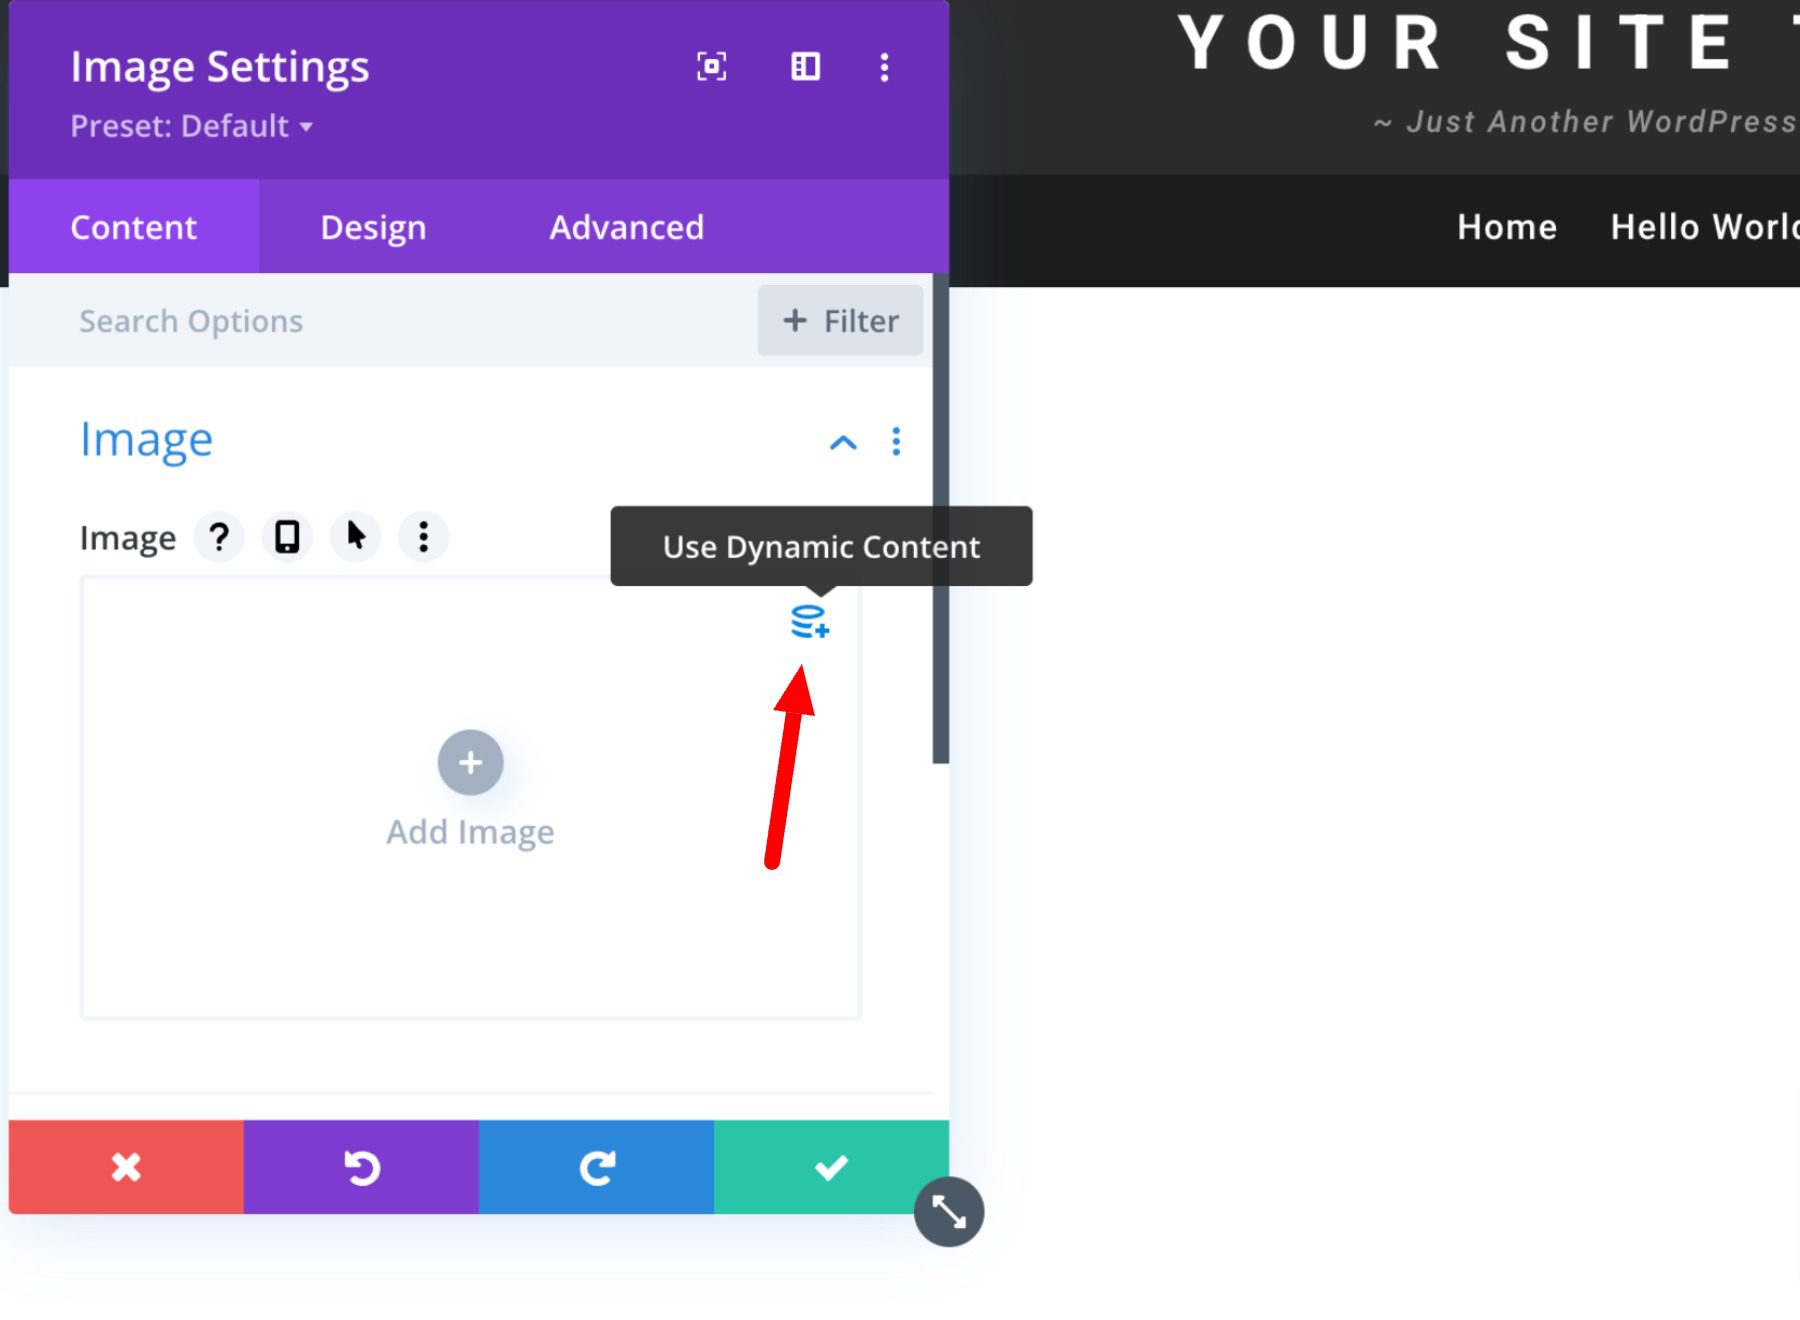
You will then be prompted to select from a list of all dynamic content that is accessible. Select Site Logo to add the dynamic logo to your header.
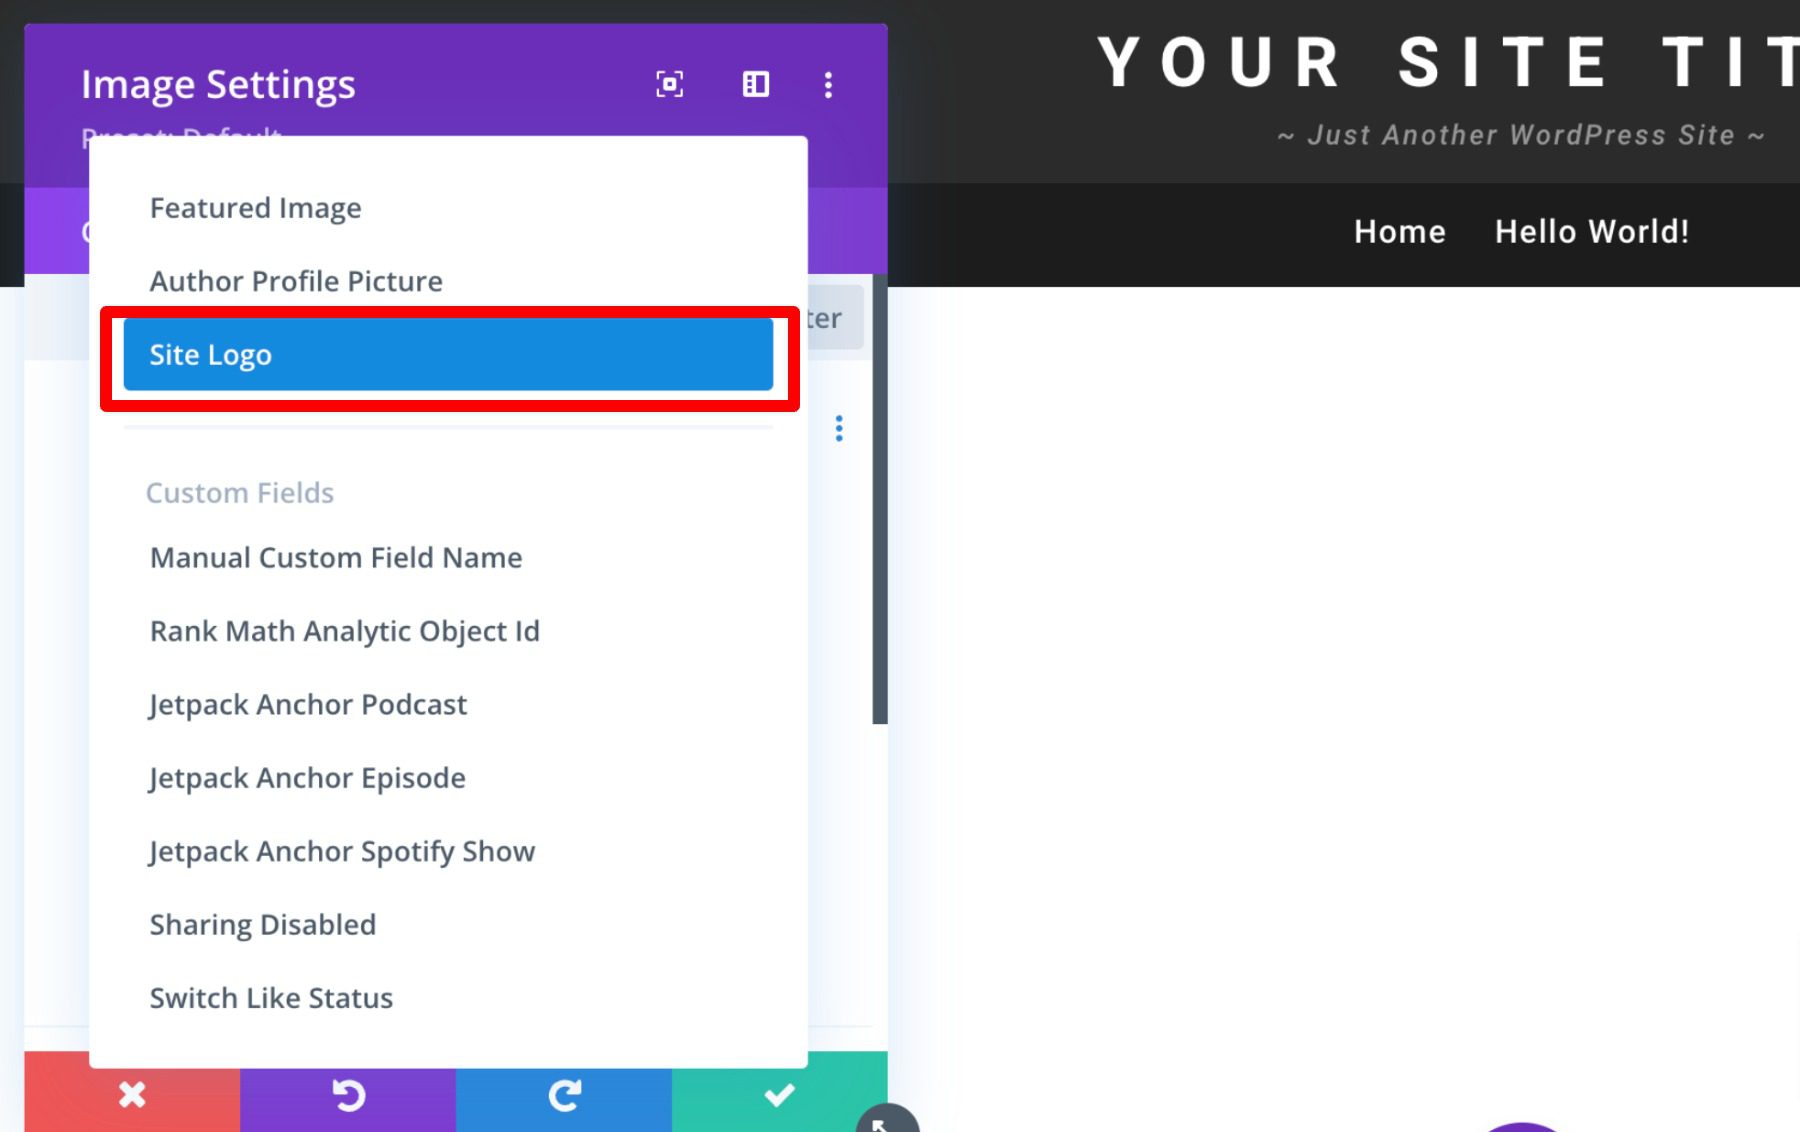
Learn more about using dynamic content with Divi here.
Conclusion
It is impossible to overstate the significance of your brand’s logo. However, you need a systematic approach to branding your site effectively. This is especially true if you want it to leave a lasting impression on audiences. Hopefully, some of the tips mentioned above can help you create your ideal logo and use the logo block correctly and effectively.
If you have any other tips on making memorable logos, leave them in the comment section below!
Featured Image via VectorMine / shutterstock.com




Why use the WordPress block editor for site logo?
Is the logo you add to the menu build in the Global Header (Divi Theme Builder) not enough?
Is there a SEO or another reason for using the WordPress block editor, that makes it a better option, than just building the menu “as usual” in the Divi Theme Builder?
I’m missing a why and when you would use this option instead of using the Divi Theme Builder.
If this is just another option for adding your logo to your header menu and just introducing the options in the WordPress Site Logo I would if this is stated more clearly 🙂
My confusing might stem from the “fact” that a logo should not be messed around with on the website itself, but must be ready made for use before uploading, so it upholds the rules in the company brand manual 🙂
Renard, thanks for your question. This simply is how you can add a logo when editing a block theme’s templates. If you are using Divi then there’d be no need for this block. If you work with WordPress a lot, it is just good to know what it is capable of and what comes ‘in the box’. Hope that helps clear things up!
I don’t see the editor option under Appearance….?
It is only available for Block-based themes like Twenty Twenty-Three.
Thank you for sharing a blog on the WordPress site logo block, it is very helpful for non-technical users who don’t understand how we can manage things on CMS. I like it very much, I hope to share more new articles like this.