Your WordPress website’s title is an incredibly important part of your brand, and knowing how to utilize it properly is important for any WordPress user. In this article, we’ll be delving into the Site Title Block, giving you some tips on how to use it properly to maximize its effectiveness on your WordPress website.
- 1 What is the WordPress Site Title Block?
- 2 How to Add the Site Title Block to your WordPress Header
- 3 Site Title Block Settings and Options
- 4 Tips and Best Practices for Using the Site Title Block Effectively
- 5 Frequently Asked Questions About the Site Title Block
- 6 Using the Dynamic Site Title in the Divi Page Builder
- 7 Conclusion
What is the WordPress Site Title Block?
The site title block in WordPress is one of many theme blocks available in the WordPress editor. This block gives you the ability to change or add your site’s title to a WordPress page template or main header.
The Site Title block is also dynamic because it pulls your site title from your website’s data (on the backend) as dynamic content. So changing your site title via the site title block or on the backend will automatically update all iterations of the Site Title Block throughout your site. Furthermore, when using the Site Title Block on a template, you have easier control over the design of the site title globally. This type of functionality is one of many new WordPress features that has come with full site editing.
Important Note: Updating the Site Title Block name WILL update the official name of your website that appears in Settings > General. Changing this will also change it on your browser title bar and in search engine results.
How to Add the Site Title Block to your WordPress Header
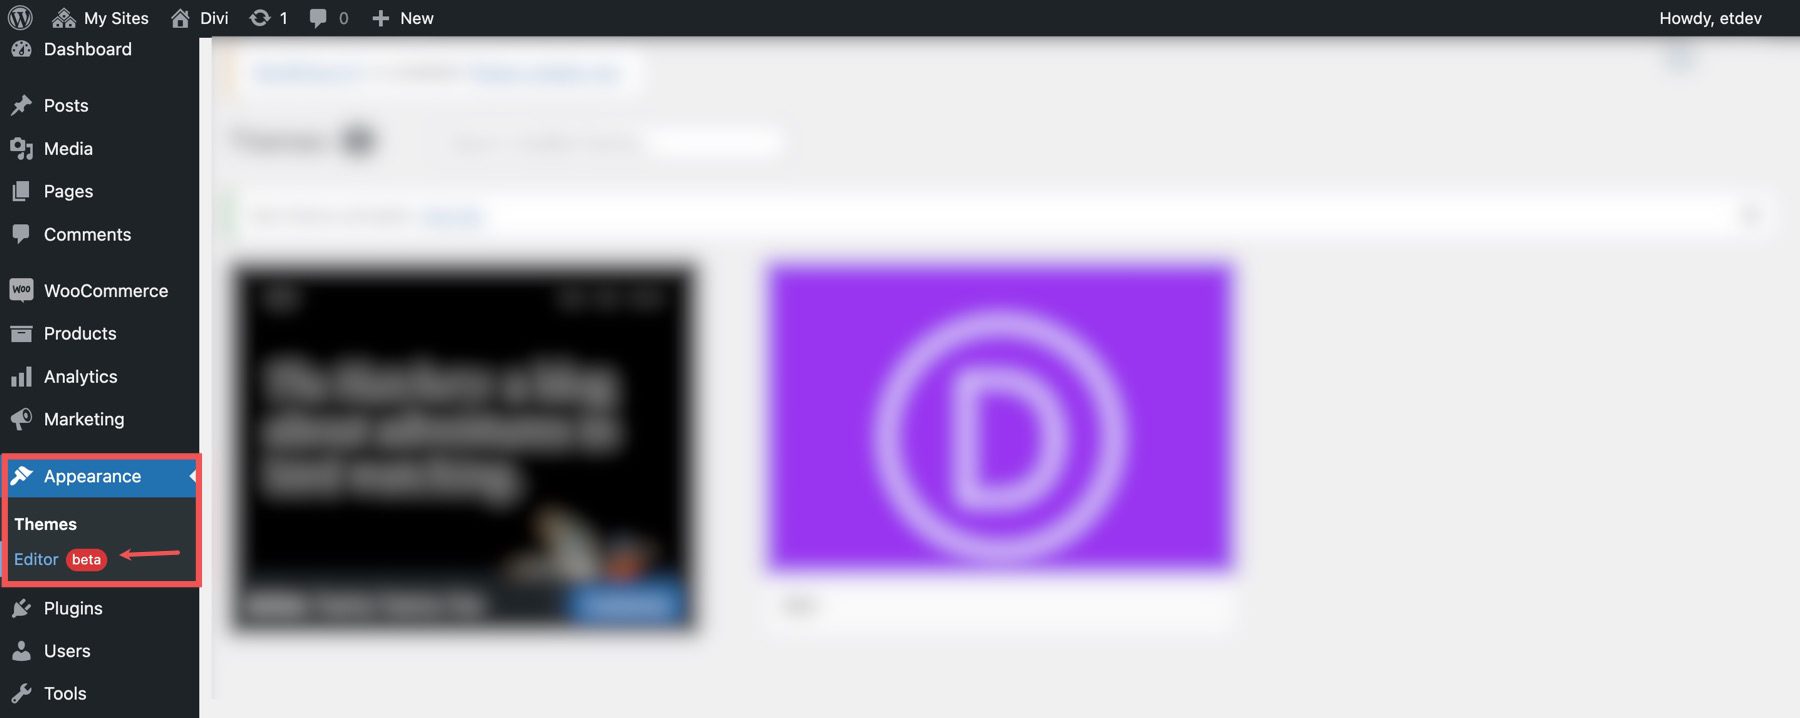
For this example, we are going to use the Twenty Twenty-Two theme to add the site title to WordPress header area of the template. From the WordPress dashboard, go to Appearance > Editor.
There should already be a Site Title inside the header area of the page template on the right of the Site Logo Block. You can also open the list view to find it as well.

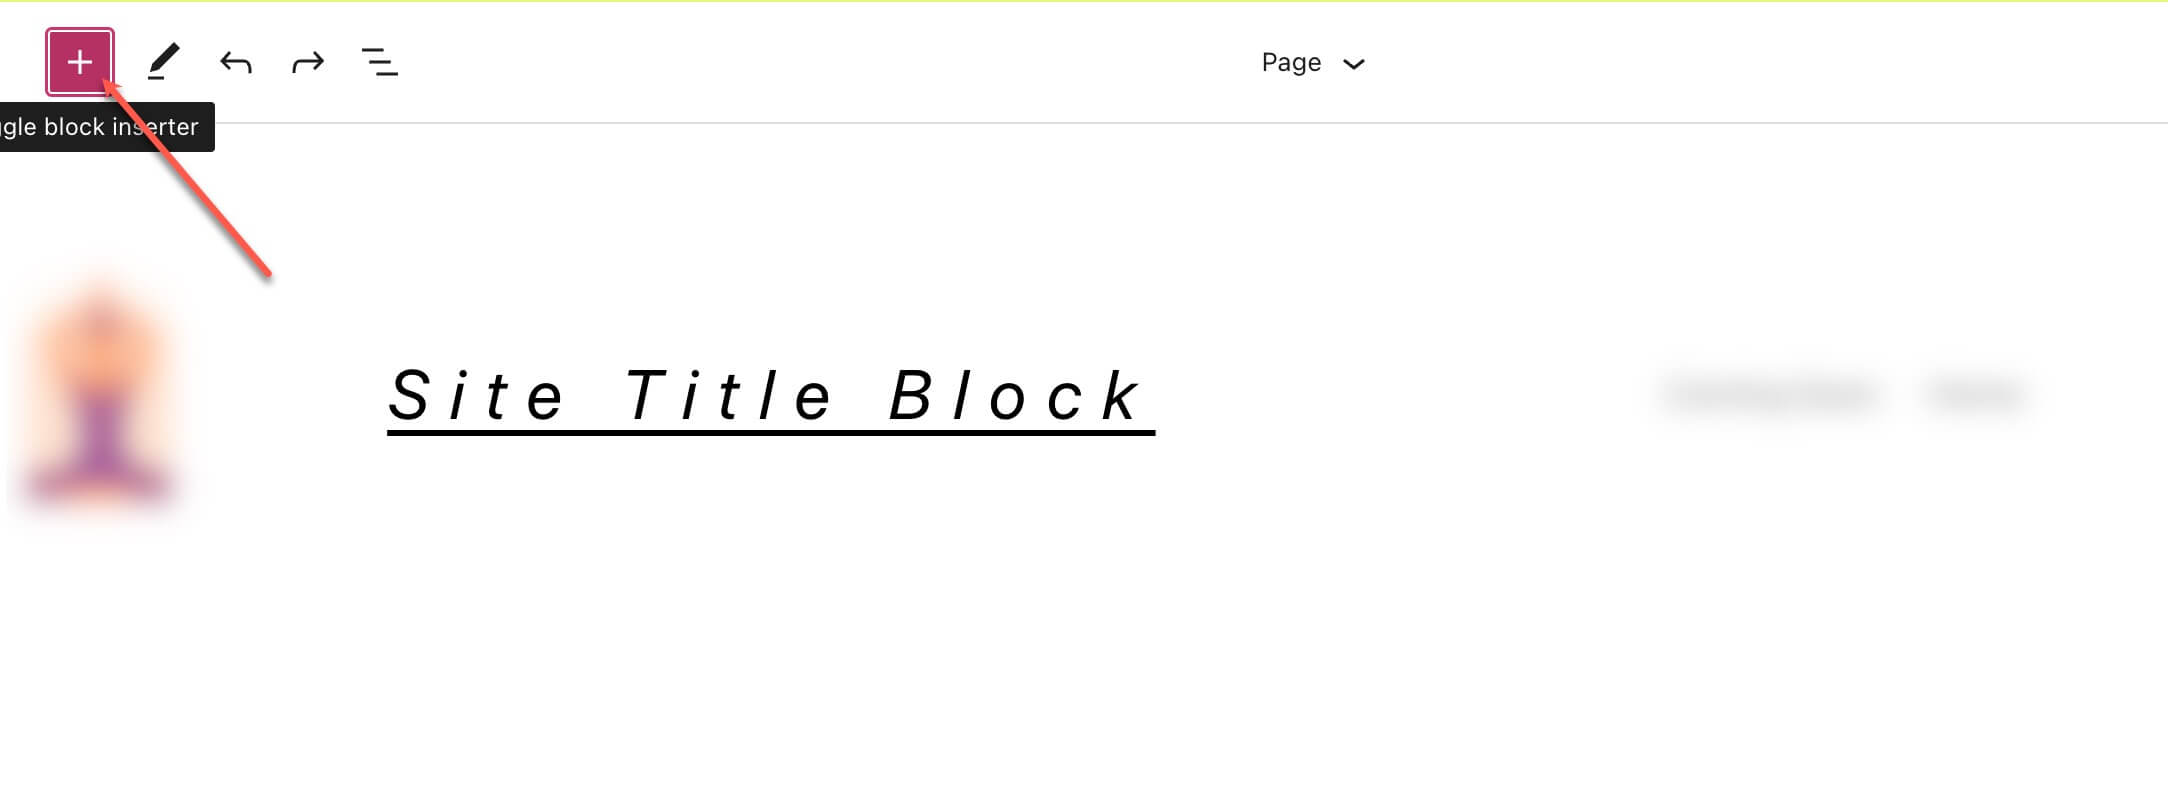
To add a Site Title block, start by clicking the Block Inserter (+).
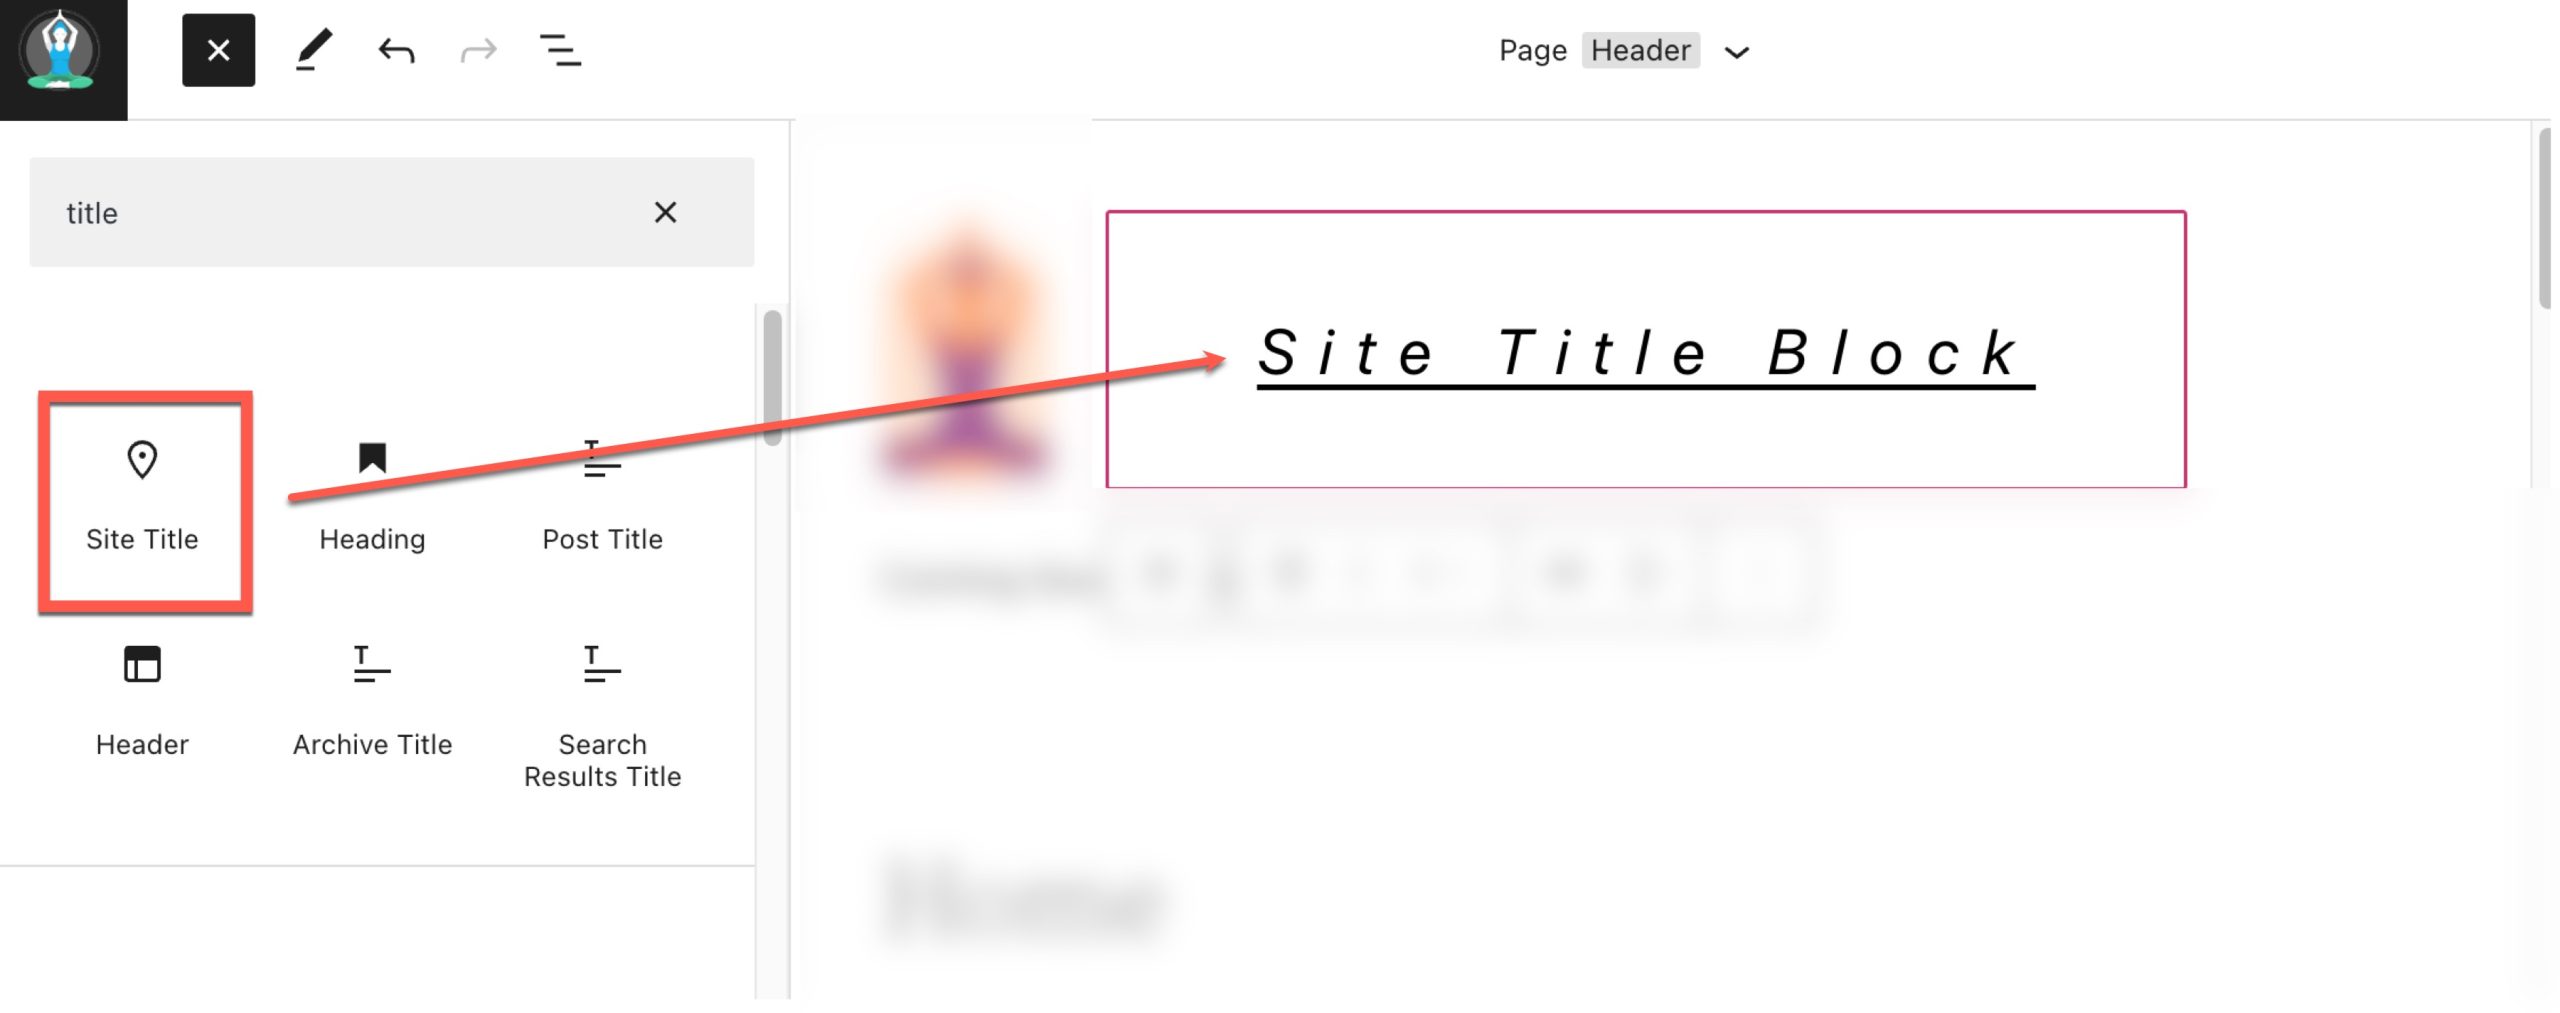
Then search for “Site Title” in the search bar.

Either click on it or drag it to your desired location to add the block to your header.

You can also type /site-title to quickly add your site’s title to any part of your page.

From here, you can click on the block and update your Site Title for your entire site and subsequently on all Site Title Blocks throughout your site. So don’t change it unless you know the consequences of doing so.

To change your website’s title away from the WordPress editor, you can navigate to Settings > General
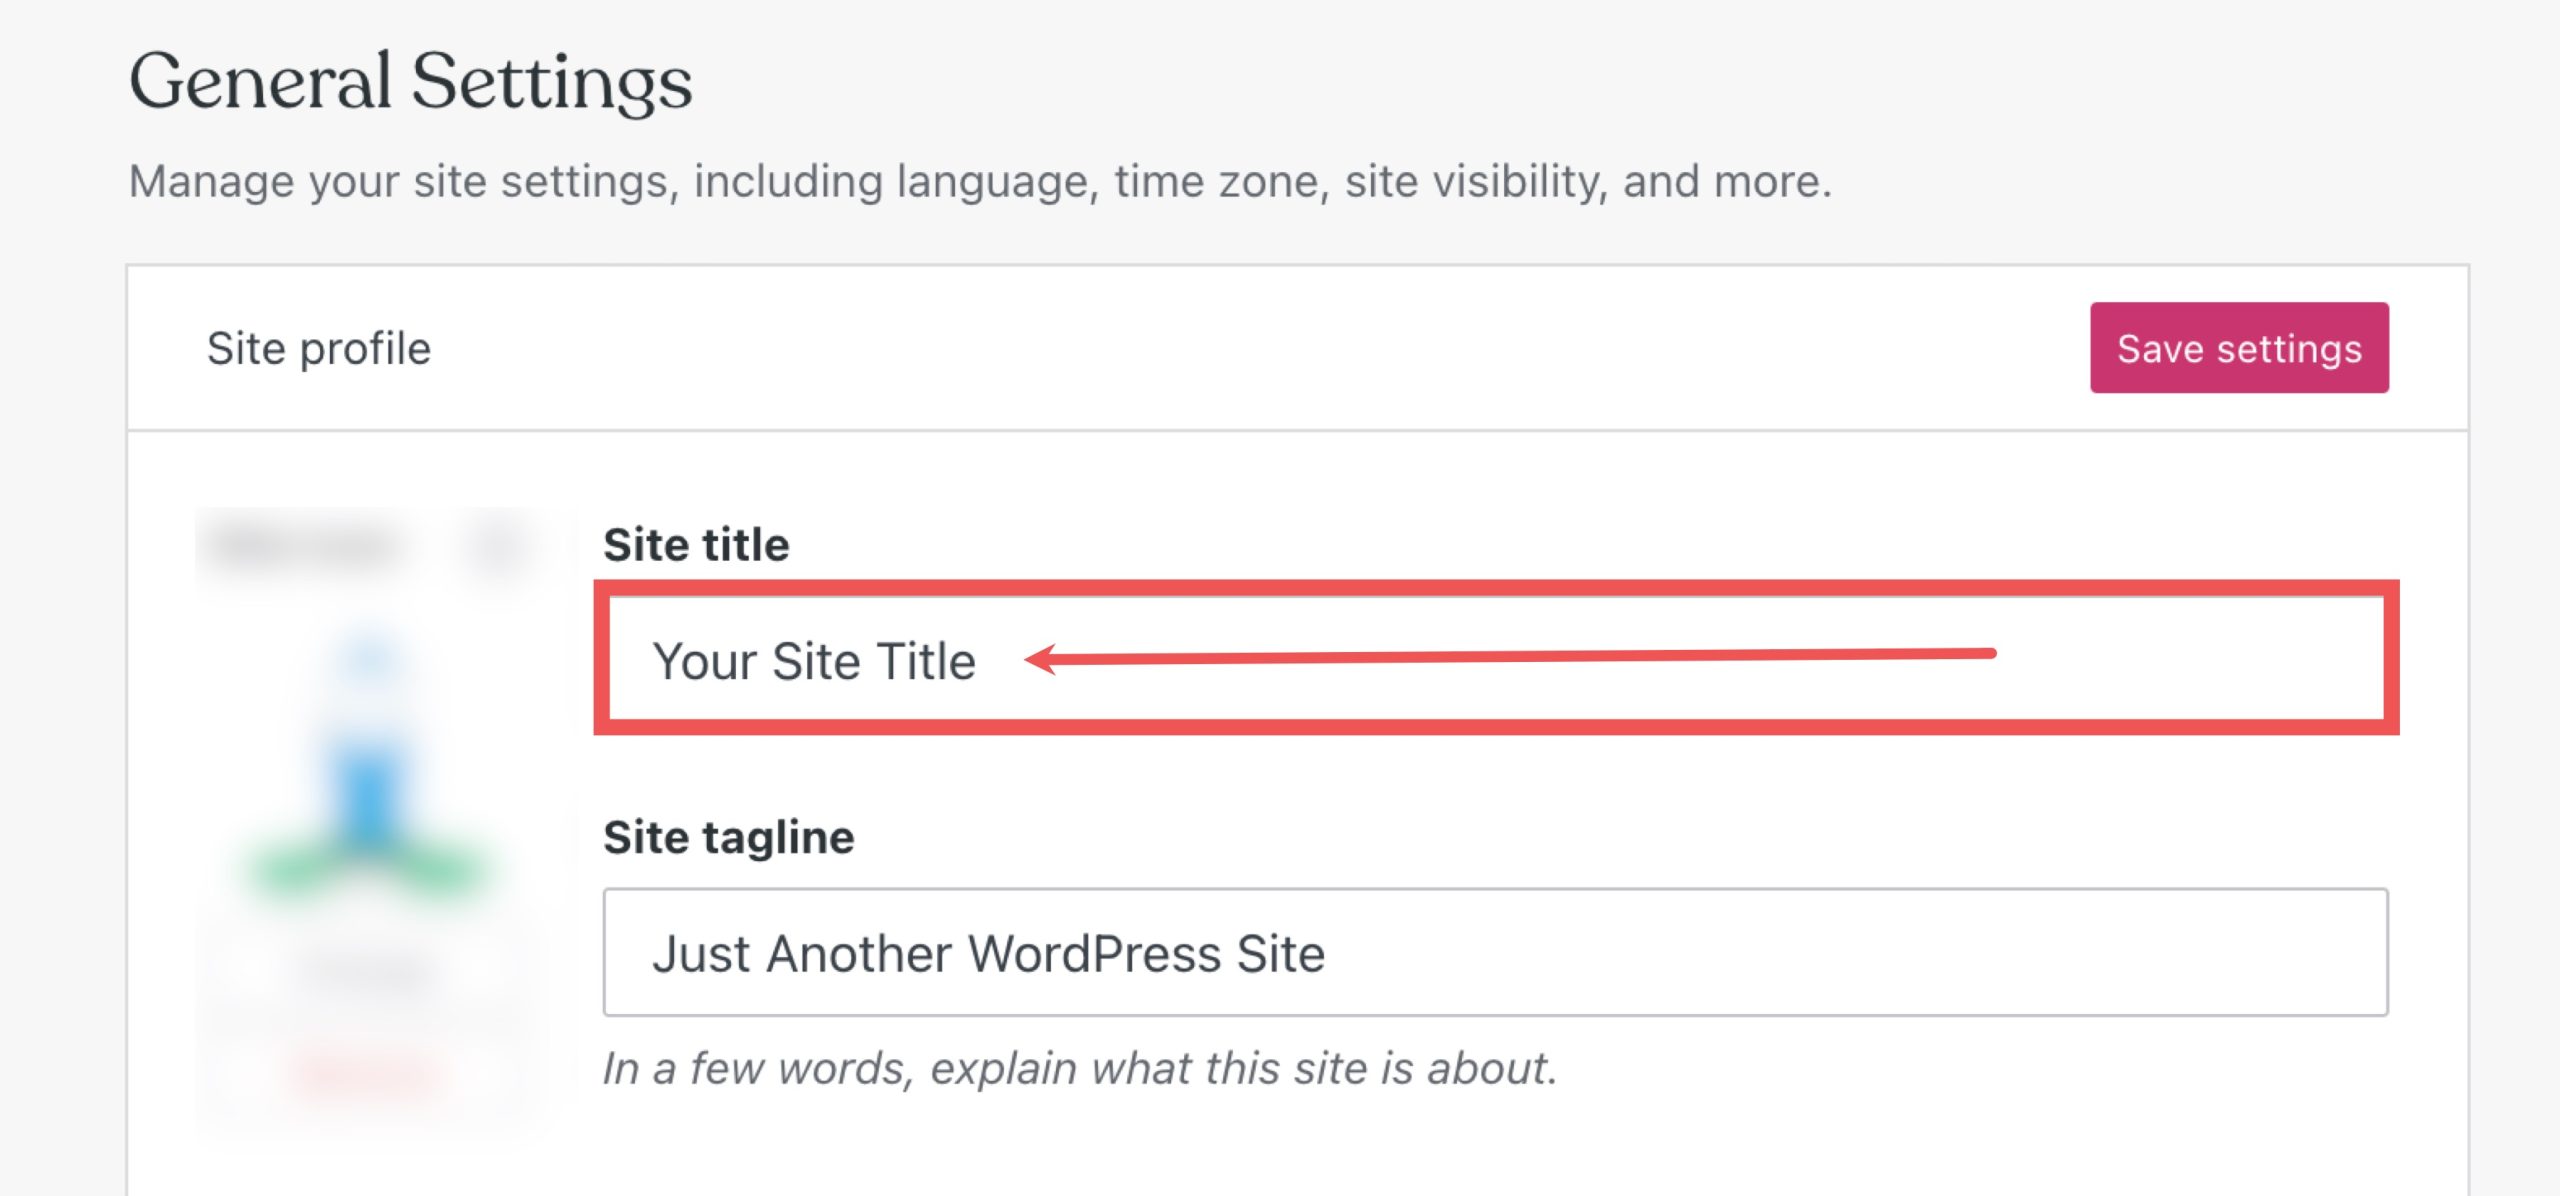
If you change your title here, your site title blocks will update on all the pages they are on.
Site Title Block Settings and Options
The Site Title Block comes with additional settings and options that make it easy to edit or customize the display of your title on your website. Here is a brief overview of the settings available.
Toolbar Settings
If you hover over the block, you’ll see a formatting menu that includes the following options:
- Transforming the block into another type of element
- Changing the heading level
- Changing the alignment of the text (left, center, right(
- More settings
Here’s a quick cheat sheet that shows where each of those options is within the formatting toolbar:

Additional Settings
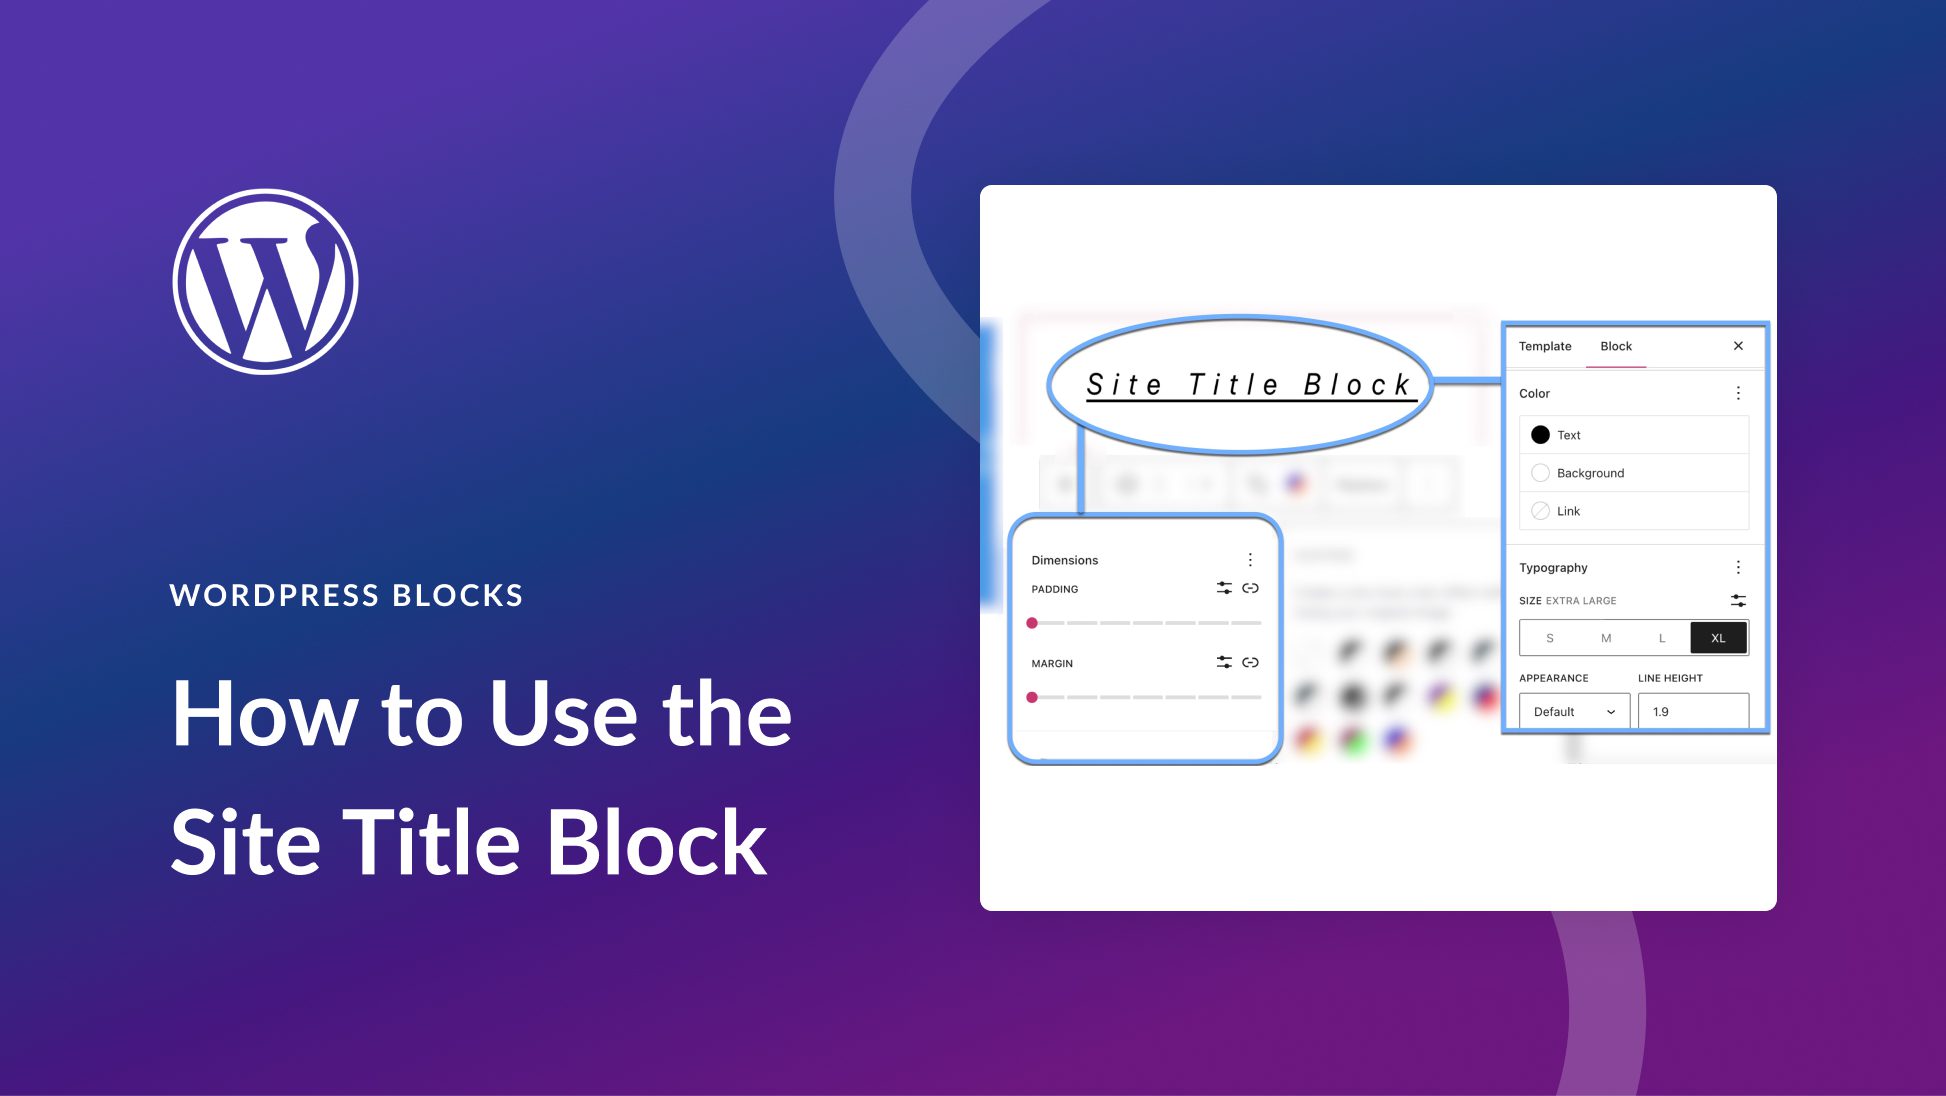
If you click on the three vertical dots on the right side of the toolbar and select show more settings or the cog in the upper right corner you can access the sidebar to view the additional block settings available.
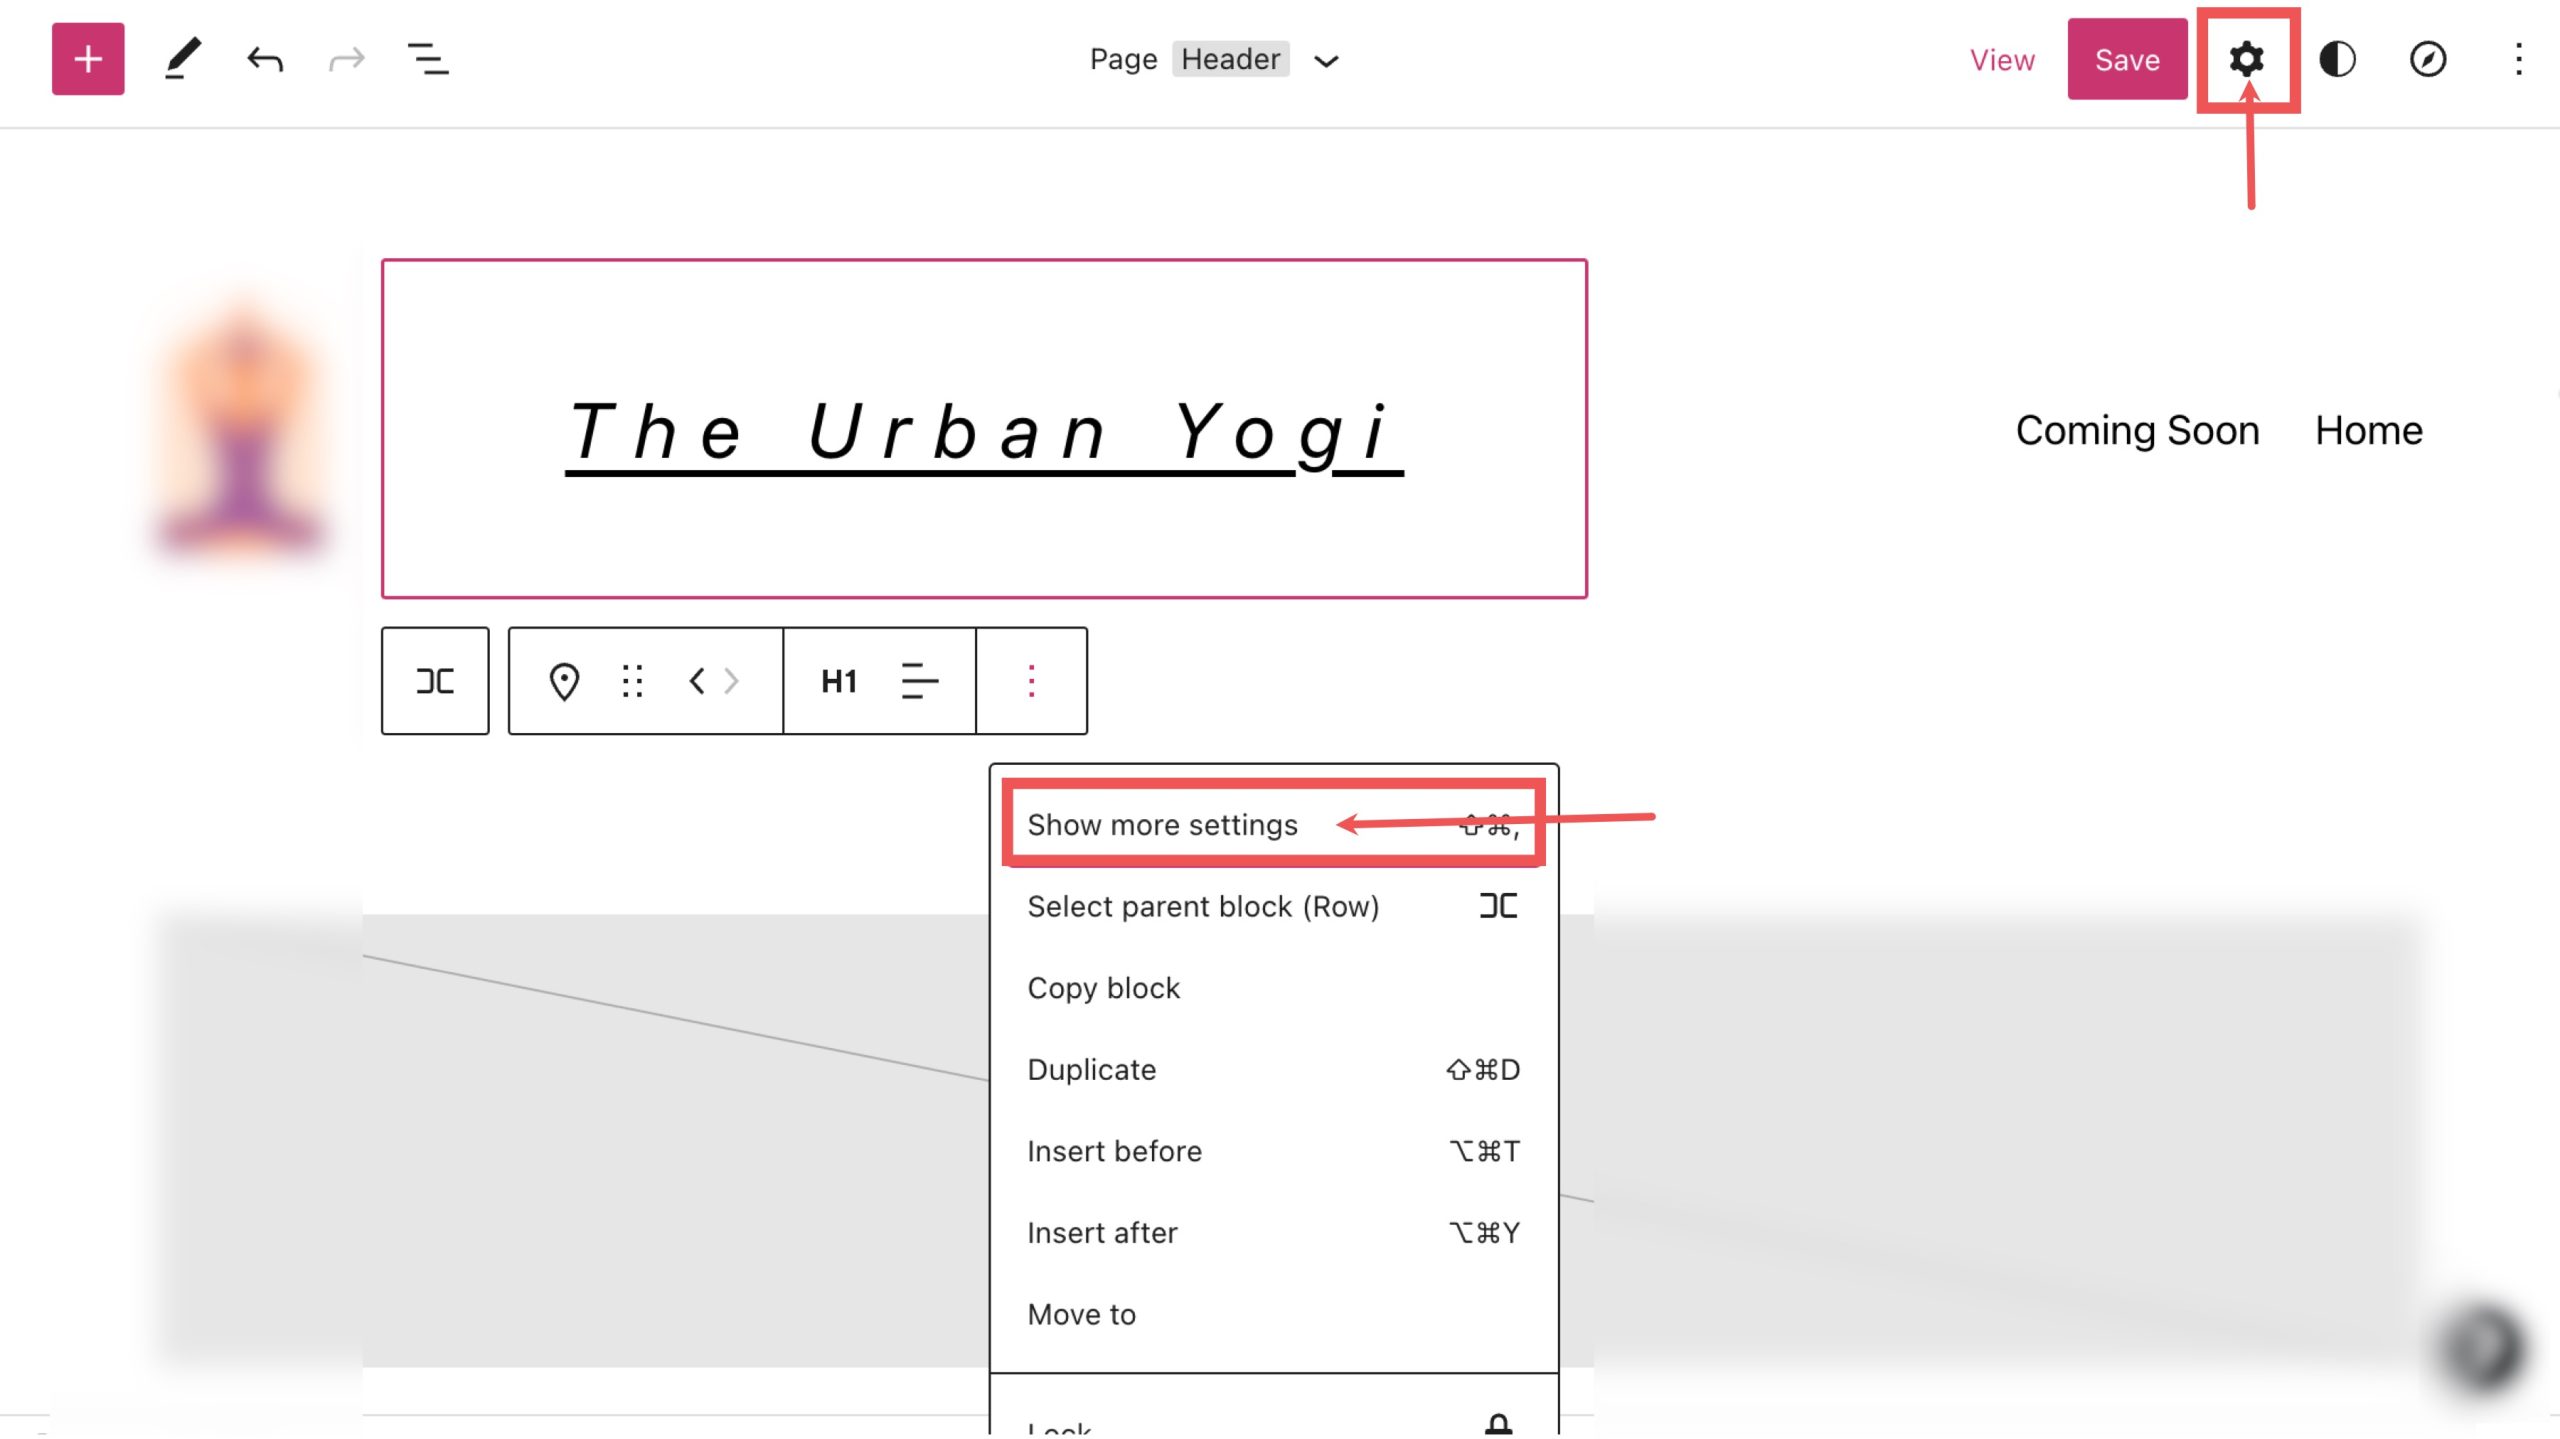
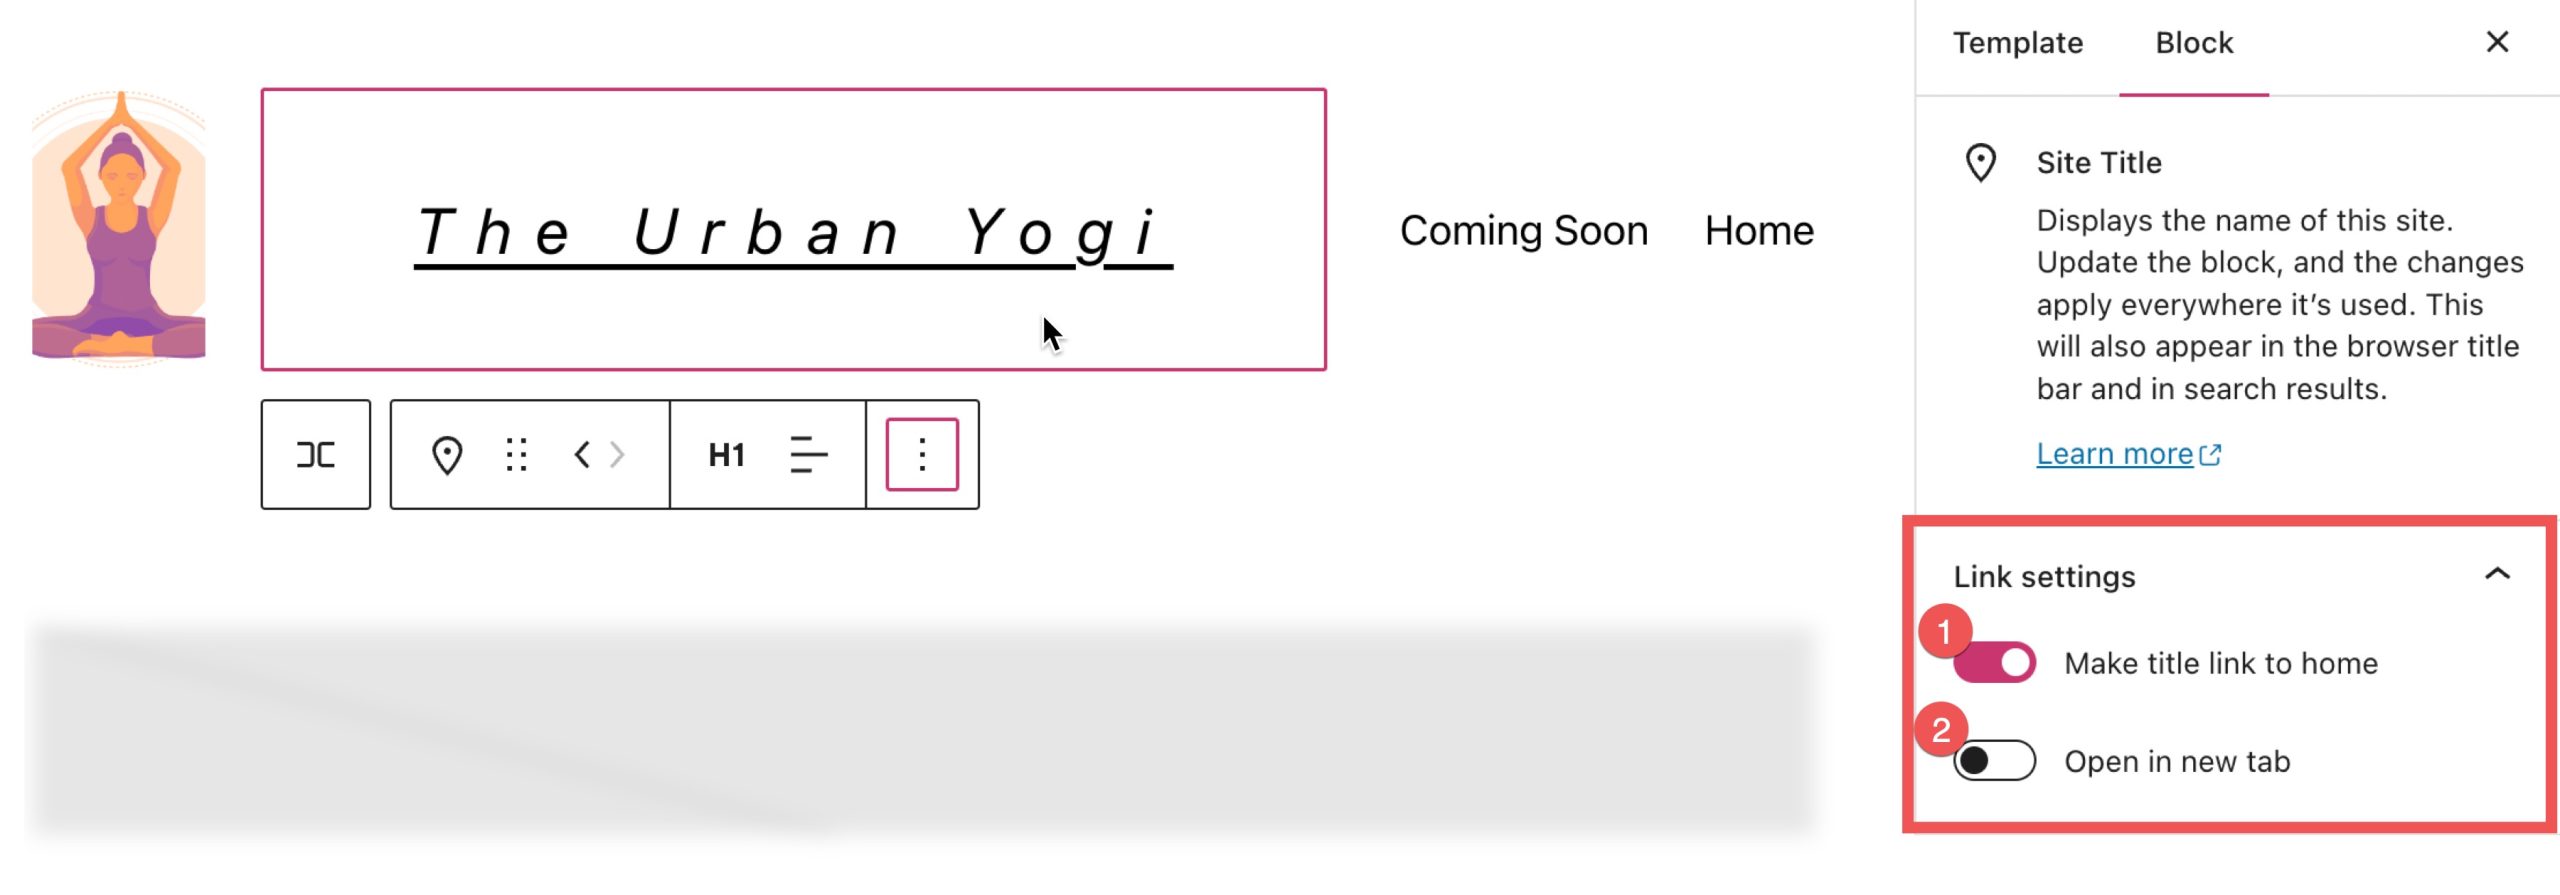
From here you can access additional settings, first you can see Link Settings:
- Make the title link to your home page.
- Open the home page in a new tab
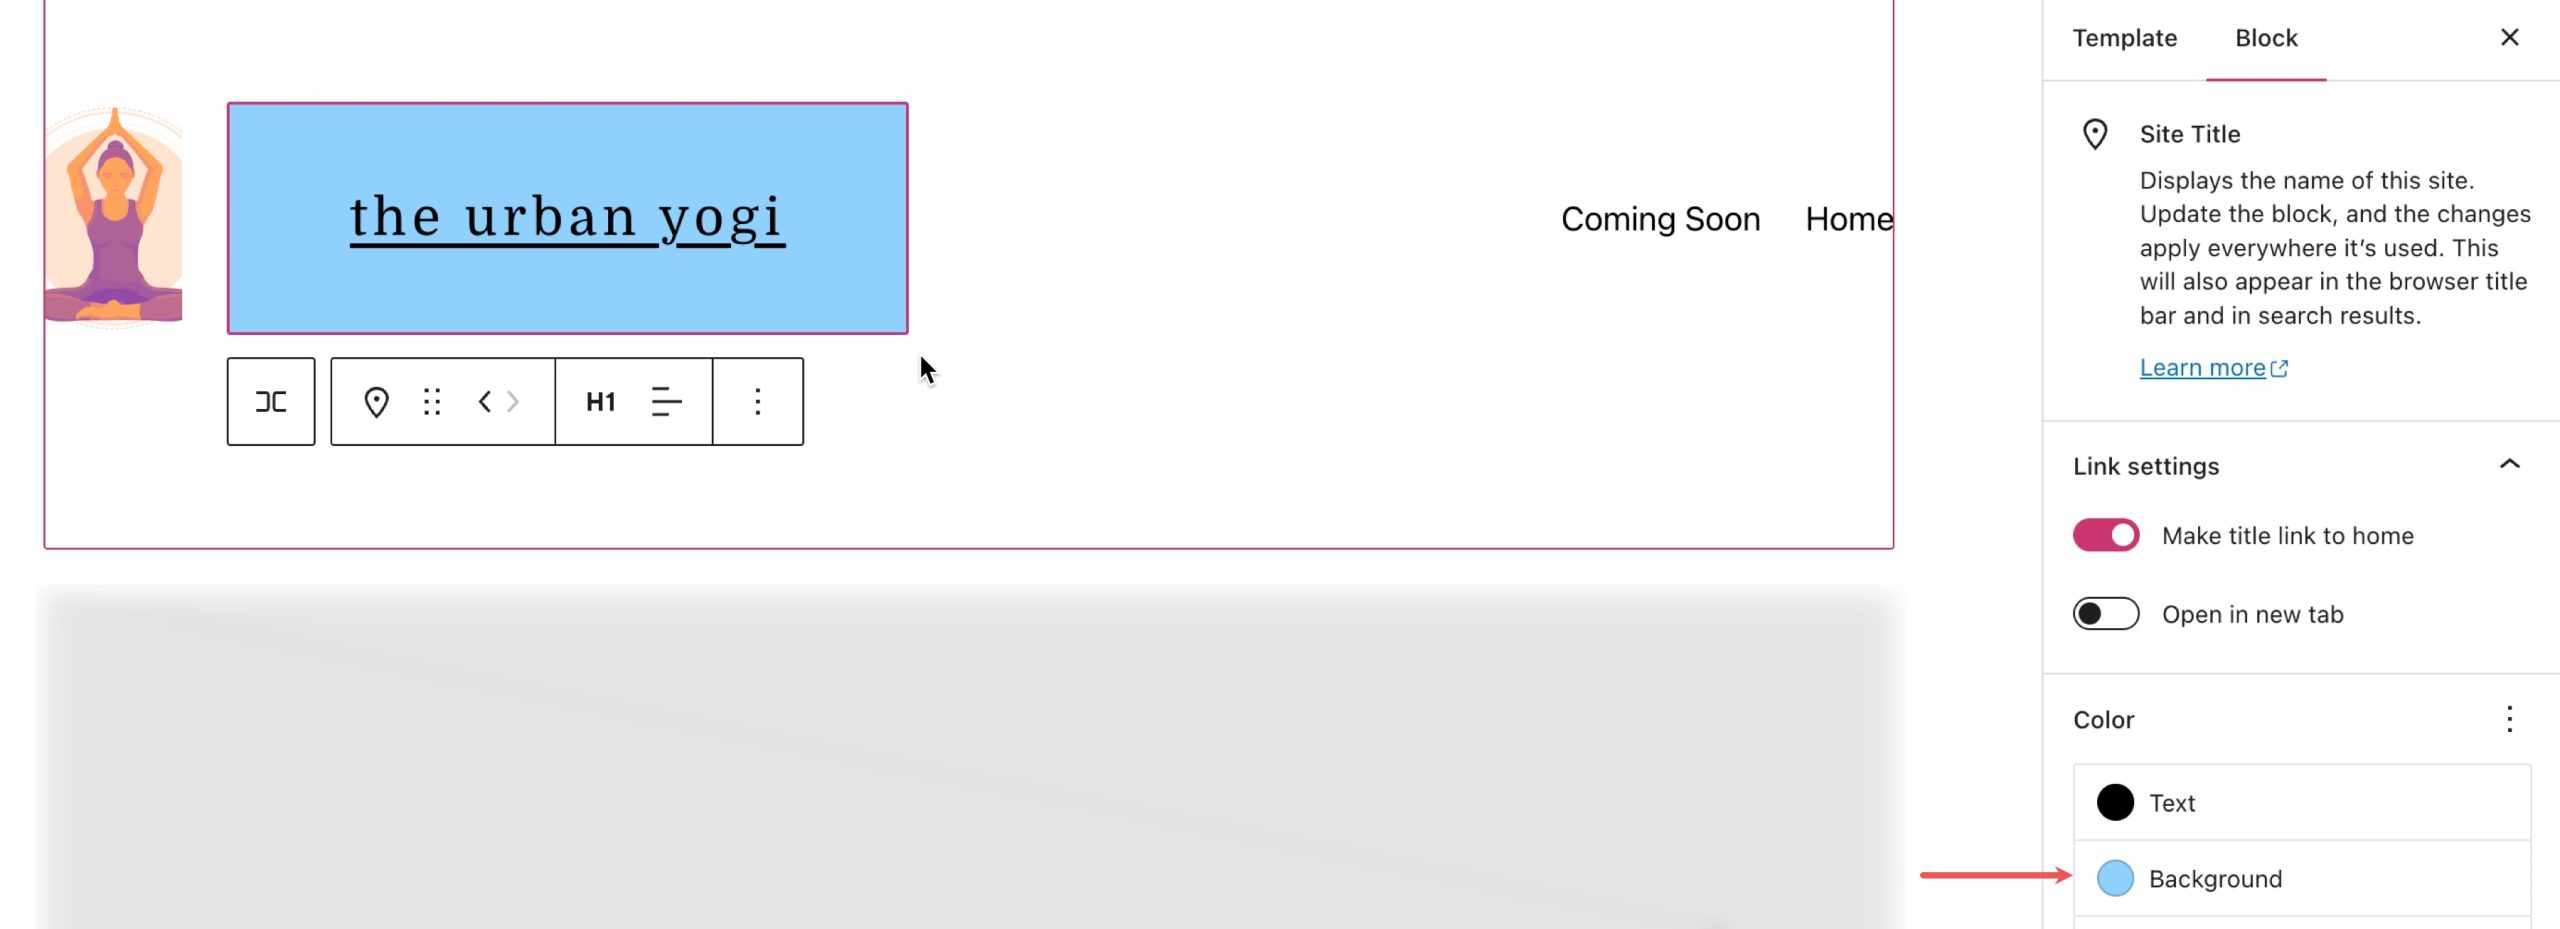
Below Link Settings, you can view the Color tab, here you can:
- Change the text color.
- Change the background color of the text.
- Change the link color of the text.

Under the color section, you can view more settings by clicking the three vertical dots next to Typography.
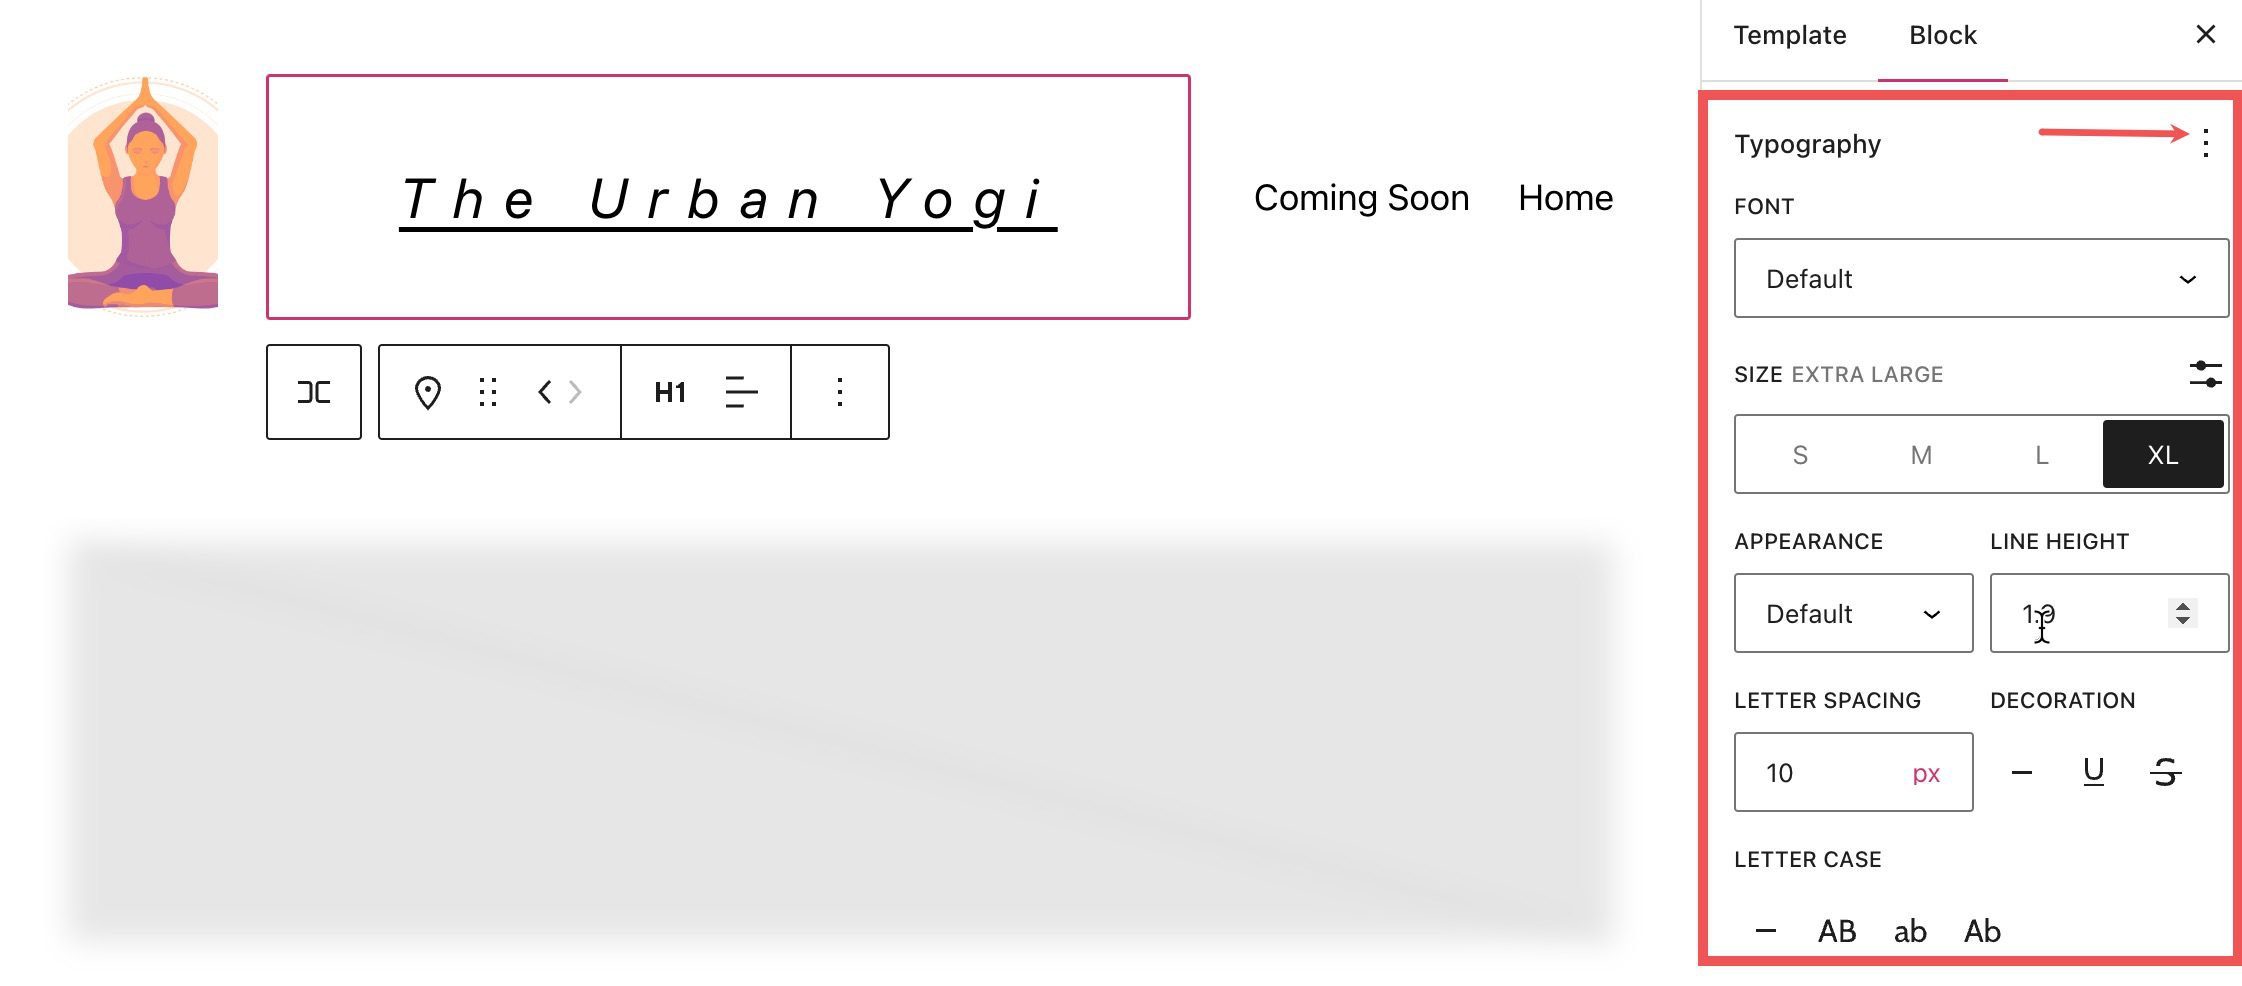
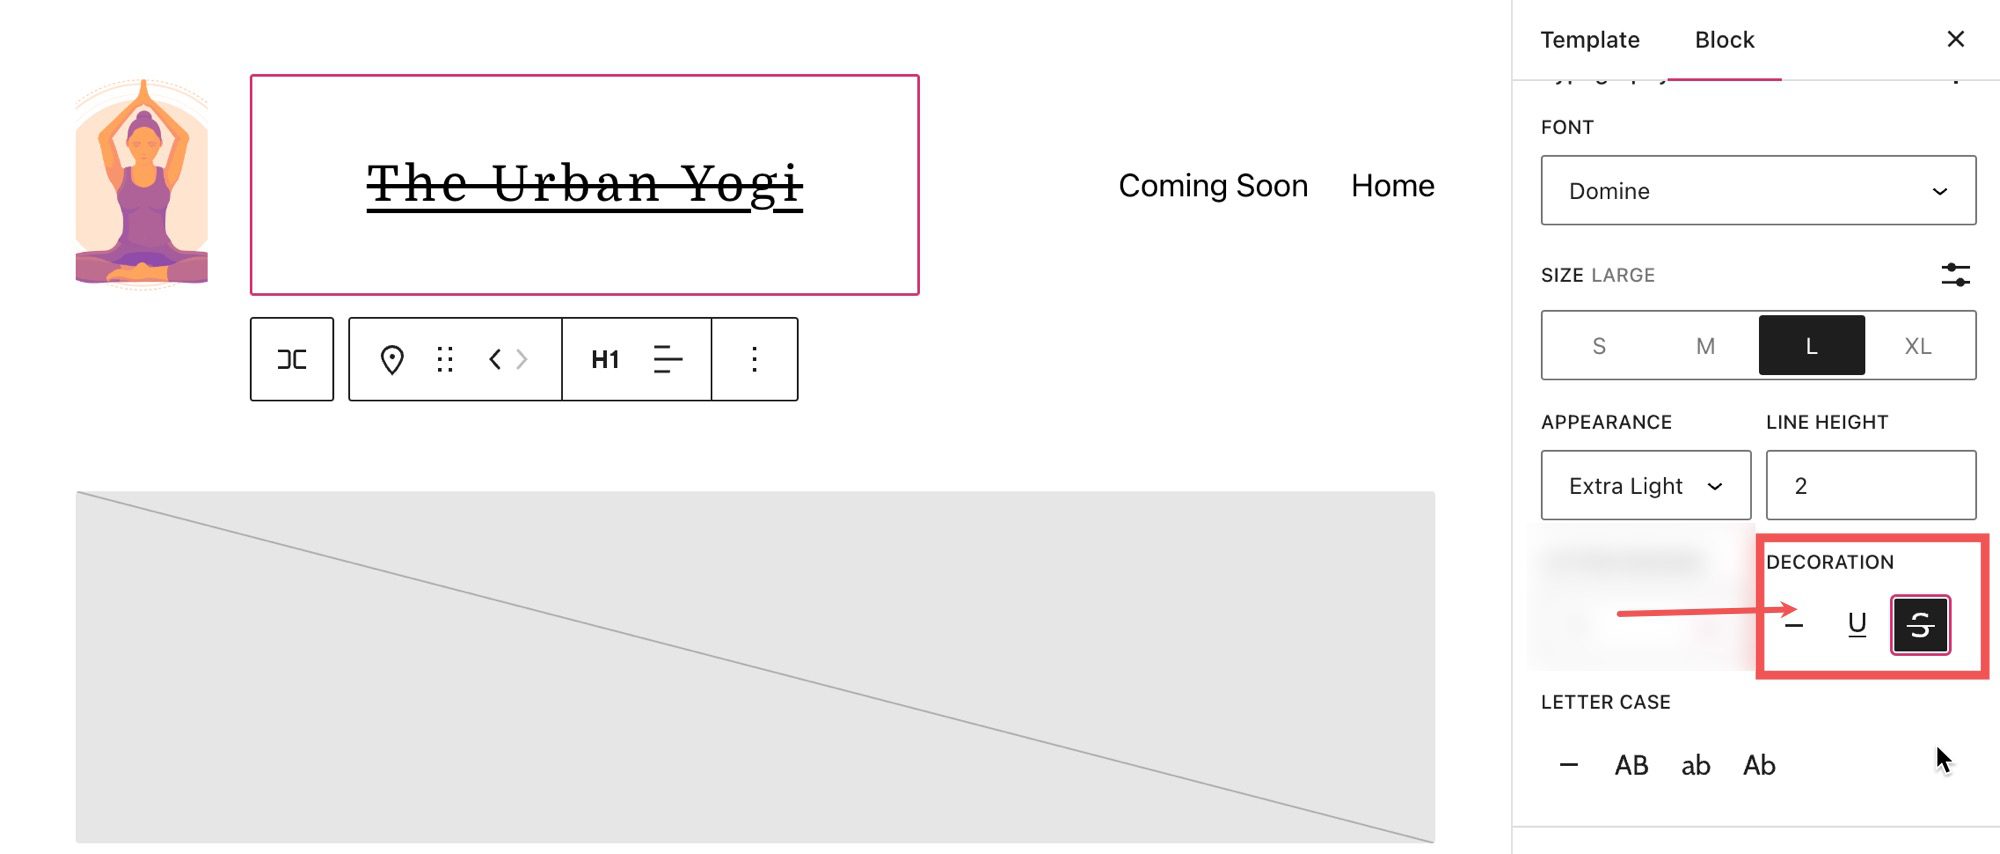
You can change the font from the font setting section.
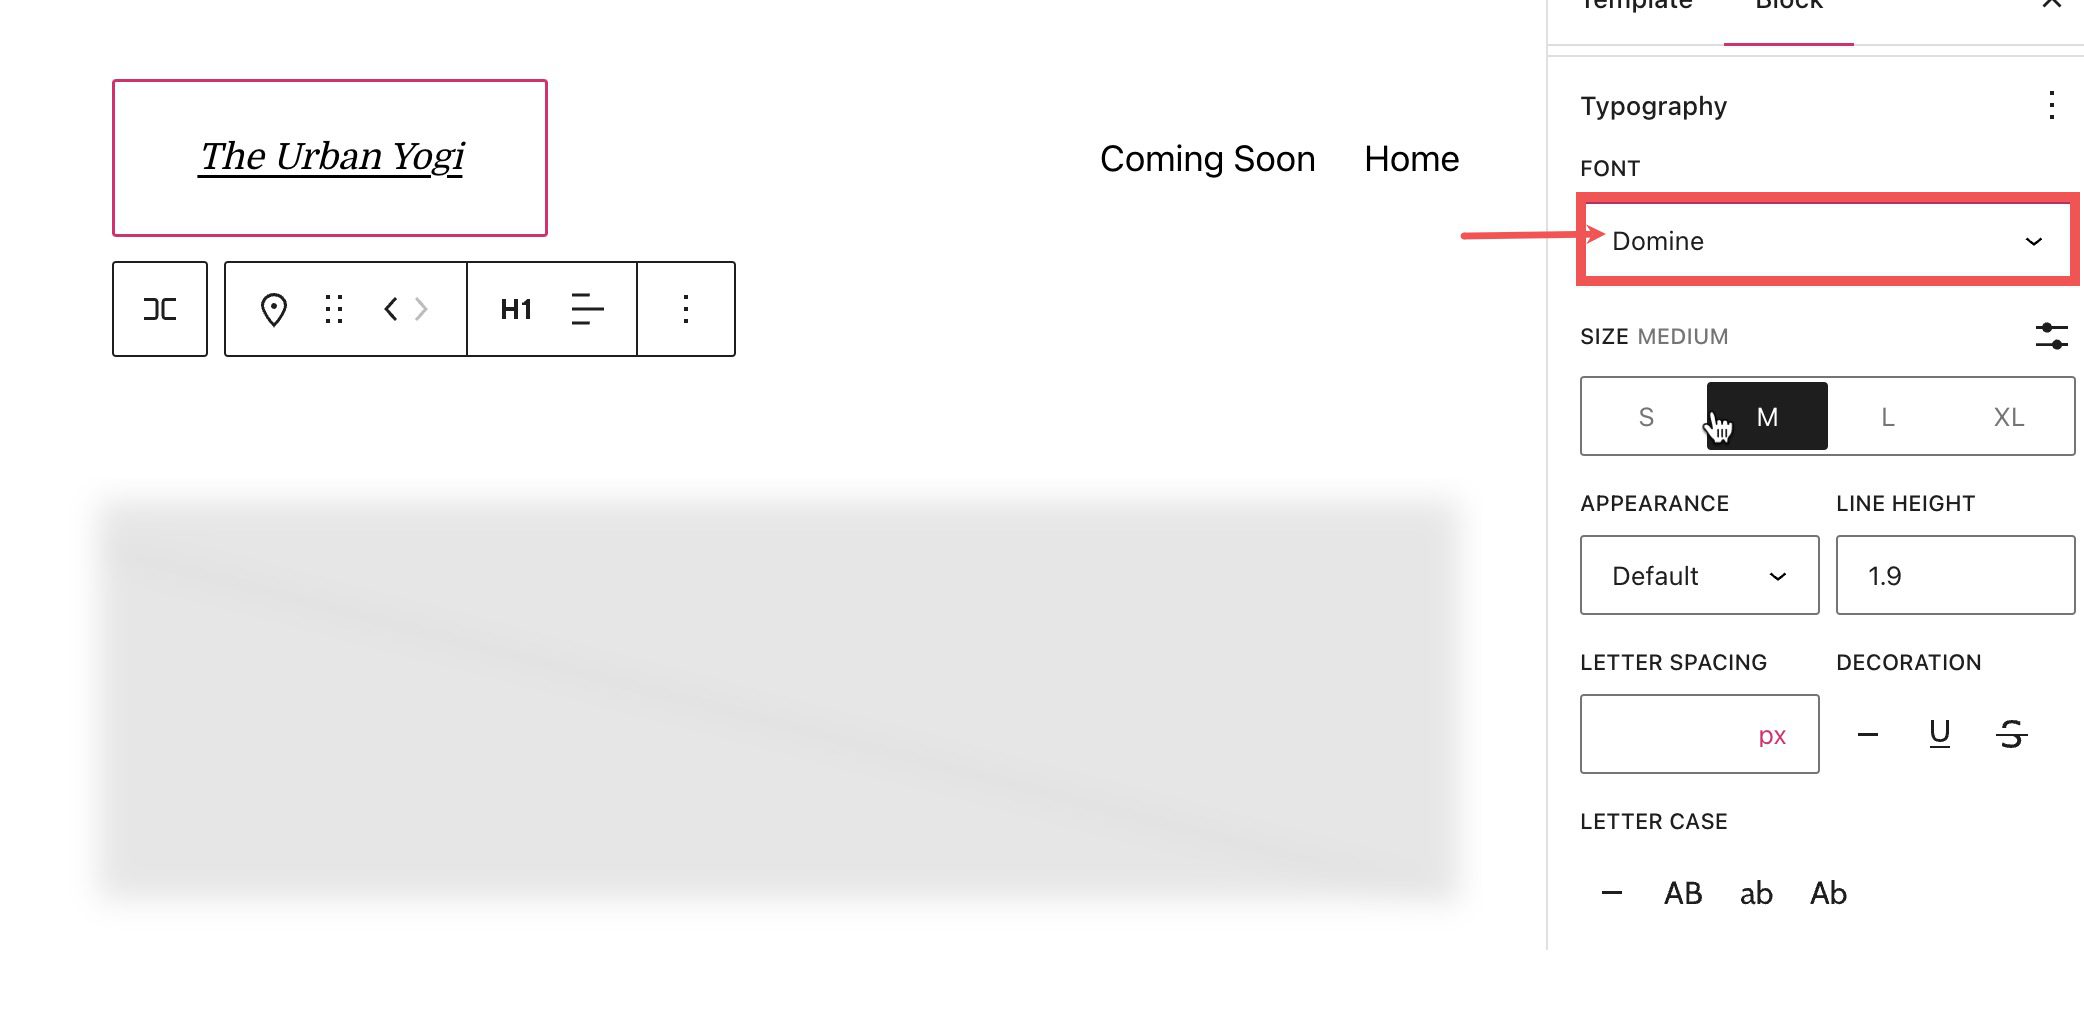
Adjust the font size under the size setting.
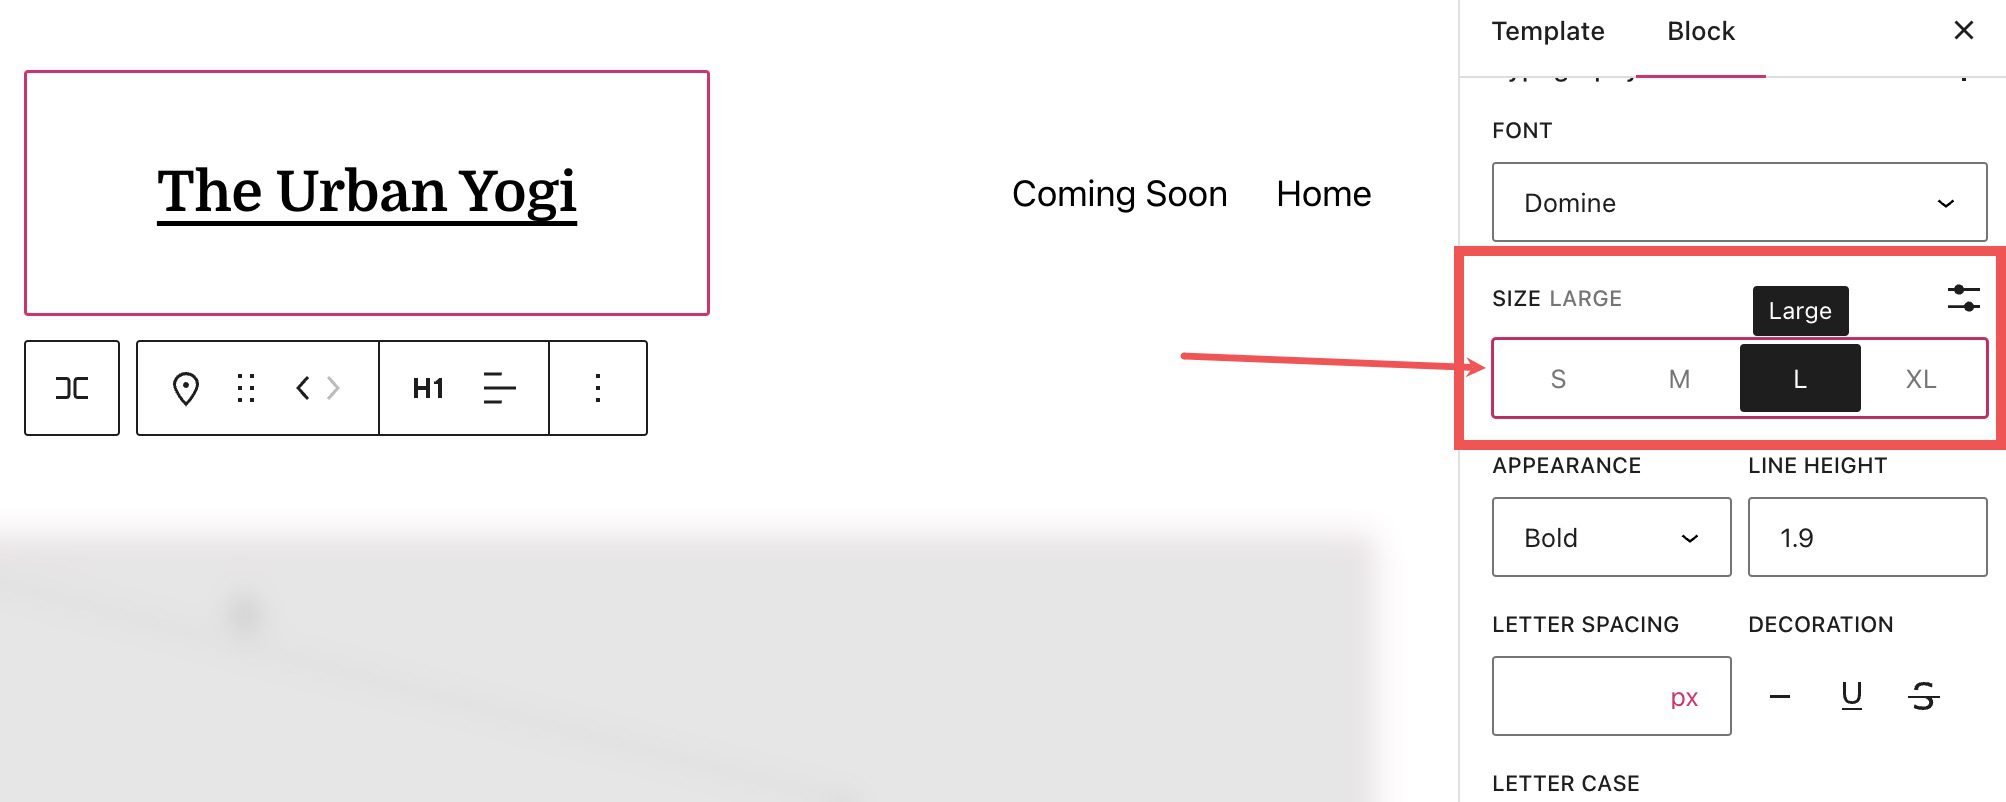
The font-weight (bold, thin, etc.) can be changed in the appearance section.
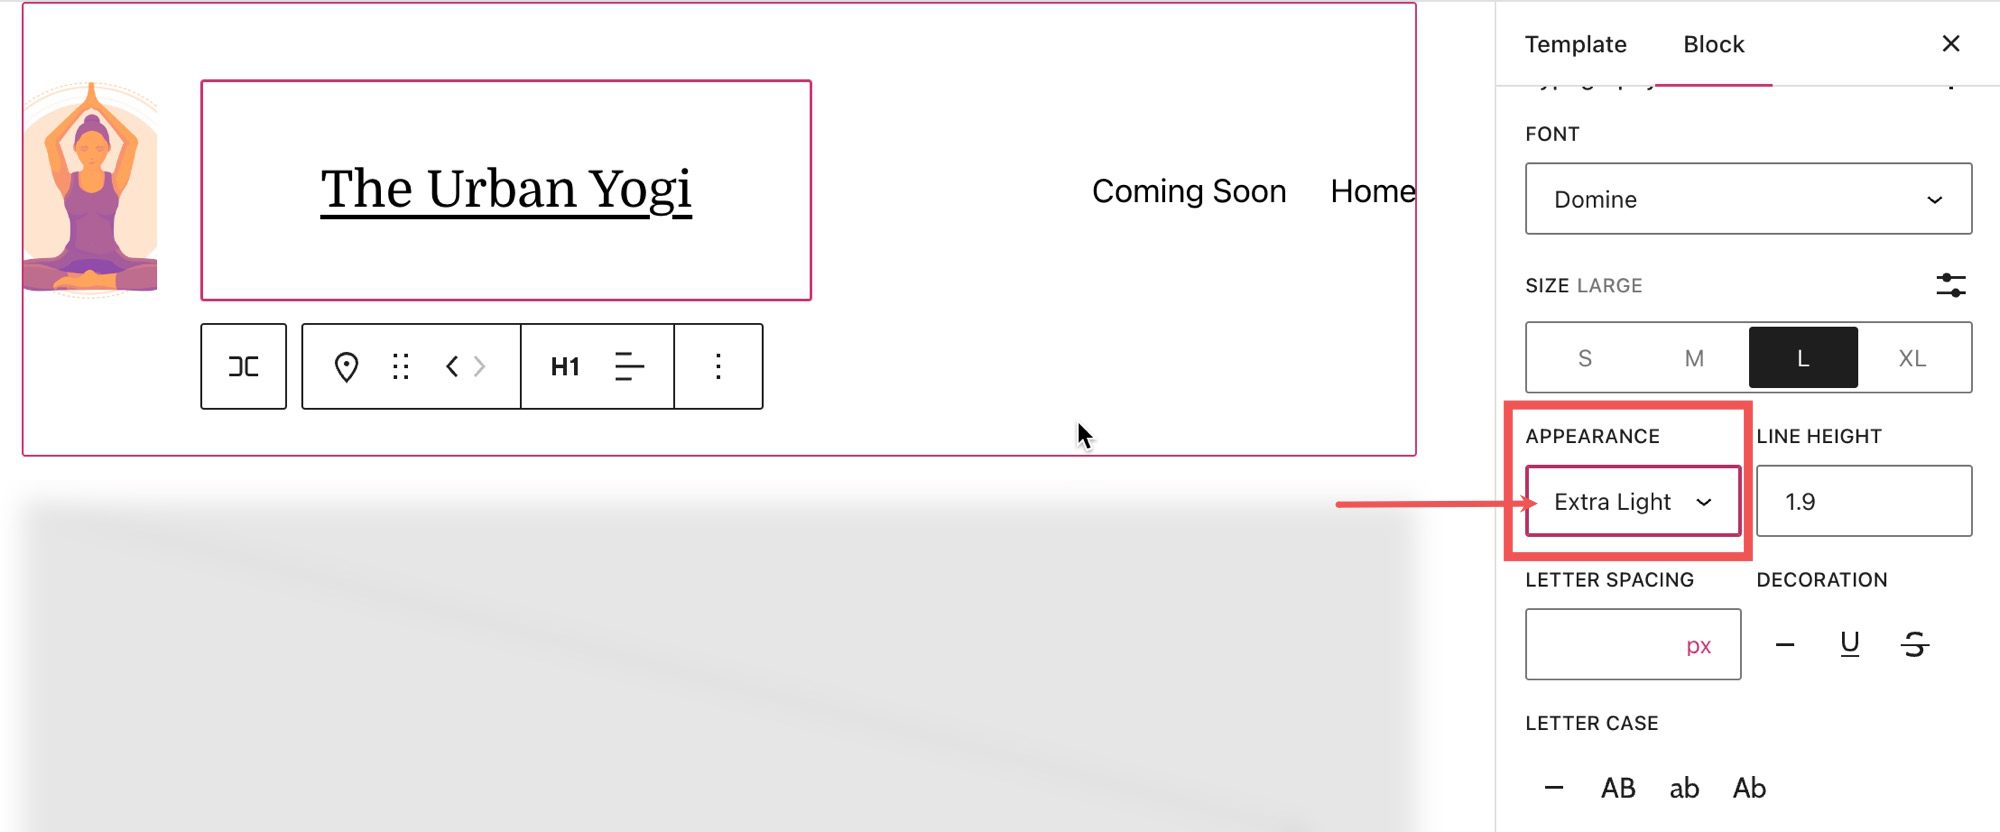
You can also adjust the letter spacing and line height in their respective sections.
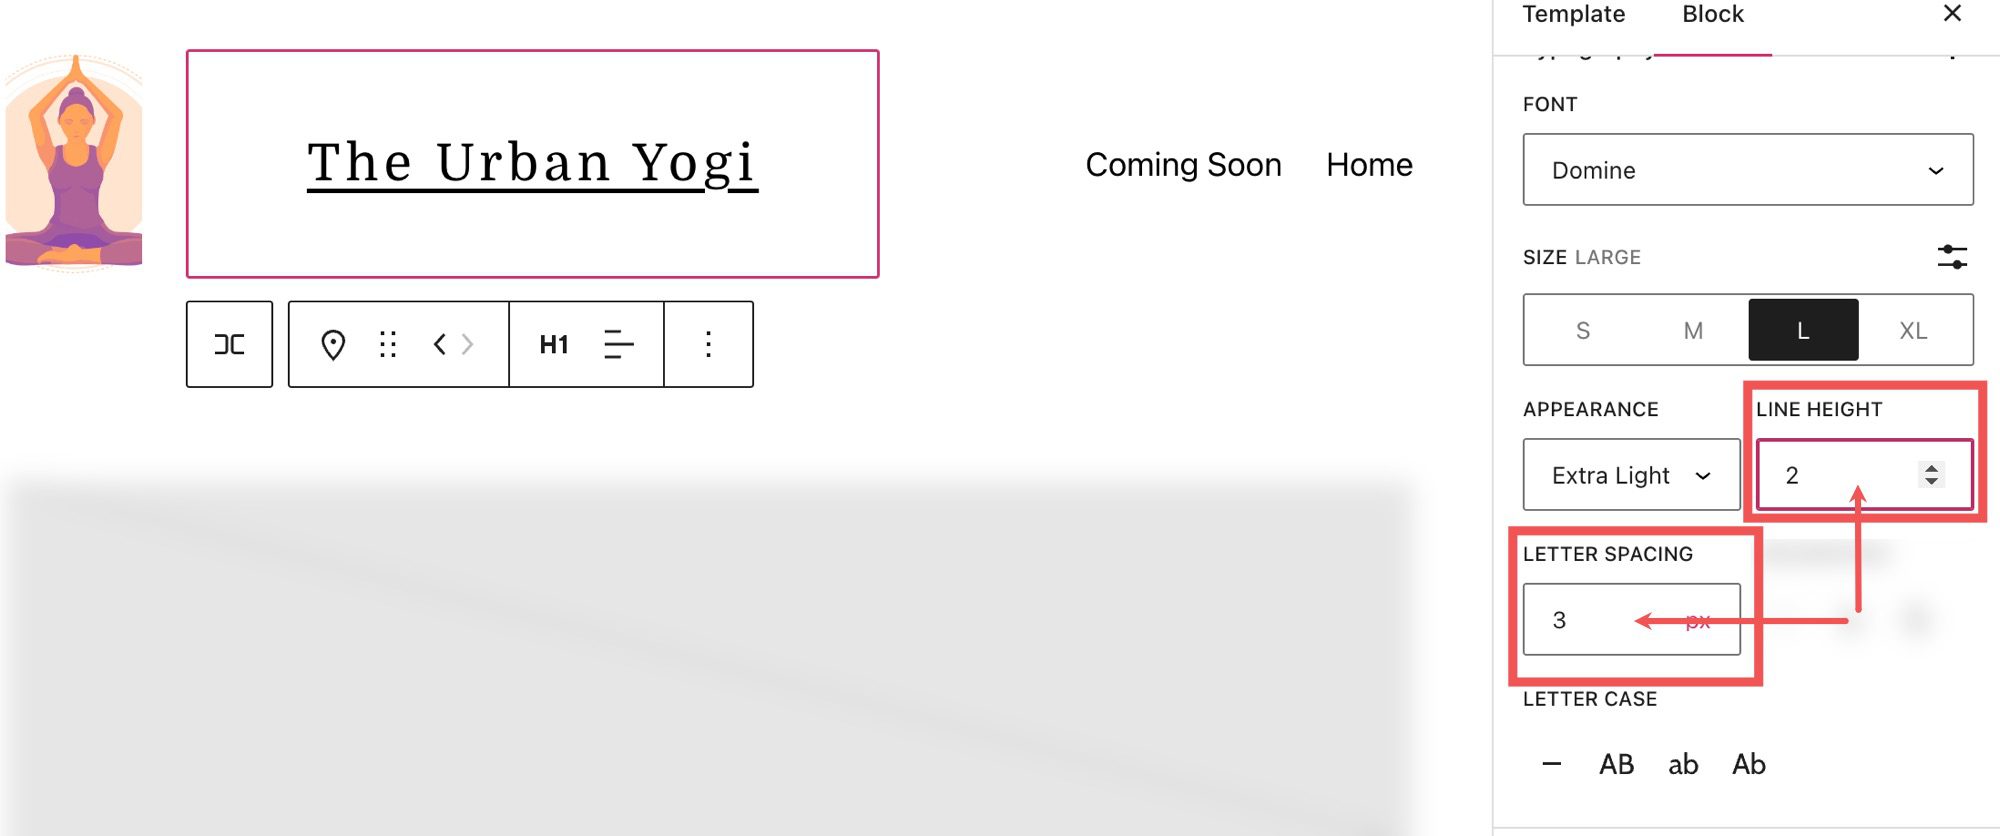
In the letter case setting, you can adjust the capitalization of the site title block.
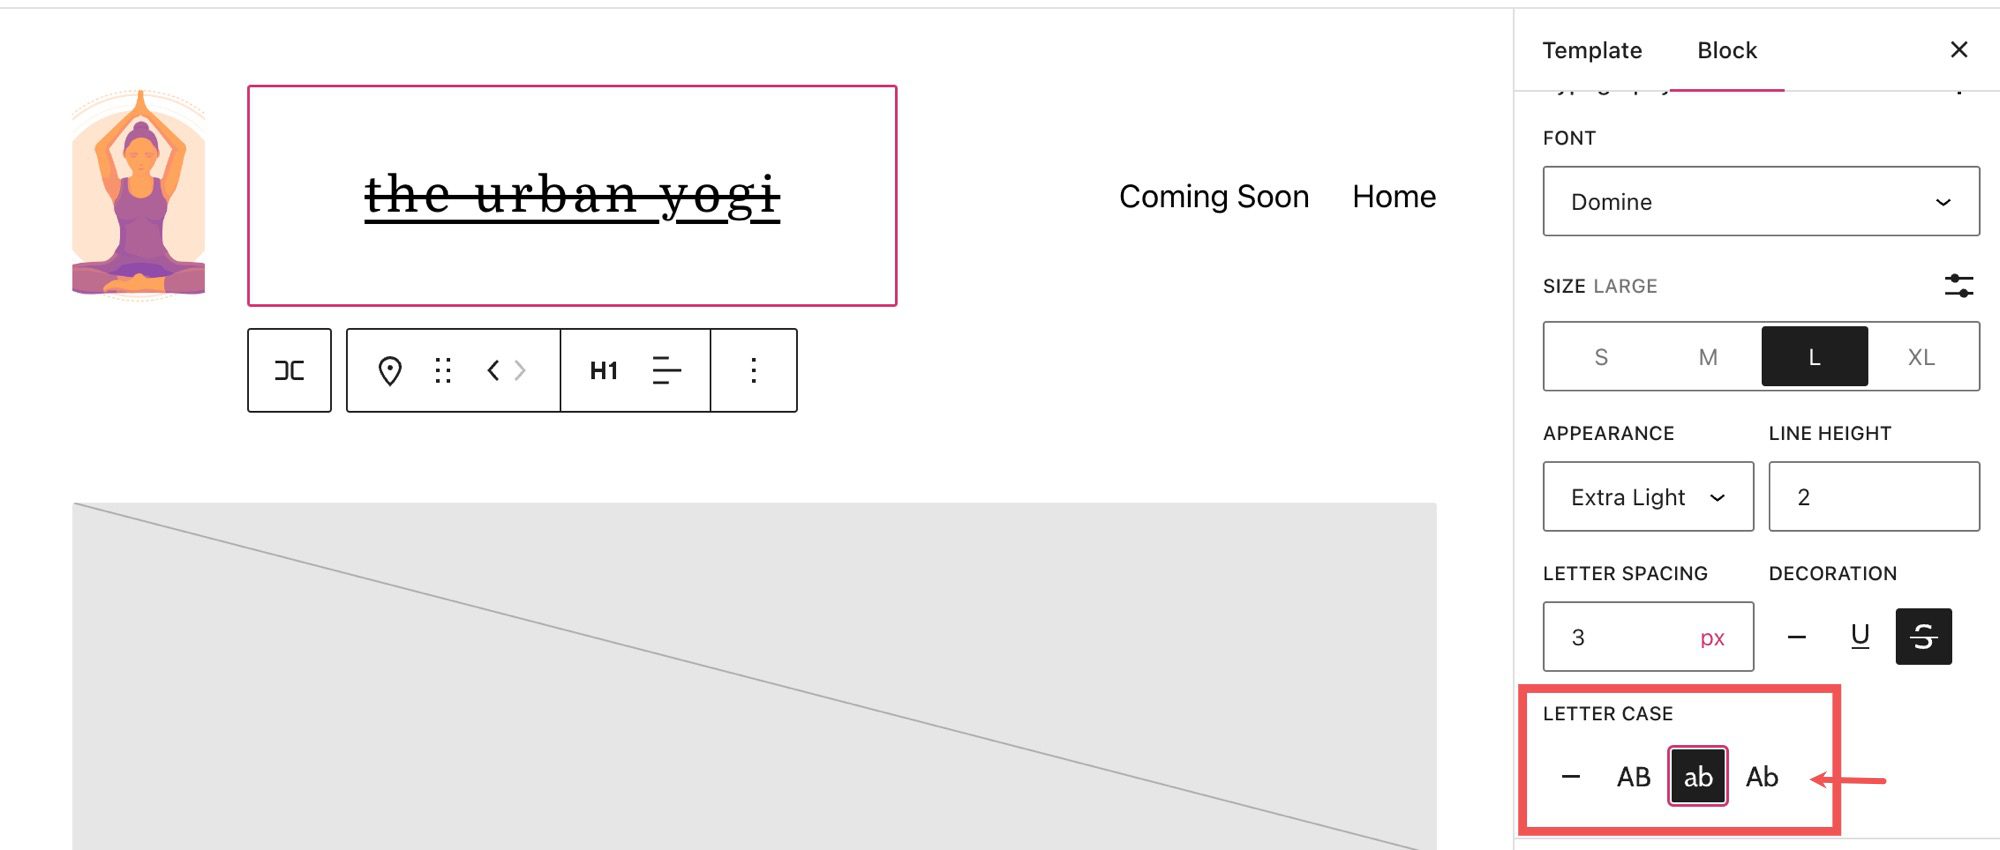
And you can underline or strikethrough your site title by selecting those options in the decoration section.
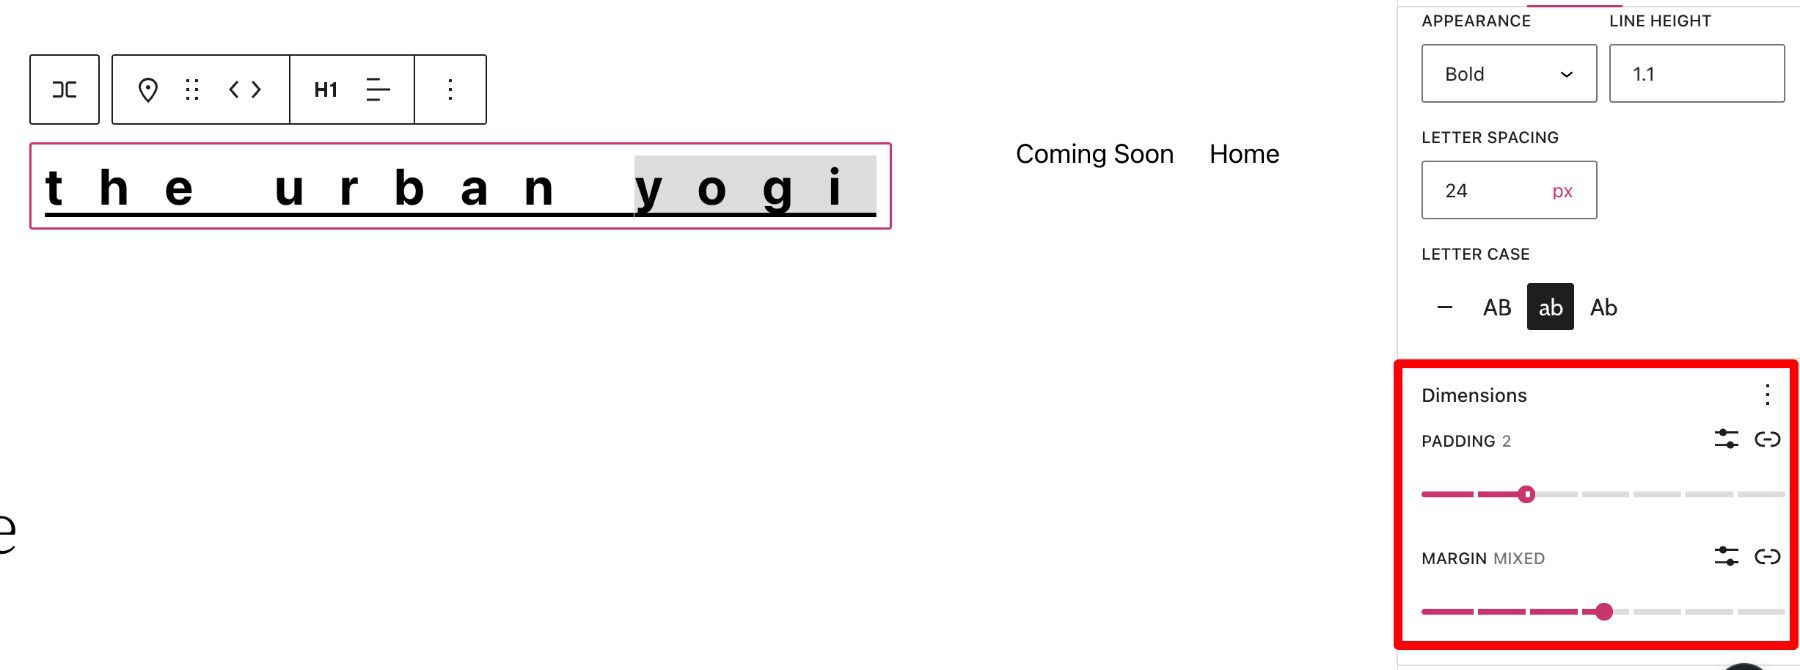
Below the settings section, you can find the dimensions tab where you can adjust the padding and margin of your site title block.
Tips and Best Practices for Using the Site Title Block Effectively
Setting Global Styles for the Site Title Block
An important distinction to note is that while the text of your site title block will update on all iterations of the block, the style (Background color, text color, etc) will not update unless specified in the site styles sidebar. For example, here we have set our Site Title block in our WordPress Template header to have a blue background color.
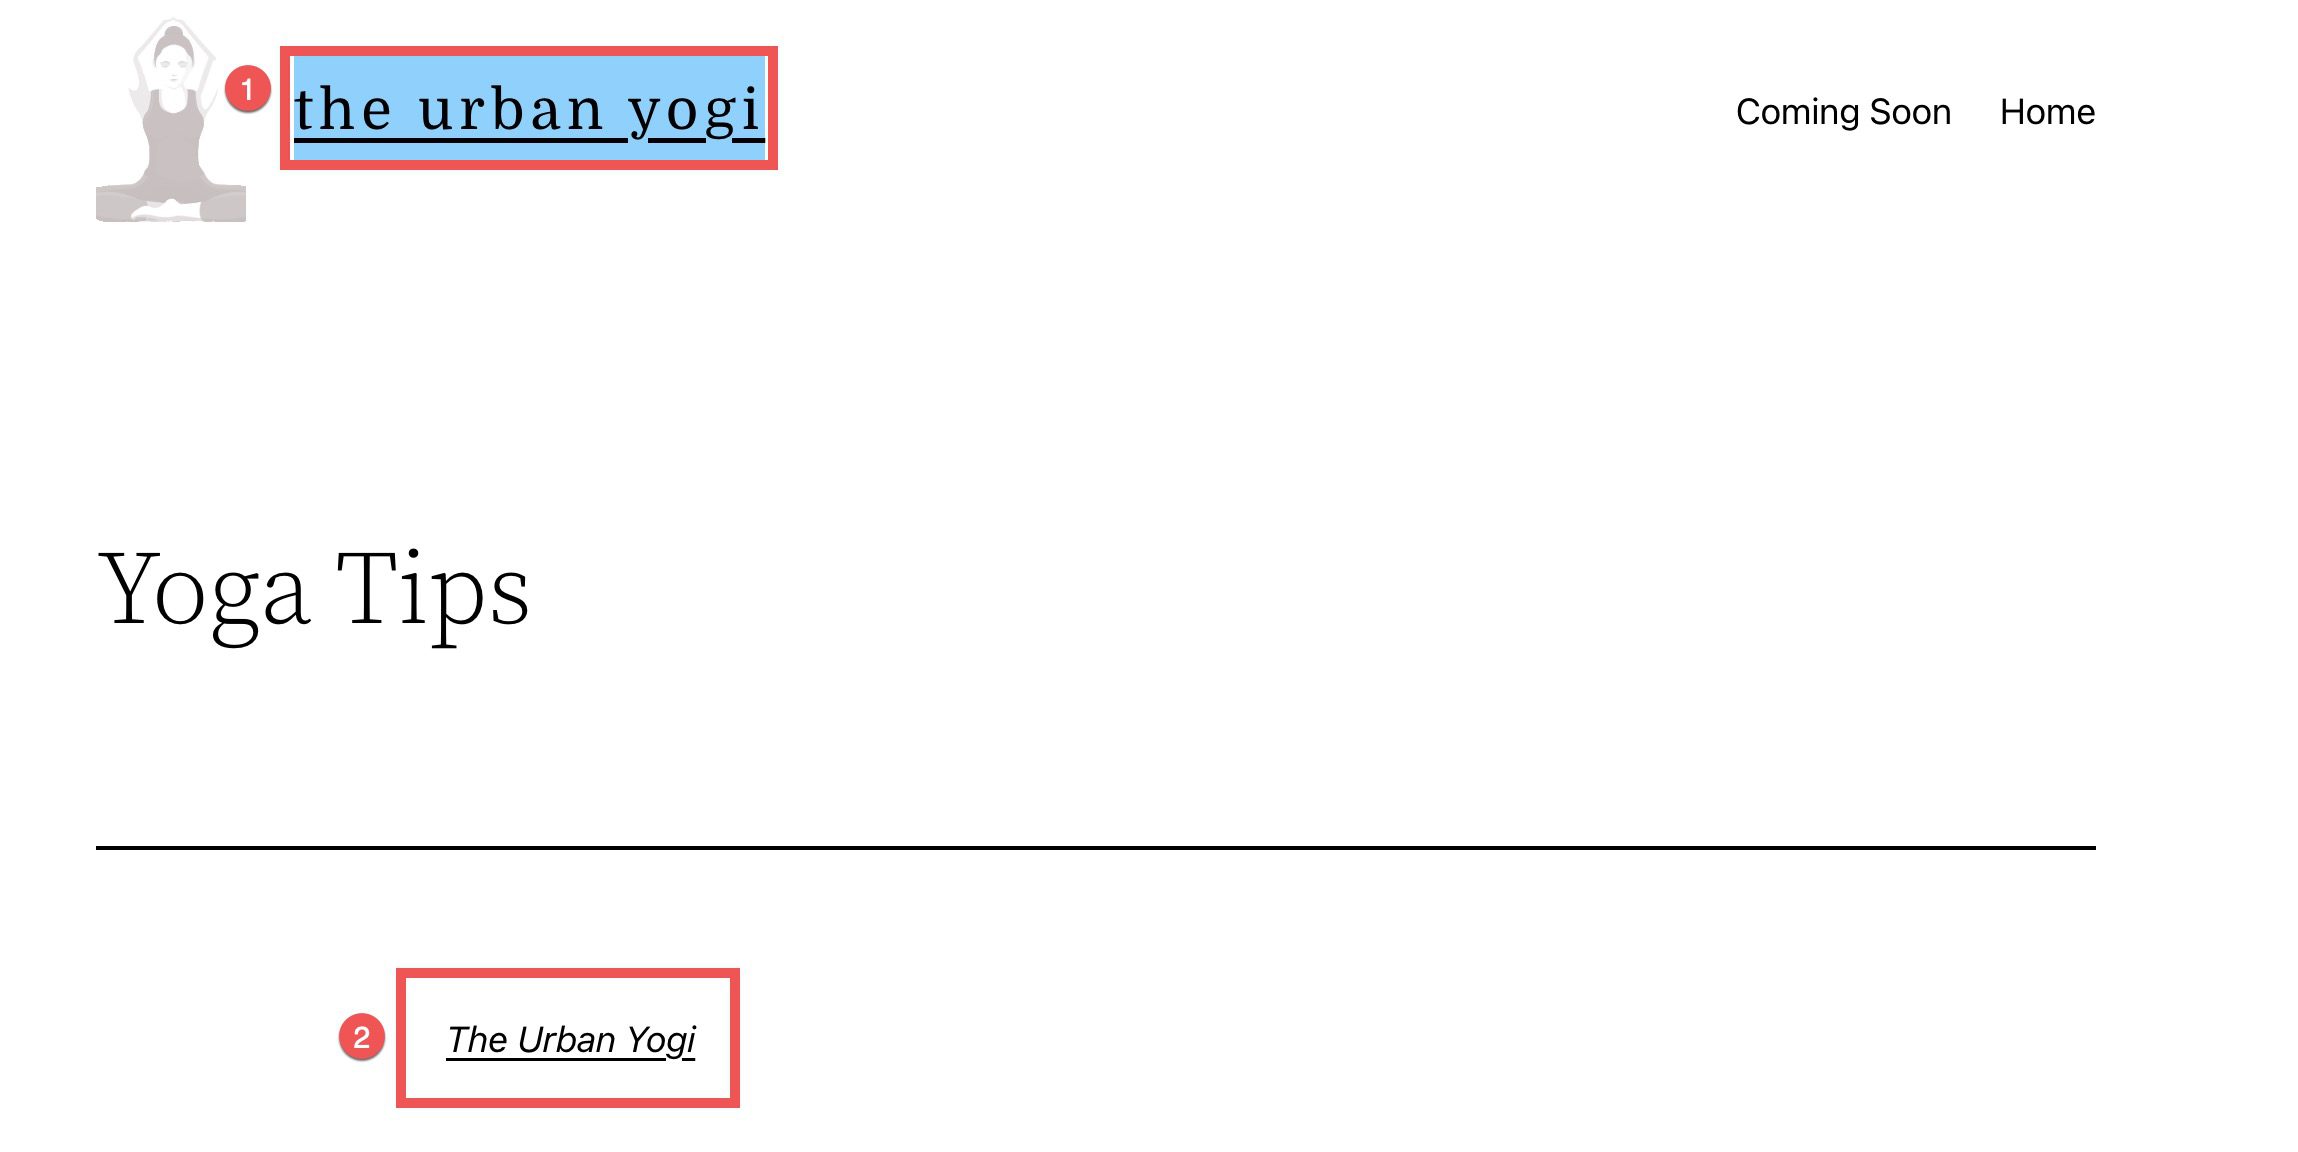
If we open a blog post, we can see that the header changes with the updated style (1), but if we put the site title block elsewhere on the page, the style doesn’t match (2).
To change the styles of all the site title blocks we can navigate to the styles tab by clicking the half-white, half-black circle in the top right of our template editor and selecting blocks.
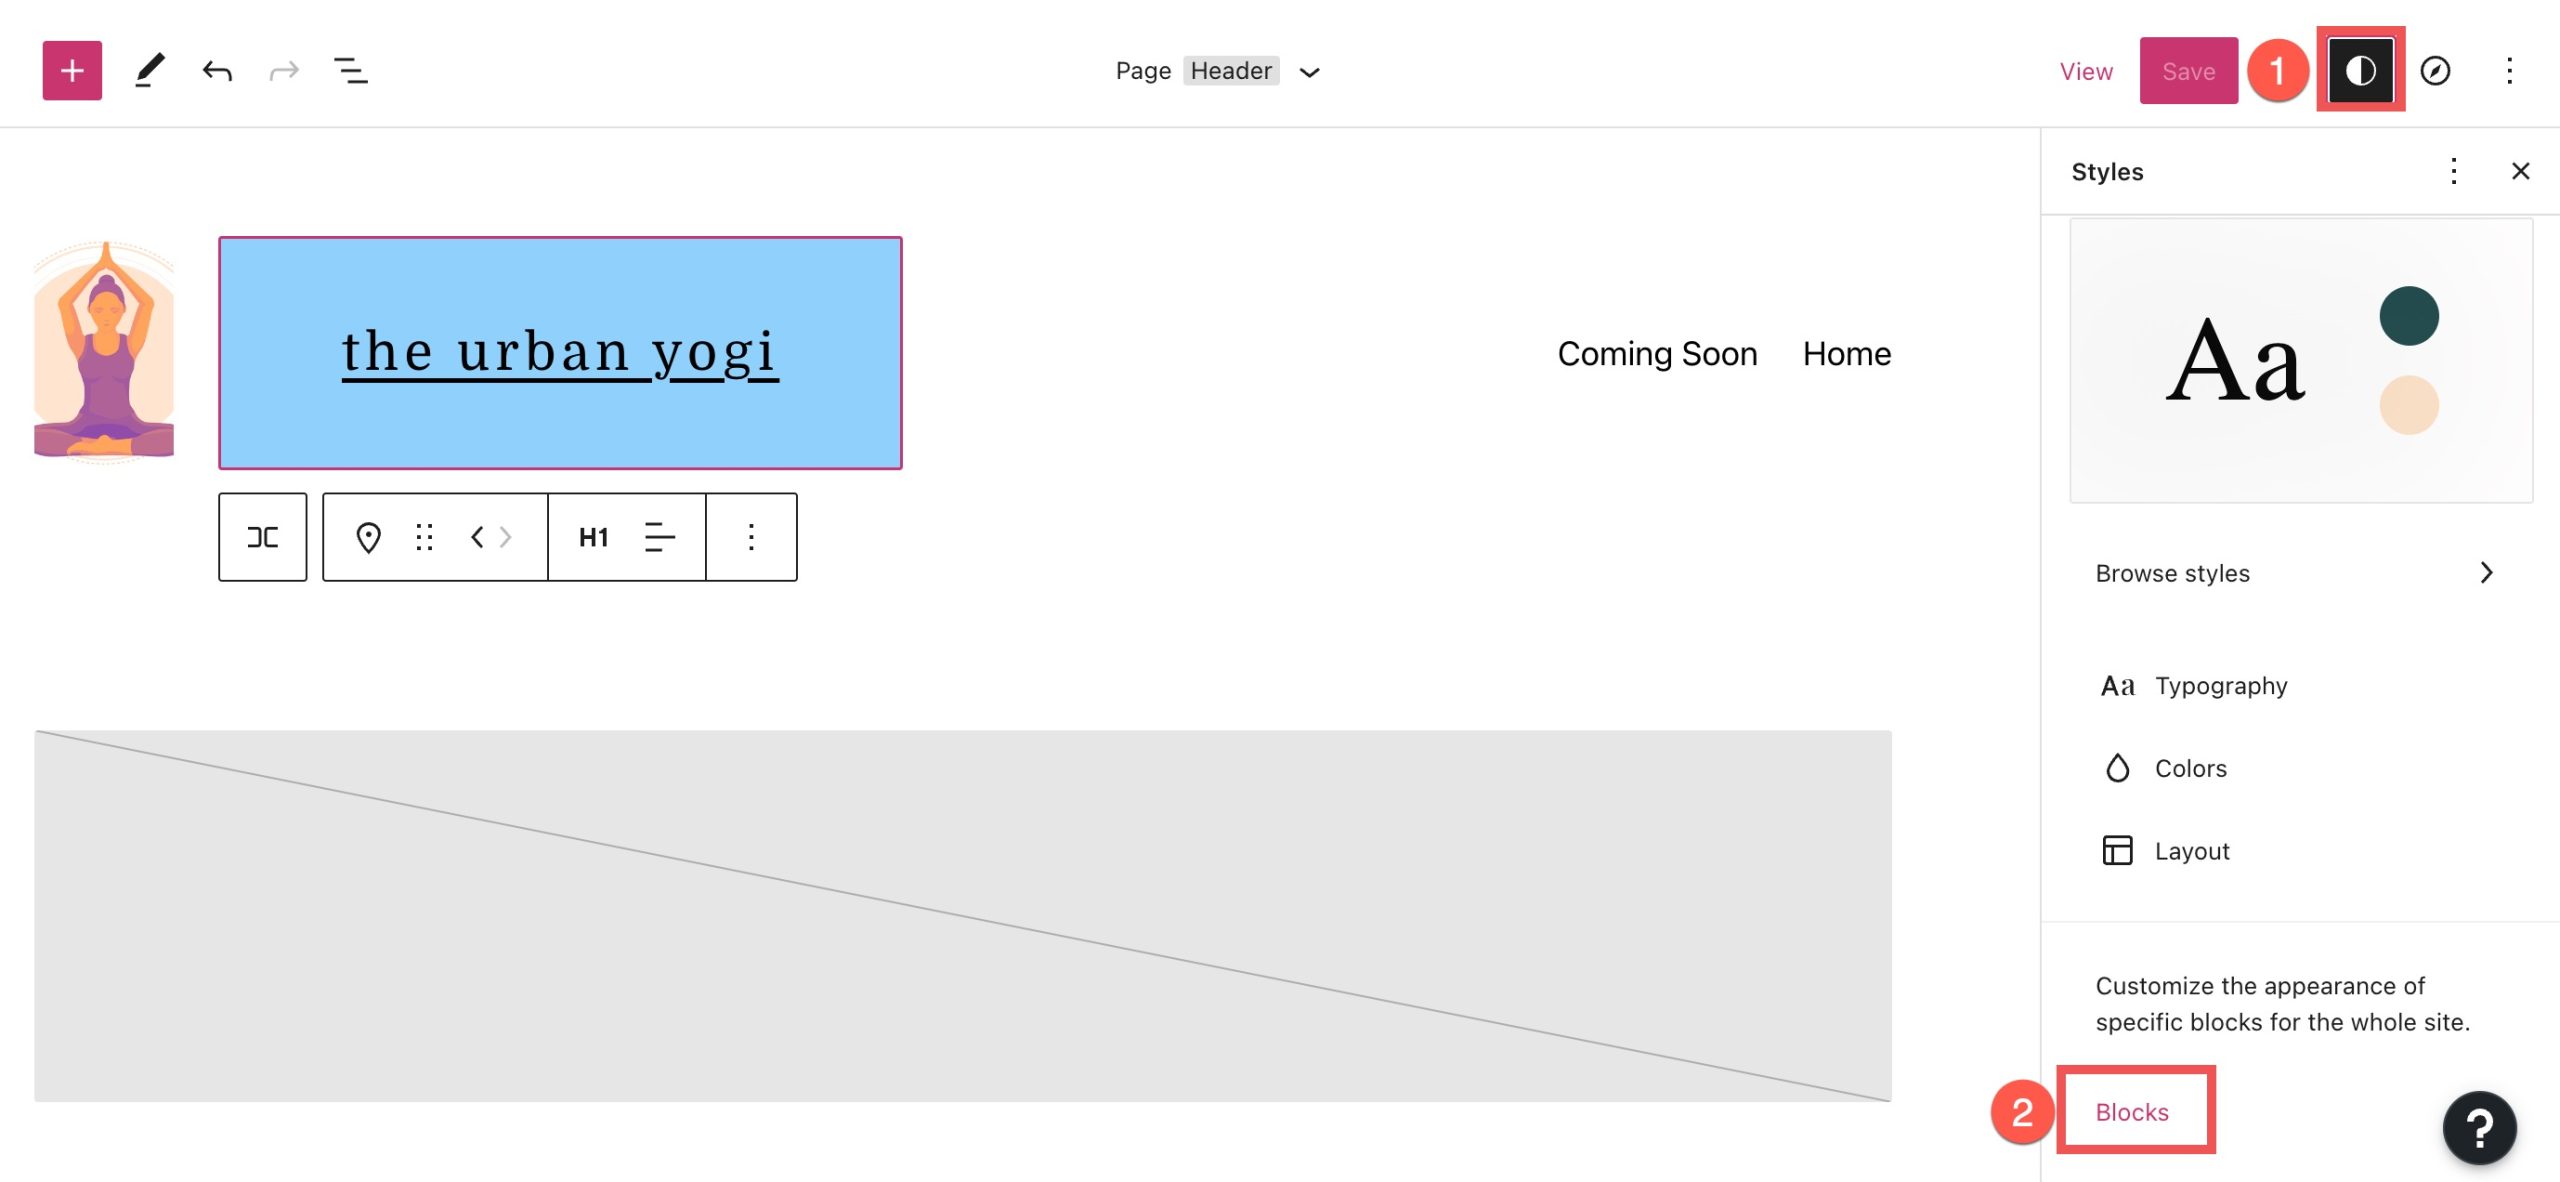
Here we can search and select site title from the search bar.

From here we can make changes that will change the style for all iterations of the site title block.

Optimize Your Site Title for SEO
For algorithms and search engine bots, keywords are crucial. In terms of maximizing your WordPress website’s SEO, it’s excellent practice craft the perfect SEO title for your site and pages. Before choosing your title, do some simple keyword research to find what best describes the information on your website.
Your Site Title Should be Consistent with Your Branding
Every component related to the branding of your website should be consistent, you should choose the right webfont and utilize the same style for your title as you do the other elements on each page of your site.
This consistency will help keep your audience engaged with your site and not confused or disoriented. Another good practice is making sure you are linking your title to your homepage, as this will help your users navigate your website more effectively.
Frequently Asked Questions About the Site Title Block
Even if using the site title block is pretty straightforward, you may still have some concerns regarding this specific component. Let’s break down some of the most often-asked questions about the functionality of the title block.
When Should I Change My Title?
You shouldn’t change your title too often because you risk losing users that already know your branding as well as confusing search engine bots that know your original title. You should only change your site when your first create your site, are focused on rebranding, have shifted into another field of expertise, or have a better SEO title.
Where Should I Use the Title Block?
Displaying your site title isn’t necessary. But there are instances where adding this dynamic content to your site makes sense. For example, putting a title next to your site logo, or header would be the best placement for a site title block.
Can I Change the Font Settings for the Title Block?
You can change the font of your site title block through the advanced settings, by clicking the three vertical dots next to Typography (Pictured Above.) You can also change a variety of style options from here as well.
Using the Dynamic Site Title in the Divi Page Builder
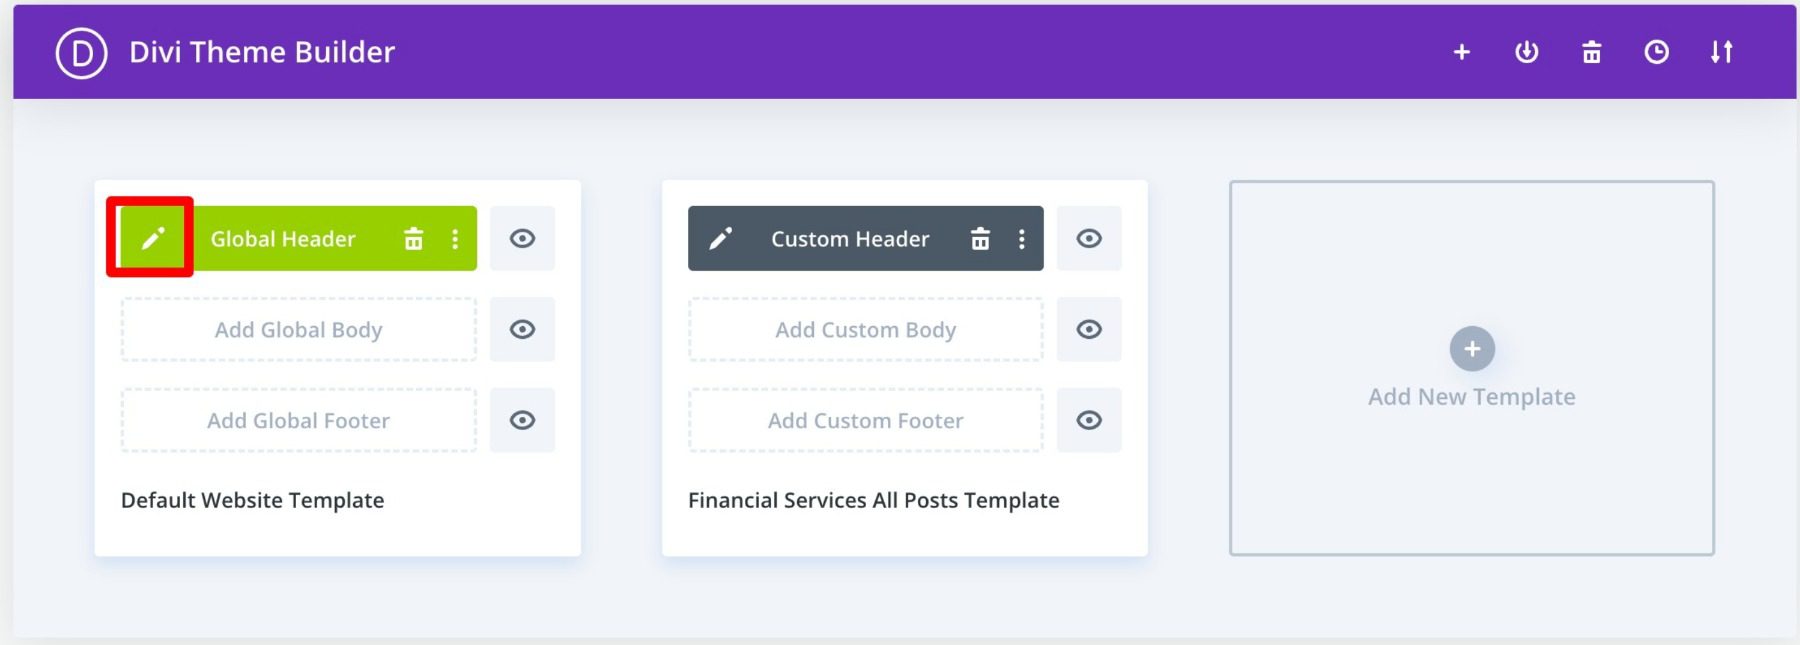
If you are using Divi, you can use the Divi theme builder to add a site title to your global header (or anywhere on your site) in just a few easy steps. You can start by clicking the edit button next to Global Header in your Divi Theme Builder.
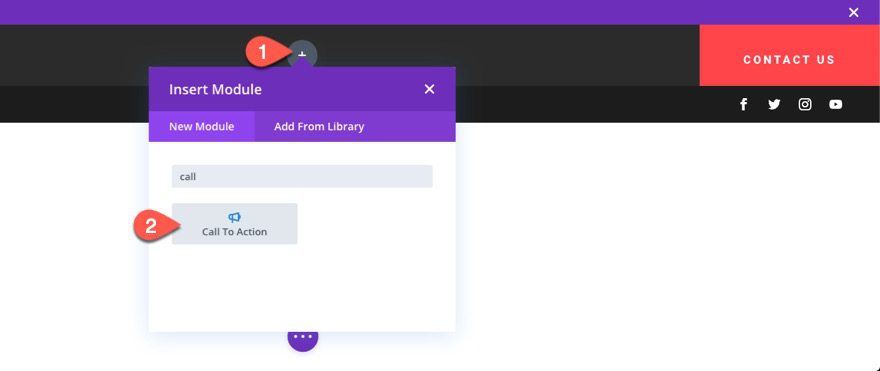
Next, add a new module (in this case, a Call to Action Module) in your header.
 Under the content settings, hover over the title input box and click the “Use Dynamic Content” icon. Then select “Site Title” from the list.
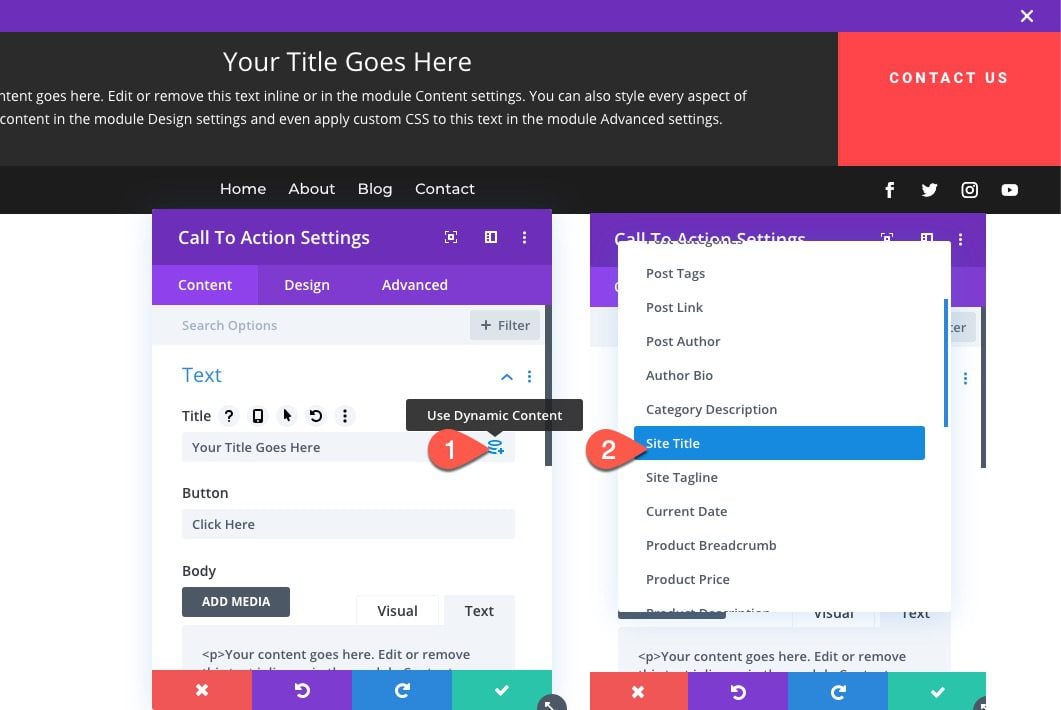
It’s just that easy! Dynamic content is now supported by all of Divi’s main content inputs. To view a complete list of all content that is accessible, simply click the dynamic content symbol. Next, choose the item you want, alter its output, and connect it to the module. The module, the page, and the rest of your website will all immediately update if that piece of content is modified.
Learn more about how to add a dynamic site title in Divi.
Conclusion
Simple yet essential, your website’s WordPress site title is an integral aspect of your site. It’s one of the first forms a WordPress site owner fills out, and it’s easy to overlook.
Using the site title block you can easily incorporate your title into your posts and edit them based on your preferences and style. We hope this article gave you some useful tips on optimizing your title!
Let us know in the comments if you have any questions regarding the WordPress site title block!




Leave A Reply