The WordPress user profile is part of the WordPress Admin. Also known as the “backend” of a WordPress website where all of its settings can be configured and content is created and managed. The user profile is where the personal information and preferences associated with a user’s account is located.
Every user of a WordPress website has a user profile regardless of their user role; be it admin or subscriber. It’s where (among other things) the backend admin experience can be customized (just for that user), where a user’s email and password are stored (and can be changed), as well as a user’s author bio and profile picture.
In this article, we’ll show you how to navigate to your WordPress user profile and walk you through each setting and option that can be found there.
Let’s get started!
Subscribe To Our Youtube Channel
How to Find your WordPress User Profile
First, you’ll need to log in to your WordPress site by going to yourwebsite.com/wp-login.php or yourwebsite.com/wp-admin.php (if logged out, both will take you to the login page). Once you’ve successfully signed in, WordPress will take you to your website’s main dashboard, which will look something like this:
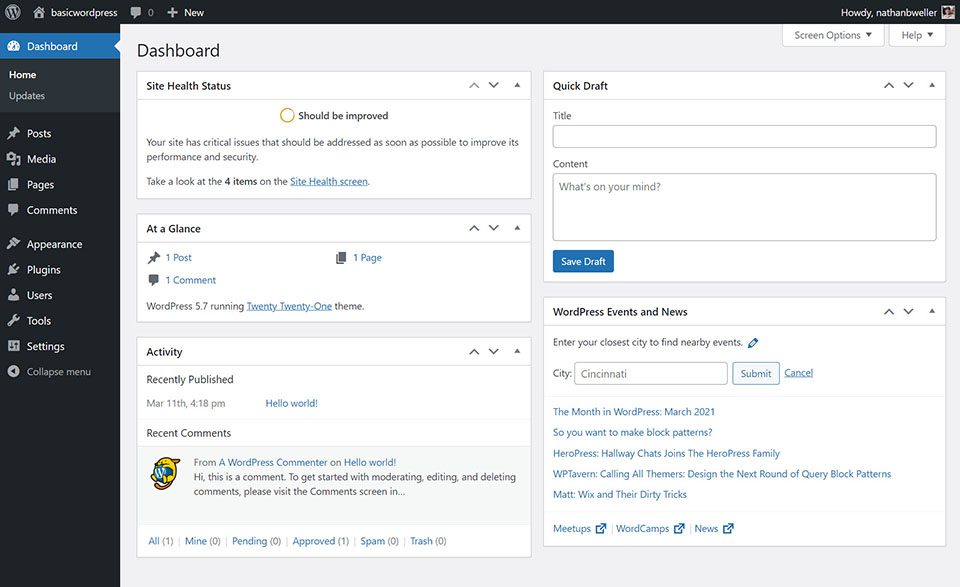
Once here there are two different ways you can navigate to your user profile. The first is located in the upper-right corner of your screen. There, you’ll find your avatar. Hover over it to open a new menu, and then select Edit Profile. Alternatively, you can locate this screen by navigating to Users > Profile in your dashboard.
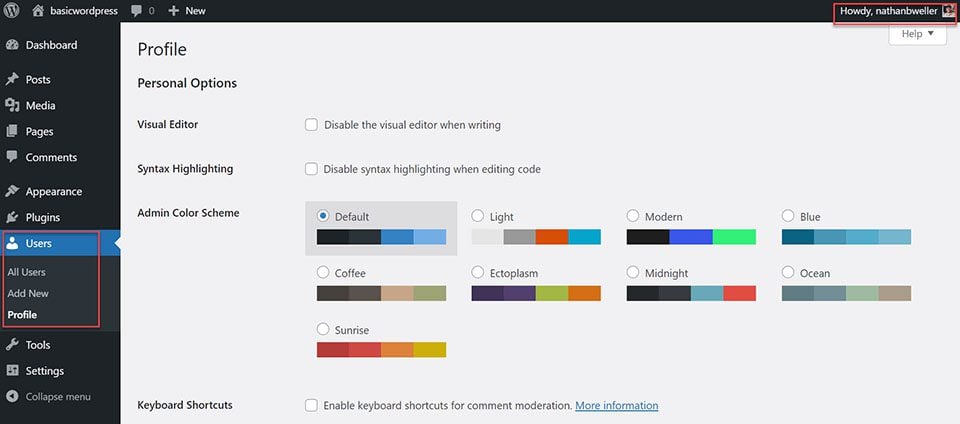
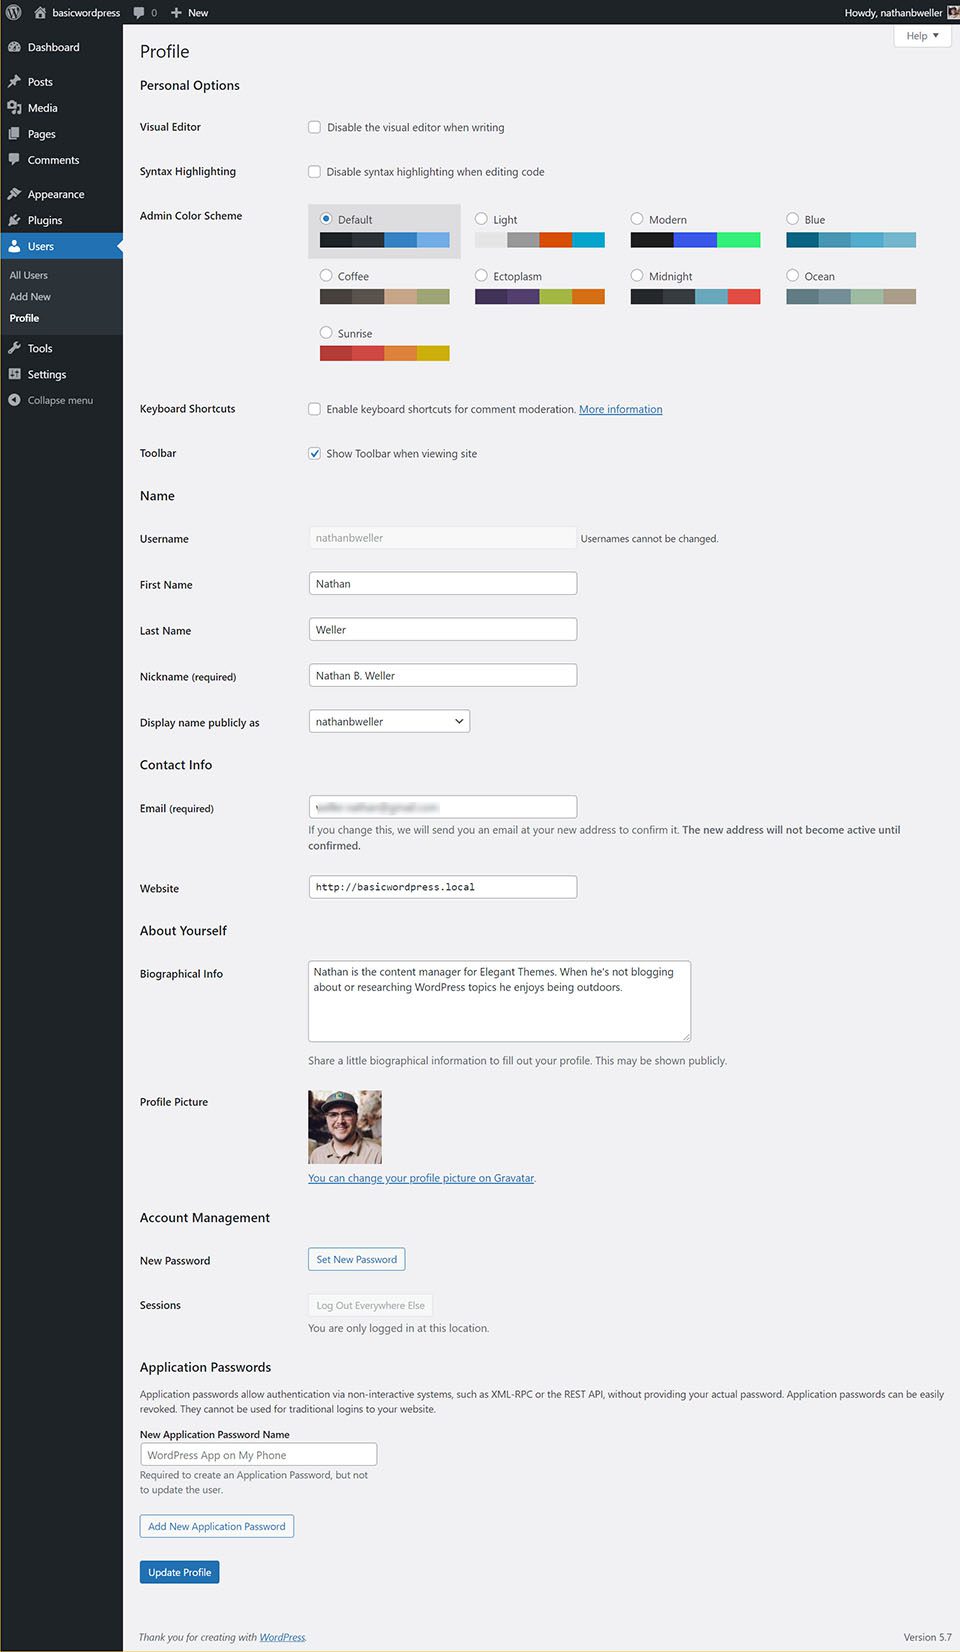
This will take you to your WordPress user profile:
How to Edit your WordPress User Profile
Now that you know where your profile settings are located, it’s time to explore how you can configure and customize them. There are six groupings of settings located here by default.
- Personal Options
- Name
- Contact Info
- About Yourself
- Account Management
- Application Passwords
As you add plugins to your website more settings may appear here. It depends on if the plugin adds information to user accounts. However, for the purposes of this post we’ll simply go over the default settings.
Personal Options
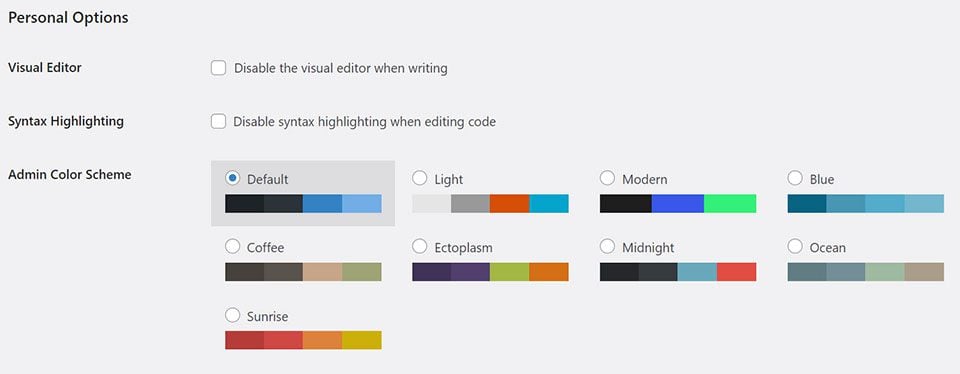
The personal options grouping of settings allow you to customize the WordPress experience for your user account. No other account will be affected by the changes you make here.
Visual Editor
The visual editor checkbox is used to disable the visual editor (also known as the block editor or Gutenberg) when creating or editing content. By default this is unchecked. And for good reason! The WordPress visual editor allows you to get the most out of the WordPress writing experience. It automatically pulls in styles from your theme so that the content you create looks exactly how it will once published. No endless saving and previewing needed!
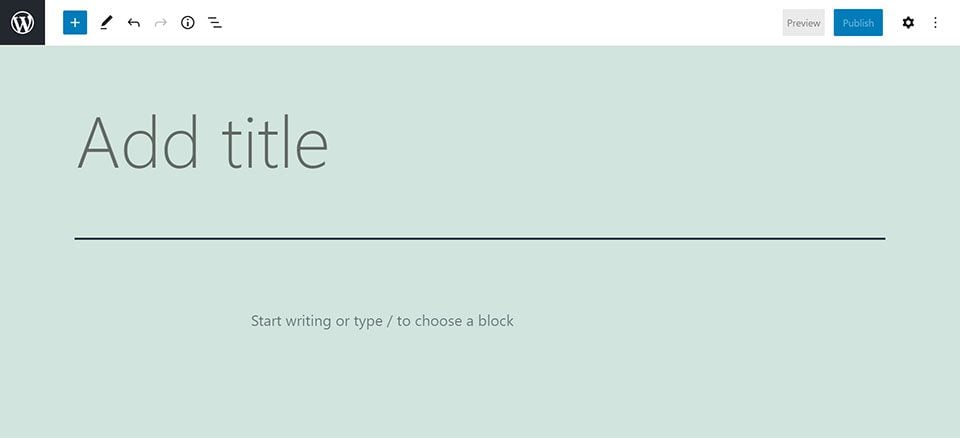
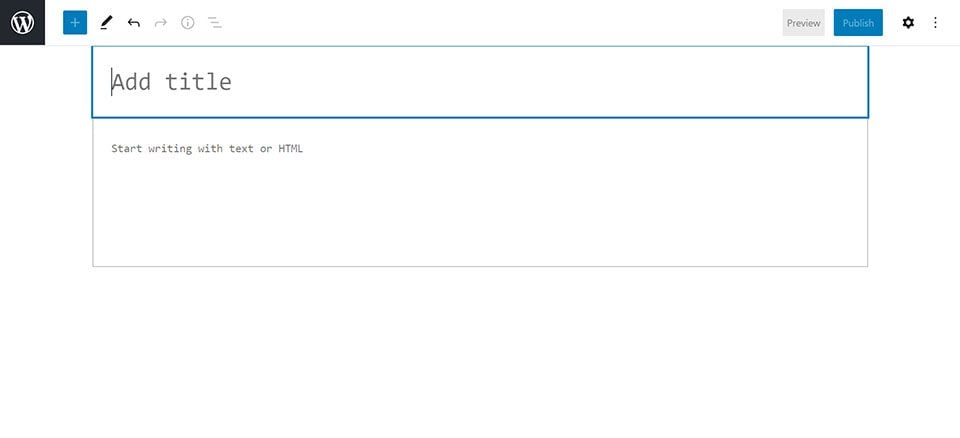
That said, some folks still prefer to write in HTML and plain text. When this box is ticked it disables the visual editor and a clean plain text editor replaces it.
Syntax Highlighting
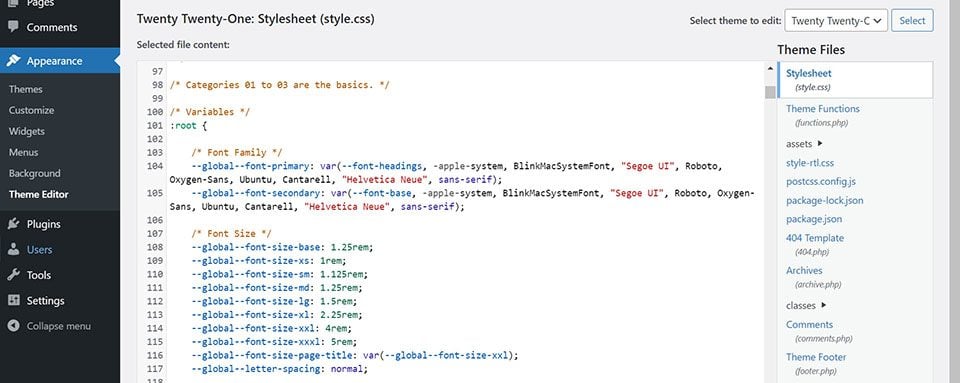
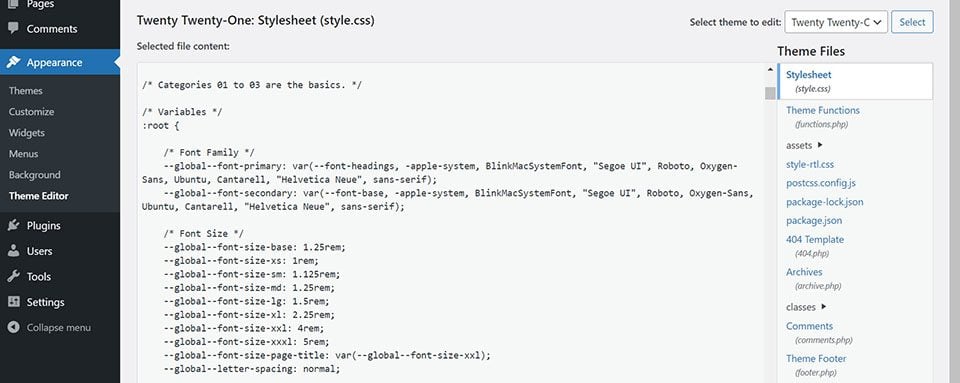
The Syntax Highlighting checkbox controls the styling for WordPress’s native code editor. This is found in two places–Appearance > Theme Editor (as pictured in these two screenshots) as well as in the custom code section of the theme customizer.
By default this checkbox is left unticked, adding helpful colors to various code elements to help users easily find the elements they’re looking for. It also adds numbered lines to the code editor. When the box is ticked (and that setting is saved) the numbered lines and text colors are removed.
Admin Color Scheme
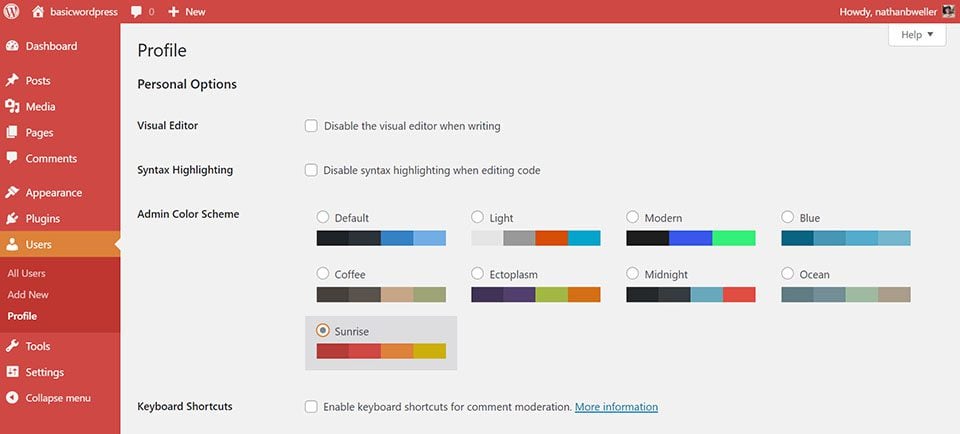
WordPress comes with several color scheme options for the admin area. Changing the color scheme is as simple as selecting the one you want and saving the setting.
Keyboard Shortcuts
The Keyboard Shortcuts checkbox controls whether or not shortcuts can be used while moderating comments. This can be extremely helpful if you rung a popular blog with lots of discussion and you need to work through large batches of comments on a regular basis. If not, then it’s probably not necessary. Which is why the checkbox is left unticked by default.
Toolbar
Finally, the last option under Personal Options is the Toolbar checkbox. This checkbox controls whether or not you see the black admin bar at the top of your screen when viewing your website on the frontend. If you don’t like seeing it while logged in then you can untick this box and it will disappear.
Name
Username
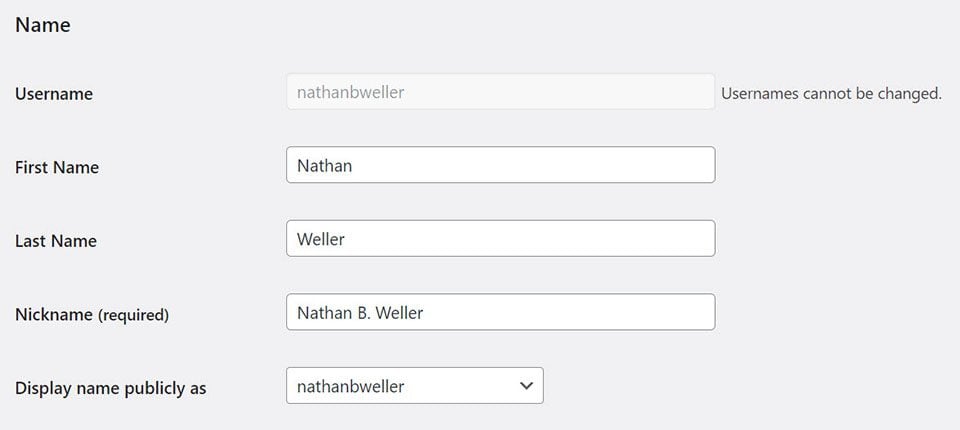
The username displayed here is the username you created when creating your WordPress site and the one you need to use when logging in. It’s a good idea to keep this private. It’s also important to pick a good strong username! One more thing someone trying to hack into your site has to figure out. Although, a really strong password is the best security (more on that later).
As the help text says, the username is unchangeable. If you don’t like it for some reason, you’ll have to create a new user for yourself with a username you do like.
First & Last Name
These spaces are self-explanatory; just write your name!
Nickname
The Nickname field (which is a required field) is a changeable user handle you can attach to your account. It allows special characters and gives you a bit more freedom and creativity in selecting an account name.
Display name publicly as
The “Display name publicly as” field is a dropdown menu featuring permutations of the information entered above it. You can choose your username, first name, last name, first and last name combined, or your nickname as the name displayed to other users and site visitors–on both the frontend and backend.
Contact Info

The Email field is where the email address associated with your user account is located. You can change this email at any time.
Website
By default the title of your own WordPress website will fill in the Website field. However, if you have an account on someone else’s WordPress website this is where you can put a link to your own site so that it’s associated with your user account. Some author box solutions will display this link along with your author bio and profile picture.
About Yourself
Biographical Information
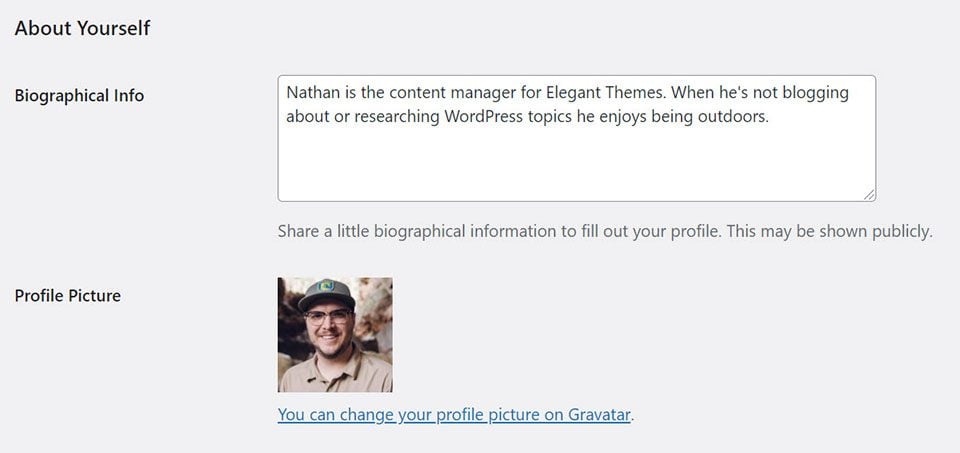
The Biographical Information field is where you can put a short byline for your account. If you’re an author this will likely appear with your blog posts. If the site is a forum or social platform then this information will likely be displayed on your public profile.
Profile Picture
The Profile Picture option is powered by Gravatar–a universal avatar service by Automattic (the creators of WordPress). If the email address you entered above this field is the same as your Gravatar account email then you will see a picture here already. If not, then you simply have to click the link and follow the Gravatar instructions.
Account Management
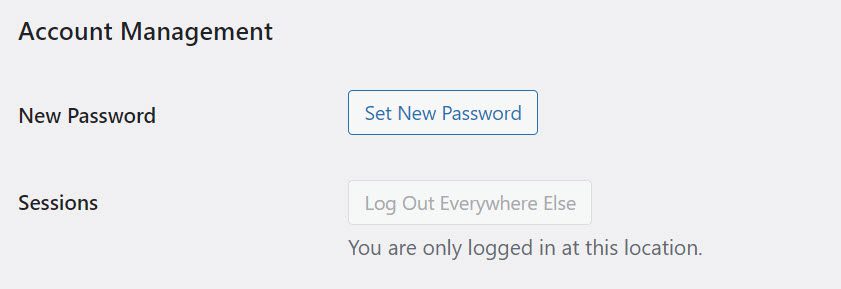
The Account Management option grouping is all about account security. By clicking the “Set New Password” button WordPress will automatically generate a strong password for you. And when you have logged into that website from more than one locations (read: multiple devices or browsers) you can quickly and easily log out at all other locations. Ensuring someone couldn’t simply pick up where you left off on another device.
Application Passwords

The Application Passwords section is for advanced users. This is where you can generate passwords for third-party applications to access the REST API. This functionality is a fairly new addition to WordPress and in time it promises to open up a lot of app interfaces with WordPress websites.
Wrapping Up
The WordPress User Profile is part of the WordPress Admin every WordPress user should be familiar with. It’s likely one of the first places you’ll add information to when creating a new WordPress website or when creating a new account on someone else’s WordPress site. Hopefully the overview we’ve done above will help you feel empowered to get the most out of it.
Featured Image via vladwel / shutterstock.com



Leave A Reply